Hinge hole boring is the process of drilling a flat‑bottomed cup, typically 35mm across and about 13mm deep, into the back edge of a door so a concealed hinge can seat and swing correctly. It is a different operation from mortising a butt hinge, which cuts a shallow rectangular pocket into the door edge rather than a round cup. For one door or a handful of cabinets, a hand drill with a hinge boring jig and a quality Forstner bit gets you there. If you’re outfitting a whole kitchen, working with veneered stock, or you simply can’t afford a misplaced hole, ordering pre‑bored or custom cabinet doors removes the risk entirely.
- DIY route: jig, Forstner or dedicated hinge boring bit, stop collar, drill press or hand drill
- Skip‑the‑risk route: order pre‑bored, custom‑sized doors and let a machine hold the tolerance for you
Key Takeaways
Accurate hinge hole boring depends on matching bit, offset, and depth stop to the hinge manufacturer’s spec. Machine pre‑boring removes that risk entirely for finish‑sensitive or high‑volume projects.
| Point | Details |
|---|---|
| Confirm specs before drilling | Check cup diameter, depth (commonly 13mm), and offset (2 to 8mm) against your specific hinge, not memory. |
| Use the right bit | A Forstner or hinge boring bit with a stop collar produces the flat‑bottomed, smooth‑walled cup concealed hinges need. |
| Prevent blowout | Clamp a sacrificial backing board under the exit point and slow down as the bit nears full depth. |
| Repair before replacing | Stripped screw holes usually need a hardwood dowel and re‑drilled pilot hole rather than a full door swap. |
| Consider pre‑bored doors for risk‑sensitive work | Tdm-thedoormaker’s measure, design, order process delivers doors with hinge holes already bored to spec, cutting rework risk on volume or veneer projects. |
Table of Contents
- What Tools Do You Need for Hinge Hole Boring?
- How Do You Measure and Lay Out Hinge Positions?
- How Does a Hinge Boring Jig Work?
- What Is the Step‑by‑Step Process for Boring Hinge Cups?
- How Do You Repair or Replace a Failed Hinge Hole?
- When Should You Order Pre‑Bored or Professionally Drilled Doors?
- Do Different Hinge Types Need Different Hole Specs?
- Does Wood Type Change How You Bore Hinge Holes?
- How Do You Maintain Hinges After Installation?
- What Mistakes Beyond Blowout Should You Watch For?
- Is DIY Hinge Boring Worth the Risk, or Should You Order Pre‑Bored Doors?
- Skip the Drilling Risk With Pre‑Bored Custom Doors
- Sources
What Tools Do You Need for Hinge Hole Boring?
The bit matters more than the drill. A Forstner bit or a purpose‑built hinge boring bit cuts a flat‑bottomed hole with clean, smooth walls, which is exactly the shape a concealed hinge’s cup needs to seat flush. Standard twist bits leave a pointed, tapered bottom that lets the hinge rock and eventually loosen its grip on the wood. Carbide‑tipped versions hold an edge far longer than high‑speed steel, especially once you’re cutting into hardwood or MDF. A long‑shank Forstner paired with a stop collar is the setup most jig makers recommend for clean results.
Size and depth need to match the hinge, not just the door. Most concealed European hinges use a 35mm cup at roughly 13mm deep. Check the hinge manufacturer’s spec sheet before you drill. A cup drilled even a millimeter too deep on thin door stock can weaken the material and leave the hinge sitting poorly.
Match the bit’s shank length to your door thickness, and always run a stop collar or the jig’s built‑in depth stop so every hole comes out identical.
Drill choice depends on volume and precision needs:
- A hand drill with a good jig works fine for a handful of doors
- A drill press adds vertical stability for anyone boring more than a few doors at once
- A benchtop hinge boring machine is the professional‑grade option, holding tolerances that hand tools struggle to match consistently
Round out your setup with two clamps, a sacrificial backing board under the exit side of the hole, and some dust control, since Forstner bits throw a surprising amount of chip debris at higher RPMs.
Pro Tip: Buy one extra bit in the size you use most. A dull Forstner bit doesn’t just cut slower, it burns hardwood edges and tears veneer, and you won’t notice the difference until the damage is already done.
How Do You Measure and Lay Out Hinge Positions?
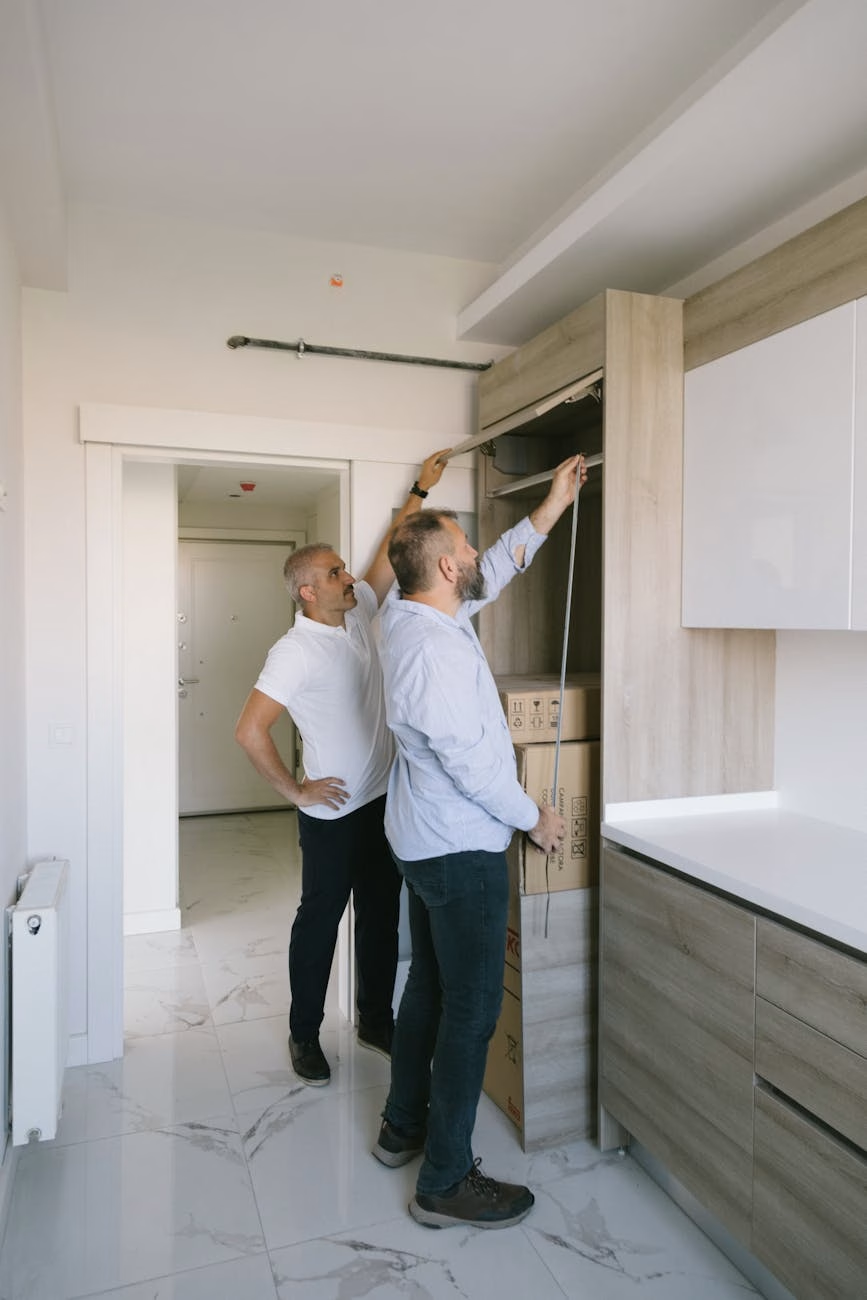
Getting the hole in the right spot matters as much as getting it round. Standard cabinet doors use two hinges positioned with margins from the top and bottom edges. Doors over 36 inches typically need a third hinge in the middle to prevent sagging.
- Confirm the hinge offset first. This is the shoulder distance from the door’s edge to the center of the cup, and it commonly runs between 2mm and 8mm depending on overlay style. Get this wrong and the door either binds against the cabinet frame or leaves a gap that never quite closes flush.
- Mark your centerlines before you touch a drill. Use a combination square to strike a line parallel to the door edge at your offset distance, then mark hinge centers along that line at your chosen top and bottom margins.
- Use a template for repeat work. If you’re boring more than two or three doors, a marked template or story stick keeps every hole in the same spot. This matters enormously once the doors are hung side by side and any inconsistency becomes visible at a glance.
- Run a manufacturer’s spec checklist before drilling anything. Confirm cup diameter, cup depth, offset, and screw spacing against the actual hinge you’re installing, not the hinge you installed last time.
A jig with a built‑in scale speeds all of this up, since most let you set the offset once and repeat it across every door without re‑measuring. If you’d rather use proven measurement tables than build your own from scratch, our guide to hinge drilling patterns walks through the numbers most cabinet lines actually use.
How Does a Hinge Boring Jig Work?
A concealed hinge jig replaces a drill press with a mechanical fixture that locates the cup and pilot holes. The core parts are an indexing cam that sets your offset distance, a clamping base that holds the jig square to the door edge, stop collars that fix your drilling depth, and screw‑hole guides that pre‑position the pilot holes for the hinge’s mounting screws.
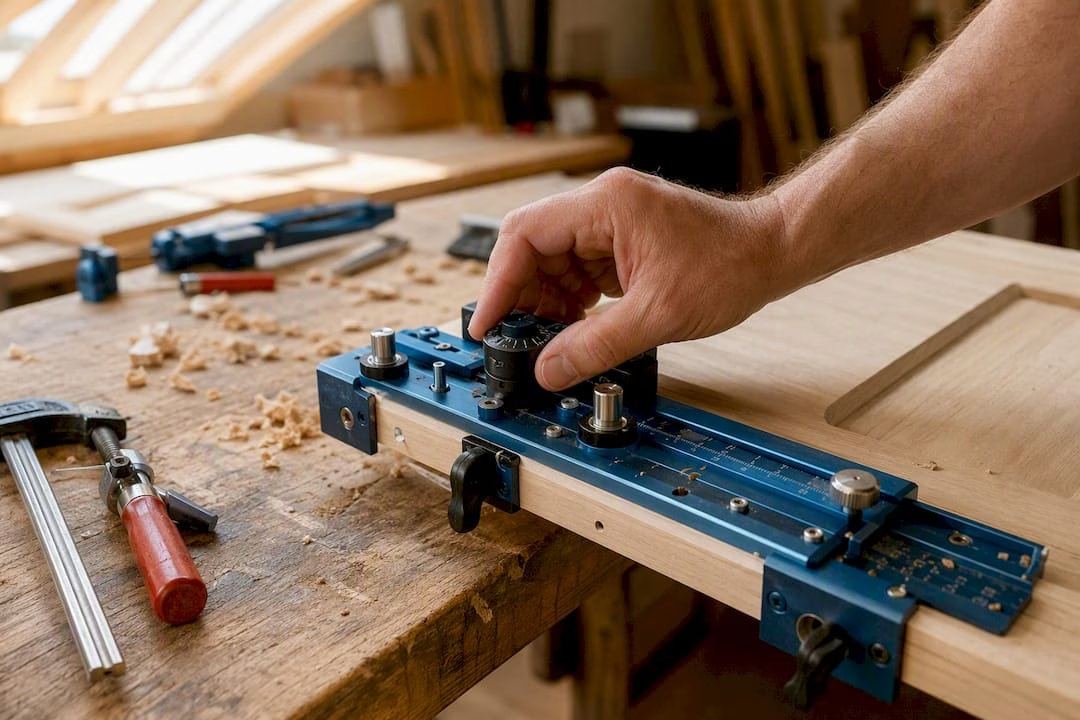
Setting one up follows a consistent sequence. Clamp the door securely, ideally with a sacrificial board underneath the boring point, then dial the jig’s cam to your required offset and lock the clamping base against the door edge. Kreg’s jig, for example, relies on firm clamping at two points of contact plus solid support underneath the door to hold precision through the cut, not just at the start.
Feature tradeoffs worth knowing before you buy:
- Jigs with a built‑in scale save time on repeat work but cost more upfront than a simple template
- Spring‑loaded clamp feet, the kind Rockler’s Jig It system uses, speed up single‑door jobs but can shift slightly on warped or uneven stock
- Screw‑hole guides built into the jig save a second setup step but only work with the hinge brand the jig was designed around
Pro Tip: If your jig doesn’t include a screw‑hole guide, drill your cup first, hold the hinge in the cup by hand, and mark the screw centers directly through the hinge plate. It takes ten extra seconds and eliminates almost all pilot‑hole misalignment.
The whole point of these features is replicating what a drill press does automatically: fixed alignment, controlled depth, and zero wander. A well‑set jig gets a hand drill remarkably close to that same repeatability on a bench or right at the jobsite.
What Is the Step‑by‑Step Process for Boring Hinge Cups?
Getting a clean cup on the first try comes down to preparation more than drilling speed. Rushing the setup is where almost every bad hole starts.
- Confirm your specs. Check the hinge’s cup diameter, depth, and offset one more time against your jig setting before any bit touches wood.
- Choose your bit and depth stop. Match the Forstner or hinge boring bit to the cup diameter, and lock a stop collar at the exact depth. 13mm for standard concealed hinges, though always verify against the hinge you’re using.
- Mark and secure. Strike your centerline, position the jig, and clamp the door with a sacrificial backing board directly under the exit point.
- Align the bit. Center the bit tip in the jig’s guide bushing before starting the drill, not after it’s already spinning.
- Control the plunge. Start the drill at a moderate speed, apply steady downward pressure, and let the bit cut rather than forcing it.
- Watch your RPM for the material. Large-diameter Forstner bits need slower speeds on hardwoods to prevent scorching, since dense stock generates more friction heat than softwood or MDF at the same feed rate. A rough guide: slow down as bit diameter and wood density both increase.
- Clear chips periodically. Retract the bit partway through deeper cups to clear debris rather than plowing straight through, which reduces heat buildup and blowout risk.
- Stop at the depth collar. Let the stop collar do its job rather than eyeballing depth by feel.
- Clean the cup. Remove chips and light fuzz from the cup walls with a chisel edge or shop vacuum before test‑fitting.
- Drill pilot holes using the jig’s guide. Keep these centered and square so the hinge plate sits flat against the door.
- Test‑fit the hinge. Set the hinge in the cup dry, check that it sits flush, and adjust offset on the next door if it doesn’t.
Once your hinges are seated and screwed down, our step-by-step cabinet door installation guide covers final alignment and reveal adjustments.
How Do You Repair or Replace a Failed Hinge Hole?
Not every bad hole means a ruined door. Surface‑level cosmetic damage, chipped edges around a cup or a screw hole that’s slightly off, can often be filled and sanded smooth. Structural damage, where the screw no longer bites into solid wood, needs a more permanent fix.
- Wood filler handles cosmetic gaps and minor chips around the cup rim, but it won’t hold a screw thread under door weight.
- For stripped screw holes, drill out the damaged hole, glue in a properly sized hardwood dowel, let it cure, trim flush, and re‑drill a fresh pilot hole through the dowel for a solid new screw bite.
- For a mislocated cup, the same dowel‑and‑refill approach works, followed by re‑boring the cup at the correct offset once the patch has cured fully.
- Cosmetic touch‑up after any repair means sanding flush, spot‑staining to match the surrounding finish, and sealing before rehanging the hinge.
- When damage is extensive or the door face has been through more than one repair already, replacing the door outright is usually faster and cleaner than a third patch job.
When Should You Order Pre‑Bored or Professionally Drilled Doors?
Some jobs simply carry too much risk for a hand drill and a jig, no matter how careful you are. A finished veneer door, a full kitchen’s worth of matching doors, or a client project where rework isn’t an option. Situations where machine tolerances earn their cost.
- Volume work. Boring twenty identical cups by hand introduces small variations that become visible once the doors hang side by side.
- Finish‑sensitive materials. Veneers and painted MDF show blowout and tear‑out far more visibly than raw hardwood, and a slip is much harder to hide.
- Tight tolerance requirements. Dedicated hinge boring machines hold tolerances often around ±0.2mm, a level of consistency that’s difficult to replicate reliably across dozens of hand‑drilled holes.
- Time constraints. A shop‑grade boring machine cuts and repeats a setup far faster than resetting a hand jig door after door.
This is precisely the gap Tdm-thedoormaker’s process is built around: you measure your existing openings, design your door style and finish, and order doors that arrive with hinge holes already bored to spec. The measure, design, order workflow shifts the tolerance risk off your bench and onto machine‑controlled production. Before you commit to either path, weigh your own time against the cost of a replacement door if a DIY hole goes wrong, and check whether your project’s finish can even hide a repair if one becomes necessary.
Do Different Hinge Types Need Different Hole Specs?
Not every hinge on a cabinet door needs a 35mm cup. Standard concealed European hinges, the most common type in modern cabinetry, use that flat‑bottomed cup and typically mount with two or three screws on the hinge plate side, plus a separate mounting plate that attaches to the cabinet frame.
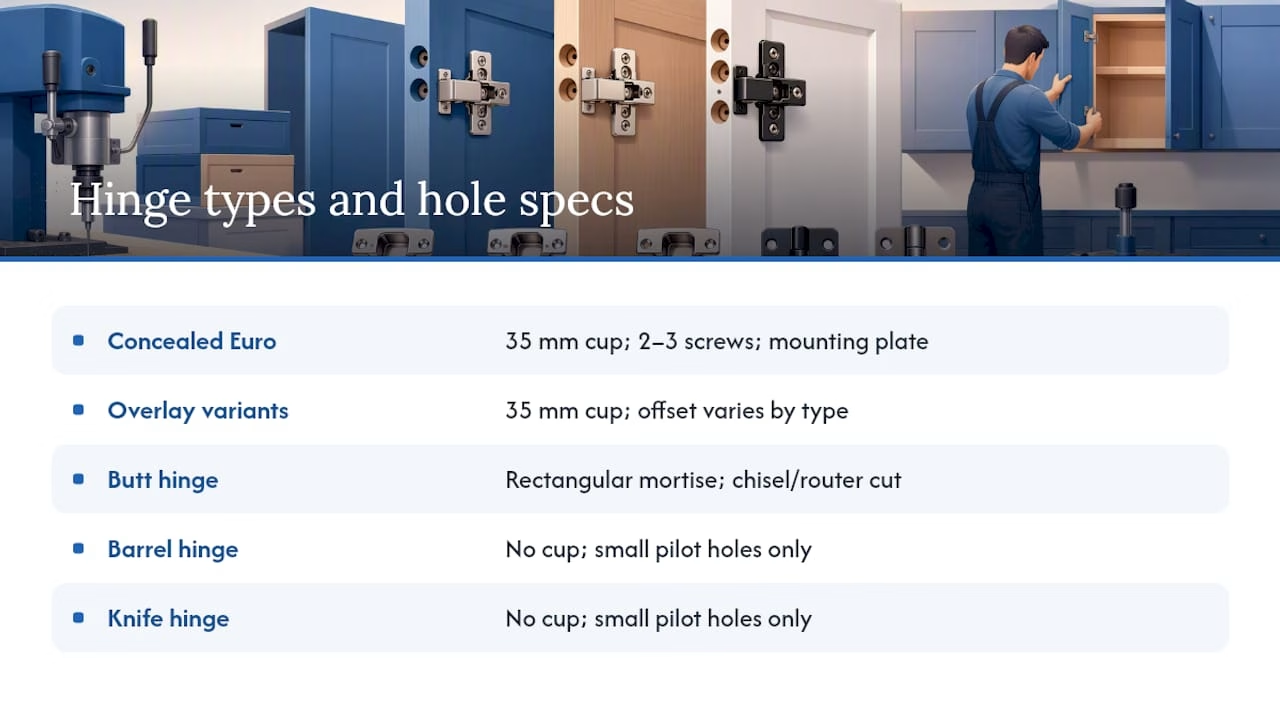
Overlay hinges, which come in full‑overlay, half‑overlay, and inset variants, all use the same 35mm cup boring but differ in the offset distance from the door edge. That offset controls how far the door sits over the cabinet face frame. A full‑overlay hinge typically needs a smaller offset than an inset hinge. Boring the same cup at the wrong offset for your specific overlay style is one of the most common fit failures in cabinet work.
Butt hinges, common on framed inset doors and older cabinetry, skip the round cup entirely in favor of a rectangular mortise cut with a chisel or router, matched to the hinge leaf’s exact dimensions. Barrel hinges and knife hinges, occasionally used on flush overlay doors, need only small pilot holes rather than any cup or mortise at all.
Before boring anything, confirm which hinge family you’re actually installing. A cup sized correctly for a European concealed hinge is the wrong hole entirely for a butt hinge or barrel hinge, and no amount of careful drilling fixes a hole cut for the wrong hardware type.
Does Wood Type Change How You Bore Hinge Holes?
Hardwood, softwood, and MDF each behave differently under a Forstner bit, and treating them identically is a common source of tear‑out. Dense hardwoods like maple and oak generate more heat at the same drilling speed, so a slower RPM and steady, even pressure prevent the bit from scorching the cup walls or dulling prematurely.
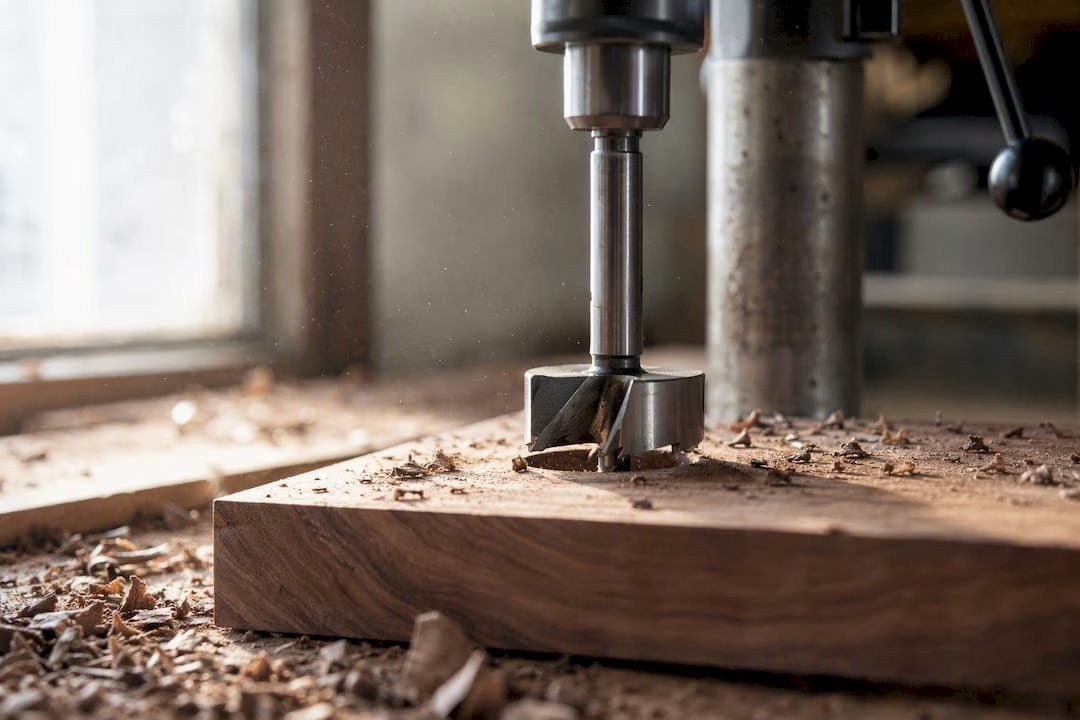
Softwoods such as pine and poplar cut faster and with less resistance, but they’re also more prone to crushing or tearing around the cup rim if you push too hard or use a bit that’s gone slightly dull. A sharp bit and moderate feed rate matter more here than raw speed.
MDF core plywood and veneered doors, meanwhile, are the most finish‑sensitive of all, since any tear‑out shows immediately through a thin veneer layer with no way to sand it out without going through to the substrate.
Whatever the material, matching bit sharpness and feed rate to the wood in front of you, rather than running one setting for every door, is what separates a clean cup from a torn one.
How Do You Maintain Hinges After Installation?
A correctly bored hinge hole is only half the job. Concealed hinges rely on a spring mechanism and moving pivot points that need occasional attention to keep doors closing smoothly for years rather than months.
A light application of machine oil or silicone-based lubricant on the hinge’s pivot points once or twice a year keeps the spring action smooth and prevents the metal-on-metal squeak that develops in kitchens exposed to grease and humidity. Avoid heavy grease, which attracts dust and grit that eventually works its way into the mechanism.
Screws loosen over time from repeated door swings, especially on heavier doors or ones that get slammed rather than closed gently. Check mounting screws every few months during the first year, since wood compresses slightly around a new screw thread as the door settles into daily use. If a screw hole has worked loose enough that the screw spins without biting, that’s the point to use the dowel repair described earlier rather than just driving a bigger screw into a weakened hole.
Most concealed hinges also include adjustment screws that shift the door’s position side to side, up and down, and in and out from the cabinet frame. A five-minute seasonal check, especially after temperature and humidity swings that shift wood dimensions, keeps doors sitting flush without needing to touch the boring at all.
What Mistakes Beyond Blowout Should You Watch For?
Blowout gets most of the attention, but it’s rarely the mistake that actually ruins a project. Misalignment and orientation errors cause more rework than a torn exit hole ever does.
Boring a hinge cup on the wrong edge, mixing up left and right hinge sides on a pair of doors, is a surprisingly common error, especially when working through a stack of doors quickly. Always dry‑fit or at least visually confirm swing direction before the bit touches wood, not after the first hole is already cut.
Inconsistent offset across multiple doors is another frequent problem, usually caused by re‑measuring by hand instead of using a fixed jig setting or template for every door in the batch. Even a millimeter of drift between doors becomes visible once they’re mounted side by side on the same cabinet run.
Skipping the manufacturer’s spec check is the mistake underneath most of the others. Assuming last year’s hinge brand uses the same offset and cup depth as this year’s box, without checking the actual spec sheet, is how a batch of otherwise well‑drilled doors ends up with hinges that don’t sit flush. A five‑minute check against the actual hardware in hand prevents almost every alignment failure on this list.
Is DIY Hinge Boring Worth the Risk, or Should You Order Pre‑Bored Doors?
The conventional DIY advice treats hinge boring as mostly a tool problem: buy the right bit, get a jig, follow the steps, and you’re set. That’s true as far as it goes, but it undersells how much of the real risk sits in repetition, not technique. One clean cup on a test scrap proves almost nothing about door twenty in a full kitchen run, where fatigue, small clamp shifts, and a slightly warmed bit all compound quietly.
Where most guides fall short is treating every project as equally forgiving. A single raw pine cabinet door can absorb a minor offset error that a veneered, finish‑matched kitchen door cannot. If you’re doing one or two doors, learn the jig, respect the depth stop, and enjoy the satisfaction of a clean cup done right. If you’re touching a dozen doors or anything with a finish you can’t easily patch, the math shifts toward letting a machine hold the tolerance instead of your forearm.
— David
Skip the Drilling Risk With Pre‑Bored Custom Doors
If a jig setup, a stack of matching doors, and the possibility of one bad cup on door number eleven sound like more risk than you want to take on, Tdm-thedoormaker builds that risk out of the process entirely. Instead of boring holes yourself and hoping every offset matches, you measure your existing cabinet openings, design your door style and finish from over 30 styles and 130+ colors, and order doors sized to your exact dimensions, with hinge holes already bored to spec before they ever leave production.

That measure, design, order sequence means the tolerance work happens on a controlled production line rather than your workbench, which matters most on finish‑sensitive materials where a torn cup can’t be sanded out without showing through the surface. It also saves the time a full kitchen’s worth of hand‑drilled doors would otherwise cost you in jig setup, test cuts, and rework. Start by browsing custom cabinet doors online to see current styles, pricing, and how the hinge hole add‑on works for your project.
Sources
- Hinge Boring (Wealdentool catalogue)
- How to install door hinges on door blanks (The Spruce)
- Grizzly G0718 hinge boring machine
- JIG IT concealed hinge drilling guide (Rockler)