
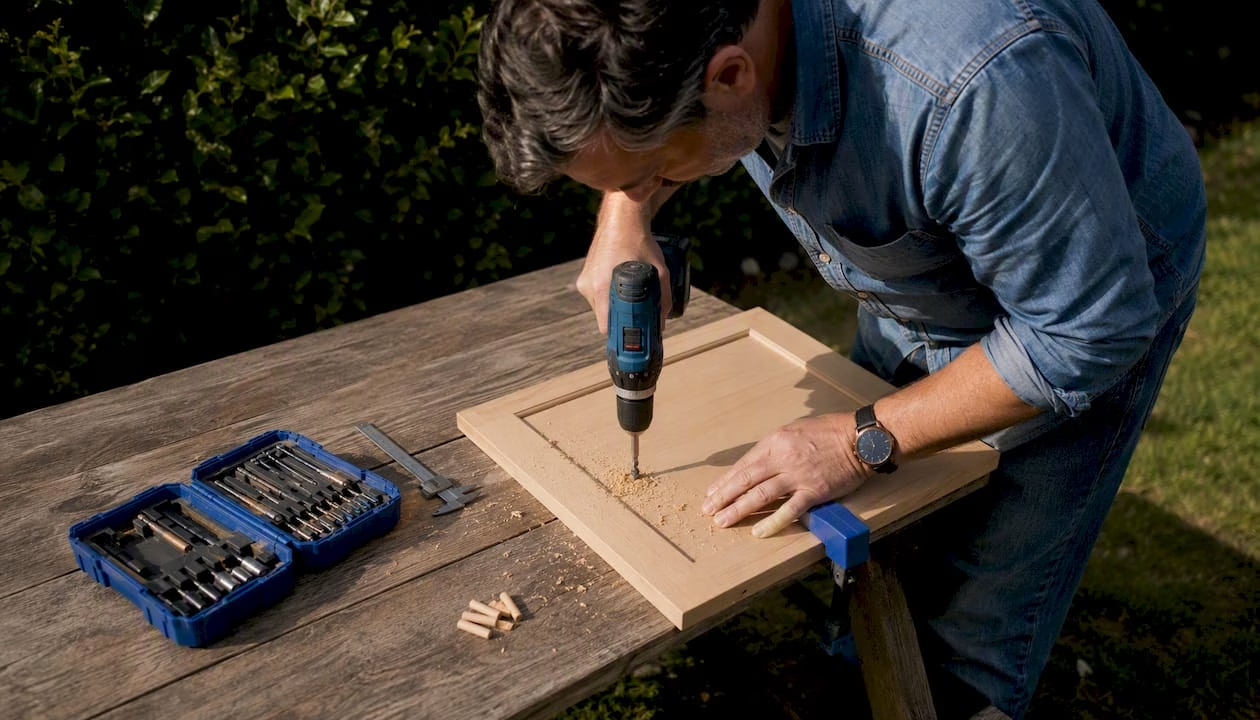
You can get perfectly aligned hardware holes every time by using a single calibrated template or jig, confirming your handle’s center-to-center (C-C) measurement, and drilling with a pilot hole plus a sacrificial backer board. Industry experts recommend a dedicated cabinet hardware jig for any multi-door project because it eliminates human measuring error and keeps every hole in exactly the same position across all your doors. For large or high-risk refacing runs, Tdm-thedoormaker offers custom doors with pre-drilled hardware holes as a ready alternative.
Before you touch a drill, run through these four steps:
- Measure your hardware’s C-C spacing from the spec sheet or packaging
- Set one reference corner per door and commit to it for every door in the project
- Calibrate your template on a scrap door and verify the C-C with a ruler or caliper
- Drill a 1/8" pilot hole first, then follow with the final clearance bit
Pro Tip: Never skip the scrap-door test. One test hole on a piece of matching material tells you immediately whether your bit size, speed, and backer setup are right before you commit to a finished door.
Table of Contents
- What tools and materials do you need before drilling?
- How do you drill cabinet hardware holes step by step?
- How do you measure and space hardware correctly?
- How do you choose and calibrate a cabinet hardware jig?
- What mistakes happen most often, and how do you fix them?
- When does ordering pre-drilled doors make more sense?
- Key Takeaways
- The case for getting the setup right before you drill
- Tdm-thedoormaker’s pre-drilled custom doors save you the risk
- Useful sources
What tools and materials do you need before drilling?
Getting the right tools together before you start prevents the most common startup mistakes. Here is what to have on hand.
Tools:
- Corded or cordless drill
- 1/8" drill bit for pilot holes; 3/16" for standard #8-32 screw clearance holes (this is the common standard, but always verify with your hardware’s instructions and test on scrap)
- Awl or nail set for dimpling the start point
- Clamps (at least two)
- Sacrificial backer board (scrap wood clamped to the back of the door)
- Cabinet hardware jig or printed template
- Level, tape measure, pencil
- Masking or painter’s tape
Materials:
- Scrap wood matching your door material for test holes
- Wood putty for repairs
- Replacement screws matched to your hardware (typically #8-32 in U.S. cabinetry)
Safety: Always wear eye protection. Keep the door clamped flat or propped securely so it cannot shift while you drill. Never let your free hand drift behind the door near the drill path.
Common U.S. cabinetry hardware typically spans a range of center-to-center (C-C) spacings covering several standard sizes. Always confirm the exact measurement from your hardware’s packaging before drilling a single hole.

How do you drill cabinet hardware holes step by step?
A repeatable sequence is what separates clean results from frustrating rework. Follow this workflow for every door.
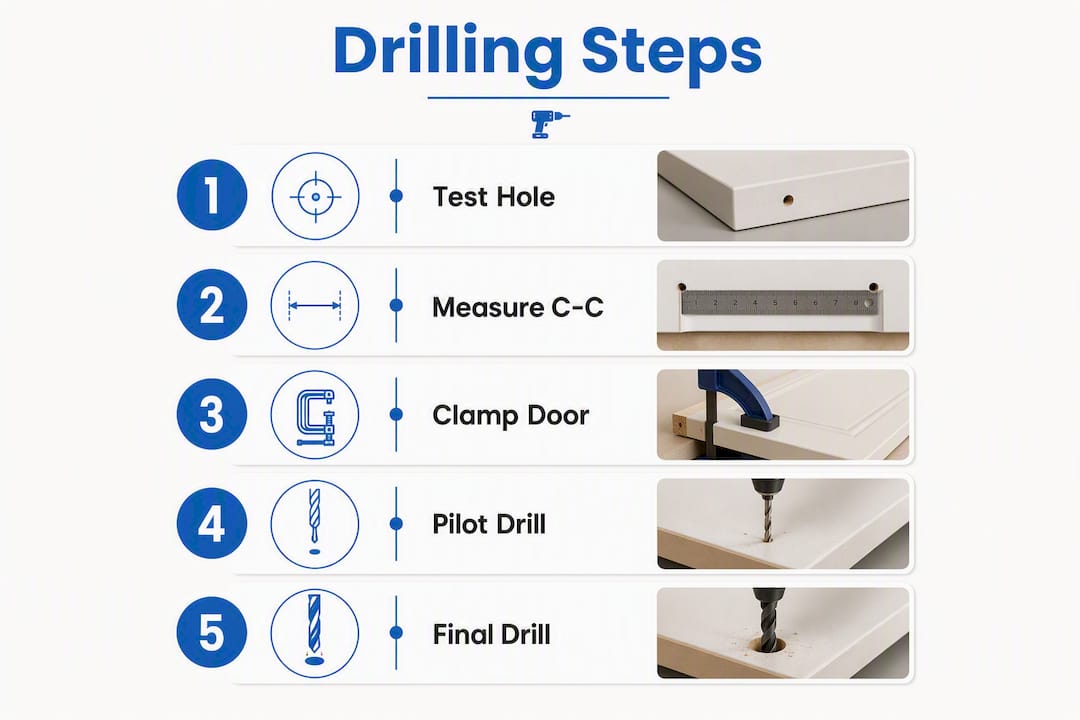
- Set your reference corner. Pick one corner per door, typically the top-hinge corner, and align your jig or template to it every time. Consistency here is what keeps all your pulls at the same height across the entire run.
- Calibrate the template on scrap. Verify the printed or commercial template’s 1" test square, confirm the C-C with a ruler, and check that the template sits level before marking anything.
- Dimple the pilot point. Use an awl or nail set to create a small indent at each mark. This keeps the bit from skating across the surface when you start drilling.
- Apply masking tape. Place a strip of painter’s tape over the drill point on the finished face. Masking tape reduces splintering on veneered or painted surfaces and helps the bit track cleanly.
- Clamp the door and backer board. Lay the door flat, then clamp a piece of scrap wood firmly against the back directly behind each drill point. This prevents exit-side blowout.
- Drill the pilot hole. Use a 1/8" bit and start with a small pilot hole to reduce pressure and keep the drill steady. Drill straight through at a consistent, moderate speed.
- Switch to the final clearance bit. For standard #8-32 hardware screws, a 3/16" bit is the common choice. Drill slowly and let the bit do the work.
- Deburr, clean, and test-fit. Remove any fuzz around the hole, insert the screw by hand, and confirm the hardware sits flush. Tighten screws by hand first, then snug with a screwdriver. Never overtighten.
Pro Tip: For thin veneer or laminate doors, drill until the pilot bit just breaks through the back face, then finish the hole from the back side. This two-direction approach produces the cleanest possible exit.
Checklist before drilling any door: test on scrap ✓, one reference corner ✓, clamp and backer board ✓, pilot hole ✓, correct clearance bit ✓, final test fit ✓.
How do you measure and space hardware correctly?
C-C (center-to-center) is the distance between the two mounting holes on a pull. It is the single measurement that determines which template or jig setting you use, and it must come from your hardware’s spec sheet, not from guesswork.
The Amerock installation template, for example, covers knobs and pulls from 3" (76mm) to 5-1/16" (128mm) C-C, which spans the full range of common U.S. cabinetry hardware. Keeping your holes within ±1/32" (±0.8mm) of the target position is the practical tolerance for visual uniformity across a full kitchen.
Placement rules vary by door type. On slab doors, position the bottom hole of a pull 2"–3" from the bottom edge for wall doors and 2"–3" from the top edge for base doors. Center pulls horizontally on drawers. On framed doors, align hardware with the stile rather than measuring from the door edge. Pick one method and apply it without variation.
| Hardware type | Typical C-C | Pilot bit | Final clearance bit |
|---|---|---|---|
| Single knob | N/A (one hole) | 1/8" | 3/16" |
| 3" pull | 3" (76mm) | 1/8" | 3/16" |
| 3-3/4" pull | 3-3/4" | 1/8" | 3/16" |
| 4" pull | 4" | 1/8" | 3/16" |
| 5" pull | 5" (128mm) | 1/8" | 3/16" |
Before you order or drill, confirm your knobs and handles C-C against this table. A mismatch discovered after drilling is expensive to fix.
How do you choose and calibrate a cabinet hardware jig?
A jig or template is what turns hardware hole drilling from a high-anxiety task into a repeatable production process. The right choice depends on your project size and budget.
- Commercial metal or plastic jig (such as the Taytools Deluxe Adjustable Jig): durable, adjustable for multiple C-C spacings, and worth the investment when doing more than about 10 doors. Clamps directly to the door edge for guided, repeatable placement.
- Printable paper or cardstock template: free or low cost, works well for small projects. Always verify the 1" test square after printing at 100% scale before using it on a real door.
- DIY MDF template: cut from 1/4" MDF with a drill press for precise holes. More durable than paper, less expensive than commercial jigs, and easy to replace if damaged.
Calibration steps: Clamp the template to your reference corner. Verify the C-C with a caliper or ruler. Mark pilot holes through the template with an awl, then drill a test hole on scrap and measure the result. Adjust before touching a finished door.
Pro Tip: Label the top edge of your template with a marker and cover any unused hole patterns with tape. One accidental drill through the wrong template hole on a finished door is a costly mistake.
What mistakes happen most often, and how do you fix them?
Most hardware drilling errors are preventable, but a few are worth knowing how to recover from.
Common mistakes and how to avoid them:
- Bit skating at the start: Always dimple the mark with an awl before drilling.
- Exit-side blowout: Clamp a sacrificial backer board to the back of the door, or finish the hole from the back after a pilot hole.
- Inconsistent hole heights across doors: Use the same reference corner every time. Varying your starting point is the most common cause of misaligned pulls across a kitchen.
- Drill-through into the cabinet frame: Keep the door clamped flat and away from the frame while drilling. Never drill a mounted door without confirming clearance behind it.
- Overtightening screws: Snug by hand, then a quarter-turn with a screwdriver. Stripped threads in MDF or particleboard are difficult to repair.
Fixes when things go wrong:
When a hole is slightly off, fill it with wood putty, let it cure fully, sand smooth, and re-drill at the correct location. For badly placed holes on painted doors, a matching touch-up paint over the filled hole is usually invisible once hardware is installed. On veneer or laminate, a decorative plug or a larger piece of hardware can sometimes cover the error. If the damage is significant, ordering a replacement door is often faster and less expensive than a complex repair. Understanding common DIY door-replacement pitfalls before you start helps you recognize when a repair is worth attempting versus when a fresh door is the cleaner path.
Safety reminders: Secure the door before every hole. Wear eye protection. Keep both hands clear of the drill path, and never hold the door with your free hand directly behind the drill point.
When does ordering pre-drilled doors make more sense?
DIY drilling works well for small projects with the right setup. For larger or more complex refacing runs, ordering pre-drilled custom doors from Tdm-thedoormaker is often the faster and lower-risk path.
Order pre-drilled doors when:
- You have more than 10–15 doors, where jig setup time and the risk of cumulative error outweigh the cost of pre-drilled options
- The finish is veneer, painted, or thin laminate, where any visible touch-up will stand out
- You want guaranteed C-C alignment across every door without calibration work
- You do not have a quality jig or a flat workspace for clamping
Drill yourself when:
- You have fewer than 10 doors and a reliable commercial jig
- You are comfortable with the calibration and scrap-testing process
- The material is solid wood or MDF, which tolerates minor corrections more forgivingly
Pro Tip: When ordering a full run of pre-drilled doors, always request one or two sample doors first. Confirm the hole placement, C-C, and finish quality before the full order ships.
For a broader look at when supplier-made doors save time and money versus full DIY, the cabinet replacement vs. refacing comparison lays out the decision clearly.
Key Takeaways
Precise hardware hole drilling comes down to one calibrated template, one reference corner, and a pilot-hole-first workflow applied consistently across every door.
| Point | Details |
|---|---|
| Confirm C-C before drilling | Always use the hardware’s spec sheet; common U.S. spacings are 3", 3-3/4", 4", and 5". |
| One reference corner per door | Aligning to the same corner every time is the main driver of visual uniformity across a full kitchen. |
| Pilot hole and backer board | A 1/8" pilot hole plus a clamped sacrificial backer prevents bit wander and exit-side blowout. |
| Tolerance target | Keep holes within ±1/32" (±0.8mm) of the target position for consistent alignment across all doors. |
| Tdm-thedoormaker pre-drilled option | For runs of more than 10 doors or sensitive finishes, ordering pre-drilled custom doors removes the risk of irreversible errors. |
The case for getting the setup right before you drill
Most DIYers underestimate how much of hardware drilling success happens before the drill ever touches the door. The template calibration, the scrap test, the reference corner — these steps feel like preparation, but they are actually the work. The drilling itself takes seconds.
What trips people up is treating each door as an individual measuring problem. The moment you shift to thinking about it as a single accurate template applied identically to every door, the whole project gets easier and faster. That mindset shift is what separates a kitchen that looks professionally done from one where you notice the pulls are slightly different heights every time you open a cabinet.
For sensitive finishes, the backer board is not optional. Veneer and thin laminate will chip on the exit side without support, and no amount of wood putty makes that invisible on a painted white door. If your project involves high-end finishes and you are not confident in your backer setup, a pre-drilled door from Tdm-thedoormaker is a straightforward way to avoid that risk entirely.
Tdm-thedoormaker’s pre-drilled custom doors save you the risk
Custom doors with pre-drilled hardware holes, sized to your exact C-C specification, are one of the most practical upgrades Tdm-thedoormaker offers for refacing projects. Every door is cut to 1/10,000" precision, and hardware holes are placed to your confirmed measurements before the door ships. You get consistent alignment across every door in the run without calibration work, scrap tests, or the risk of an off-center hole on a finished surface.

Tdm-thedoormaker’s ordering process covers the full workflow: measure, design, and order through an online configurator with step-by-step guidance and video tutorials. Add-ons include hinge drilling, sample doors for approval before the full order, and color swatches. If you want to confirm placement before committing to a full run, request a sample door first.
Start your DIY cabinet refacing project with pre-drilled doors and skip the guesswork entirely.
Useful sources
- How to Install Cabinet Handles (Family Handyman) — industry recommendation for jig use on multi-door projects
- How to Install Cabinet Handles (Home Depot) — drill bit sizing and scrap-test guidance
- How to Install Drawer Pulls and Cabinet Knobs (Lowe’s) — masking tape technique and wood putty repairs
- Free Printable Cabinet Hardware Template PDF (The Cabinet Craftsmen) — printable template calibration and jig threshold guidance
- How To Drill Holes For Cabinet Hardware (Plank Hardware) — pilot hole sizing and drilling sequence
- Cabinet Hardware Installation Template (Amerock) — C-C spacing reference for common U.S. hardware
- Tdm-thedoormaker: custom pre-drilled cabinet doors — pre-drilled ordering, hinge drilling add-on, and sample door options