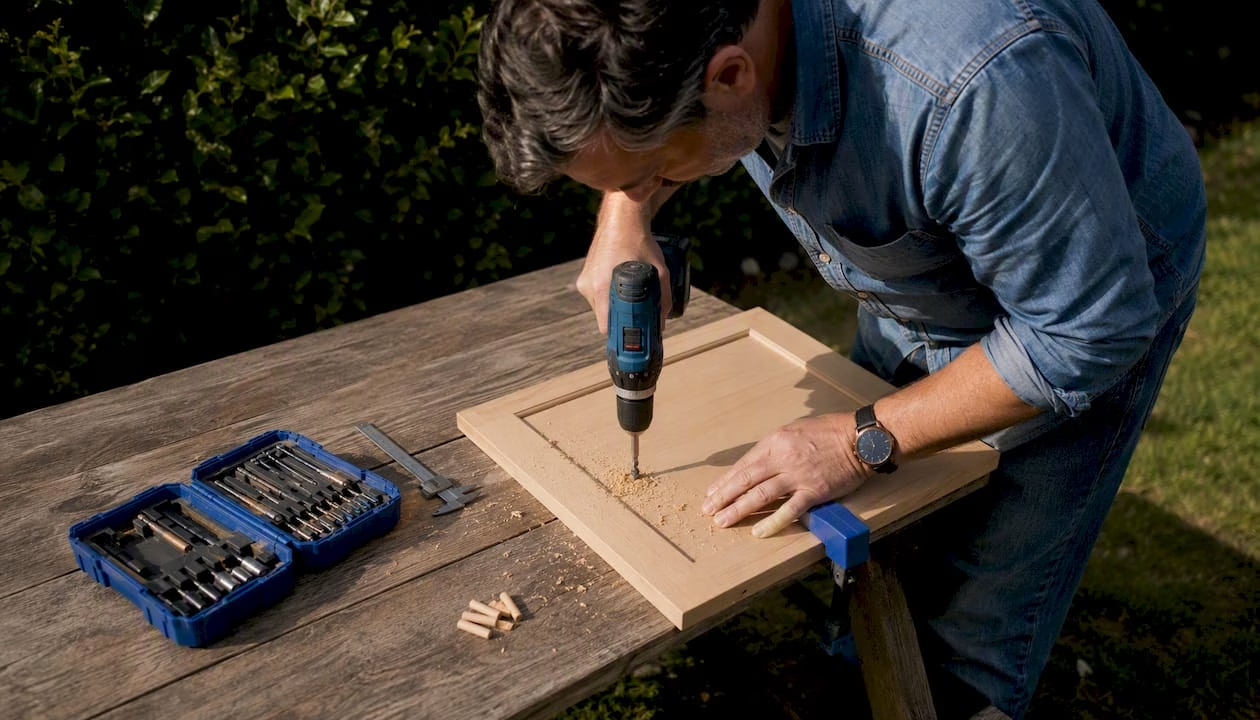

Replacing kitchen drawers is defined as the process of removing worn or damaged drawer boxes, slides, or fronts and installing new components to restore full function and appearance. You can complete this project in a single afternoon when you measure correctly and select compatible hardware. Most homeowners skip full cabinet replacement entirely because only the drawer components are worn, making targeted replacement the smarter, more affordable fix. Knowing how to replace kitchen drawers correctly means understanding three things: accurate measurement, hardware compatibility, and proper installation sequence.
What tools and materials do you need to replace kitchen drawers?
Gathering the right tools before you start saves you from stopping mid-project. A missing drill bit or the wrong screw length causes more delays than the actual installation work.
Essential tools:
- Tape measure (at least 25 feet)
- Power drill with Phillips and flat-head bits
- Screwdriver set
- Level (a 4-foot level works best for slide alignment)
- Clamps (for holding slides in position while drilling)
- Pencil for marking drill points
- Safety glasses
Materials you will need:
- New drawer box or drawer kit
- Drawer slides (matched to your cabinet type)
- Drawer front (if replacing the face)
- Wood screws in the correct length for your slide hardware
- Double-sided tape (for drawer front alignment)
Pro Tip: Buy your drawer slides and drawer box from the same supplier or at least verify they are rated for the same clearance spec. Drawer boxes and slides act as a matched system, and incompatible combinations cause binding or installation failure.
Choosing the right slide type
The slide type you choose depends on your cabinet construction. Frameless cabinets allow easier undermount slide installation, while face-frame cabinets typically require side-mount or center-mount hardware. Cabinet construction type dictates which drawer slide types you can use and how you install them.
| Slide Type | Best For | Key Advantage |
|---|---|---|
| Side-mount | Face-frame and frameless | Widely available, easy to adjust |
| Undermount | Frameless cabinets | Hidden from view, smooth action |
| Center-mount | Older or lighter-duty drawers | Simple installation, low cost |
Hardwood and plywood are the best materials for drawer boxes. Hardwood and plywood drawer boxes outlast cheaper alternatives like MDF or particleboard, especially under the daily stress of kitchen use. Dovetail joinery adds the most structural strength and is worth the extra cost for heavy-use drawers.
How do you accurately measure kitchen cabinets for drawer replacement?
Measurement accuracy is the single most critical factor separating a successful drawer replacement from a frustrating one. Rushing the measurement phase is the main cause of improper drawer fit and daily functional problems. A drawer that is even a fraction too wide will bind against the cabinet frame and never operate smoothly.
Step-by-step measurement process
- Measure the cabinet opening width. Measure from the inside left wall to the inside right wall at the widest point. Write this number down.
- Calculate the drawer box width. For side-mount slides, subtract 1 inch from the cabinet opening width to account for the slide hardware on each side. Side-mount slides require about 1 inch total clearance, so your drawer box width equals the opening minus that clearance.
- Measure the cabinet opening height. Measure from the bottom of the opening to the top. Your drawer box height should be at least 1/2 inch shorter than this measurement.
- Measure the cabinet depth. Measure from the front face of the cabinet to the back wall. Your drawer box depth should be 1 inch shorter than this to allow for the slide mechanism at the back.
- Measure the existing drawer box. Compare your cabinet opening measurements to the old drawer box. If they match your calculations, you have a reliable reference for ordering.
Pro Tip: Always measure twice and write both measurements down before ordering anything. A quick guide to measuring cabinets can help you avoid the most common sizing errors homeowners make.
The key distinction most beginners miss is the difference between the cabinet opening size and the drawer box size. Cabinet opening and drawer box measurements are not the same number. The slide hardware always consumes some of that space, and ignoring this step leads to a drawer that simply will not fit.
Quick measurement checklist:
- Cabinet opening width, height, and depth recorded
- Slide clearance subtracted from width
- Drawer box depth confirmed against cabinet depth
- Old drawer box dimensions compared as a cross-check
How do you remove old drawers and install new kitchen drawers?
The installation process follows a clear sequence. Skipping steps or working out of order is the fastest way to end up with a misaligned drawer that sticks or falls off its track.
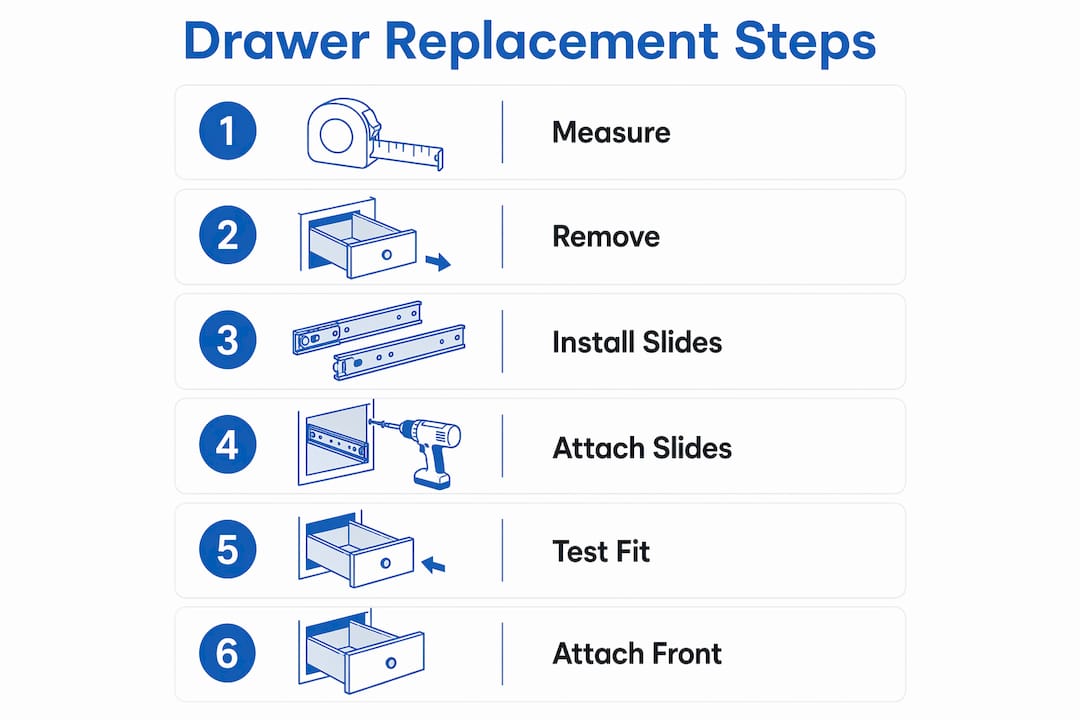
Step 1: Remove the old drawer
Pull the drawer out as far as it will go. Most modern slides have a release tab or lever on each side. Press or lift these tabs simultaneously and pull the drawer box free. If the drawer uses older wooden runners, simply lift and pull. Set the drawer box aside and unscrew the old slides from the cabinet walls using your drill.
Step 2: Install the new drawer slides
Position the cabinet-side slide member along the inside wall of the cabinet at the correct height. Use your level to confirm it is perfectly horizontal before drilling any screws. A slide that is even slightly off level will cause the drawer to tilt and bind. Screw the slide into place using the pre-drilled holes in the slide hardware. Repeat on the opposite wall, checking that both slides sit at exactly the same height.
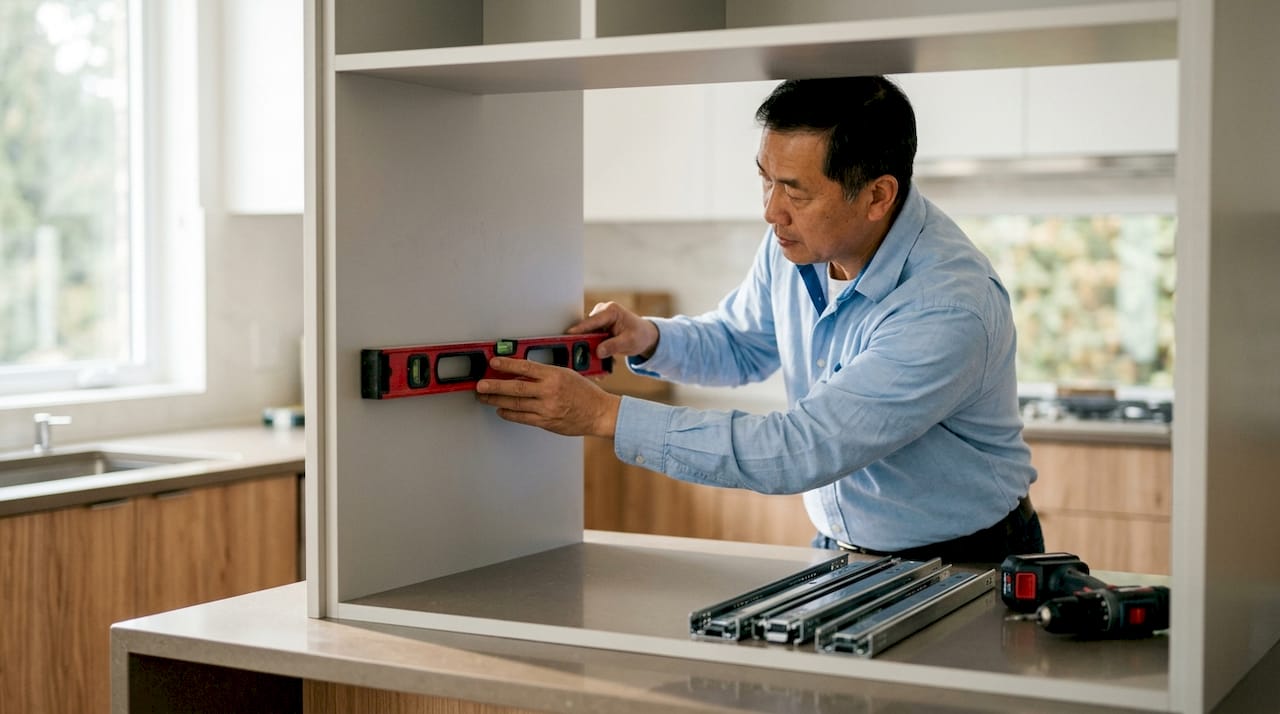
Pro Tip: Use a clamp to hold the slide in position while you drill the first screw. This prevents the slide from shifting and keeps your alignment accurate.
Step 3: Attach the drawer-side slide members
Mount the drawer-side portion of each slide to the outside walls of your new drawer box. Follow the manufacturer’s spacing instructions, as the mounting position varies by slide brand and type. Confirm the slides are flush with the front edge of the drawer box.
Step 4: Insert and test the drawer box
Align the drawer-side slides with the cabinet-side slides and push the drawer box in until it clicks into place. Open and close the drawer several times. It should glide smoothly with no side-to-side wobble or vertical tilt. If it sticks, check that both cabinet-side slides are at the same height and that the drawer box width is correct.
Common troubleshooting issues:
- Drawer sticks on one side: One slide is higher than the other. Loosen the screws on the higher slide and adjust down.
- Drawer tilts forward when open: The drawer-side slides are mounted too far back on the box. Reposition them forward.
- Drawer will not close fully: The drawer box depth is too long. Measure again and trim or reorder.
Step 5: Attach the drawer front
Attaching the drawer front comes after the drawer box is installed and operating correctly. Apply strips of double-sided tape to the back of the drawer front. Position the front against the drawer box with the correct reveal spacing on all sides, then press firmly to let the tape hold it temporarily. Open and close the drawer to confirm the alignment looks right. Once satisfied, drill screws from inside the drawer box through into the drawer front to make it permanent. You can find custom-sized drawer fronts that match your exact measurements if you are updating the kitchen’s look at the same time.
What drawer materials and styles last the longest?
The material you choose for your drawer box directly affects how long it holds up under daily kitchen use. Kitchen drawers live a hard life. They carry heavy pots, utensils, and groceries, and they open and close hundreds of times a year.
Hardwood and plywood are the top choices for durability. Hardwood species like maple and birch resist warping and hold screws firmly. Plywood offers similar strength at a lower price point and resists moisture better than solid wood in some conditions. MDF and particleboard cost less upfront but swell when exposed to moisture and do not hold screws as well over time. For a kitchen, the extra investment in plywood or hardwood pays off in longevity.
Joinery type matters as much as material. Dovetail joints interlock mechanically, making them the strongest option for drawer corners. Doweled joints are common in mid-range drawer boxes and perform well for standard loads. Stapled or glued butt joints are the weakest and tend to fail first in high-use drawers.
For drawer fronts, the style you choose should complement your existing cabinet doors. Shaker-style fronts work with almost any kitchen design and remain popular for their clean lines. Flat-panel fronts suit modern kitchens. Raised-panel fronts add traditional character. If you are upgrading kitchen cabinet fronts at the same time as replacing the drawer boxes, matching the front style to your cabinet doors creates a unified look without a full remodel.
Key Takeaways
Replacing kitchen drawers successfully requires accurate measurement, compatible hardware, and a careful installation sequence from slides to drawer front.
| Point | Details |
|---|---|
| Measure cabinet opening, not drawer box | Subtract slide clearance from the opening width before ordering any hardware. |
| Match drawer box to slide type | Order the drawer box and slides as a compatible system to avoid binding. |
| Level slides before drilling | Both cabinet-side slides must sit at the same height for smooth operation. |
| Attach drawer front last | Use double-sided tape to confirm alignment before screwing the front permanently. |
| Choose hardwood or plywood | These materials outlast MDF and particleboard under daily kitchen use. |
What I have learned from replacing kitchen drawers
After working through more drawer replacements than I can count, the lesson that sticks hardest is this: most people underestimate how much the measurement phase matters and overestimate how complicated the installation is. The installation itself is straightforward once your numbers are right. The measurement phase is where projects succeed or fail.
The second thing I have seen trip up homeowners is treating the drawer box and slides as separate purchasing decisions. They are not. Ordering a drawer box without specifying the hardware style leads to clearance and mounting problems that are genuinely difficult to fix after the fact. Buy them together or at minimum confirm compatibility before anything ships.
My honest advice on cost: do not cut corners on the drawer box material. The price difference between a particleboard box and a plywood box is small. The difference in how long they last is significant. Kitchens are high-moisture, high-traffic environments. Spend the extra $15–$20 per drawer box on quality material and you will not be doing this project again in three years.
Finally, many homeowners replace full cabinets when only the drawer components are worn. That adds unnecessary expense. If your cabinet boxes are structurally sound, replacing only the drawers and fronts is the right call. It is faster, cheaper, and the result looks just as good.
— David
Refresh your kitchen with Tdm-thedoormaker
Once your drawer boxes are in and operating smoothly, the drawer fronts are the next place to focus your attention. A new drawer front changes how your entire kitchen looks, and getting the size exactly right is what separates a clean result from one that looks patched together.

Tdm-thedoormaker makes it straightforward to order replacement drawer fronts in custom sizes that match your exact measurements. You choose the style, finish, and dimensions, and Tdm-thedoormaker handles the craftsmanship. If you want to take the refresh further, their custom cabinet doors online let you update every cabinet front in the kitchen without a full remodel. The process is measure, design, and order, with competitive pricing and fast turnaround.
FAQ
How long does a kitchen drawer replacement take?
A kitchen drawer replacement is a manageable weekend project. With accurate measurements in hand, most homeowners complete a single drawer in an afternoon.
Do I need to replace the whole cabinet if my drawer is broken?
No. Only the drawer box, front, or slides typically need replacement when a drawer fails. Cabinet boxes are usually structurally sound and do not need to be replaced.
What is the correct drawer box width for side-mount slides?
Subtract 1 inch from your cabinet opening width. Side-mount slides require about 1 inch total clearance across both sides, so the drawer box must be that much narrower than the opening.
What is the best material for a replacement drawer box?
Hardwood or plywood is the best choice for kitchen drawer boxes. Both materials resist warping, hold screws firmly, and outlast MDF or particleboard under daily use.
Can I just replace the drawer front without replacing the whole drawer?
Yes. Replacing just the drawer front is a cost-effective option when the drawer box is still structurally sound. It updates the kitchen’s appearance without the full replacement process.