
Blog

How to Install Cabinet Doors: A Beginner’s Step-by-Step Guide

How to Install Cabinet Doors: A Beginner’s Step-by-Step Guide

The fastest reliable way to install cabinet doors is to confirm your hinge type and overlay, measure each opening at multiple heights, bore the 35 mm cup holes (or order doors pre-bored), mount the hinge plates to the cabinet, hang the door top hinge first, then use the hinge’s three-axis adjustments to dial in even gaps. According to The Spruce, a straightforward overlay door swap takes about 20–30 minutes per door for an experienced DIYer when no trimming or cup drilling is required. First-timers should budget 30–90 minutes per door, especially when cup drilling or trimming is involved.

Before you pick up a drill, do two things: measure every opening individually (cabinets are rarely perfectly square), and confirm whether you need inset, partial-overlay, or full-overlay hinges. Those two decisions shape everything that follows.

Key Takeaways

Successful cabinet door installation comes down to measuring each opening individually, choosing the correct hinge and overlay type, and using hinge adjustments to dial in even gaps after hanging.

Point Details
Measure every opening separately Width and height can vary across a run; record the smallest dimension at three points each.
Match hinge to overlay type Inset, partial-overlay, and full-overlay doors each require a different hinge arm and mounting plate.
Pre-bored doors skip the riskiest step Ordering doors with 35 mm cups already bored eliminates tear-out risk and speeds installation significantly.
Hang top hinge first, adjust last Attach the top hinge to bear weight, verify gaps before tightening, then use three-axis adjustments to square the door.
Tdm-thedoormaker for custom sizing Pre-bored, precision-cut doors in 30+ styles remove on-site cup drilling from the process entirely.

Table of Contents

What tools do you need to install cabinet doors?

Gathering the right tools before you start prevents mid-project trips to the hardware store and keeps the work moving.

Essential tools:

  • Tape measure, pencil, and speed square
  • Cordless drill/driver with a Phillips bit
  • 35 mm (1-3/8") Forstner bit for hinge cup holes
  • Drill press or a handheld drill with a depth-stop collar
  • Self-centering bit (Vix bit) for pilot holes
  • Chisel and mallet for minor adjustments
  • Block plane or random-orbit sander for trimming
  • Clamps and shims
  • Level

Hinge hardware:

  • Concealed European-style 35 mm cup hinges (Blum or Hettich are widely available)
  • Face-frame or frameless mounting plates to match your cabinet construction
  • Soft-close hinges if you want dampened closing action
  • Kreg hinge placement jig for repeatable hole placement across multiple doors

Materials and consumables:

  • Cabinet screws sized for your box material (typically #6 x 5/8" for mounting plates)
  • Masking tape or a scrap backer board to prevent tear-out when drilling
  • Wood filler and sandpaper for any surface prep
  • Touch-up paint or finish pen

Safety gear: safety glasses, hearing protection, and a dust mask when drilling or sanding.

Pro Tip: Place a scrap piece of MDF or plywood directly behind the drill-out point when boring cup holes. It backs the veneer or laminate surface and prevents the Forstner bit from blowing out the face as it exits. If you have more than six doors to do and no drill press, seriously consider ordering pre-bored doors instead — the time savings and cleaner results are worth it.

How do you identify door overlay type and choose the right hinge?

Getting the hinge wrong is the most common and most expensive mistake in a cabinet door installation. The overlay type determines which hinge you need before you buy a single piece of hardware.

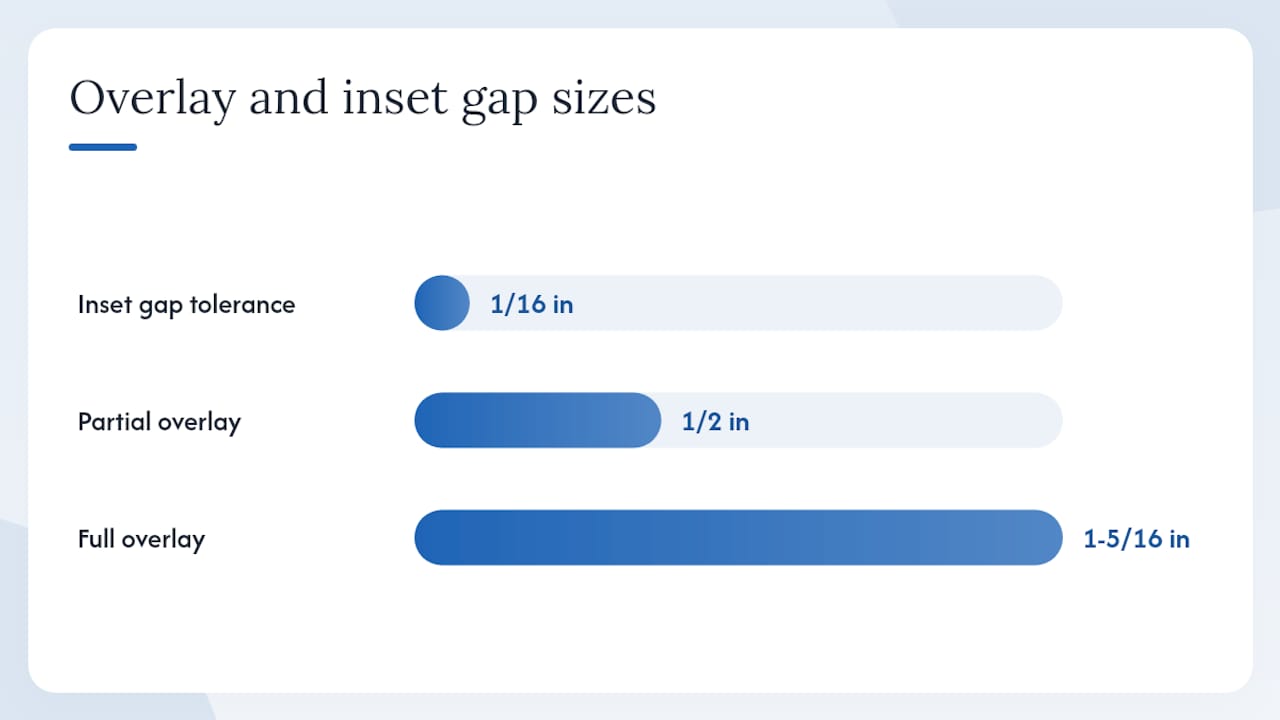
Inset doors sit flush inside the cabinet opening. They require tight tolerances (typically 1/16" gap on all sides) and hinges designed for zero or minimal overlay. These are the hardest to fit because any out-of-square opening shows immediately.

Partial-overlay doors cover part of the face frame, leaving the frame visible between adjacent doors. A 1/2" overlay is the most common standard in American kitchens.

Full-overlay doors cover nearly the entire face frame. They are standard on frameless (European-style) cabinets and require a different mounting plate than face-frame cabinets.

Concealed European cup hinges are the preferred choice across all three door types because their built-in three-axis adjustability lets you correct alignment after the door is already hung. That adjustability is why professionals favor them for consistent gaps and easy tuning. The cup diameter is always 35 mm; what changes is the mounting plate and the arm angle (typically 95°–110° for standard doors, 165°+ for corner applications).

Door Type Hinge Style Mounting Plate Typical Overlay
Inset Concealed cup, inset arm Face-frame or frameless 0" (flush)
Partial overlay Concealed cup, standard arm Face-frame clip plate 1/2"
Full overlay Concealed cup, full-overlay arm Frameless or long clip plate 1-1/4"–1-3/8"

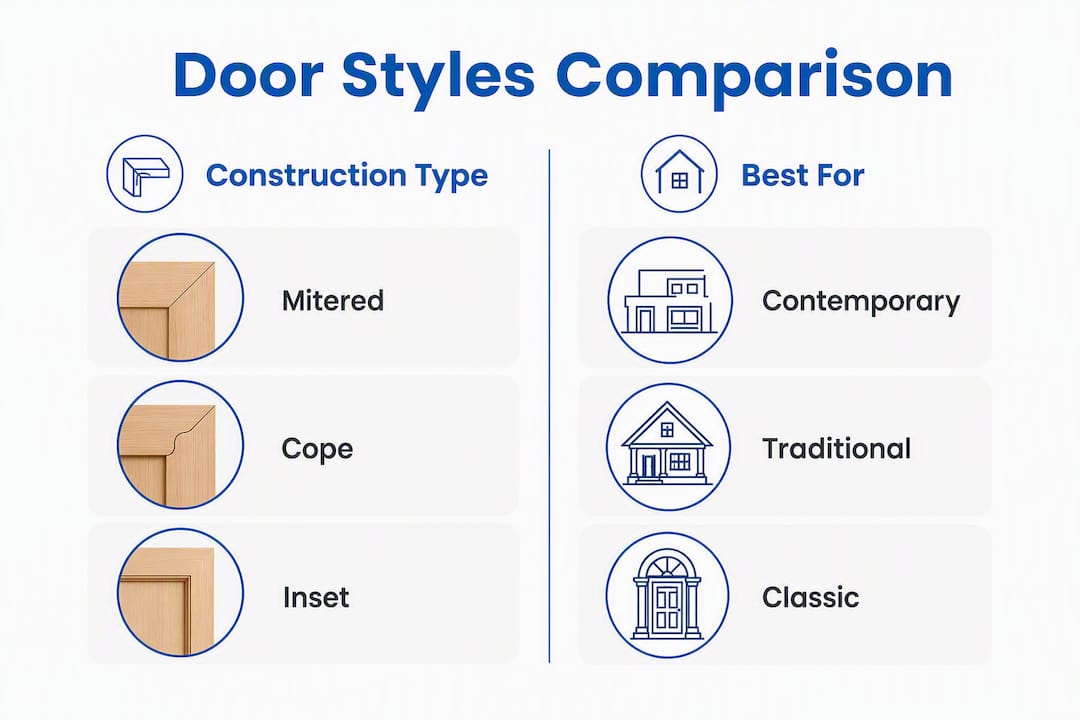
Diagram comparing cabinet door types and hinge styles

For full-overlay hinge selection and installation specifics, the overlay amount and your cabinet’s face-frame construction are the two measurements that determine which plate you order. Soft-close versions of all three types are available and add only a small cost premium.

How do you measure each opening and mark hinge locations?

Measure every opening individually. Cabinets shift, settle, and are rarely perfectly square, so a width measured at the top can differ from the width at the bottom by 1/8" or more. This Old House recommends measuring each opening separately rather than assuming uniform sizes across a run of cabinets.

Measurement sequence:

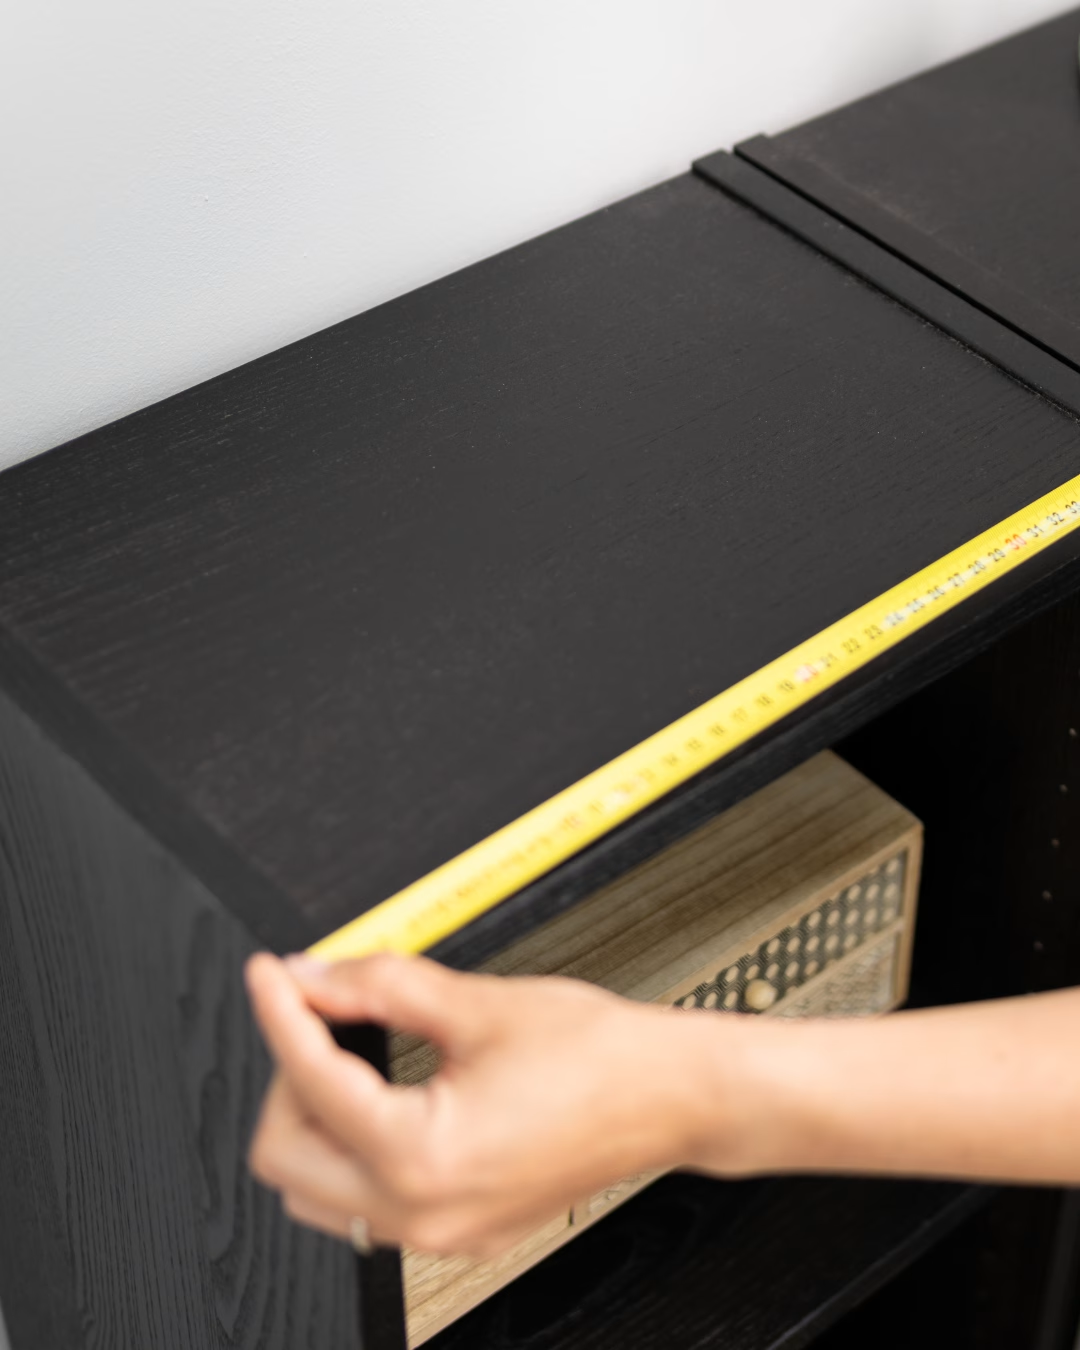
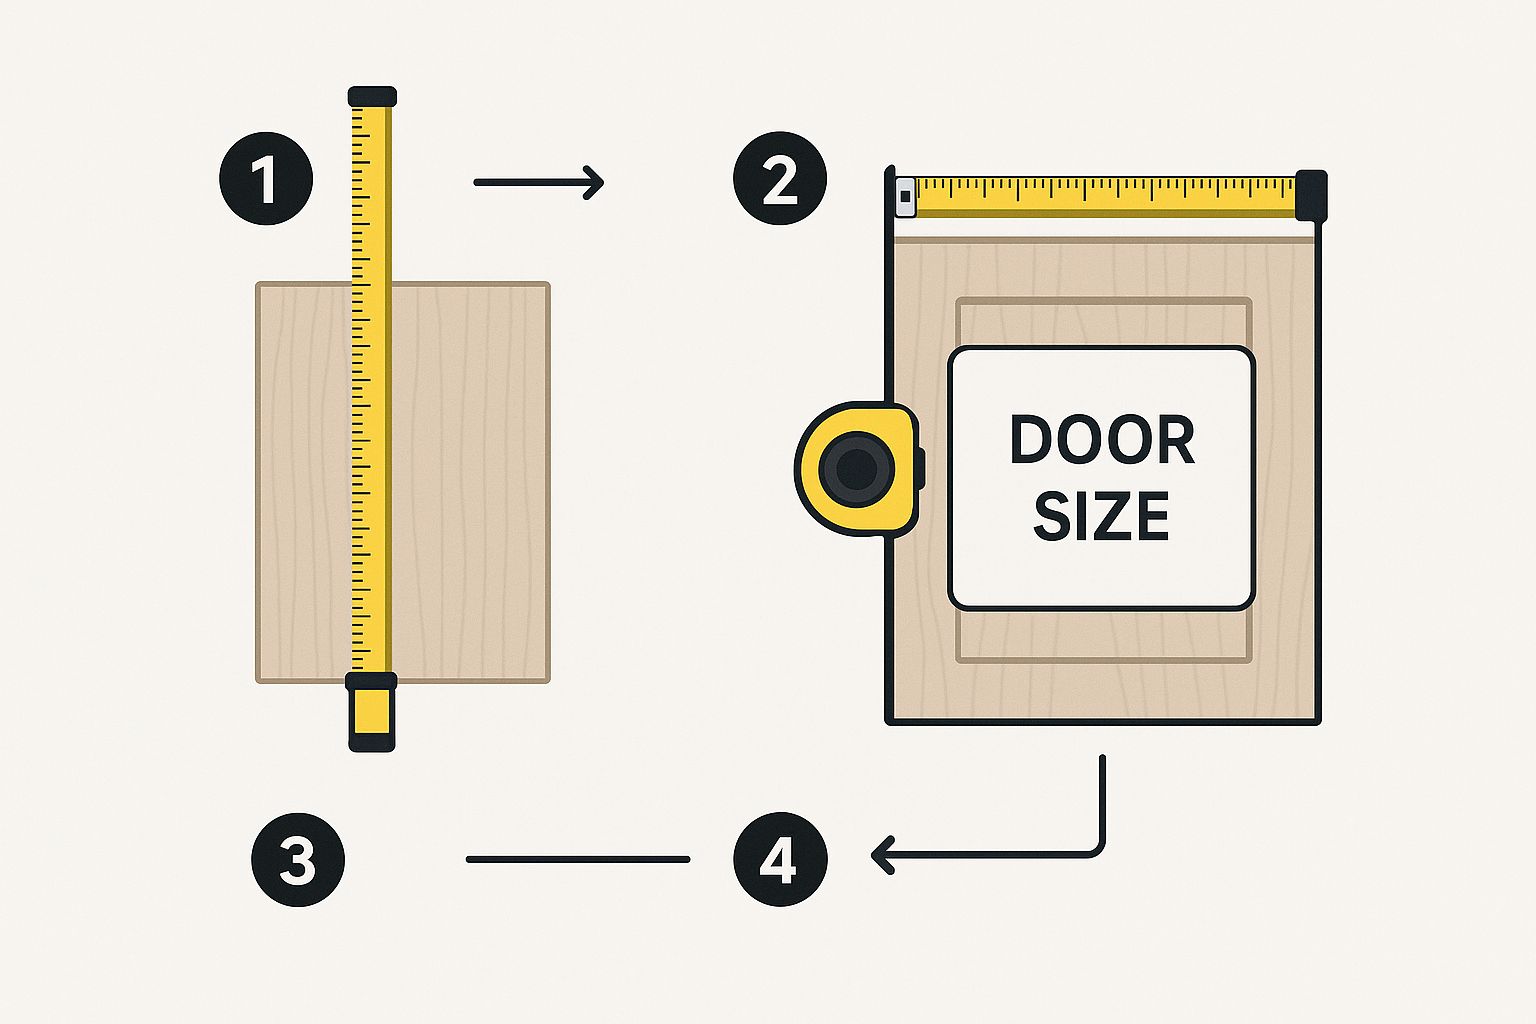
  • Measure width at the top, middle, and bottom of the opening; record the smallest value.
  • Measure height at the left, center, and right; record the smallest value.
  • Add your overlay amount to each dimension (e.g., 1/2" per side = 1" total width addition for partial overlay).
  • Note whether the opening is square by measuring both diagonals; if they differ by more than 1/8", plan to shim or trim.

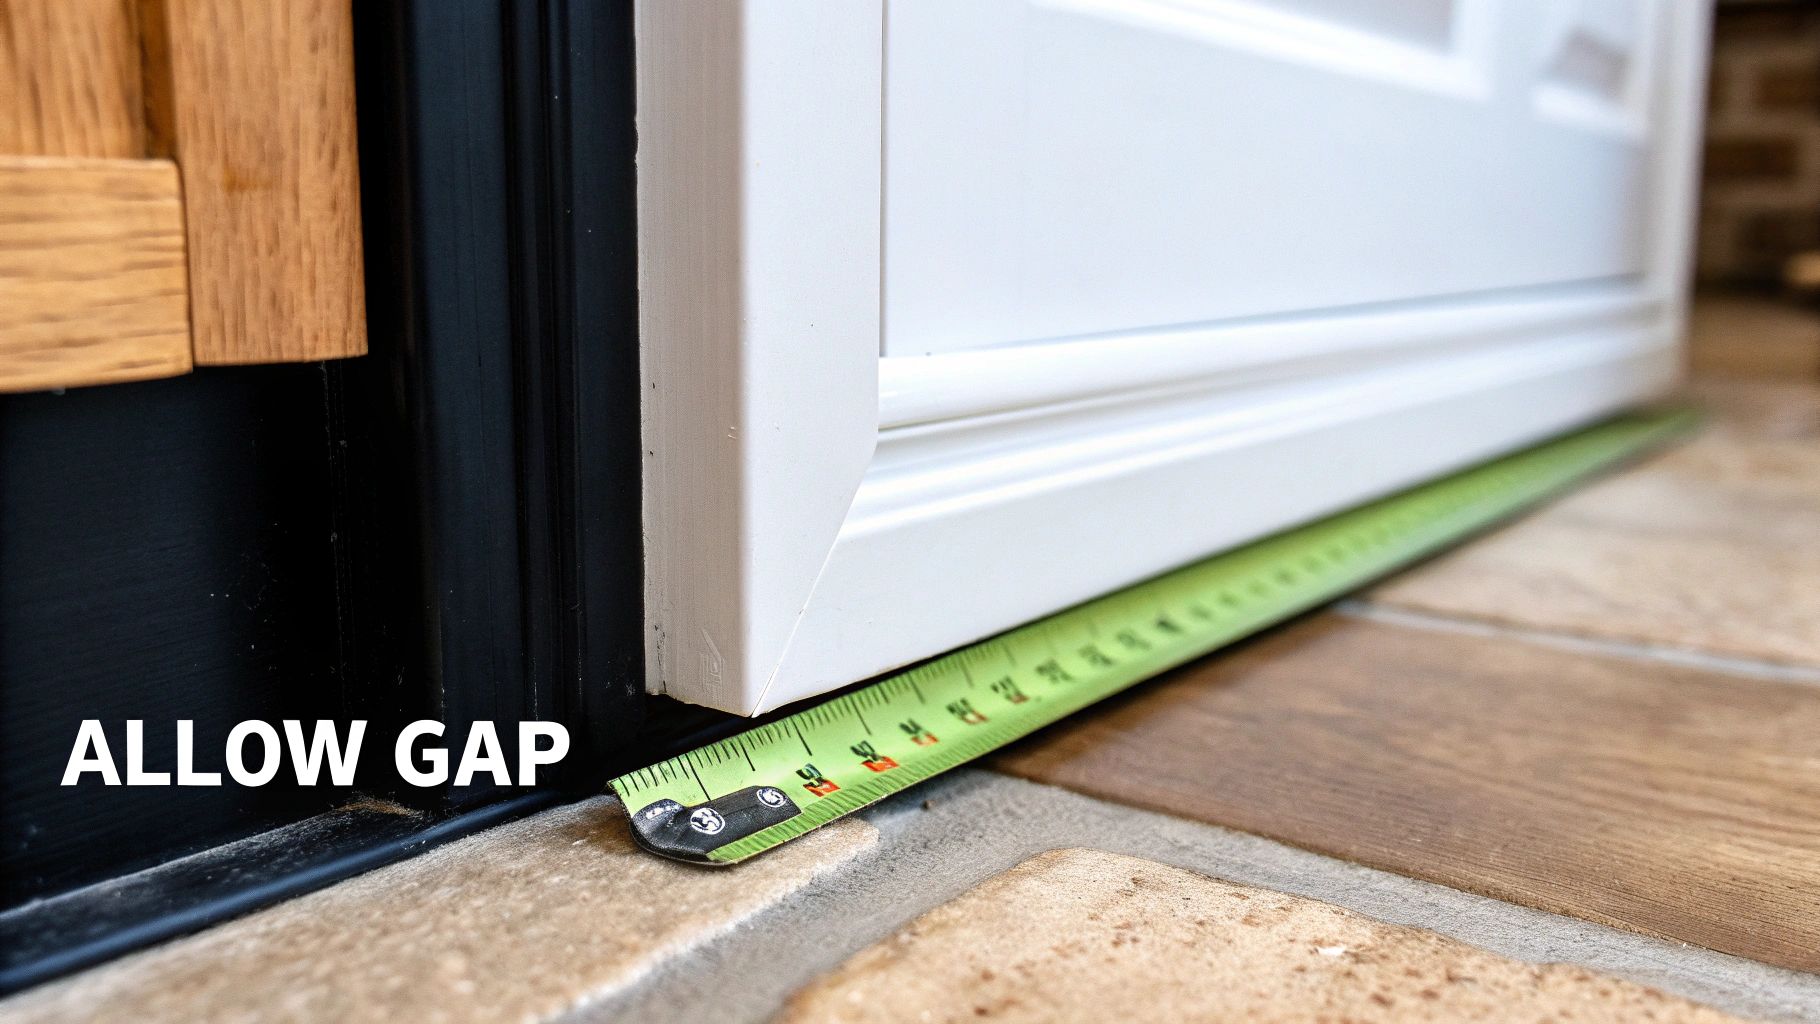
For inset doors, tolerances tighten considerably. Measure to the nearest 1/32" and account for a consistent 1/16" reveal on all four sides. A detailed inset door measuring guide walks through the shimming strategies that keep gaps uniform even in out-of-square openings.

Marking hinge locations:

A reliable starting point is placing hinge cup centers approximately 4" down from the top edge and 4" up from the bottom edge, as shown in Wood Magazine’s cabinet door video. For doors taller than 40", add a third hinge at the midpoint. Mark the centerline of each cup location with a pencil, then mark the screw hole positions using a hinge as a template or a dedicated jig.
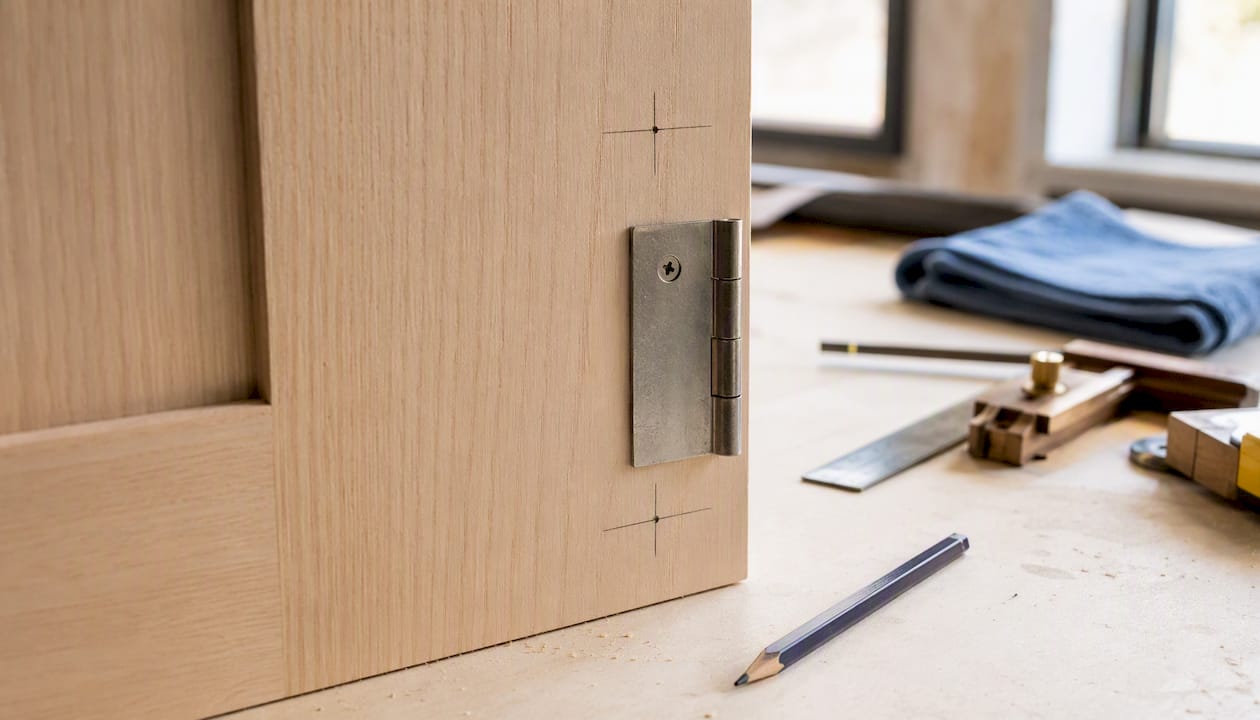
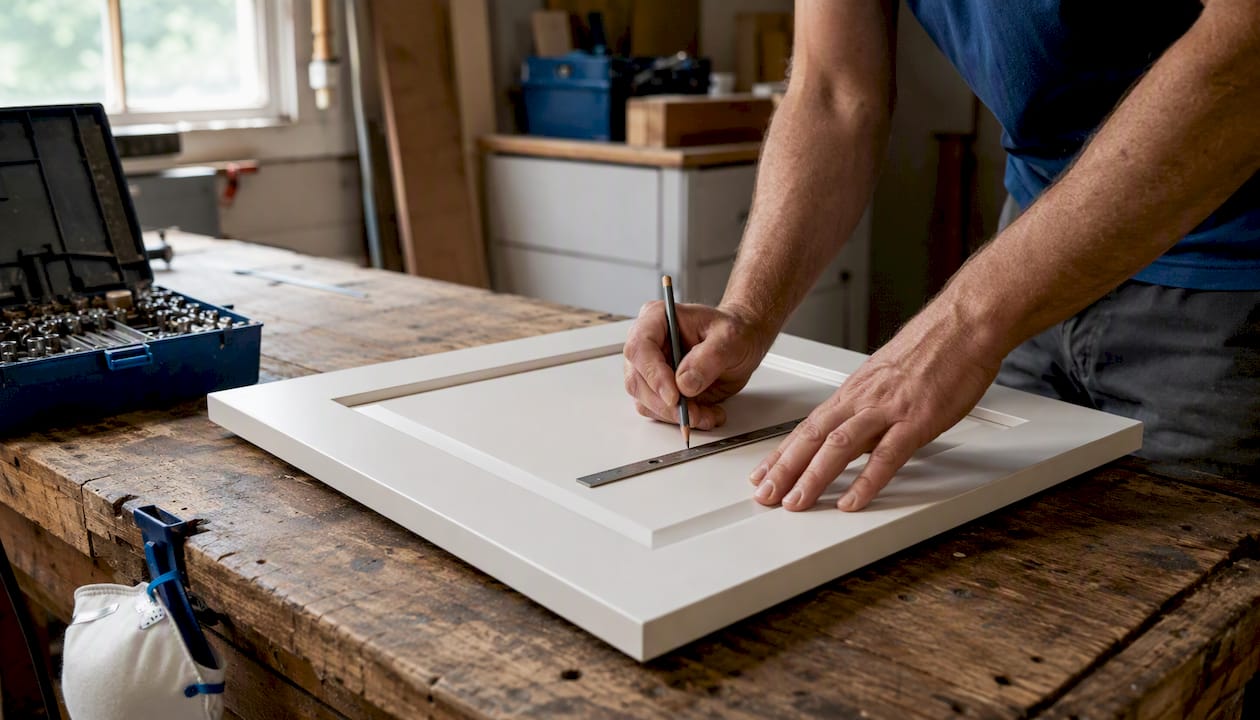
Marking hinge cup centers on cabinet door

Pro Tip: Cut a simple plywood drilling template the same width as your door stile and mark the cup center and screw holes once. Clamp it to each door in turn and you get identical placement every time. The Kreg hinge placement jig does the same thing with adjustable stops, which is especially useful when you’re hanging a full kitchen’s worth of doors.

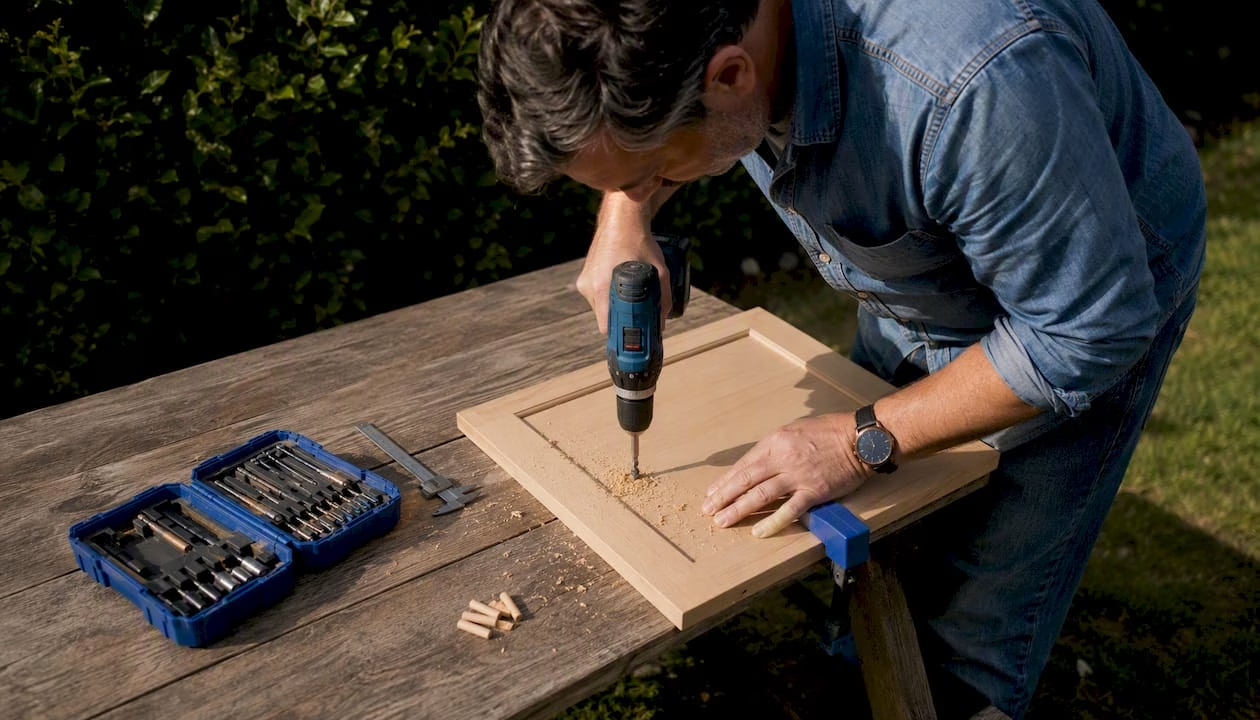
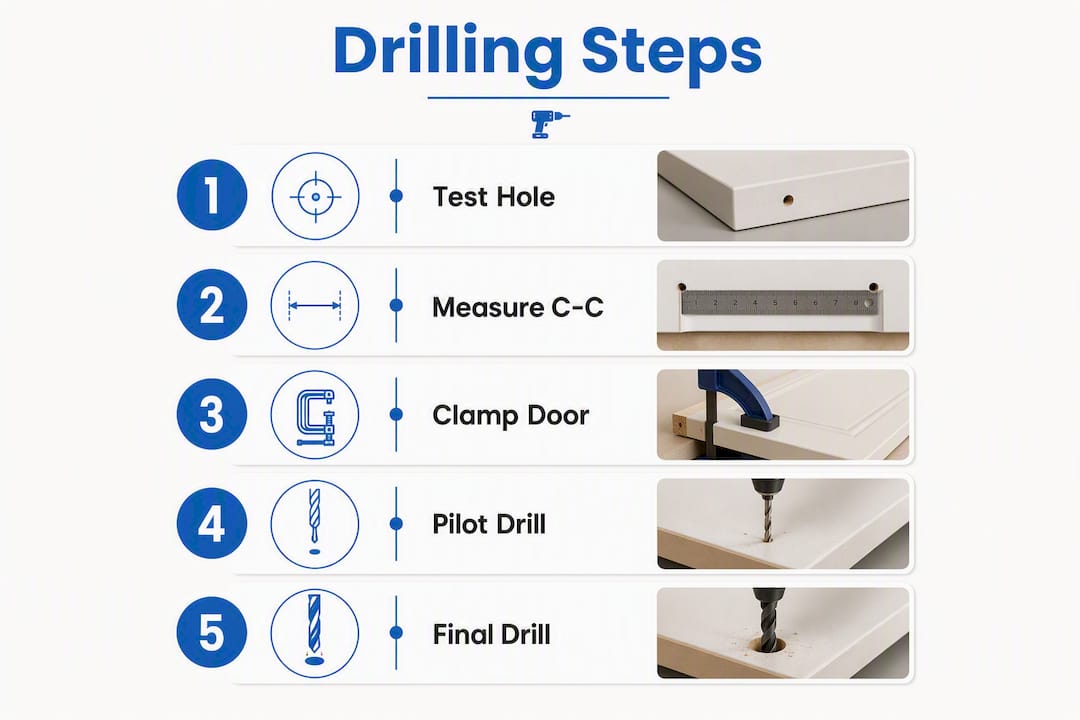
How do you drill 35 mm hinge cup holes cleanly?

Cup drilling is the step where most beginners make irreversible mistakes, so take it slowly.
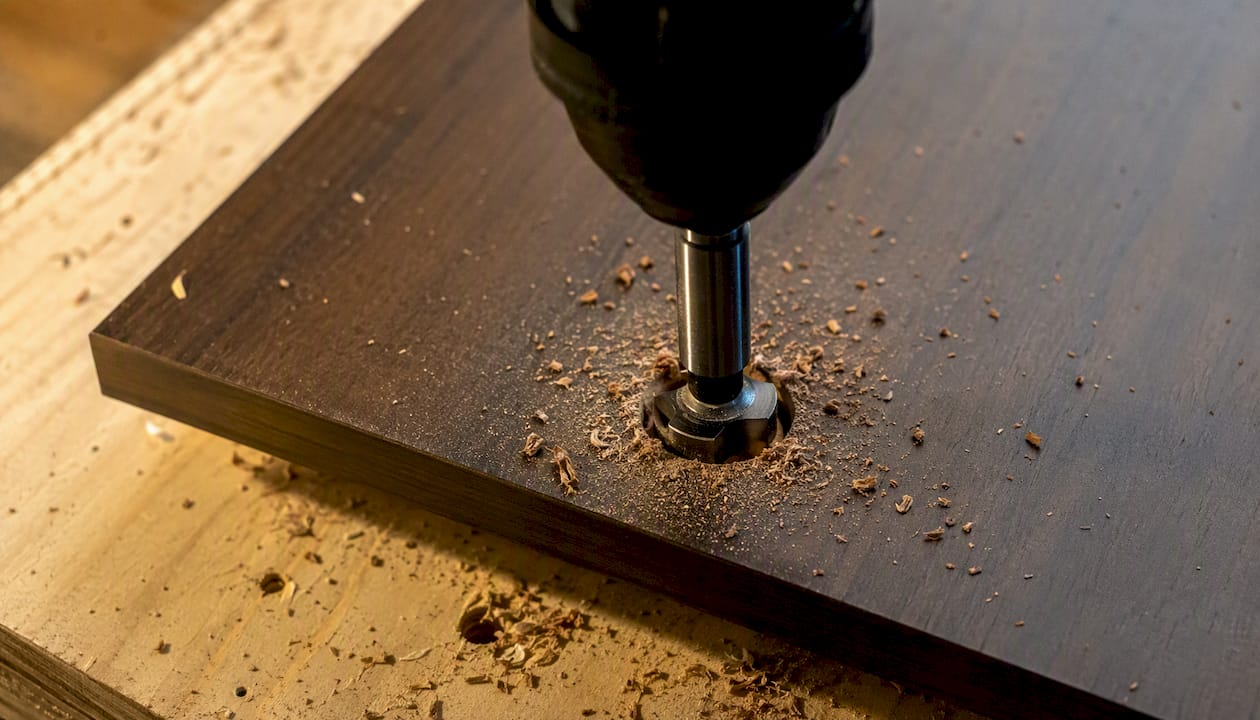
Drilling clean 35 mm hinge cup hole in cabinet door

When to drill yourself vs. order pre-bored:

If you have a drill press, a 35 mm Forstner bit, and a depth-stop collar, drilling your own cups is straightforward. If you’re working with a handheld drill only, or if you’re replacing more than eight doors, ordering pre-bored doors removes the riskiest step entirely and speeds the whole project.

Step-by-step cup drilling:

  1. Clamp the door face-down on a sacrificial board. The backer board prevents tear-out on veneered or laminate surfaces.
  2. Transfer your hinge locations from the template. Mark the cup center clearly with a punch or awl.
  3. Set the depth stop on your Forstner bit. Standard concealed hinges require a cup depth of 13 mm (about 1/2"). Check your specific hinge spec sheet.
  4. Drill at low speed (400–600 RPM) with steady, even feed pressure. High speed causes burning and tear-out.
  5. Clear chips between passes and check depth with a small ruler before removing the door from the clamp.
  6. Test-fit the hinge cup in the hole before moving to the next location.

Wood Magazine’s installation guide places cup centers approximately 4" from top and bottom as a reliable professional starting point, with the cup edge set back from the stile edge to match the overlay. A depth stop is non-negotiable: drilling even 2 mm too deep can break through the door face on thinner stock.

Safety note: Forstner bits grab aggressively. Always clamp the workpiece securely and keep fingers well clear of the bit path. Use eye protection; chips fly at speed.

How do you fasten hinges to the door correctly?

Mounting hinges to the door first is the recommended sequence. It lets you verify cup fit and hinge swing before the door is anywhere near the cabinet.

Attachment checklist:

  • Seat the hinge cup fully in the drilled hole. The cup flange should sit flush against the door face with no rocking.
  • Pre-drill pilot holes for the cup screws using a self-centering (Vix) bit. This is especially important near the stile edge on solid wood doors, where screws can split the grain.
  • Drive cup screws to snug. Use low torque on your driver; over-tightening strips the holes in MDF or particleboard, and those holes are hard to repair cleanly.
  • Check that the hinge arm runs parallel to the door stile when the hinge is open. If it angles, the cup is not fully seated.
  • Test the hinge swing through its full range before moving on.

For the mounting plate screws, use the length specified by the hinge manufacturer. Longer screws give better pull-out resistance in particleboard cabinet boxes, which is the most common material in American kitchen cabinets.

How do you transfer hinge positions to the cabinet and install mounting plates?

With hinges attached to the door, you now need to transfer those positions to the cabinet box or face frame accurately.

Transfer method:

  • Hold the door against the opening using shims to maintain the correct overlay and gap. A temporary ledger board screwed lightly across the bottom of the opening gives you a consistent shelf to rest the door on while marking.
  • Mark through the mounting plate screw holes onto the cabinet with a pencil or awl.
  • Remove the door and pre-drill pilot holes at each mark. Use a bit slightly smaller than the screw shank.

Face-frame vs. frameless differences:

On face-frame cabinets, the mounting plate screws into the face frame itself. The plate’s position relative to the frame edge determines the overlay, so measure twice before drilling. On frameless (European-style) cabinets, the plate screws directly into the cabinet side panel, typically 37 mm from the front edge for standard hinges.

Rockler’s hanging guide recommends using a chalk line or temporary ledger to keep overlay consistent across a run of doors, which is particularly helpful when you’re mounting plates for an entire kitchen at once.

Pro Tip: Install the top mounting plate first and leave its screws one turn loose. Hang the door, check the overlay and gap, then tighten. It’s much easier to nudge a plate slightly before it’s fully seated than to back out screws and re-drill.

What is the right sequence for hanging the door?

Physical hanging is where the project either comes together or gets frustrating. A clear sequence prevents dropped doors and stripped screws.

Hanging sequence:

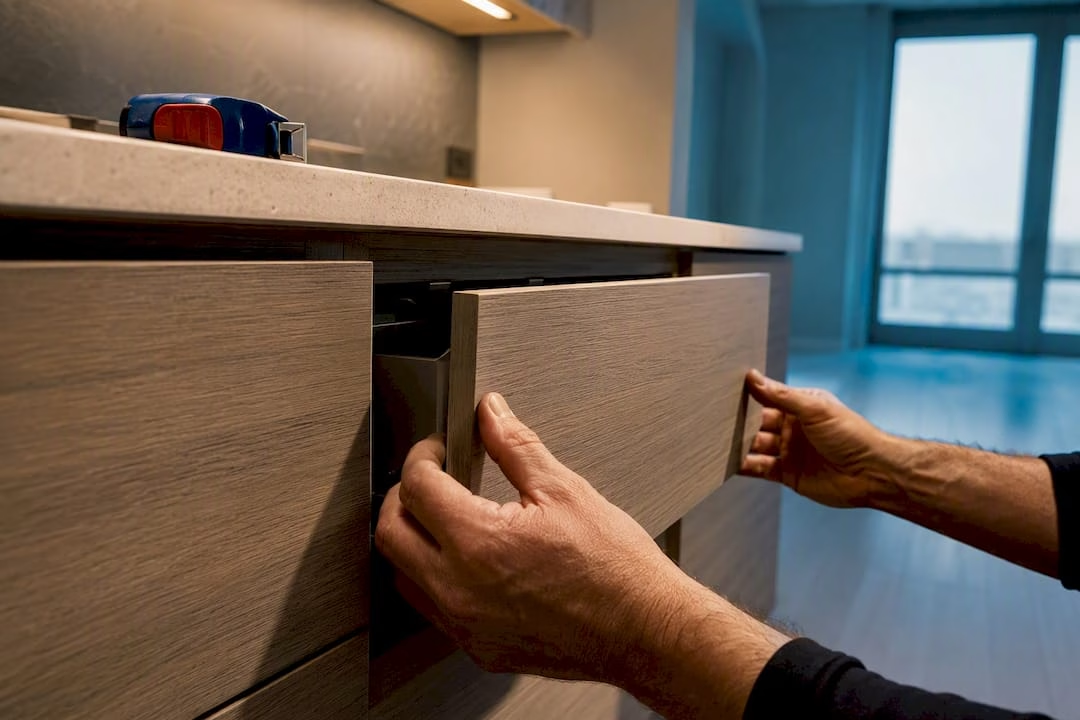
  • Attach the top hinge to its mounting plate first. The top hinge bears the door’s weight during the initial hang, so securing it first gives you control.
  • Hold the door at the correct height using shims under the bottom edge or a temporary ledger. For heavy doors, a second person holding the door makes this step much safer.
  • Snap or screw the bottom hinge onto its plate. For snap-in concealed hinges (common on Blum systems), press the hinge arm onto the plate until you hear a click. For screw-on systems, drive screws finger-tight only at this stage.
  • For three-hinge doors, attach the middle hinge last.
  • Verify gaps and overlay before fully tightening any screws.

Eagle Woodworking’s hinge guide emphasizes low torque on the driver throughout this stage. Stripped mounting plate screws in particleboard are a common and avoidable problem. If a screw feels like it’s spinning without biting, stop, remove it, and use a slightly longer screw or a toothpick-and-glue fill before re-driving.

Quick pre-tighten checklist:

  • Gap is consistent on all four sides of the door.
  • Door aligns with adjacent doors at the same height.
  • Door clears drawer slides and neighboring drawers when opened.
  • Soft-close mechanism engages smoothly if present.

How do you adjust hinges and fix common alignment problems?

Concealed cup hinges have three independent adjustments, and knowing which screw does what saves a lot of trial and error.

The three adjustments:

  • Side-to-side (lateral): The slotted screw on the mounting plate moves the door left or right. Use this to equalize the gap between adjacent doors.
  • In/out (depth): The screw that moves the hinge arm forward or back adjusts how far the door sits from the cabinet face. Use this when the door sticks out or sits recessed relative to its neighbors.
  • Up/down (vertical): On clip-style plates, loosening the plate screw and sliding the plate up or down moves the door vertically. Some hinge arms also have a cam screw for small vertical corrections.

Troubleshooting common problems:

  • Door rubs on the frame: Adjust depth (in/out) to pull the door slightly away from the frame, then check side-to-side.
  • Uneven gap at top vs. bottom: The top and bottom hinges need different lateral adjustments. Move them in opposite directions by small increments.
  • Door sags over time: Tighten the mounting plate screws. If the holes are stripped, fill with a wooden toothpick and wood glue, let dry, and re-drive.
  • Door catches on drawer slide: Adjust depth inward or check whether the door needs a small trim at the bottom corner.

When to trim vs. adjust: hinge adjustments typically cover up to 2 mm of correction in any direction. Beyond that, light planing or sanding is the right fix. A block plane removes thin shavings cleanly from solid wood edges; a random-orbit sander works better on MDF or veneered doors. Always remove material gradually and test the fit frequently.

Pro Tip: Fold a business card in half and use it as a gap gauge. A standard business card is about 0.010" thick; two layers give you roughly 1/32". Consistent gaps across all doors is the mark of a well-hung set. Make one small hinge adjustment at a time, close the door, and check before turning any screw again.

For a broader list of pitfalls to avoid during door replacement, the cabinet refacing mistakes guide covers the most common errors homeowners make during full-kitchen door swaps.

How do you install pulls and knobs and complete the final checks?

Hardware goes on last, after all hinge adjustments are final. Installing pulls before the door is perfectly aligned means drilling holes in the wrong position.

Installation sequence:

  • Use a hardware placement jig (available at most hardware stores) to mark consistent hole positions across all doors and drawer fronts. Consistent placement matters more than the exact measurement you choose.
  • Mark hole centers with a punch or awl to prevent the drill bit from wandering.
  • Drill pilot holes from the door face through to the back. Place a backer board behind the door to prevent tear-out on the exit side.
  • Fit the pull or knob, thread the machine screw from the back, and tighten finger-tight first to confirm alignment before final torque.
  • For pre-drilled hardware holes, Tdm-thedoormaker’s hardware hole drilling guide explains standard hole spacing and bit sizes for common pull styles.

Final quality checklist:

  • Gap widths are consistent on all four sides of every door.
  • All doors sit square in their openings and align at the same height across a run.
  • Soft-close mechanisms engage on every door without slamming.
  • No drawer is obstructed when any adjacent door is opened.
  • All screw heads are flush or countersunk; touch up exposed heads with a finish pen if needed.

When does ordering custom or pre-bored doors make more sense?

DIY cup drilling is satisfying when it goes well, but it is not always the right call. Popular Science’s hanging guide notes that a single door can take anywhere from under an hour to several hours depending on trimming and alignment needs. That range widens considerably when you add cup drilling to the equation.

Circumstances where pre-bored or custom doors make sense:

  • You’re replacing more than eight doors and don’t own a drill press.
  • Your openings are non-standard sizes (common in older homes or after remodels).
  • You want inset doors, where tolerances are tightest and errors are most visible.
  • You’re working with an unfamiliar door material (thermofoil, high-gloss acrylic) where drilling mistakes are hard to fix.
  • You want a guaranteed fit without iterative trimming.

Cost and time tradeoff: The tools for cup drilling (Forstner bit, depth stop, drill press or guide) add up quickly for a one-time project. For a full kitchen of 20+ doors, ordering pre-bored doors from a custom supplier often costs less in total time than drilling each one yourself, even accounting for the door price premium. A useful DIY measurement guide walks through how to calculate exact door dimensions from your opening measurements before placing an order.

Practical approach: Order a single pre-bored sample door first. Hang it, adjust it, and confirm the fit before committing to a full set. Most custom door suppliers, including Tdm-thedoormaker, offer sample doors for exactly this reason.

How do you maintain cabinet doors after installation?

A well-hung door lasts for years with minimal attention, but a few habits keep hinges and surfaces in good condition.

Clean cabinet door surfaces regularly with a damp cloth and a mild dish soap solution. Avoid abrasive cleaners on painted MDF or thermofoil doors; they dull the finish and can lift edges over time. Wipe dry immediately after cleaning to prevent moisture from working into seams.

Check hinge screws every six to twelve months, particularly on heavy doors. Particleboard and MDF compress slightly under load, and screws that were snug at installation can loosen after a year of use. A quick tighten with a Phillips driver takes thirty seconds and prevents the gradual sag that throws off your gap alignment.

Lubricate hinge pivot points annually with a small amount of dry PTFE spray or a drop of 3-in-1 oil. Soft-close mechanisms benefit from occasional cleaning; debris in the damper channel can cause sluggish or uneven closing. If a soft-close hinge stops dampening properly, most Blum and Hettich models allow you to replace just the damper cartridge without removing the entire hinge.

For painted doors, keep a small container of touch-up paint. High-traffic doors accumulate nicks at the bottom corners and around pulls. A quick touch-up every year or two keeps the finish looking fresh without a full repaint.

What first-time installers often get wrong

Most first-time cabinet door installs go smoothly once the measuring is done carefully. The frustration usually comes from one of three places: assuming all openings are the same size, skipping pilot holes near door edges, or making large hinge adjustments instead of small ones.

The measuring step deserves more time than most beginners give it. Spending an extra fifteen minutes recording width and height at three points per opening, and checking diagonals for square, prevents the kind of rework that turns a two-hour project into a full weekend. Measure each opening individually, as This Old House advises, and record every number before ordering or cutting anything.

The other thing worth saying plainly: your first door will take longer than your second, and your second will take longer than your fifth. The sequence becomes muscle memory quickly. Start with one door, get it right, and use it as your reference for the rest of the set. If you’re doing a full kitchen, resist the urge to hang all the doors before adjusting any of them. Adjust each door fully before moving to the next, and you’ll avoid chasing cumulative errors across the whole run.

Stop before final finishing and verify every gap with a consistent gauge. A business card, a folded piece of cardstock, or a set of feeler gauges all work. Consistent gaps matter more than perfect gaps.

Tdm-thedoormaker makes the hardest step optional

Cup drilling is the step that stops most DIYers cold, and it’s the one you can skip entirely. Tdm-thedoormaker supplies custom cabinet doors precision-cut to 1/10,000" with hinge holes pre-bored to your spec, so you go straight from unpacking to mounting plates. No Forstner bit, no depth stop, no tear-out risk.
Tdm-thedoormaker

The selection covers 30+ door styles and 130+ colors and finishes, including options for inset, partial-overlay, and full-overlay configurations. If your openings are non-standard or you’re working with a mix of sizes across a kitchen, the online configurator sizes each door individually. Order a single sample door first, hang it, confirm the fit, then place the full order. Use the cabinet door measurement guide to get your numbers right before you order.

Sources

These resources expand on the key techniques covered above, from cup drilling to ordering pre-bored doors.

FROM THE SAME CATEGORY

Sep 8 2026 BY Ksenija Lebec, Blog

Landlords: inspect cabinets, run vacancy based ROI, budget $1,000–$13,000, and plan 1–3 day refacing installs with bulk order tips.

Build a Door MADE TO FIT YOU!

Mullion vs Muntin: The Cabinet Refacing Guide

Mullion vs Muntin: The Cabinet Refacing Guide

In cabinetry, a mullion is the thicker structural bar or frame element that divides full door openings or creates multi-panel glass doors, while a muntin is the narrower grid bar that subdivides a single glass opening into a divided-lite pattern. For most cabinet refacing projects, the practical choice comes down to this: choose mullions when you want a traditional multi-panel display door with real structural presence, and choose muntins (or applied grille overlays) when you want the divided-lite look on a single pane of glass without the added cost or complexity.

Quick decision triggers:

  • Displaying dishware or collectibles: A true mullion door with separate glass openings gives each section its own frame and visual weight.
  • Matching existing doors on a budget: An applied muntin grille over single glass replicates the grid look at lower cost and with faster lead times.
  • Retrofitting a single glass opening: Muntins or applied overlays are almost always the right call here since true mullion construction requires rebuilding the door frame.

Table of Contents

What’s the difference between a mullion and a muntin on a cabinet door?

Mullions are the heavier dividers — typically 1.5" to 2.5" wide — that form the structural frame separating distinct glass openings within a door. You can identify them by their thickness relative to the stile and rail: a mullion usually matches or nearly matches the face width of the surrounding frame. At the glass reveal, you will see a full rabbet or stop on each side because each opening holds its own pane.

Muntins are narrower, often 3/8" to 3/4" wide, and they sit over or within a single glass opening to create the appearance of multiple smaller panes. On an applied grille, the muntin simply adheres to the face of the glass; on a true divided-lite door, it sits between separate small panes. Run your finger along the intersection: if the bar is thin and the glass behind it is continuous, you are looking at a muntin or applied grille. If the bar is thick and each section of glass is independently seated, that is a mullion.

Feature Mullion Muntin / Applied Grille
Typical face width 1.5"–2.5" 3/8"–3/4"
Glass arrangement Separate panes per opening Single pane (or true divided lite)
Structural role Frames and divides openings Decorative grid only
Finish edge Full rabbet on each side Thin profile, minimal reveal
Best visual ID Matches stile/rail thickness Noticeably thinner than frame

Pro Tip: Photograph your existing door flat against a white wall before ordering. The contrast makes it easy to measure bar widths accurately and confirm whether you have a mullion frame or an applied grille.

What materials and profiles work best for cabinet mullions and muntins?

Mullion options range across materials and styles, and the right choice depends on whether the door will be painted, stained, or left natural.

Material Durability Paintability Stainability Cost Tier Best Use
Solid wood High Good Excellent Higher Stained traditional doors
MDF Moderate Excellent Poor Lower Painted display doors
PVC/Vinyl High Good Poor Moderate Humid environments
Aluminum/Metal Very high Powder coat only N/A Higher Modern/industrial style

Solid wood mullions accept stain evenly and hold routed profiles cleanly, making them the standard for raised-panel or traditional shaker doors. MDF is the go-to for painted doors because it takes primer and paint without grain telegraphing through the finish. For kitchens near a sink or in high-humidity spaces, PVC holds up where wood or MDF might swell over time. Aluminum suits flat-panel modern doors where a thin, precise line is the point.

Craftsman routing profile on wooden mullion

Profile shapes matter too. A flat or pencil-bead profile reads as contemporary; an ogee or cove profile signals traditional cabinetry. Face width affects visual scale: a 2" mullion on a small upper cabinet can feel heavy, while a 3/4" muntin on a tall pantry door can look too delicate.

How do you choose muntins vs mullions for your refacing project?

The decision framework is straightforward once you know what the door needs to do.

  • Budget and schedule: Applied muntin grilles are the fastest, most affordable path to the divided look. DIY refacing guidance consistently recommends them for projects where matching the existing style matters more than construction authenticity.

Pro Tip: For refacing projects where you are replacing only some doors, an applied grille on single glass is almost always the better match for existing cabinetry. True mullion construction changes the door’s profile depth, which can create a visible mismatch at adjacent doors.

How do installation type and overlay style affect compatibility?

Applied mullions over single glass are the most flexible option for refacing because they do not change the door’s structural depth or hinge requirements. True mullion frames, by contrast, add depth at the glass reveal and may require adjusting hinge backset or using a different hinge cup size.

Construction Type Compatible Door Types Hinge Style Glass Options
Applied grille (overlay) Full overlay, half overlay Any concealed or surface hinge Single pane only
True mullion frame Inset, face-frame Concealed or butt hinge Separate panes per opening
Insert mullion Full overlay, inset Concealed hinge Single pane or divided lite
Retrofit mullion insert Existing single-glass door Existing hinges (no change) Single pane only

Quick installer checks before ordering:

  • Confirm hinge cup clearance: a thicker mullion bar near the hinge side needs at least 3mm of clearance from the cup edge.
  • Check edge-banding requirements: MDF mullions on painted doors need edge banding on all exposed edges to prevent moisture absorption.
  • Verify backset depth: true mullion frames typically add 3/8"–1/2" to the door’s overall depth.

Which mullion and muntin styles suit common cabinet door types?

Matching the grid treatment to the door style is what makes a refacing project look intentional rather than assembled.

Pro Tip: Request sample doors in two different face widths before finalizing. The difference between a 1/2" and a 3/4" bar looks small on paper but reads very differently at kitchen scale. Matching the interior door style of the room also helps anchor the cabinet choice.

Why Tdm-thedoormaker is a reliable choice for custom mullion orders

Tdm-thedoormaker’s three-step process (measure, design, order) is built specifically for refacing projects where precision and consistency matter. The configurator accepts measurements to 1/10,000", which eliminates the fit issues that come from rounding to the nearest 1/8". Doors arrive with predrilled hinge holes when specified, so installation is straightforward.

The mullions and frames product category covers multiple materials and profiles, and the glass doors with mullions page shows real style examples you can use as visual references when specifying your order.

Key capabilities:

  • Precision sizing to 1/10,000" via the online configurator.
  • Sample doors and color swatches available before full production.
  • Predrilled hinge holes included when specified.
  • Over 30 door styles and 130+ colors and finishes.
  • Fast turnaround with competitive pricing.

Pro Tip: Use Tdm-thedoormaker’s video tutorials alongside the configurator the first time you place an order. They walk through hinge hole placement and overlay specification in detail, which saves back-and-forth with the support team.

Key Takeaways

Mullions divide full openings structurally; muntins (or applied grilles) subdivide a single glass pane decoratively, and choosing correctly before ordering prevents the most common refacing rework.

Point Details
Mullion vs muntin defined Mullions are thicker structural dividers (1.5"–2.5" wide); muntins are narrow grid bars (3/8"–3/4") over a single pane.
Material by finish type Use MDF for painted doors, solid wood for stained doors, PVC for humid spaces, and aluminum for modern flat-panel styles.
Applied grille advantage Applied grilles replicate the divided look on single glass at lower cost and shorter lead times, ideal for most refacing projects.
Measure to spec Record full door dimensions to 1/10,000", glass opening sizes, overlay style, and hinge locations before ordering.
Tdm-thedoormaker ordering Use the configurator for precision sizing, request a sample door to confirm profile and finish, and specify hinge holes upfront.

What the mullion vs muntin choice really comes down to

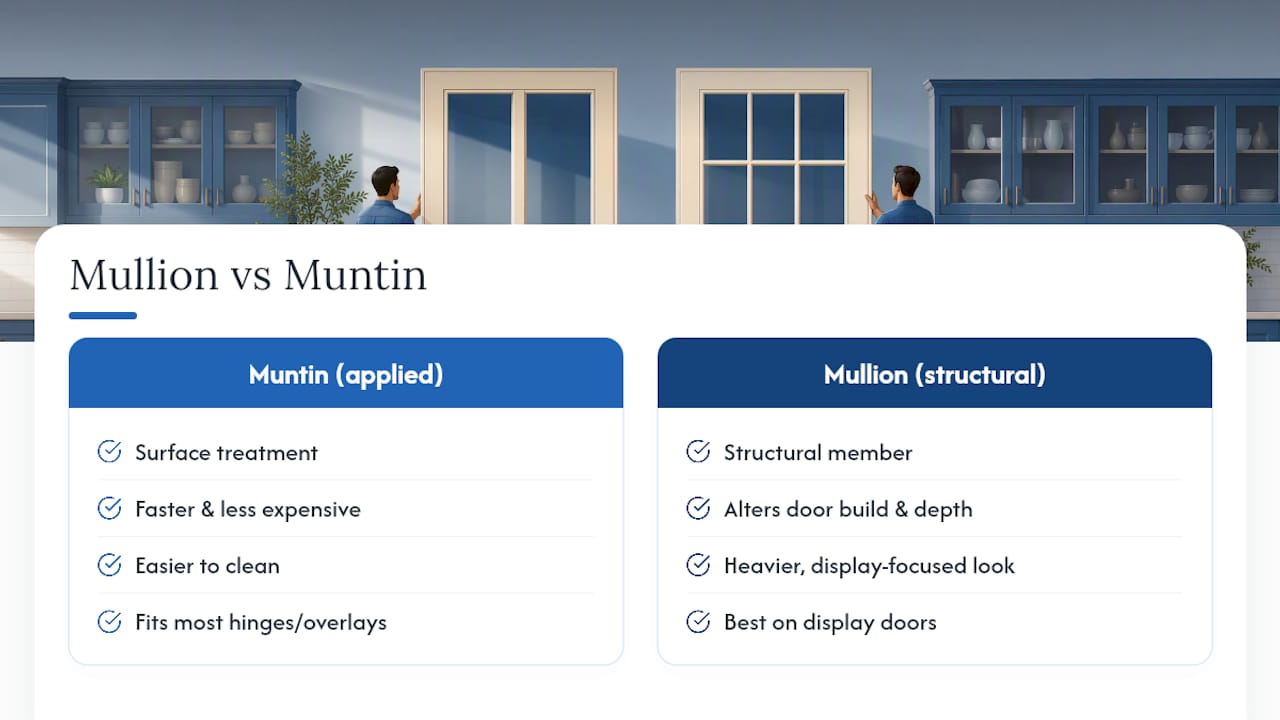
Most of the confusion around mullions and muntins comes from treating them as interchangeable style options when they are actually different construction decisions. A muntin or applied grille is a surface treatment. A mullion is a structural commitment that changes how the door is built, how deep it sits, and how the glass is held. Getting that distinction wrong at the ordering stage is what leads to doors that do not fit, hinges that bind, or a grid that looks out of scale with the rest of the kitchen.

The practical takeaway: for the majority of refacing projects, an applied grille on single glass is the right answer. It is faster, less expensive, easier to clean, and compatible with virtually any hinge and overlay configuration. True mullion construction earns its place on display doors where the architectural weight of a divided frame is the point, particularly on traditional or transitional kitchens where the door is meant to be noticed.

What tends to get overlooked is scale. A 3/8" muntin bar on a tall pantry door reads as a scratch. A 2" mullion on a small upper cabinet reads as a wall. Spending five minutes with a sample door at kitchen scale before committing to a full order is the single most effective way to avoid a result that looks slightly off without anyone being able to say exactly why.

What the mullion vs muntin choice really comes down to — overview diagram

Custom cabinet doors with precision sizing, starting today

Tdm-thedoormaker takes the complexity out of ordering custom mullion and muntin doors for refacing. Instead of guessing at profiles and hoping the finish matches, you measure once using the step-by-step configurator, choose from over 30 styles and 130+ colors, and order doors sized to 1/10,000" precision with hinge holes predrilled.

Tdm-thedoormaker

The sample door program means you can confirm the exact profile depth, finish color, and glass reveal against your existing cabinetry before a single production door is cut. Fast turnaround and pricing that undercuts larger retailers make it a practical choice for both homeowners and contractors managing multiple refacing jobs.

Start your project at the DIY cabinet refacing guide, or go straight to the custom ordering process to configure your doors now. If you want to see how glass doors with luxury grille details translate into a finished kitchen, that context can help you finalize your style choice before you order.

FROM THE SAME CATEGORY

Sep 8 2026 BY Ksenija Lebec, Blog

Landlords: inspect cabinets, run vacancy based ROI, budget $1,000–$13,000, and plan 1–3 day refacing installs with bulk order tips.

Build a Door MADE TO FIT YOU!

Custom Cabinet Door Sizes: Measure, Calculate, and Order Right

Custom Cabinet Door Sizes: Measure, Calculate, and Order Right

There is no universal standard size for cabinet doors. Every opening is different, so the finished door size you order depends entirely on your opening measurements plus your chosen mounting style. The core formulas are straightforward: for a single overlay door, Door Width (DW) = Opening Width (OW) + 2 × Overlay per side (OL), and Door Height (DH) = Opening Height (OH) + 2 × OL. For a single inset or frameless door, DW = OW − 2 × Reveal per side (RV), and DH = OH − 2 × RV. For double overlay doors, each door’s width = (OW + 2 × OL − Center Gap G) / 2, with the same height formula.

Two quick examples to anchor the math:

  • Single overlay, example opening, with typical overlay per side: Door width equals the opening width plus twice the overlay; door height equals the opening height plus twice the overlay. Finished door dimensions result from applying this formula. (https://www.fastkitchendesign.com/tools/cabinet-door-size-calculator/).
  • Double overlay, example opening, with typical overlay and center gap: Each door width equals the opening width plus twice the overlay minus the center gap, divided by two; door height is the opening height plus twice the overlay. Finished door dimensions follow this calculation.

TL;DR ordering checklist:

  • Measure OW and OH at three points each (top, middle, bottom for width; left, center, right for height)
  • Choose overlay or inset style and confirm the overlay/reveal value from your hinge spec
  • Apply the matching formula; round to the nearest 1/16"
  • Subtract the center gap before splitting width for double doors
  • Enter finished DW and DH (not opening dimensions) when placing your order

Table of Contents

How do you measure cabinet openings correctly?

Accurate measurements are the foundation of every well-fitting door. A steel tape measure is your primary tool; a combination square or digital caliper helps verify that corners are truly square. Keep a pencil and notepad handy, and photograph each opening and its hinge locations before you start.

Step-by-step measurement checklist:

  • Measure OW at the top, middle, and bottom of the opening; record the smallest value
  • Measure OH on the left side, center, and right side; record the smallest value
  • For replacement projects,

    (width first, then height) if you plan to reuse the same hinges

  • Note the hinge type, hinge overlay or reveal, and whether the box is face-frame or frameless
  • Photograph the hinge cup locations and any existing boring patterns

For face-frame cabinets, OW and OH are the clear opening inside the frame. For frameless (European-style) boxes, the opening is the full interior width and height of the box, and your reveal is typically smaller.

Measurement What to record Why it matters
OW (opening width) Smallest of three readings Prevents a door that is too wide to close
OH (opening height) Smallest of three readings Prevents a door that binds at top or bottom
Existing door size Width × height from back of door Baseline for replacement without recalculating
Hinge type / overlay Hinge model or overlay value Drives OL in the formula
Preferred overlay or reveal Your chosen OL or RV per side Entered directly into the size formula

Pro Tip: In older homes, face frames are sometimes twisted or bowed. If your three width readings vary by more than 1/8", measure at the narrowest point and note the discrepancy in your order. A door sized to the widest reading will bind; sized to the narrowest, it will have a slight gap on one side that you can address with the overlay.

For a detailed walkthrough, Tdm-thedoormaker’s step-by-step measurement guide covers how to collect OW and OH and photograph hinge locations before you calculate anything.


Overlay doors

Single door: DW = OW + 2 × OL; DH = OH + 2 × OL

Overlay cabinet door and hinge close-up

Double doors: DW per door = (OW + 2 × OL − G) / 2; DH = OH + 2 × OL

Inset and frameless doors

Single door: DW = OW − 2 × RV; DH = OH − 2 × RV

Inset cabinet door reveal gap close-up

Double doors: DW per door = (OW − 2 × RV − G) / 2; DH = OH − 2 × RV

The overlay and inset formulas follow the same logic in both cases: overlay adds material, inset subtracts it. Round every result to the nearest 1/16" before entering it. To convert a decimal to a fraction, multiply the decimal portion by 16 and round to the nearest whole number (e.g., 0.4375 × 16 = 7, so 0.4375" = 7/16").

Three worked examples:

Scenario OW OH OL / RV G DW DH
Single overlay (1/2" OL) 16" 30" OL = 1/2"
Double overlay (1/2" OL, 1/8" G) 16" 30" OL = 1/2" 1/8" 8-7/16" each
Single inset (1/8" RV) 16" 30" RV = 1/8" 15" 29"

For the double-overlay example: (16 + 1 − 0.125) / 2 = 8.4375" = 8-7/16". Rounding to the nearest 1/16" keeps the center gap consistent and prevents the doors from touching or binding at the center.

Confirm your hinge’s overlay spec before finalizing OL. Hinge manufacturers publish the exact overlay their cup accommodates; using a mismatched value produces a door that sits crooked or stresses the hinge arm. Tdm-thedoormaker’s full overlay hinge guide explains how to read those specs and match them to your door size.

For inset doors specifically, the reveal choice also depends on material. Solid-wood doors need a slightly larger reveal (around 1/8") to allow for seasonal movement, while thermofoil or MDF faces move very little and can use a tighter 1/16" reveal. You can find more detail on inset-specific reveal recommendations in Tdm-thedoormaker’s inset door measuring guide.


What are the standard overlay, reveal, and center-gap values?

Most cabinet projects use a small set of default values, and knowing them saves time when you are ordering multiple doors at once.

Overlay per side (OL) — common values:

  • 1-1/4" full overlay: — covers nearly all of the face frame; gives a cleaner, more modern look

Reveal per side (RV) — inset and frameless:

Center gap (G) — double doors:

When to change these defaults: a very wide door may need a larger center gap to clear soft-close hardware; solid-wood panels in humid climates benefit from a 1/8" reveal rather than 1/16"; decorative alignment across a bank of doors sometimes calls for a consistent overlay that differs from the hinge’s default.

Pro Tip: Always pull the hinge manufacturer’s spec sheet before locking in your OL value. The overlay number printed on the hinge packaging overrides any generic default, and a 1/16" mismatch there can cause the door to sit proud of the frame or bind on closing.


When should you use one door instead of two?

Single doors are suitable within a moderate width range; beyond that, weight and usability concerns often recommend using multiple doors instead. Two doors are the practical answer for openings wider than 24", and they are standard for most base cabinets wider than that threshold.

Hardware and size considerations:

  • Minimum door width is typically around 5"–6" for most manufacturers; narrower than that and hinge boring becomes structurally unreliable
  • Maximum single-door height varies by manufacturer but commonly caps around 96"; taller doors need additional hinges or reinforced stiles
  • Soft-close hinges require a minimum door thickness (usually 5/8"–3/4") and enough stile width to accommodate the cup bore (typically 35mm)
  • Wide doors in solid wood may need a center rail or edge reinforcement to resist warping

For a wider opening with typical overlay and center gap, the width is adjusted by adding overlay and subtracting the gap before dividing evenly for two doors, ensuring each door fits correctly. Subtracting the center gap before dividing is the step most people skip, and it is exactly what causes two doors to press against each other at the center. Pantry-style tall doors follow the same logic; One Day Doors & Closets offers useful context on pantry door selection for readers working with taller openings.


How do you enter sizes when placing a custom door order?

Getting the math right is only half the job. Entering the information correctly in the order form is where many projects go sideways.

Ordering checklist (numbered for the configurator flow):

  1. Confirm you are entering finished door dimensions (DW and DH), not opening dimensions
  2. Use inches, expressed as a decimal or fraction to the nearest 1/16"
  3. State overlay or reveal per side clearly, not the total
  4. List door count per opening and whether it is a single or double pair
  5. Include the center gap value for any double-door pair
  6. Specify hinge boring requirements: yes/no, hinge model if known, cup diameter (usually 35mm), and distance from door edge to cup center
  7. Note door thickness and edge profile if your cabinet box requires a specific fit

Questions to ask your vendor before finalizing:

  • Do they drill hinge holes, or do you supply a boring template?
  • What thickness options are available, and does the edge profile affect the finished width?
  • What are their accepted tolerances (typically ±1/16")?
  • What is the lead time, and can you order a single sample door first?

Ordering a sample door before committing to a full production run is one of the most cost-effective steps you can take, especially for nonstandard sizes or unfamiliar finishes. Tdm-thedoormaker’s ordering guide walks through each field in the configurator so you know exactly what to enter. For drawer fronts, the sizing logic is the same; Tdm-thedoormaker’s drawer front guide covers the parallel steps.

Bespoke manufacturers build to the dimensions you supply, so accuracy at this stage determines fit. Include a short note with each line item: the opening’s OW and OH, the hinge model if you are reusing existing hardware, and whether the door is a replacement or for a new build.


Key Takeaways

Finished door size is always calculated from the opening measurement plus or minus your overlay or reveal; entering opening dimensions directly into an order form is the single most common and costly mistake in custom cabinet door sizing.

Point Details
Measure at three points Record the smallest OW and OH reading to avoid a door that binds.
Apply the correct formula Add 2 × OL for overlay; subtract 2 × RV for inset; always subtract G before splitting doubles.
Confirm hinge overlay spec The hinge manufacturer’s overlay value sets your OL; never assume a generic default.
Order a sample first A single sample door validates fit, finish, and hinge boring before full production.
Tdm-thedoormaker configurator Tdm-thedoormaker’s online configurator accepts precise custom sizes and offers hinge drilling and sample doors as add-ons.

Why getting the size right matters more than most people expect

The formulas in this guide are not complicated, but the consequences of skipping steps are real. A door that is 1/4" too wide on a double pair means both doors bind at the center every single time they close. Over months, that stress works the hinge screws loose. A door sized 1/2" too short on an overlay application leaves a visible gap at the top of the frame that no amount of adjustment fixes after the fact.

What surprises most homeowners is how often the problem traces back not to the formula but to a single measurement taken at only one point, or to an overlay value assumed rather than confirmed from the hinge spec. The math is forgiving if the inputs are right. The inputs are only right if you measure carefully and cross-check the hinge catalog before you calculate.

The other thing worth saying plainly: ordering a sample door is not a luxury step. For any nonstandard size, unfamiliar finish, or first-time order with a new vendor, a sample door costs a fraction of a full set and tells you everything you need to know about fit, color accuracy, and hinge-boring placement before you commit. Tdm-thedoormaker’s measure-design-order workflow is built around exactly this kind of deliberate sequencing, and their cabinet door sizing guide walks through each stage with video tutorials if you want to see the process in action.


Tdm-thedoormaker makes custom sizing straightforward

Calculating the right door size is the hard part. Ordering it should not be. Tdm-thedoormaker’s online configurator lets you enter your finished DW and DH directly, choose from over 30 styles and 130+ colors, and add hinge-hole drilling to your order without a separate call or email. Sizing is accepted to 1/10,000" precision, so the number you calculate is the number that gets built.

Tdm-thedoormaker

For homeowners comparing cabinet refacing versus a full remodel, custom doors through Tdm-thedoormaker typically cost a fraction of full replacement while delivering the same visual result. Sample doors and color swatches are available before you commit to a full production run, and the customer support team can confirm hinge specs and drilling locations if you are unsure. Start your order or request a sample at tdm-thedoormaker.com.


Useful resources for verifying specs and calculations

These resources help you confirm hinge specs, run calculations, and check vendor requirements before you place an order.

Calculators and formula references:

Hinge specs and vendor measurement guides:

Resource Best for
Calculator Academy Quick overlay/inset math with adjustable inputs
FKD Calculator Worked examples and fraction rounding reference
Tdm-thedoormaker sizing guide Formula walkthrough matched to the online configurator
Woodshop Diaries Overlay logic and double-door center-gap guidance
YouTube measurement video Replacement door technique and hinge reuse decisions
FROM THE SAME CATEGORY

Sep 8 2026 BY Ksenija Lebec, Blog

Landlords: inspect cabinets, run vacancy based ROI, budget $1,000–$13,000, and plan 1–3 day refacing installs with bulk order tips.

Build a Door MADE TO FIT YOU!

How to Measure Cabinet Doors for a Perfect Fit

How to Measure Cabinet Doors for a Perfect Fit

Alright, before you even think about measuring, let’s get your gear in order. A little prep work here goes a long way and honestly makes the whole process smoother and more accurate.

Gathering the Right Tools for the Job

A few minutes of organization now will save you from a ton of frustrating do-overs later. You only need a few simple things, but they need to be the right things.

A flimsy, old tape measure just won’t cut it. They can sag or even stretch, which is a recipe for disaster when you’re ordering custom doors. Your most important tool is a high-quality steel tape measure. It gives you the rigidity you need for a perfectly straight, precise reading, especially when you’re measuring a wide opening.

Next, grab a simple notepad and a pencil. It’s tempting to just jot numbers down on a scrap of wood or punch them into your phone, but don’t. A dedicated notepad keeps your width and height measurements organized and easy to read, which seriously cuts down on the chance of mixing them up. For example, a note like “Upper Cabinet #1: 18″ W x 32″ H” is much clearer than a random “18×32” in your phone’s notes.

Pro Tip: Always double-check if your cabinet frames are square. This is a big one, especially in older homes where things have had time to settle. Just hold a small level against the frame—it’ll tell you instantly if it’s plumb. This quick check can save you a headache and explain why you might be getting different measurements at the top and bottom of an opening.

Here’s a quick rundown of what you’ll want on hand:

  • Steel Tape Measure: This is non-negotiable for accurate, consistent readings.
  • Notepad & Pencil: To keep every measurement clear and organized.
  • Straight Edge or Level: Perfect for checking if frames are square and helping you draw straight lines if needed.

I once had a client who used a fabric sewing tape for their measurements. It sounds silly, but it happens. Their numbers were off by nearly a quarter-inch, and that tiny error made their beautiful custom doors completely unusable. Using the right tools is truly the first—and most important—step to getting this project done right.

Cracking the Code on Cabinet Overlays

Woman measuring kitchen cabinet hardware placement

Before you even think about touching a tape measure, you need to understand how your doors sit on the cabinet frame. This is called overlay, and it’s the single biggest factor in getting your door sizes right. A measurement for one style will be completely wrong for another, so this is a critical first step.

Simply put, overlay describes how much of the cabinet face frame the door covers when closed. Getting this right dictates the entire formula for your final door dimensions.

Full Overlay Doors

Just like the name says, full overlay doors cover almost the entire cabinet face frame. This gives you that modern, seamless look with very tight gaps between doors. When you look at the cabinets, you see door, door, door—and very little of the frame behind them.

To measure for a single full overlay door, you’ll take the opening’s width and height, then add the overlay amount to each dimension. A very common overlay is 1/2 inch, which means you’d add a total of 1 inch to the final width and height measurements (1/2 inch for the left side, 1/2 inch for the right, and so on).

Here’s a real-world example: If your cabinet opening is 16 inches wide by 30 inches high, and you want a standard 1/2 inch overlay:

  • Door Width: 16″ + 1″ = 17″
  • Door Height: 30″ + 1″ = 31″

Partial Overlay Doors

Partial overlay is the classic style you’ve probably seen in countless kitchens. Also known as traditional or standard overlay, the door only partially covers the face frame. This design leaves a good portion of the frame—usually 1 to 1.5 inches—exposed around each door.

The measuring process is the same as for full overlay, but you’re just adding a smaller amount. For instance, with a 3/8 inch overlay, you’d add a total of 3/4 inch to the opening’s width and height.

Practical Example: For that same 16-inch wide by 30-inch high opening, but with a 3/8-inch partial overlay:

  • Door Width: 16″ + 3/4″ = 16 3/4″
  • Door Height: 30″ + 3/4″ = 30 3/4″

A small mistake here can throw everything off. You could end up with doors that collide with each other or have sloppy, uneven gaps, completely ruining the professional look you’re after. Nail the overlay, and the rest of the job becomes much easier.

Inset Doors

Inset doors are in a class of their own. They don’t sit on top of the frame at all—they sit perfectly flush inside the cabinet opening. The face of the door is level with the cabinet frame, giving it a high-end, custom furniture appearance.

Measuring for inset doors is the opposite of the other styles; you subtract instead of add. You’ll measure the opening precisely and then subtract a small amount, typically 1/8 inch total from both the width and height. This creates a tiny, consistent clearance gap so the door doesn’t scrape against the frame.

Let’s use our example opening: For a 16-inch wide by 30-inch high opening:

  • Door Width: 16″ – 1/8″ = 15 7/8″
  • Door Height: 30″ – 1/8″ = 29 7/8″

This kind of precision is more important than ever. The global cabinet market is projected to grow from USD 17.4 billion in 2025 to nearly USD 23.9 billion by 2033, and much of that growth is driven by a demand for accuracy that reduces waste and ensures a perfect fit.

Of course, the way a door fits is also tied directly to its hardware. To learn more about that piece of the puzzle, check out this a comprehensive guide to cabinet door hinge types.

Cabinet Door Overlay Measurement Guide

To make things easier, here’s a quick-reference table that breaks down the math for each style.

Door Style Measurement Approach Example Calculation
Full Overlay Opening + (Overlay x 2) 16″ Opening + (1/2″ x 2) = 17″
Partial Overlay Opening + (Overlay x 2) 16″ Opening + (3/8″ x 2) = 16 3/4″
Inset Opening – Clearance Gap 16″ Opening – 1/8″ = 15 7/8″

Keep this guide handy when you’re taking your measurements. It’s a simple way to double-check your work and ensure you order doors that will fit perfectly.

Measuring Cabinet Openings Like a Pro

Alright, let’s get to the most important part: measuring your cabinet openings. This is where a little bit of precision goes a long way. I’m going to walk you through the same process the pros use to make sure every door hangs perfectly, and it all comes down to what we call the “rule of threes.”

One thing you learn quickly is that cabinet frames, especially in older homes, are almost never perfectly square. Houses settle, wood shifts over the years, and things can get a bit skewed. Just measuring in one spot is a classic rookie mistake that leads to doors that scrape, bind, or have weird, uneven gaps.

The Rule of Threes in Practice

To work around any of these imperfections, you need to measure the width at the top, middle, and bottom of the opening. Then, you’ll do the same for the height by measuring the left, middle, and right sides. This approach gives you the full story of the opening’s actual shape, not just a single snapshot.

Once you have your three width and three height measurements, the rule is simple: always use the smallest measurement of the set. This is your safety net. It guarantees your new door will fit into the tightest point of the opening without any trouble.

Let’s say you measure the width and get these numbers:

  • Top: 15 inches
  • Middle: 15 1/16 inches
  • Bottom: 14 15/16 inches

In this case, you’d lock in 14 15/16 inches as your final width. That’s the number you’ll use when you calculate the final door size based on your chosen overlay.

This image really drives home the idea of capturing both the vertical and horizontal dimensions to get that perfect fit.

Image

It’s a great visual reminder that both height and width need that same level of careful attention. These two dimensions are the foundation of your whole project.

Measuring for Double Doors

What about those wide openings that need a pair of doors? The process starts the same but has one extra step to make sure they meet perfectly in the center without clashing.

First, measure the opening’s width using the rule of threes and take the smallest dimension, just like before. Now, you need to account for a small gap between the two doors so they don’t smack into each other. A standard gap is 1/8 inch.

To figure out the width for each individual door, you’ll add 1 inch for the overlay (assuming a standard 1/2-inch overlay on both sides), subtract the 1/8-inch gap, and then divide the whole thing by two.

Here’s a practical example: Your opening is 30 inches wide.

  1. Add Overlay: 30″ + 1″ = 31″
  2. Subtract Gap: 31″ – 1/8″ = 30 7/8″
  3. Divide by Two: 30 7/8″ ÷ 2 = 15 7/16″
    Each of your two doors should be 15 7/16 inches wide.

For a little more guidance, checking out an expert guide on how to measure kitchen cabinets can give you some extra tips and comprehensive techniques. Nailing these foundational skills is what makes for a flawless installation.

How to Measure Existing Doors for a Perfect Match

If you’re already happy with how your current doors fit and you’re just looking for a style upgrade, measuring your existing doors is a fantastic shortcut. But there’s definitely a right way to do it. The biggest mistake I see people make is trying to measure a door while it’s still hanging on the hinges—it’s a surefire way to get inaccurate numbers.

To get a perfect measurement, you have to take the door off first. Lay it down on a flat, stable surface like a workbench or even a clean spot on the floor. This gets rid of any sag from the hinges and guarantees your tape measure lies perfectly straight. Once it’s flat, carefully measure the exact height and width down to the nearest 1/16th of an inch.

Image

Don’t Forget Hinge Placement

Getting the height and width is only half the battle. The most critical step—and the one people often forget—is to measure for your hinge placements. If you skip this, your new doors won’t line up with the existing hinge holes on your cabinet frames, and that’s a massive headache you don’t want.

You’ll need to record the distance from both the top and bottom edge of the door to the center of each hinge cup hole. That’s the large, round recess where the hinge itself sits.

For example, if your top hinge cup is 3 inches from the top edge of the door, and the bottom hinge is 3 inches from the bottom edge, you need to write those exact numbers down. This precision is what turns the project into a seamless swap instead of a frustrating struggle.

This step is an essential part of the process when you want to transform your kitchen by replacing cabinet doors without the pain of redrilling your cabinet frames. A few extra moments of careful measuring here will pay off big time.

To make sure you don’t miss anything, just follow this simple checklist for each door:

  • Door Width: Measured flat, to the nearest 1/16″.
  • Door Height: Measured flat, to the nearest 1/16″.
  • Top Hinge: Distance from the top edge to the center of the hinge cup.
  • Bottom Hinge: Distance from the bottom edge to the center of the hinge cup.

Capturing these four key dimensions ensures your new custom doors will be a perfect match, ready to hang on your existing cabinets with zero issues.

Common Measuring Mistakes and How to Avoid Them

Even with the best intentions, a few simple mistakes can derail your entire cabinet door project. We’ve seen it happen. Let’s walk through the common traps people fall into and, more importantly, how you can sidestep them for a flawless result. These small details are often the difference between a professional finish and a frustrating redo.

One of the most frequent slip-ups is just mixing up the width and height measurements on your notepad. It sounds basic, but in the middle of a project, it happens more than you’d think. Always, always label your numbers clearly—something like “15” W x 30” H“—to avoid any confusion when it’s time to place your order.

Overlooking the Details

Another classic mistake is forgetting to correctly account for your overlay or necessary clearance gaps. We once had a homeowner who measured perfectly for a set of inset doors but forgot to subtract the crucial 1/8-inch clearance gap on all sides. The result? Beautiful new doors that were just slightly too big and wouldn’t close. A real headache.

The old carpenter’s mantra, “Measure twice, cut once,” is the golden rule here. Before you finalize anything, do yourself a favor and double-check every single number on your list against the actual cabinet frames. This one final check is your best insurance policy against costly errors.

Getting these measurements right is absolutely vital. The global cabinet door market was valued at around USD 17 billion in 2025, a figure that shows just how massive this industry is. Improper sizing doesn’t just affect your project; it contributes to waste and installation issues that have a ripple effect.

Avoiding these common pitfalls is a huge step toward a successful project. For those looking to dive deeper, our guide on refacing kitchen cabinet doors offers even more tips that can help ensure a smooth process from start to finish.

Answering Your Cabinet Measurement Questions

Even with the most detailed guide, there are always a few questions that pop up right when you think you’re done measuring. We’ve been there. To help you get over that final hurdle, we’ve pulled together the most common questions we hear from customers and installers alike.

Key Questions Answered

So, what’s the standard overlay for modern cabinets? While it can definitely vary, 1/2 inch is what you’ll see most often. This just means the door overlaps the cabinet frame by that amount on all four sides. But remember, the real boss here is your hinges—always check their specs before you lock in your final door size.

Another tricky spot we get asked about all the time is corner cabinets, especially those with bi-fold or lazy Susan doors. These can feel a little intimidating. The best way to tackle them is to measure each of the two door panels individually for both its width and height. For a practical example, a Lazy Susan door might consist of two panels, each measuring 10″ x 30″, hinged together to cover a larger corner opening.

The golden rule through all of this? Consistency. In the U.S., most suppliers, including us, work in inches down to the 1/16th. On the other hand, European-style cabinets are often measured in millimeters. It’s always smart to check with your door supplier to see what unit they prefer so you can avoid any frustrating conversion errors.

Nailing these final details will help you figure out if this is a project you want to tackle yourself or if it’s time to call in a pro. Our guide on choosing between DIY and hiring contractors can help you make that call. For a wider perspective on getting dimensions right, you might find these expert tips on how to measure furniture for a perfect fit helpful, too.


Ready to turn those perfect measurements into the perfect doors? At The Door Maker, our “Build a Door” tool makes it simple to design the exact custom cabinet doors you’ve been imagining. Start your project today at https://tdm-thedoormaker.com.

Article created using Outrank

FROM THE SAME CATEGORY

Sep 8 2026 BY Ksenija Lebec, Blog

Landlords: inspect cabinets, run vacancy based ROI, budget $1,000–$13,000, and plan 1–3 day refacing installs with bulk order tips.

Build a Door MADE TO FIT YOU!

Kitchen Hardware Placement: A DIY Measurement Guide

Kitchen Hardware Placement: A DIY Measurement Guide

The core rule for kitchen hardware placement is straightforward: place knobs a few inches from the corner of the door, on the side opposite the hinge. On upper cabinets, measure from the bottom corner; on base cabinets, measure from the top corner. Pulls go centered on the stile for doors, or centered on the drawer face for drawers under 24" wide. Wide drawers use two pulls positioned at roughly the one-third and two-third marks across the face.

Before you pick up a drill, tape a paper template to one door and step back. View it from across the room. What looks right at arm’s length often shifts when you see the full run of cabinets. That 30-second check prevents the most common and most frustrating mistake in hardware installation: a hole drilled in the wrong spot.

Quick reference: Upper doors, measure from the bottom corner. Base doors, measure from the top corner. Always measure from the inside edge of the stile on framed or Shaker doors, not the outer edge of the door.

Professionals use a hardware jig for exactly this reason. A True Position-style jig (the TP-1934 is a widely used example) clamps to the door corner and transfers hole positions repeatably across every cabinet in the run. You can also make a cardboard template cut to your cabinet dimensions with holes marked at your chosen offset. Either way, label the template clearly: mark which edge is the hinge side and which is the top. Flipping a template is the single most common DIY error, and a piece of painter’s tape with “HINGE” written on it costs nothing.

Pro Tip: Stick a strip of painter’s tape over your pencil mark before drilling. It protects the finish from chipping and keeps the bit from wandering on smooth surfaces.


Table of Contents

What placement style should you use for your kitchen?

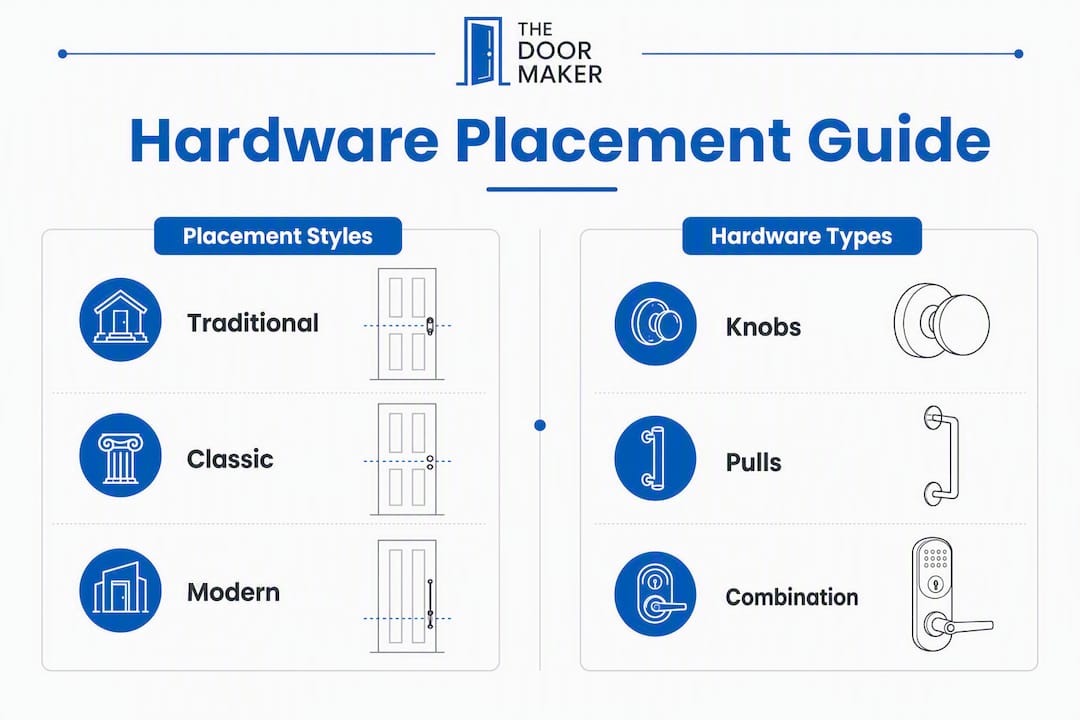
The three main placement systems are Traditional, Classic, and Modern. Each one creates a different visual rhythm across the room, and the right choice depends on your cabinet style and how you want the kitchen to feel.

Traditional placement uses corner-mounted knobs on all doors, positioned at the standard 2.5–3" offset, with centered pulls on drawers. This is the natural fit for period-style kitchens, cottage designs, and raised-panel doors where the knob reads as a decorative detail rather than a purely functional grip.

Infographic comparing hardware placement styles and types

Classic placement keeps knobs on upper cabinet doors and switches to pulls on all drawers. The corner offset stays consistent throughout, which gives the kitchen a tidy, organized look without committing to a fully modern aesthetic. Transitional kitchens with Shaker-style doors tend to land here.

Modern/Contemporary placement uses uniform pulls across every door and drawer. Long bar pulls are centered on the stile for doors (often oriented vertically) and centered on the face for drawers (oriented horizontally). The result is a clean grid that reads as intentional and architectural. Slab-door kitchens almost always use this system.

The underlying principle across all three styles is consistency. Pick one placement logic and apply it to every cabinet in the room. A kitchen where some pulls are corner-mounted and others are stile-centered looks unfinished, even if each individual placement is technically correct. Mixing hardware types is fine; mixing placement logic is not.


Knobs or pulls: which one actually works better?

Choose pulls when ease of use is the priority. Choose knobs when you want a smaller, decorative accent on doors where the opening force is light.

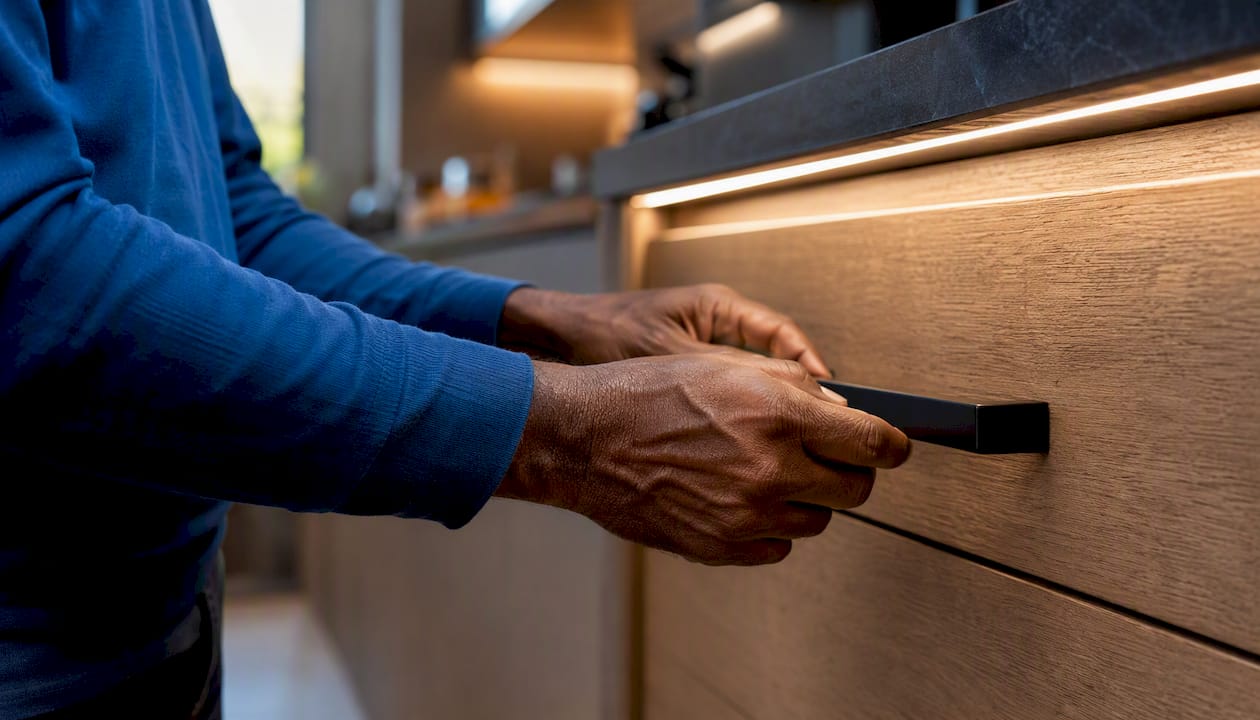
Close-up of hands using drawer pull hardware

The ergonomic difference is real. A pull gives you a full-hand grip and distributes opening force across your fingers and palm. A knob requires a pinch grip, which works fine on a lightweight upper cabinet door but becomes tiring on a heavy base cabinet or a deep drawer loaded with pots. For households with children, older adults, or anyone with limited hand strength, pulls across the board are the practical call.

That said, knobs have a legitimate place. On upper cabinet doors with light-duty hinges and smaller door sizes, a 1.25"–1.5" diameter knob reads as a clean, proportional accent. The key is keeping the knob diameter in scale with the door: a small knob on a 42" tall pantry door looks lost.

The approved mix is knobs on upper doors and pulls on drawers and base cabinet doors. This combination is common because it balances the decorative quality of knobs (at eye level, where you see them most) with the functional advantage of pulls (at waist and hip level, where you use them hardest). You can explore the full range of knob and handle styles to find combinations that suit your cabinet doors before committing.

One firm rule: keep the finish consistent. Mixing satin nickel knobs with matte black pulls reads as an oversight, not a design choice. If you mix hardware types, match the metal and the visual weight.


How do you size and space drawer pulls correctly?

The starting point is drawer width. Drawers under 24" wide get one centered pull. Drawers between 24" and 36" wide typically use two pulls, placed at the one-third and two-third marks across the face. Drawers over 36" can use one long bar pull centered on the face, or two pulls using the same one-third rule.

Understanding center-to-center (C-C) spacing

Pull length is described two ways: overall length (the full physical length of the pull) and center-to-center (C-C) distance (the distance between the two screw holes). When you order or shop for pulls, C-C is the measurement that determines whether the hardware fits your existing holes. Common C-C sizes are 3", 3.75", 5", 6.25", and 7.5". A pull with a 5" C-C will have an overall length of roughly 6.5"–7", depending on the end caps.

For a 30" drawer, a single pull with a 7.5" C-C (roughly 9" overall) reads as balanced and proportional. For a 36" drawer, two pulls with a 5" C-C each, spaced at the 12" and 24" marks, gives good structural leverage and a clean look.

Drawer width Pull strategy
Under 24 inches 1 centered pull
Wider drawers 2 pulls at 1/3 and 2/3
Very wide drawers 1 long pull or 2 pulls

On stacked drawer banks, the bottom drawer often looks visually heavy. Raising the pull slightly (about 1/4"–1/2" above true center) on the lowest drawer in a stack corrects this without being noticeable up close.

For installation, follow these steps in order:

  1. Measure the drawer width and select your pull strategy from the table above.
  2. Calculate the center point of the drawer face horizontally and vertically.
  3. For two pulls, divide the drawer width into thirds and mark the one-third and two-third positions.
  4. Mark both hole positions with a pencil, then cover each mark with painter’s tape.
  5. Drill a pilot hole first (typically 3/32" for most wood drawer fronts).
  6. Follow with the finish hole sized to your screw diameter (usually 3/16"–7/32").
  7. Install the pull from the back of the drawer front where the construction allows, using screws long enough to pass through the drawer front with at least 3/4" of thread engagement.

Check screw length carefully. A standard 3/4" thick drawer front needs a screw that clears the front plus reaches the pull post. Most pulls ship with 1" machine screws; if your drawer front is thicker (some are 7/8" or 1"), you will need longer screws. For more detailed drawer front replacement guidance, including sizing and screw specs, that resource covers the full process.


Where exactly should you place hardware on cabinet doors?

On every door, hardware goes on the side opposite the hinge. That is the non-negotiable starting point. From there, the exact position depends on whether the door is an upper or a base cabinet and what construction style it uses.

  • Upper cabinet doors: Place hardware near the bottom corner on the pull side, 2.5–3" from the corner (for slab doors and most doors). On Shaker or inset doors, measure 2"–2.5" from the inside frame edge to keep the hardware within the frame. For base cabinets, place hardware near the top corner on the pull side at the same offset, matching the reference point for each door style.
  • Vertical vs. horizontal pulls on doors: Pulls on doors are typically oriented vertically. This aligns with the natural pulling motion and reinforces the vertical lines of the door. Horizontal pulls on doors can work in a modern kitchen but tend to look better on very wide doors where a vertical pull would look undersized.
  • Edge clearance: Placing hardware too close to a thin edge can weaken the door over time and feels uncomfortable to grip. The 2.5–3" offset exists partly for this reason. Never place a screw within 1" of the door edge.

How to measure, mark, and drill without errors

Use a template or jig for every door. Measuring each cabinet individually and drilling freehand produces visible inconsistencies across a run of 20 or 30 doors. A jig eliminates that variable entirely.

Here is the full installation sequence:

  1. Lay out all doors and drawer fronts on a flat surface or lean them against the wall in order. Label each one with painter’s tape: mark the hinge side and the top before you do anything else.
  2. Set your template or jig to the chosen offset (2.5"–3" from the corner for doors; centered for drawers). If using a cardboard template, cut it to match the door corner and mark the hole positions precisely.
  3. Label the template with “HINGE SIDE” and “TOP” in permanent marker. This is the step most DIYers skip, and it is the reason most templates get flipped.
  4. Transfer the centerlines to each door using the template. Mark with a pencil, then place a small strip of painter’s tape over each mark.
  5. Clamp the jig (or hold the template firmly) and mark through the tape.
  6. Drill pilot holes at 3/32" to establish position and prevent splitting.
  7. Finish the holes at the diameter matching your screw size (typically 3/16"–7/32"). Drill from the front face with a backing board clamped behind the door to prevent blowout, or drill halfway through from the front and finish from the back.
  8. Install hardware with the screw inserted from the back of the door where possible. Tighten snugly but not so hard that you compress the wood.

Pro Tip: When drilling MDF or thermofoil doors, go slow on the finish hole. High RPM on smooth surfaces causes the bit to wander and can chip the face. A sharp brad-point bit at low speed gives a clean entry.

For detailed drill bit sizes and screw length recommendations by door thickness, Tdm-thedoormaker’s hardware hole drilling guide covers the specifics for common cabinet materials including MDF, plywood, and solid wood.

Overhead view of drilling hardware holes in cabinet door


Does pull length need to match the door or drawer size?

Yes, and the 1/3 rule is the most reliable starting point: pull length should equal roughly one-third of the drawer width or, when used vertically on a door, one-third of the door height. For a more modern look, you can push toward one-half, which gives a bolder, more architectural feel.

Knob sizing follows a simpler logic. A 1.25" diameter knob suits most standard upper cabinet doors. Go up to 1.5" on larger doors (over 18" wide) and down to 1" on small spice-rack or decorative doors. A knob that is too large on a small door looks clunky; one that is too small on a tall door disappears.

Door/drawer size Suggested pull length Knob diameter
Drawer under 18" 3"–4" (C-C) N/A
Drawer 18"–30" 4"–6" (C-C) N/A
Drawer 30"–36" 6"–8" (C-C) N/A
Upper door (standard) 3"–5" vertical pull 1.25"–1.5"
Base door (standard) 4"–6" vertical pull 1.25"–1.5"
Tall pantry door 6"–8" vertical pull 1.5"

A quick visual check: stand at the far end of the kitchen and look at the hardware. If a pull disappears into the door visually, it is too short. If it dominates the door face, it is too long. The 1/3 rule gets you close; your eye confirms it.

On stacked drawer banks, the lowest drawer in the stack often benefits from a slightly longer pull than the drawers above it. The visual weight of a deep base drawer calls for a pull that matches it.


What about corner cabinets, appliance panels, and other tricky spots?

Standard placement rules cover most cabinets, but several common situations call for adjustments.

  • Diagonal corner doors: Center the hardware on the door face rather than using a corner offset. The angled geometry makes a corner measurement awkward and often puts hardware too close to the hinge.
  • Appliance panels: Align hardware height with the adjacent cabinet doors. The goal is a continuous horizontal line across the run, so the panel reads as part of the kitchen rather than an interruption.
  • Toe-kick drawers: Use small finger pulls or recessed cup pulls. Standard bar pulls are too large for the shallow face and can interfere with foot clearance.
  • False fronts and dummy panels: Install dummy hardware at the same position as the real hardware on adjacent doors. Consistency across the run matters more than whether the hardware is functional.
  • Inset doors: Measure from the inside edge of the frame, and use a slightly tighter offset (2"–2.5") to keep hardware within the inset panel area. On Shaker-style inset doors, align on the rail or stile edge rather than centering on the panel itself.
  • ADA and accessibility: Pulls are strongly preferred over knobs for accessible kitchens. Lower upper cabinet hardware by 1"–2" if the primary user has limited reach. Longer pulls (6"+ C-C) give better leverage for users with limited grip strength.
  • Misaligned existing holes: If new hardware does not match old hole spacing, fill the old holes with a wood filler rated for painted surfaces, sand flush, spot-prime, and refinish before drilling new positions. Trying to bridge mismatched holes with a longer pull works only when the C-C difference is small (under 1/2") and the pull design hides the old hole.

Which hardware finishes are working well right now?

The current direction in kitchen hardware favors clean silhouettes and consistent finishes across the full kitchen. Mixing knob and pull types is common and accepted; mixing three or four different metal tones is not.

  • Matte black reads as high contrast against white, light gray, or natural wood cabinets. It shows fingerprints less than polished finishes and suits both modern and transitional kitchens.
  • Satin nickel is the most versatile finish in the market. It coordinates with stainless appliances, chrome plumbing, and brushed aluminum without clashing, making it a reliable default for kitchens with mixed metal tones.
  • Warm brass and unlacquered brass suit traditional and transitional kitchens, particularly those with warm wood tones, cream cabinets, or earthy color palettes. Unlacquered brass develops a patina over time, which some homeowners prefer and others find high-maintenance.
  • Brushed gold sits between satin nickel and warm brass in temperature. It works well in kitchens where the lighting is warm and the cabinet color is in the greige or off-white range.

Limit yourself to two metal tones in the kitchen. The practical rule is to match hardware finish temperature to your plumbing fixtures and light fixtures. If your faucet is matte black, matte black hardware reads as intentional. If your faucet is brushed nickel and your hardware is warm brass, the mismatch is visible every day.

For silhouette, simple cylindrical or bar pulls suit modern and transitional kitchens. More detailed shapes (cup pulls, bin pulls, decorative backplates) belong in traditional rooms where the ornament is part of the design language. For a broader look at how current finish trends connect to cabinet color choices, that resource covers the 2026 direction in detail. You can also find guidance on choosing interior door finishes that coordinate with your cabinet hardware for a cohesive whole-room look.


Your printable measurement cheat-sheet and installer checklist

The table below covers the go-to measurements for the most common cabinet configurations. Print it, fold it, and keep it in your tool bag.

Measurement / spec Standard value Notes
Upper door offset 2.5"–3" from bottom corner (slab/most doors); 2"–2.5" from inside frame edge (Shaker/inset) Measure from inside stile edge on framed doors
Base door offset 2.5"–3" from top corner (slab/most doors); 2"–2.5" from inside frame edge (Shaker/inset) Same reference point as uppers
Shaker/inset door offset 2"–2.5" from inside frame edge Do not measure from outer door edge
Single drawer pull Centered on face For drawers under 24" wide
Double drawer pulls At 1/3 and 2/3 of width For drawers 24"–36" wide
Pilot hole size 3/32" For most wood and MDF fronts
Finish hole size 3/16"–7/32" Match to screw diameter
Screw length (3/4" front) 1" machine screw Standard pull post depth
Screw length (7/8"–1" front) 1.25"–1.5" machine screw Verify pull post depth first

Installer checklist (one page, job-site ready):

  • Label every door and drawer front before moving them (hinge side, top).
  • Set template or jig to chosen offset; label template with “HINGE SIDE” and “TOP.”
  • Apply painter’s tape over each pencil mark before drilling.
  • Drill pilot holes at 3/32" first; finish holes at 3/16"–7/32".
  • Use a backing board or drill halfway from front and finish from back to prevent blowout.
  • Check screw length against door thickness before installing.
  • Install hardware from the back of the door where construction allows.
  • Step back and sight down the full run before final tightening.

Tdm-thedoormaker’s hardware hole drilling guide goes deeper on drill bit selection and screw specs for specific cabinet materials, including MDF and thermofoil doors where technique matters most.


Key Takeaways

Consistent kitchen hardware placement comes down to three measurements: 2.5–3" from the corner on slab/most doors (2"–2.5" from inside frame edge for Shaker/inset doors), centered on drawer faces, and pull length at roughly one-third of the drawer width.

Point Details
Standard door offset Place knobs or pulls 2.5–3" from the corner on slab/most doors or 2"–2.5" from inside frame edge on Shaker/inset doors, on the side opposite the hinge.
Drawer pull rule Center one pull on drawers under 24"; use two pulls at 1/3 and 2/3 for drawers 24"–36" wide.
Use a jig or template Label it with hinge side and top to prevent flipping; repeat for every door in the run.
Match finish, not type Mixing knobs and pulls is fine; mixing metal finishes or placement logic is not.
Tdm-thedoormaker resource The hardware hole drilling guide covers drill sizes, screw lengths, and material-specific technique for DIY installs.

The case for measuring twice and drilling once

There is a version of this project that goes wrong in the first ten minutes: someone measures from the outer edge of the door instead of the inside stile, drills without a template, and ends up with 24 cabinet doors where the hardware walks half an inch across the run. It is not a dramatic error. It is just visible enough to bother you every morning.

The placement rules in this guide are not arbitrary. The 2.5–3" offset exists because it keeps hardware away from thin edges that can split under repeated stress, while still landing where your hand naturally reaches. The 1/3 rule for pull length exists because a pull that is too short on a wide drawer looks like an afterthought. These are installer-tested proportions that hold up across traditional, transitional, and modern kitchens.

What most guides understate is how much the template step matters. Not because measuring is hard, but because doing it 30 times in a row without a reference point introduces drift. A jig or a labeled cardboard template is not a professional shortcut; it is the difference between a kitchen that looks custom and one that looks close.

The other thing worth saying plainly: if you are going through the effort of placing and installing new hardware, it is worth looking at whether the doors themselves are worth keeping. Hardware can refresh a kitchen significantly, but if the doors are worn, damaged, or simply the wrong style, new hardware on old fronts is a partial fix. That is a decision worth making deliberately, not by default.


New doors make hardware placement worth the effort

If you are already measuring and drilling for new hardware, you are most of the way to a kitchen that looks genuinely updated. The next step some homeowners take at this point is replacing the cabinet fronts themselves, which turns a hardware refresh into a full visual transformation without touching the cabinet boxes.

Tdm-thedoormaker

Tdm-thedoormaker makes that step straightforward. Custom cabinet doors and drawer fronts are available in over 30 styles and 130+ colors and finishes, sized to 1/10,000" precision so they fit your existing boxes exactly. The ordering process runs through a three-step online configurator: measure, design, and order. You can add pre-drilled hardware holes at checkout, which means your new doors arrive ready for the exact placement specs you have already worked out. Order a sample door first to confirm color and finish before committing to the full order, or go straight to the DIY cabinet refacing guide to see how the full process works from measurement to install.


Useful sources

These are the resources worth bookmarking for measurements, templates, and installation technique:

  • Where to put knobs and handles on kitchen cabinets — The Spruce: Practical placement guidance with structural and ergonomic context.
FROM THE SAME CATEGORY

Sep 8 2026 BY Ksenija Lebec, Blog

Landlords: inspect cabinets, run vacancy based ROI, budget $1,000–$13,000, and plan 1–3 day refacing installs with bulk order tips.

Build a Door MADE TO FIT YOU!

Glass Ready Doors: Custom Cabinet Styles and How to Order

Glass Ready Doors: Custom Cabinet Styles and How to Order

If you want to upgrade your kitchen cabinets without replacing the boxes, glass-ready doors are the most direct path. A glass-ready door is a pre-routed cabinet door frame with a recessed rabbet cut into the interior face, sized to accept a custom glass insert. You order the door in your chosen style and finish, then drop in a pre-cut glass panel using retainer clips or wood stop molding. Tdm-thedoormaker is a recommended source for custom glass-ready cabinet doors, offering over 30 styles and 130+ finishes with sizing precise to 1/10,000″ and an online configurator that walks you through the full process.

Getting started takes three steps:

  • Measure your cabinet opening and rabbet dimensions before anything else
  • Design your door in the configurator, selecting style, finish, size, and add-ons like pre-drilled hinge holes
  • Order with optional sample doors and color swatches if you want to confirm the finish before committing

Table of Contents

What glass-ready door styles can you order?

Many established cabinet-door manufacturers sell glass-ready doors across multiple construction types: mitered, cope and stick, and applied moulding. Each construction changes how the frame joints look and how the rabbet is formed. Mitered frames have angled corner joints for a cleaner, more contemporary profile. Cope and stick doors use a routed tongue-and-groove joint that is traditional and durable. Applied moulding doors add a decorative overlay to a flat or recessed panel, giving you more visual depth without changing the underlying frame.

French-lite layouts let you divide the glass area into multiple panes using mullions. Common configurations include 1-lite (single open pane), 2-lite, 4-lite, and 6-lite. The mullions are structural and decorative at once. For frame and mullion options that pair with different kitchen styles, Tdm-thedoormaker provides detailed guidance on which profiles work best with each door construction.

Construction Type Joint Style Best For
Mitered Angled corners Contemporary and transitional kitchens
Cope and stick Routed tongue-and-groove Traditional and shaker-style kitchens
Applied moulding Overlay on flat frame Decorative, layered visual effect
Slab/frame Flat with routed rabbet Minimalist or modern designs

Infographic comparing glass-ready door construction types and uses

Material options include MDF, hardwood species (maple, oak, cherry, alder), and thermofoil. Finish choices span painted, stained, unfinished, and thermofoil. Ordering a sample door or finish swatch before finalizing your order is worth the small upfront cost, especially for painted finishes where color variation under different lighting conditions can be significant.

What customization options do you specify at checkout?

Glass-ready cabinet doors are not one-size-fits-all, and the customization choices you make at ordering directly affect how the glass fits and how the finished door hangs.

  • Exact door dimensions: Width and height are specified to precise fractions, which matters when you are fitting into an existing cabinet frame
  • Rabbet depth and width: Confirm these match the glass thickness you plan to use (typically 1/8″ or 3/16″)
  • Edge profiles: Choose from flat, ogee, bead, or other profiles depending on your door construction
  • Hinge bore placement: Pre-drilled hinge holes save significant time during installation and reduce the risk of misalignment; specify your overlay type (full, half, or inset) and hinge brand if possible
  • Applied moulding choices: If your style includes decorative overlay, select the moulding profile at this stage
  • Add-ons: Bump stops, sample doors, and color swatches can all be added before checkout.

Providing hinge specifications and requesting pre-drilled holes at order time consistently reduces fit issues during installation. In-field drilling after delivery introduces more room for error, particularly on painted or thermofoil finishes where surface damage is harder to repair.

How does glass type affect the look of your cabinets?

Glass texture and opacity are as important as door style for the final visual result. Clear glass displays cabinet contents fully and works well when you want to show off dishware or glassware collections. Frosted glass diffuses light and obscures contents, which suits pantry doors or cabinets storing less decorative items. Reeded glass adds a vertical texture that catches light and creates a contemporary, tactile effect without fully hiding what is behind it. Seeded glass has small air bubbles embedded in the surface, producing a vintage or farmhouse aesthetic.

Designer choosing textured glass samples for cabinets

Ordering pre-cut glass panels sized specifically for your doors removes the risk of breakage and produces square edges that meet professional cabinet standards. For decorative glass options and how different textures interact with interior lighting, resources like One Day Doors & Closets offer useful visual comparisons.

Pro Tip: Place a light source inside the cabinet during your planning stage. Texture and opacity look very different with backlighting versus front lighting, and this simple test can change your glass choice entirely.

How is glass fitted into a glass-ready door?

Installing glass in cabinet doors is a manageable upgrade that modernizes a kitchen without a full remodel. Three retention methods are standard: glass retainer clips, wood stop molding, and silicone. Retainer clips are the professional preference because they hold the glass securely without permanent adhesion, making future glass swaps straightforward. A clip-based installation combined with a small silicone cushion is a common professional approach that balances serviceability and stability.

  1. Remove the door from the cabinet and lay it flat on a padded work surface
  2. Dry-fit the glass panel to confirm it seats correctly in the rabbet
  3. Place rubber or foam cushion strips along the rabbet edges to protect the glass edges
  4. Secure with retainer clips spaced about every 6–8 inches, or apply wood stop molding cut to length and fastened with small brad nails
  5. Rehang the door and check alignment before tightening hinge screws fully
Glass Thickness Typical Use Clip Spacing
1/8″ Standard cabinet inserts Every 6–8 inches
3/16″ Deeper rabbets, added rigidity Every 6–8 inches

Pro Tip: Order pre-cut glass panels rather than cutting glass at home. DIY glass cutting requires a single-pass score with a straight edge, safety goggles, and gloves — and even careful cuts can produce uneven edges that leave gaps in the rabbet.

For guidance on whether to handle installation yourself or bring in a professional, Tdm-thedoormaker’s resource on choosing between DIY and hiring contractors covers the decision clearly.

How do you measure and place your order correctly?

Follow a three-step process: measure, design in the configurator, and order with samples if you are uncertain about the finish.

  1. Measure the cabinet opening from inside edge to inside edge, both width and height
  2. Measure the rabbet depth and interior lip width so you know which glass thickness fits
  3. Subtract 1/16″–1/8″ from both the width and height measurements to allow for expansion and easy placement
  4. Note hinge bore locations and your overlay type before opening the configurator
  5. Open the configurator at Tdm-thedoormaker’s how-to-order page and select your door style, finish, exact dimensions, and add-ons
  6. Add sample doors or swatches to your order if you have not confirmed the finish in person
  7. Review and submit — confirm glass sizing preference and hinge-hole specifications before checkout

HGTV’s installation guidance confirms the 1/16″–1/8″ subtraction as standard practice for glass fit. The custom ordering process at Tdm-thedoormaker walks through each of these steps with video tutorials.

What should you expect for pricing, lead times, and shipping?

Woman measuring cabinet door glass opening with caliper

Pricing for glass-ready cabinet doors varies by door construction, material species, finish level, and add-ons. Mitered and cope-and-stick doors in hardwood species cost more than MDF equivalents. Painted and stained finishes add to the base price compared with unfinished doors. Pre-drilled hinge holes and pre-cut glass panels are typically priced as line-item add-ons.

Key cost drivers to budget for:

  • Door size (larger doors use more material and cost proportionally more)
  • Construction type (mitered and applied moulding generally carry a premium over basic cope and stick)
  • Finish level (painted and stained finishes cost more than unfinished)
  • Pre-cut glass panels (vendor-supplied glass adds cost but saves time and reduces breakage risk)
  • Pre-drilled hinge holes (a modest add-on that pays for itself in installation time)

Contractor and volume pricing is available for larger orders. Sample doors and color swatches typically ship faster than production orders and are a low-cost way to confirm your choices before committing to a full order. Lead times for custom production orders vary by manufacturer and current volume, so confirm the current timeline with Tdm-thedoormaker directly when you place your order.

Key Takeaways

Glass-ready cabinet doors deliver a high-end look at a fraction of full cabinet replacement cost when you order the right style, measure accurately, and choose the correct glass retention method.

Point Details
Measure before you order Subtract 1/16″–1/8″ from opening dimensions so the glass panel fits without stress.
Choose retention method carefully Retainer clips spaced every 6–8 inches are preferred by professionals for maintainability.
Match glass to your use case Clear glass displays; frosted obscures; reeded and seeded add texture and a design character.
Order pre-cut glass panels Vendor-supplied panels eliminate breakage risk and produce square edges for a clean fit.
Use Tdm-thedoormaker’s configurator Over 30 styles, 130+ finishes, and sizing to 1/10,000″ with a measure → design → order flow.

Why the configurator model changes what is possible for homeowners

The conventional assumption about custom cabinet doors is that precision and affordability cannot coexist outside of a showroom or a contractor relationship. That assumption is outdated. Tdm-thedoormaker’s measure → design → order model puts the same sizing accuracy that cabinet shops charge a premium for directly into the hands of a homeowner with a tape measure and a browser. Sizing to 1/10,000″ is not a marketing claim; it is the practical result of a configurator that accepts exact fractional dimensions rather than rounding to the nearest standard size.

What most people underestimate is how much of the cost in traditional cabinet refacing goes toward the back-and-forth: showroom visits, contractor measurements, revision cycles. Ordering sample doors and color swatches before committing to a full order removes most of that friction. You confirm the finish under your actual kitchen lighting, not a showroom’s. That is a meaningful difference when you are choosing between a painted white and a painted off-white that look identical on a screen.

The glass-ready format specifically rewards this model. Because the rabbet is pre-routed to a specified depth, the glass panel dimensions are predictable from your measurements alone. There is no guesswork about whether the glass will seat correctly if you measured accurately and ordered pre-cut panels.

Ready to order your glass-ready cabinet doors?

Tdm-thedoormaker gives you a direct path from measurement to finished door, without the cost of a full cabinet replacement or the delays of a traditional showroom order. With over 30 door styles, 130+ colors and finishes, and sizing precise to 1/10,000″, you can configure glass-ready cabinet doors that fit your existing frames exactly.

Tdm-thedoormaker

Order sample doors and color swatches first if you want to confirm your finish choice under real lighting conditions. When you are ready to commit, the DIY cabinet refacing resource walks through the full project from start to finish. Contractors ordering for multiple kitchens can request volume pricing directly. Start your design in the configurator at Tdm-thedoormaker’s how-to-order page and have your measurements ready.

Useful sources and further reading

  • Installing Glass in Cabinet Doors: A Practical DIY Guide | Architectural Glass — covers retainer clip spacing, glass thickness, and step-by-step installation for recessed cabinet doors
  • Installing Glass Panels in Cabinet Doors | HGTV — confirms the 1/16″–1/8″ subtraction allowance for glass fit
  • How To Cut Glass & Install It in a Cabinet Door | WoodAndShop — safety guidance for DIY glass cutting, including scoring technique and protective equipment
  • Adding Glass To Cabinet Doors Made Simple | Obsessed Woodworking — practical case study on clip-plus-silicone retention for a professional finish
  • How to Order | Tdm-thedoormaker — configurator entry point and ordering instructions
  • Custom Cabinet Ordering Process Explained | Tdm-thedoormaker — detailed walkthrough of the measure → design → order flow with video tutorials
FROM THE SAME CATEGORY

Sep 8 2026 BY Ksenija Lebec, Blog

Landlords: inspect cabinets, run vacancy based ROI, budget $1,000–$13,000, and plan 1–3 day refacing installs with bulk order tips.

Build a Door MADE TO FIT YOU!

Two Tone Cabinets: Ideas and How to Get the Look

Two Tone Cabinets: Ideas and How to Get the Look

Two tone cabinets work well for most kitchens, and the lowest-risk way to get the look is to keep your upper cabinets in a neutral white or off-white and use a bolder color or wood tone on the lowers or island. You don’t need a full remodel. According to reports, two-tone kitchen cabinets remain a popular strategy in U.S. residential renovations, with a significant share of homeowners choosing white for uppers and bolder tones below. The fastest path to the look: choose your layout, pick one neutral plus one accent, then decide whether to paint, reface, or replace. Refacing with custom doors through Tdm-thedoormaker typically costs a fraction of full replacement and can be completed without gutting your kitchen.

Quick action steps:

  • Choose your layout: island accent, upper/lower split, or perimeter plus pantry wall
  • Pick one neutral and one accent color that share an undertone
  • Decide your method: paint (lowest cost, shortest life), refacing (best value), or full replacement (highest cost)
  • Order sample doors or paint chips before committing
  • Confirm hardware finish across both tones before ordering

Table of Contents

The combinations that hold up best over time share one quality: one tone is clearly the supporting player. Designers consistently recommend pairing one neutral with one accent, and earth-based greens, terracottas, and warm browns are among the most liveable accents heading into 2026.

Warm white uppers + medium walnut lowers. This is the most universally flattering pairing. The warmth in the wood and the warmth in the white reinforce each other, and the result reads as intentional rather than trendy. Works especially well in open-plan kitchens where the wood grain adds texture without competing with the rest of the room.

Cream or khaki uppers + smoky sage green lowers. A softer take on the green trend. Sage reads as a neutral in most lighting, so the contrast is subtle enough for smaller kitchens. Pair with brushed nickel or matte black hardware for a clean finish.

Greige uppers + walnut island. Greige (a gray-beige blend) is one of the most flexible upper cabinet colors because it reads warm or cool depending on the light. A walnut island against greige perimeter cabinets gives you a two-tone result without any painted accent at all.

White uppers + deep indigo or navy lowers. A classic tuxedo pairing. Navy lowers ground the room and feel more timeless than trendy. Home Depot’s design guidance recommends testing sample doors in your own lighting before committing to a deep color, since navy can shift significantly between natural and artificial light.

Wood perimeter + bold island. Keep the surrounding cabinets in a consistent wood tone and let the island carry a single saturated color: forest green, terracotta, or deep slate blue. This approach works in contemporary and transitional kitchens and is the easiest to update later.

When choosing finishes, ISTC notes that bar pulls dominate hardware trends, with brushed nickel, matte black, and brushed gold as the most common finishes. Picking one hardware finish across both tones is one of the simplest ways to make a two-tone scheme feel cohesive rather than accidental.

Among homeowners choosing a light upper cabinet color, many pick white, off-white, or a wood tone, while lower cabinets tend to be in wood, blue, green, or deep neutral shades.

Pro Tip: Order sample doors in both colors and place them side by side in your kitchen at different times of day. A pairing that looks balanced at noon can feel off under warm evening lighting. Tdm-thedoormaker offers sample doors so you can test before you commit.

For more color direction, the 2026 kitchen refacing color trends guide from Tdm-thedoormaker covers the palettes gaining traction this year.


Why does two-tone work? The visual rules behind the look

The light-uppers/dark-lowers principle works because it mirrors how we perceive architectural weight. Lighter colors recede visually, so pale upper cabinets push the ceiling up and make the room feel taller. Darker lowers anchor the space without making it feel closed in. In a small kitchen, this single decision can do more for the perceived size of the room than any other design choice.

The 70/30 dominance rule prevents the room from feeling visually split. One color should cover roughly 70% of the cabinet surface; the accent covers the remaining 30%. When both tones compete for equal space, the eye has nowhere to rest and the kitchen reads as busy rather than layered.

Undertone matching is where most homeowners go wrong. Warm woods pair with warm whites (creamy, ivory, or slightly yellow-based whites). Cool tones like navy or slate pair with cool whites (bright, slightly blue-based whites). To test undertones, hold your paint chip or sample door next to your countertop and floor sample in natural light. If the white looks dingy or yellow next to a cool counter, it’s a warm white and the pairing will fight. Boise Cabinet Co’s guidance reinforces this: tying the palette to counters and floors is one of the three keys to a successful two-tone scheme.

Hands holding matching warm tone cabinet samples

Consistent door profiles matter as much as color. If your upper cabinets have a shaker-style door and your lowers have a flat-panel door, the kitchen reads as two separate projects rather than one intentional design. Choose a vendor that offers the same door profile across multiple finishes so both tones share the same frame. Tdm-thedoormaker’s catalog covers over 30 door styles in 130+ colors and finishes, which makes it straightforward to hold a single profile across two tones.

Pro Tip: When you’re unsure where to put the accent color, start with the island. It’s physically separate from the perimeter cabinets, so it reads as a deliberate design choice rather than a mismatch, and it’s far easier to repaint or reface a single island later than to redo an entire lower run.


How do you pick two colors that actually work together?

Start with one neutral and one accent. The neutral gives the eye a place to rest; the accent does the visual work. This is the safest approach because a neutral upper cabinet will coordinate with almost any countertop or flooring change you make in the future.

Step-by-step color selection process:

  1. Identify your countertop undertone. Hold a white piece of paper next to your counter. If the counter looks warm (beige, cream, gold), you need a warm neutral. If it looks cool (gray, blue, green), choose a cool neutral.
  2. Pull two or three accent options that share that undertone. If your counters are warm, consider sage green, terracotta, or warm navy. If cool, look at slate blue, deep teal, or charcoal.
  3. Order sample doors or large paint chips in both colors. Place them on the actual cabinet surfaces, not just held up in the air.
  4. Photograph the samples with your phone under natural light, under overhead lighting, and in the evening. Colors shift more than most people expect.
  5. Live with the samples for at least two days before deciding.

A few additional checks worth running:

  • Place the accent sample next to your flooring material. Wood floors with red undertones will clash with a green-based accent unless the green leans warm.
  • Check the finish. Matte finishes absorb light and make colors look slightly darker and more muted. Gloss finishes reflect light and intensify the color. In a low-light kitchen, a matte deep color can feel heavy; a satin finish on the same color reads lighter.
  • Keep the door profile identical across both colors. Switching profiles between uppers and lowers is one of the most common mistakes in two-tone kitchen design.

For a practical look at how finish type affects color perception, the thermofoil versus painted cabinet fronts comparison from Tdm-thedoormaker covers the differences in durability and color consistency between finish types.

Pro Tip: If you’re torn between two accent colors, choose the one that appears in your countertop, backsplash, or flooring. Pulling a color that already exists in the room creates cohesion without effort.


Paint, refacing, or full replacement: which method fits your project?

For most homeowners, cabinet refacing with custom doors delivers the best balance of cost, durability, and finish quality. Painting is the cheapest entry point but requires the most maintenance over time. Full replacement makes sense only when the cabinet boxes themselves are damaged or when a layout change is needed.

Method Typical U.S. Cost Range Timeline Durability Finish Options Disruption Updateable Later
Paint (DIY) $200–$500 2–5 days 3–5 years Limited to paint colors Low Yes, repaint
Paint (professional) 3 days 5–10 years Paint colors, some glazes Low–Medium Yes, repaint
Cabinet refacing (custom doors) $1,500–$5,000 1–3 weeks 130+ colors, thermofoil, wood, painted MDF Low Yes, swap doors
Full replacement 4 weeks Unlimited High Partial

Cost ranges are estimates based on typical U.S. market conditions and vary by kitchen size, region, and material selection. Refacing costs include new doors and drawer fronts but not countertops, plumbing, or electrical work.

Painting is the right choice if you’re on a tight budget and willing to repaint every few years. The finish is only as durable as the prep work and primer underneath, and cabinet fronts take daily abuse from moisture, grease, and repeated handling. Professional painting extends the life considerably, but the surface remains more vulnerable to chipping than a factory-finished door.

Refacing with custom doors is the method most worth considering for a two-tone project. You keep the existing cabinet boxes and replace only the doors, drawer fronts, and hardware. The result is a factory-finished surface that holds up far better than site-applied paint, and you can mix two finishes across the same door profile. For a detailed breakdown of when refacing makes more sense than replacement, the cabinet refacing versus full remodel page from Tdm-thedoormaker walks through the trade-offs clearly.

Full replacement is rarely necessary for a two-tone update unless the cabinet boxes are water-damaged, structurally compromised, or you need a layout change. The cost and disruption are significantly higher, and the kitchen is typically unusable for several weeks.

Pro Tip: Budget an extra $200–$500 for hardware when planning a two-tone project. New pulls and knobs in a consistent finish (matte black, brushed nickel, or brushed gold) do as much to unify the look as the color choice itself.


Where should you put the second color in your kitchen layout?

The island is the most flexible placement for an accent color. It’s physically separate from the perimeter cabinets, which means the contrast reads as intentional, and it’s the easiest surface to update later if your taste changes. Multiple design guides confirm that the island is the safest, most update-friendly location for a bold accent because repainting or refacing a single island costs far less than redoing a full lower run.

Layout options and when each works best:

  • Island accent: Best for open-plan kitchens with a freestanding or peninsula island. The island becomes the focal point. Works with almost any perimeter color.
  • Upper/lower split (tuxedo style): Classic and high-contrast. Light uppers, dark lowers. Works in kitchens of any size, but requires careful undertone matching to avoid a jarring split.
  • Perimeter plus pantry wall: Use the main perimeter in one color and the pantry or butler’s pantry in the accent. Creates a sense of a separate zone without touching the main run.
  • Wood perimeter plus painted island: One of the most durable combinations because wood-tone cabinets age gracefully and the painted island can be refreshed independently.
  • Reversed layout (dark uppers, light lowers): A dramatic, high-end look that works in kitchens with tall ceilings and strong natural light. Requires careful execution; without adequate ceiling height or light, dark uppers can make the room feel top-heavy.

The 70/30 rule applies to every layout: the dominant color should cover roughly 70% of the visible cabinet surface. In an upper/lower split, that usually means keeping the uppers as the dominant tone. In an island-accent layout, the perimeter is dominant and the island carries the 30%.

Pro Tip: Before committing to a layout, place a sample door on the island surface and step back to the kitchen entrance. That’s the view most guests see first, and it’s the most reliable way to judge whether the accent reads as a design choice or a mismatch.

Kitchen island with cabinet door sample

For more layout and style ideas, modern kitchen cabinet ideas for every budget covers a range of approaches worth reviewing alongside your floor plan.


What are the most common two-tone cabinet mistakes homeowners regret?

Too-high contrast. Pure white paired with pure black, or bright white with espresso, ages faster than any other combination. The contrast is striking at first but becomes visually exhausting over time. Fix: soften one end of the pairing. Use an off-white or warm cream instead of pure white, or choose a deep charcoal instead of true black.

Mismatched undertones. A warm wood lower paired with a cool bright white upper creates a subtle visual tension that most homeowners can’t name but definitely feel. Fix: test both colors against your countertop in natural light before ordering.

Switching door profiles between tones. Using a shaker door on uppers and a flat-panel on lowers makes the kitchen look like two separate projects were installed at different times. Fix: choose one door style and apply it across both colors. This is the single most overlooked detail in DIY two-tone projects.

Two equally bold colors. Pairing navy lowers with forest green uppers, for example, gives the eye no place to rest. Fix: one color must be clearly neutral. If you want two saturated colors, limit the bold tone to the island only.

Inconsistent hardware. Mixing brushed nickel pulls on uppers with matte black knobs on lowers fragments the look. Boise Cabinet Co’s guidance is direct on this: consistent hardware across both tones is one of the three non-negotiable keys to a cohesive two-tone result. Fix: choose one hardware finish and apply it everywhere.

Ignoring lighting. A deep green lower cabinet that looks rich and grounded in a showroom can read as nearly black in a kitchen with limited natural light. Fix: test sample doors under your actual kitchen lighting, not just in a store.

Choosing a two-tone scheme without testing samples in your own kitchen first is the most common source of regret. Colors behave differently under different lighting conditions, and what looks balanced in a showroom or on a screen can feel completely different once it’s installed.

On resale: neutral-plus-wood and navy or sage island accents hold up well with buyers. High-contrast pairings like white and espresso, or two saturated colors, tend to narrow your buyer pool.


How does refacing with Tdm-thedoormaker deliver a two-tone result?

Tdm-thedoormaker simplifies two-tone refacing through custom doors, precise sizing to 1/10,000", and an online configurator that walks you through the full process without requiring a contractor visit.

The process, step by step:

  1. Measure. Measure each cabinet opening: width, height, and depth. Tdm-thedoormaker’s video tutorials cover exactly what to measure and how to account for overlay and inset configurations. Precise measurements are what make custom doors fit without shimming or trimming.
  2. Design. Use the online configurator to select your door style, choose two colors or finishes (one for uppers, one for lowers or island), and add options like hinge holes. Order sample doors or color swatches first if you haven’t finalized your pairing.
  3. Order. The configurator generates a complete order with your exact dimensions. You can add drawer fronts, mullions, and frames in the same session. Hinge-hole drilling is available as an add-on, which saves significant time during installation.
  4. Install. Most homeowners handle installation themselves. Removing old doors and hanging new ones requires basic tools and follows the same process regardless of whether you’re doing one color or two. The DIY cabinet refacing guide from Tdm-thedoormaker covers the installation steps in detail.

What Tdm-thedoormaker delivers:

  • Custom doors and drawer fronts in 30+ styles and 130+ colors and finishes
  • Sample doors and color swatches for pre-order testing
  • Precise sizing to 1/10,000" so doors fit without adjustment
  • Hinge-hole drilling as an add-on option
  • Video tutorials covering measurement, design, and installation

Tdm-thedoormaker’s direct-to-consumer model means pricing typically undercuts larger retailers significantly, and the turnaround time is faster than ordering through a traditional cabinet supplier.

Pro Tip: Order sample doors in both of your chosen colors before placing your full order. Place them on the actual cabinet surfaces in your kitchen and live with them for a few days. The sample cost is minimal compared to the cost of ordering doors in a color that doesn’t work in your specific lighting.


How do painted and refaced cabinets differ in durability and maintenance?

Painted cabinets and refaced cabinets live very different lives over time, and the difference matters more in a two-tone kitchen where one surface is often darker and shows wear differently than the other.

Site-applied paint, whether DIY or professional, is only as durable as the prep work underneath. Cabinet fronts handle daily contact: grease, moisture, repeated opening and closing, and occasional impacts. Paint applied on-site tends to chip at edges and corners within a few years, particularly on lower cabinets that take more physical contact. Touching up painted cabinets is possible but rarely invisible, especially on darker colors where the sheen difference between old and new paint is visible.

Factory-finished doors from a refacing project use a surface applied under controlled conditions with consistent thickness and adhesion. Thermofoil and painted MDF doors from Tdm-thedoormaker are finished before they arrive at your home, which means the surface is harder and more consistent than anything applied with a brush or roller on-site. For a detailed look at how thermofoil and painted finishes compare in practice, the thermofoil versus painted cabinet fronts breakdown from Tdm-thedoormaker covers the key differences in wear and cleaning.

Cleaning is also simpler with factory-finished surfaces. Most can be wiped down with a damp cloth and mild soap without risk of lifting the finish. Painted on-site surfaces, particularly those with a flat or matte sheen, are more sensitive to repeated wiping and can dull or streak over time.

One practical note for two-tone kitchens specifically: if your lower cabinets are a dark color, they will show fingerprints and grease more visibly than light uppers. A satin or semi-gloss finish on dark lowers makes cleaning easier than a matte finish, which tends to hold grease in the texture.


How does lighting affect two-tone cabinets and how should you plan for it?

Lighting is the variable most homeowners underestimate when planning a two-tone kitchen. The same color can look dramatically different depending on whether the light source is warm or cool, natural or artificial, and how much of it reaches the cabinet surface.

Natural light is the most flattering for two-tone schemes because it renders colors accurately. A north-facing kitchen with limited natural light will make cool colors like navy or slate look darker and heavier than they appear in a showroom. A south-facing kitchen with strong afternoon sun can wash out pale neutrals and make warm whites look almost yellow.

Under-cabinet lighting has a significant effect on lower cabinet color. Warm LED strips (2700K–3000K) will shift a sage green lower toward yellow-green and make a warm wood tone look richer. Cool LED strips (4000K+) will push the same sage toward blue-green and make warm woods look flat. Before finalizing your lower cabinet color, check what color temperature your under-cabinet lights are, or plan to update them as part of the project.

Overhead lighting matters for upper cabinets. Recessed lights directly above upper cabinets can create a hot spot that bleaches out the color at the top and leaves the lower portion of the door in shadow. This effect is more pronounced on darker upper cabinets and less noticeable on white or off-white.

The practical approach is to test sample doors under all three lighting conditions you actually use: morning natural light, midday overhead lighting, and evening artificial light. Photograph each condition with your phone. Colors that hold up consistently across all three are the safest choices for a two-tone kitchen you’ll live with for years.


Key Takeaways

Two-tone cabinets work best when one color is clearly dominant, both tones share an undertone, and a single door profile runs across the entire kitchen.

Point Details
Layout first Choose island accent, upper/lower split, or perimeter plus pantry wall before selecting colors.
One neutral, one accent Keep one color clearly neutral so the eye has a place to rest and the look stays resale-friendly.
Test before you order Place sample doors in your kitchen under natural and artificial light for at least two days before committing.
Refacing beats painting for durability Factory-finished custom doors last significantly longer than site-applied paint and require less maintenance.
Tdm-thedoormaker for two-tone refacing Custom doors in 30+ styles and 130+ colors, precise sizing, and an online configurator make two-tone refacing straightforward without a full remodel.

The case for starting smaller than you think

Two-tone kitchen design gets oversold as a bold commitment, and that framing pushes homeowners toward decisions they later regret. The most successful two-tone kitchens I’ve seen are the ones where the homeowner started with the island, tested the accent color for a few weeks, and only then decided whether to extend it to the lower run.

The reason refacing makes more sense than painting for most two-tone projects isn’t just durability. It’s the ability to make a precise, reversible decision. When you order custom doors in two finishes from Tdm-thedoormaker, you’re choosing a factory-finished surface that holds its color consistently, not hoping that a brush-applied coat of paint will look the same in five years. And if your taste changes, swapping doors is a fraction of the cost of repainting or replacing.

The mistake most homeowners make isn’t choosing the wrong colors. It’s skipping the sample stage and committing to a full order based on a screen or a small paint chip. Order the sample doors. Place them in your kitchen. Live with them. That single step eliminates most of the regret stories you’ll find in renovation forums.


Tdm-thedoormaker makes two-tone refacing practical for real kitchens

Custom two-tone doors without the cost of a full remodel: that’s the practical advantage Tdm-thedoormaker offers homeowners who want a design-forward kitchen without replacing every cabinet box in the room.

Tdm-thedoormaker

Tdm-thedoormaker’s catalog covers 30+ door styles and 130+ colors and finishes, all available through an online configurator that walks you through measurement, design, and ordering in three steps. Hinge-hole drilling, color swatches, and sample doors are available as add-ons, so you can test your two-tone pairing in your actual kitchen before placing a full order. Sizing is precise to 1/10,000", which means doors arrive ready to hang without trimming or shimming.

For homeowners weighing refacing against full replacement, the cabinet replacement vs. refacing comparison covers the cost and timeline differences in plain terms. If you’re ready to handle installation yourself, the DIY cabinet refacing guide walks through the full process with video support. Start by ordering sample doors in your two chosen colors and use the configurator to build your order from there.


Sources and further reading

FROM THE SAME CATEGORY

Sep 8 2026 BY Ksenija Lebec, Blog

Landlords: inspect cabinets, run vacancy based ROI, budget $1,000–$13,000, and plan 1–3 day refacing installs with bulk order tips.

Build a Door MADE TO FIT YOU!

Best Online Cabinet Doors: Top Styles and How to Order

Best Online Cabinet Doors: Top Styles and How to Order

For most homeowners, custom cabinet doors ordered through a configurator-first vendor deliver the best combination of precise fit, finish variety, and long-term value. Tdm-thedoormaker’s The Door Maker is the recommended pick for DIY refacing and replacement projects, offering over 30 styles and 130+ colors and finishes with sizing accurate to 1/10,000" — a level of precision that stock and semi-custom options simply don’t match.

Here’s why it stands out for most homeowners:

  • Fit: Custom sizing to your exact dimensions eliminates the gaps and shimming that come with stock doors.
  • Selection: A wide range of door styles and finishes cover everything from classic Shaker to ornate raised-panel profiles.
  • Price: Refacing with custom online doors typically costs a fraction of full cabinet replacement, without sacrificing the finished look.

Pro Tip: Order a sample door or color swatch before placing your full order. Seeing the finish in your actual kitchen lighting prevents costly surprises and reduces the chance of a return.


Table of Contents

What are the best online cabinet doors to compare?

The table below compares the main options available through Tdm-thedoormaker, covering the key dimensions that matter most when you’re planning a refacing or replacement project.

Option Best for Customization level Material & durability Lead time & shipping Ease of ordering
The Door Maker Homeowners wanting precise custom sizing and wide style/finish selection for refacing Fully custom: exact sizing, 130+ finishes, hinge hole add-ons Solid wood, MDF, thermofoil, veneer; high durability options available Custom lead times; ships direct Online configurator, sample program, measurement guides, video tutorials
The Shaker Cabinet Door Timeless, transitional look that works in most kitchen styles Wide finish options, custom sizing MDF or solid wood; durable and consistent Standard custom lead time Straightforward configurator selection
The Adobe Cabinet Door Farmhouse, cottage, or warm traditional aesthetics Custom sizing, rustic finish options Solid wood or MDF with molding details Standard custom lead time Configurator with style preview
The Heritage Cabinet Door Restoration projects or classic, ornate looks Custom sizing, raised panel, period detailing Solid wood preferred; high durability Standard custom lead time Configurator with detailed profile options
The Revere Cabinet Door Slightly decorative but restrained, transitional style Custom sizing, broad finish range MDF or solid wood; durable Standard custom lead time Configurator selection
The Delaware Cabinet Door Contemporary-traditional hybrid with clean lines Custom sizing, painted or stained finishes MDF or solid wood; durable Standard custom lead time Configurator with finish options
The Executive Cabinet Door Upscale, statement cabinet look Custom sizing, premium panel and edge detailing Premium solid wood or MDF; high durability Standard custom lead time Configurator with premium profile options

A few things worth noting after scanning that table. The Door Maker bundles the full ordering infrastructure — configurator, sample program, measurement tools, and video tutorials — into a single direct-to-consumer experience. The individual door styles (Shaker, Adobe, Heritage, and the rest) are profiles you choose within that system, not separate vendors. Stock options from big-box retailers offer faster turnaround for standard sizes, but you give up precise fit and finish depth. Custom doors versus stock cabinetry is a genuine tradeoff worth understanding before you commit to either path.

Infographic comparing stock versus custom cabinet doors


How do you pick the right cabinet doors for your project?

The single most important question is: what is your project goal? Refacing an existing kitchen to update its look is a very different job from replacing a few damaged doors or building new cabinetry. Your answer shapes every other decision.

Work through this checklist before placing any order:

  • Style match: Does the door profile fit your kitchen’s overall aesthetic — transitional, traditional, contemporary, or farmhouse?
  • Material: Will the doors be in a high-humidity area (near a sink or dishwasher) or a high-traffic zone? Material choice matters more in those spots.
  • Measurement accuracy: Do you have exact opening dimensions, or do you need a measurement guide to get there?
  • Hardware preparation: Do your existing hinges require specific boring patterns? Confirm hinge hole specs before ordering.
  • Finish options: Do you want painted, stained, or a wrapped finish like thermofoil? Not every supplier offers all three.
  • Sample availability: Can you order a physical sample door or color swatch to check the finish in your space?
  • Return policy: What happens if a door arrives damaged or the finish doesn’t match?
  • Warranty: Is there a documented warranty on finish and construction?

Before placing a full order with any online seller, ask these four questions directly:

  1. Can I order a sample door or swatch in my chosen finish before committing to the full quantity?
  2. What are your exact lead times from order confirmation to shipping?
  3. Do you support custom sizing to fractional dimensions, and what is your tolerance?
  4. What does your warranty cover, and how do I file a claim if a door arrives damaged?

Watch for these red flags: no sample program, vague or missing warranty language, no measurement guide or video support, and pricing that excludes shipping until checkout. Common DIY pitfalls like measurement errors and hinge misalignment are far more likely when an online seller provides no measurement guidance. Choosing the right cabinet doors starts with knowing what questions to ask.


Which cabinet door styles can you buy online, and when does each work best?

Shaker and slab doors dominate online sales because they work across the widest range of kitchen styles. Raised panel and ornate profiles are trend-stable for traditional homes, while louvered and glass-front options serve specific functional or aesthetic needs.

Here’s a quick-reference breakdown of the styles most commonly available online:

  • The Shaker Cabinet Door: Recessed center panel, clean lines. Works in transitional, modern farmhouse, and contemporary kitchens. The most resale-friendly profile on the market.
  • Slab/Flat-panel: No frame, no detail. Best for ultra-modern or minimalist spaces. Shows surface imperfections more readily, so material quality matters.
  • Raised panel: A center panel that sits above the frame. Classic and formal; suits traditional and period-style kitchens.
  • Louvered: Horizontal slats allow airflow. Practical for pantry doors or areas needing ventilation; less common for full kitchen suites.
  • Glass-front: Replaces the solid panel with glass. Opens up upper cabinets visually and works well in smaller kitchens where light matters.
  • The Adobe Cabinet Door: Warmer molding lines with a rustic profile. Best for farmhouse, cottage, or country-style kitchens.
  • The Heritage Cabinet Door: Period-correct raised panel detailing. The right choice for restoration projects or homes with traditional architectural character.
  • The Revere Cabinet Door: Shaker simplicity with a subtle decorative line. Sits between plain and ornate — a good fit for homeowners who want a little detail without committing to a full traditional look.
  • The Delaware Cabinet Door: Clean, slightly contemporary framing with painted or stained finish options. Works well in kitchens that blend modern and traditional elements.
  • The Executive Cabinet Door: Premium panel and edge detailing for an upscale, statement look. Best when the kitchen is a focal point of the home.

When you’re deciding between profiles, manufacturer photos are a starting point, but customer before-and-after galleries tell you far more. They show how a door looks under real kitchen lighting, next to real countertops and backsplashes. For contemporary cabinet door styles, browsing a gallery of completed kitchens is the fastest way to narrow your shortlist.

Pro Tip: If resale value matters to you, Shaker doors in a neutral painted finish photograph well in listing photos and appeal to the broadest pool of buyers. In smaller kitchens, glass-front uppers on a few key cabinets add perceived depth without a major cost increase.

Hands holding different cabinet door style samples


What materials and finishes hold up best for kitchen cabinet doors?

Material choice is the single biggest driver of how long your cabinet doors look good, especially in a kitchen where heat, moisture, and daily contact are constant. The right material depends on your budget, the room’s conditions, and whether you plan to refinish the doors later.

Here’s how the main options compare:

Material Pros Cons Best use case
Solid wood Refinishable, premium look, long lifespan Higher cost, can expand/contract with humidity High-end kitchens, areas where refinishing is expected
MDF (painted) Smooth, consistent surface; holds paint well Not water-resistant at edges; heavier than solid wood Painted finishes in moderate-humidity areas
Thermofoil Budget-friendly, moisture-resistant surface Can peel near heat sources; not refinishable Budget kitchens, rentals, low-heat zones
Veneer Real wood look at lower cost than solid Thin layer limits sanding/refinishing Mid-range kitchens wanting a wood grain look
Lacquer/painted finish Durable, cleanable, wide color range Chips can show on high-traffic doors Any kitchen; best on MDF substrate
Stained finish Highlights natural wood grain Requires solid wood or veneer substrate Traditional and warm-toned kitchens

For kitchens and bathrooms, durability near moisture sources is the priority. Thermofoil works for budget projects in lower-heat zones, but it can delaminate near a dishwasher or range over time. Painted MDF is the mid-range standard: consistent, smooth, and available in virtually any color. Solid wood is the right call when you expect to refinish or when the kitchen is a long-term investment. A full breakdown of kitchen cabinet door materials covers these tradeoffs in more detail, and the durable cabinet door options guide is worth reading before finalizing your material choice for high-traffic areas.

On pricing, stock doors from big-box retailers are the lowest entry point but come in fixed sizes and limited finishes. Semi-custom options add some sizing flexibility at a moderate price increase. Fully custom doors from a direct-to-consumer vendor like The Door Maker cost more per door than stock but typically deliver significant savings versus a full cabinet replacement. Refacing saves money compared to ripping out and replacing entire cabinet boxes — often by a substantial margin.


How do you measure, order samples, and install cabinet doors bought online?

Accurate measurement and a physical sample are the two steps that prevent the most common ordering mistakes. Getting both right before you commit to a full order reduces the risk of a poor fit or a finish that looks different in your kitchen than it did on a screen.

Follow this sequence for a smooth online order:

  1. Measure your cabinet openings — width and height to the nearest 1/16". For overlay doors, add your desired overlay amount to each dimension. For inset doors, measure the opening precisely and subtract a small gap for clearance.
  2. Request a sample door or color swatch in your chosen finish. Ordering samples lets you check color accuracy under your kitchen’s actual lighting before committing.
  3. Use the online configurator to enter your dimensions, select your style, finish, and any add-ons (hinge holes, specific boring patterns).
  4. Confirm hinge and drilling prep — specify your hinge cup size and boring pattern to match your existing hardware. Pre-drilled hinge locations cut installation time significantly.
  5. Place your order and save your order confirmation with all dimensions and specs listed.
  6. Receive and inspect each door before installation. Check finish consistency, dimensions, and any pre-drilled holes against your order specs.
  7. Install or hire a pro. For a full kitchen refacing, a step-by-step DIY refacing guide walks you through the process.

On lead times: stock doors from big-box retailers ship in days. Semi-custom options typically run 2–4 weeks. Fully custom doors from direct-to-consumer vendors vary by order complexity, so confirm the lead time at checkout and factor it into your project timeline.

Before installation, verify these items:

  • All door dimensions match your order confirmation.
  • Finish is consistent across the full set (check in the same light).
  • Pre-drilled hinge holes align with your hardware.
  • No shipping damage to edges or corners.

The most common installation pitfalls are hinge misalignment and doors that bind because the overlay wasn’t calculated correctly. Measure twice, confirm your overlay spec with the vendor, and test-fit one door before hanging the full set.


Handyman measuring kitchen cabinet opening

The Door Maker matches the core buyer job better than most online options: you need doors that fit precisely, look the way you expect, and arrive with enough support to install them yourself without a contractor.

The features that make it the recommended choice for DIY refacing:

  • Precise custom sizing to 1/10,000" — eliminates the gaps and shimming that come with stock or semi-custom doors.
  • 30+ styles and 130+ colors and finishes — enough range to match virtually any kitchen aesthetic, from Shaker to Executive.
  • Online configurator with step-by-step design, measurement, and ordering tools built in.
  • Sample door and color swatch program — order before you commit to the full quantity.
  • Hinge hole add-ons — specify your boring pattern at order time so doors arrive ready to hang.
  • Video tutorials and measurement guides — practical support for homeowners doing this for the first time.
  • Competitive pricing that typically undercuts full cabinet replacement by a significant margin.

The ordering process follows three clear steps: measure your openings, configure your doors (style, finish, size, hardware prep), and place your order. For a full kitchen refacing project, the recommended approach is to stagger delivery: order samples first, then a small test batch to validate fit and finish, then the full order. This staged approach catches any sizing or finish issues before you’re committed to the whole kitchen.

For homeowners comparing refacing against a full remodel, the cabinet refacing versus full remodel page lays out the cost and timeline tradeoffs clearly.


Key Takeaways

Custom cabinet doors from a configurator-first vendor deliver the best fit, finish range, and value for DIY refacing — but only when you measure accurately and order a sample before committing to the full set.

Point Details
Custom sizing prevents fit problems Precise sizing to your exact dimensions eliminates gaps, shimming, and binding at installation.
Order samples before the full set A physical sample door or swatch confirms color and finish accuracy under your kitchen’s real lighting.
Material choice drives durability Match material to room conditions: thermofoil for budget/low-heat zones, painted MDF for mid-range, solid wood where refinishing is expected.
Stagger your order for a full kitchen Order samples first, then a test batch, then the full quantity to catch sizing or finish issues early.
Tdm-thedoormaker’s The Door Maker Offers 30+ styles, 130+ finishes, precise custom sizing, a configurator, and a sample program for DIY refacing projects.

The case for going custom: a perspective worth considering

The conventional advice for cabinet updates is to price out stock doors first and upgrade only if the budget allows. That logic made sense when custom meant calling a local millwork shop and waiting months. Online configurators have changed the math.

What most homeowners underestimate is how much a poor fit costs downstream. A stock door that’s a quarter-inch too narrow looks fine in the store and wrong in the kitchen. You adjust, shim, or live with it. A custom door sized to your actual opening doesn’t require that compromise. The price difference between stock and custom online is often smaller than people expect, and the installation experience is genuinely different.

The other thing worth saying plainly: the sample step is not optional if you care about the result. Finish colors look different on a screen than they do under incandescent or LED kitchen lighting. Ordering a swatch or a sample door costs a small amount and saves the frustration of a full set in the wrong color. Video tutorials and measurement guides matter for the same reason: the homeowners who run into trouble during installation are almost always the ones who skipped the measurement check or didn’t confirm their hinge boring pattern before ordering.

The Door Maker’s model — measure, configure, order — is the right sequence. It’s not complicated, but it does require doing the steps in order.


Ready to order? Start with a sample from The Door Maker

Refacing your cabinets with custom doors doesn’t require a contractor or a big-box budget. The Door Maker gives you a direct path: configure your doors to your exact dimensions, choose from 30+ styles and 130+ finishes, and order a sample door or color swatch before you commit to the full set.

Tdm-thedoormaker

The sample program is the lowest-risk way to start. You see the finish in your kitchen, confirm the sizing approach works for your cabinets, and move forward with confidence. Visit the custom cabinet doors ordering page to configure your doors, request a sample, and get your project moving. If you’re still deciding on materials, the kitchen cabinet door materials guide is a practical next read.


Useful resources for going deeper

These pages cover the topics most homeowners need when planning a cabinet door project:

  • Custom Cabinet Doors Online: Style on a Budget — The Door Maker’s full ordering guide, covering the configurator, sizing, and sample program.
  • How to Reface Cabinets Yourself — Step-by-step DIY refacing instructions and a checklist for a successful installation.
FROM THE SAME CATEGORY

Sep 8 2026 BY Ksenija Lebec, Blog

Landlords: inspect cabinets, run vacancy based ROI, budget $1,000–$13,000, and plan 1–3 day refacing installs with bulk order tips.

Build a Door MADE TO FIT YOU!

Hardware Hole Drilling for DIY Cabinet Refacing

Hardware Hole Drilling for DIY Cabinet Refacing

You can get perfectly aligned hardware holes every time by using a single calibrated template or jig, confirming your handle’s center-to-center (C-C) measurement, and drilling with a pilot hole plus a sacrificial backer board. Industry experts recommend a dedicated cabinet hardware jig for any multi-door project because it eliminates human measuring error and keeps every hole in exactly the same position across all your doors. For large or high-risk refacing runs, Tdm-thedoormaker offers custom doors with pre-drilled hardware holes as a ready alternative.

Before you touch a drill, run through these four steps:

  • Measure your hardware’s C-C spacing from the spec sheet or packaging
  • Set one reference corner per door and commit to it for every door in the project
  • Calibrate your template on a scrap door and verify the C-C with a ruler or caliper
  • Drill a 1/8" pilot hole first, then follow with the final clearance bit

Pro Tip: Never skip the scrap-door test. One test hole on a piece of matching material tells you immediately whether your bit size, speed, and backer setup are right before you commit to a finished door.


Table of Contents

What tools and materials do you need before drilling?

Getting the right tools together before you start prevents the most common startup mistakes. Here is what to have on hand.

Tools:

  • Corded or cordless drill
  • 1/8" drill bit for pilot holes; 3/16" for standard #8-32 screw clearance holes (this is the common standard, but always verify with your hardware’s instructions and test on scrap)
  • Awl or nail set for dimpling the start point
  • Clamps (at least two)
  • Sacrificial backer board (scrap wood clamped to the back of the door)
  • Cabinet hardware jig or printed template
  • Level, tape measure, pencil
  • Masking or painter’s tape

Materials:

  • Scrap wood matching your door material for test holes
  • Wood putty for repairs
  • Replacement screws matched to your hardware (typically #8-32 in U.S. cabinetry)

Safety: Always wear eye protection. Keep the door clamped flat or propped securely so it cannot shift while you drill. Never let your free hand drift behind the door near the drill path.

Common U.S. cabinetry hardware typically spans a range of center-to-center (C-C) spacings covering several standard sizes. Always confirm the exact measurement from your hardware’s packaging before drilling a single hole.

Close-up of hardware drilling safety tools


How do you drill cabinet hardware holes step by step?

A repeatable sequence is what separates clean results from frustrating rework. Follow this workflow for every door.

  1. Set your reference corner. Pick one corner per door, typically the top-hinge corner, and align your jig or template to it every time. Consistency here is what keeps all your pulls at the same height across the entire run.
  2. Calibrate the template on scrap. Verify the printed or commercial template’s 1" test square, confirm the C-C with a ruler, and check that the template sits level before marking anything.
  3. Dimple the pilot point. Use an awl or nail set to create a small indent at each mark. This keeps the bit from skating across the surface when you start drilling.
  4. Apply masking tape. Place a strip of painter’s tape over the drill point on the finished face. Masking tape reduces splintering on veneered or painted surfaces and helps the bit track cleanly.
  5. Clamp the door and backer board. Lay the door flat, then clamp a piece of scrap wood firmly against the back directly behind each drill point. This prevents exit-side blowout.
  6. Drill the pilot hole. Use a 1/8" bit and start with a small pilot hole to reduce pressure and keep the drill steady. Drill straight through at a consistent, moderate speed.
  7. Switch to the final clearance bit. For standard #8-32 hardware screws, a 3/16" bit is the common choice. Drill slowly and let the bit do the work.
  8. Deburr, clean, and test-fit. Remove any fuzz around the hole, insert the screw by hand, and confirm the hardware sits flush. Tighten screws by hand first, then snug with a screwdriver. Never overtighten.

Pro Tip: For thin veneer or laminate doors, drill until the pilot bit just breaks through the back face, then finish the hole from the back side. This two-direction approach produces the cleanest possible exit.

Checklist before drilling any door: test on scrap ✓, one reference corner ✓, clamp and backer board ✓, pilot hole ✓, correct clearance bit ✓, final test fit ✓.


How do you measure and space hardware correctly?

C-C (center-to-center) is the distance between the two mounting holes on a pull. It is the single measurement that determines which template or jig setting you use, and it must come from your hardware’s spec sheet, not from guesswork.

The Amerock installation template, for example, covers knobs and pulls from 3" (76mm) to 5-1/16" (128mm) C-C, which spans the full range of common U.S. cabinetry hardware. Keeping your holes within ±1/32" (±0.8mm) of the target position is the practical tolerance for visual uniformity across a full kitchen.

Step-by-step guide for cabinet hardware drilling

Placement rules vary by door type. On slab doors, position the bottom hole of a pull 2"–3" from the bottom edge for wall doors and 2"–3" from the top edge for base doors. Center pulls horizontally on drawers. On framed doors, align hardware with the stile rather than measuring from the door edge. Pick one method and apply it without variation.

Hardware type Typical C-C Pilot bit Final clearance bit
Single knob N/A (one hole) 1/8" 3/16"
3" pull 3" (76mm) 1/8" 3/16"
3-3/4" pull 3-3/4" 1/8" 3/16"
4" pull 4" 1/8" 3/16"
5" pull 5" (128mm) 1/8" 3/16"

Before you order or drill, confirm your knobs and handles C-C against this table. A mismatch discovered after drilling is expensive to fix.


How do you choose and calibrate a cabinet hardware jig?

A jig or template is what turns hardware hole drilling from a high-anxiety task into a repeatable production process. The right choice depends on your project size and budget.

  1. Commercial metal or plastic jig (such as the Taytools Deluxe Adjustable Jig): durable, adjustable for multiple C-C spacings, and worth the investment when doing more than about 10 doors. Clamps directly to the door edge for guided, repeatable placement.
  2. Printable paper or cardstock template: free or low cost, works well for small projects. Always verify the 1" test square after printing at 100% scale before using it on a real door.
  3. DIY MDF template: cut from 1/4" MDF with a drill press for precise holes. More durable than paper, less expensive than commercial jigs, and easy to replace if damaged.

Calibration steps: Clamp the template to your reference corner. Verify the C-C with a caliper or ruler. Mark pilot holes through the template with an awl, then drill a test hole on scrap and measure the result. Adjust before touching a finished door.

Pro Tip: Label the top edge of your template with a marker and cover any unused hole patterns with tape. One accidental drill through the wrong template hole on a finished door is a costly mistake.


What mistakes happen most often, and how do you fix them?

Most hardware drilling errors are preventable, but a few are worth knowing how to recover from.

Common mistakes and how to avoid them:

  • Bit skating at the start: Always dimple the mark with an awl before drilling.
  • Exit-side blowout: Clamp a sacrificial backer board to the back of the door, or finish the hole from the back after a pilot hole.
  • Inconsistent hole heights across doors: Use the same reference corner every time. Varying your starting point is the most common cause of misaligned pulls across a kitchen.
  • Drill-through into the cabinet frame: Keep the door clamped flat and away from the frame while drilling. Never drill a mounted door without confirming clearance behind it.
  • Overtightening screws: Snug by hand, then a quarter-turn with a screwdriver. Stripped threads in MDF or particleboard are difficult to repair.

Fixes when things go wrong:

When a hole is slightly off, fill it with wood putty, let it cure fully, sand smooth, and re-drill at the correct location. For badly placed holes on painted doors, a matching touch-up paint over the filled hole is usually invisible once hardware is installed. On veneer or laminate, a decorative plug or a larger piece of hardware can sometimes cover the error. If the damage is significant, ordering a replacement door is often faster and less expensive than a complex repair. Understanding common DIY door-replacement pitfalls before you start helps you recognize when a repair is worth attempting versus when a fresh door is the cleaner path.

Safety reminders: Secure the door before every hole. Wear eye protection. Keep both hands clear of the drill path, and never hold the door with your free hand directly behind the drill point.


When does ordering pre-drilled doors make more sense?

DIY drilling works well for small projects with the right setup. For larger or more complex refacing runs, ordering pre-drilled custom doors from Tdm-thedoormaker is often the faster and lower-risk path.

Order pre-drilled doors when:

  • You have more than 10–15 doors, where jig setup time and the risk of cumulative error outweigh the cost of pre-drilled options
  • The finish is veneer, painted, or thin laminate, where any visible touch-up will stand out
  • You want guaranteed C-C alignment across every door without calibration work
  • You do not have a quality jig or a flat workspace for clamping

Drill yourself when:

  • You have fewer than 10 doors and a reliable commercial jig
  • You are comfortable with the calibration and scrap-testing process
  • The material is solid wood or MDF, which tolerates minor corrections more forgivingly

Pro Tip: When ordering a full run of pre-drilled doors, always request one or two sample doors first. Confirm the hole placement, C-C, and finish quality before the full order ships.

For a broader look at when supplier-made doors save time and money versus full DIY, the cabinet replacement vs. refacing comparison lays out the decision clearly.


Key Takeaways

Precise hardware hole drilling comes down to one calibrated template, one reference corner, and a pilot-hole-first workflow applied consistently across every door.

Point Details
Confirm C-C before drilling Always use the hardware’s spec sheet; common U.S. spacings are 3", 3-3/4", 4", and 5".
One reference corner per door Aligning to the same corner every time is the main driver of visual uniformity across a full kitchen.
Pilot hole and backer board A 1/8" pilot hole plus a clamped sacrificial backer prevents bit wander and exit-side blowout.
Tolerance target Keep holes within ±1/32" (±0.8mm) of the target position for consistent alignment across all doors.
Tdm-thedoormaker pre-drilled option For runs of more than 10 doors or sensitive finishes, ordering pre-drilled custom doors removes the risk of irreversible errors.

The case for getting the setup right before you drill

Most DIYers underestimate how much of hardware drilling success happens before the drill ever touches the door. The template calibration, the scrap test, the reference corner — these steps feel like preparation, but they are actually the work. The drilling itself takes seconds.

What trips people up is treating each door as an individual measuring problem. The moment you shift to thinking about it as a single accurate template applied identically to every door, the whole project gets easier and faster. That mindset shift is what separates a kitchen that looks professionally done from one where you notice the pulls are slightly different heights every time you open a cabinet.

For sensitive finishes, the backer board is not optional. Veneer and thin laminate will chip on the exit side without support, and no amount of wood putty makes that invisible on a painted white door. If your project involves high-end finishes and you are not confident in your backer setup, a pre-drilled door from Tdm-thedoormaker is a straightforward way to avoid that risk entirely.


Tdm-thedoormaker’s pre-drilled custom doors save you the risk

Custom doors with pre-drilled hardware holes, sized to your exact C-C specification, are one of the most practical upgrades Tdm-thedoormaker offers for refacing projects. Every door is cut to 1/10,000" precision, and hardware holes are placed to your confirmed measurements before the door ships. You get consistent alignment across every door in the run without calibration work, scrap tests, or the risk of an off-center hole on a finished surface.

Tdm-thedoormaker

Tdm-thedoormaker’s ordering process covers the full workflow: measure, design, and order through an online configurator with step-by-step guidance and video tutorials. Add-ons include hinge drilling, sample doors for approval before the full order, and color swatches. If you want to confirm placement before committing to a full run, request a sample door first.

Start your DIY cabinet refacing project with pre-drilled doors and skip the guesswork entirely.


Useful sources

  • How to Install Cabinet Handles (Family Handyman) — industry recommendation for jig use on multi-door projects
  • How to Install Cabinet Handles (Home Depot) — drill bit sizing and scrap-test guidance
  • How to Install Drawer Pulls and Cabinet Knobs (Lowe’s) — masking tape technique and wood putty repairs
  • Free Printable Cabinet Hardware Template PDF (The Cabinet Craftsmen) — printable template calibration and jig threshold guidance
  • How To Drill Holes For Cabinet Hardware (Plank Hardware) — pilot hole sizing and drilling sequence
  • Cabinet Hardware Installation Template (Amerock) — C-C spacing reference for common U.S. hardware
  • Tdm-thedoormaker: custom pre-drilled cabinet doors — pre-drilled ordering, hinge drilling add-on, and sample door options
FROM THE SAME CATEGORY

Sep 8 2026 BY Ksenija Lebec, Blog

Landlords: inspect cabinets, run vacancy based ROI, budget $1,000–$13,000, and plan 1–3 day refacing installs with bulk order tips.

Build a Door MADE TO FIT YOU!

Best Kitchen Cabinet Colors for a Lasting Reface

Best Kitchen Cabinet Colors for a Lasting Reface

For most refacing projects, the best kitchen cabinet colors come down to four families: warm off-whites, natural wood tones, muted greens and blues, and deep moody tones reserved for islands or accents. The one-step rule: match your color family to your dominant fixed finishes — countertop material, flooring, and major trim — then let your lighting direction confirm the choice. A south-facing kitchen with white quartz counters almost always lands on a warm off-white. A north-facing space with oak floors tends to read better with a natural stain or a soft sage.

Quick picks by situation:

  • Warm off-white (BM White Dove, SW Alabaster): best all-around choice for resale and most lighting conditions
  • Natural wood stain or woodgrain finish: best for warmth, longevity, and transitional or farmhouse styles
  • Muted sage, eucalyptus, or soft blue-gray: best for contemporary and transitional kitchens with good natural light
  • Deep charcoal, navy, or forest green: best on islands or lower cabinets in well-lit spaces

Before you finalize any color: order a physical sample door and view it in your actual kitchen under both daylight and your artificial lighting. Tdm-thedoormaker’s sample door program exists precisely for this step. A swatch chip is rarely enough.


Table of Contents

What are the best kitchen cabinet colors for your space?

1. Warm off-whites

Warm off-whites are the most specified cabinet color family in 2026, and for good reason. They work across lighting conditions, pair with nearly every countertop material, and hold their appeal through multiple design cycles. Benjamin Moore White Dove and Sherwin-Williams Alabaster are the two most consistently recommended options. White Dove sits between stark and creamy, making it the safer pick when you have mixed whites in the kitchen (appliances, tile, trim). Alabaster runs warmer and suits homes with timber floors or Tuscan-era finishes.

Designer choosing warm off-white cabinet sample

Undertones matter more than most homeowners expect. A warm off-white can pull yellow, pink, or gray depending on your light source. Always compare your chosen white against your countertop and appliance whites before ordering doors.

Pro Tip: Place a large paint chip or peel-and-stick sample next to your countertop and backsplash at the same time. Whites that look identical on a fan deck can read very differently once they’re surrounded by your fixed finishes.

2. Natural wood tones

Wood-toned doors — whether a real wood veneer, a stained MDF, or a woodgrain thermofoil — are the strongest choice for longevity. Designers increasingly favor natural textures and architectural harmony over painted trend colors, and wood fits that philosophy well. A light oak or maple stain reads warm and current without committing to a color that could feel dated in five years. Darker walnut or espresso stains add depth and pair naturally with matte black or brushed brass hardware.

Wood tones also solve the undertone problem entirely. There’s no white-matching exercise, and they coordinate with most stone and quartz countertops without effort.

3. Muted greens and soft blue-grays

Muted sage, eucalyptus, and soft blue-gray have moved from accent choices to full-run cabinet colors in transitional and contemporary kitchens. Sherwin-Williams Evergreen Fog and Benjamin Moore October Mist are two of the most specified shades. In north-facing kitchens, these colors read almost as neutrals, which makes them far more livable than they appear on a paint chip. In south-facing spaces with strong natural light, they stay vivid enough to feel intentional without overwhelming the room.

Use these across a full perimeter run only when your countertop and flooring are relatively neutral. If your kitchen already has strong warm tones in the floor or backsplash, limit muted greens to an island or lower cabinets.

4. Deep moody tones for islands and accents

Charcoal, navy, and deep forest green work best as accent colors rather than full-kitchen commitments. Sherwin-Williams Naval and Benjamin Moore Hale Navy are the two most commonly specified navy options. On an island with a light quartz top and matte black hardware, either reads as grounded and sophisticated. Forest green in a well-lit kitchen adds richness without the visual weight of black.

The practical rule: deep tones on islands or lower cabinets only, unless your kitchen has exceptional natural light and high ceilings.

5. Two-tone combinations

Two-tone kitchens — typically a warm off-white on upper cabinets and a deeper tone on lowers or the island — are one of the fastest-growing design approaches in current planning activity. The split works because it grounds the kitchen visually while keeping the upper portion light and open. The most reliable combination: warm white uppers, natural oak or navy island, matte black hardware, and a light stone countertop. Keep the same hardware finish throughout to hold the room together.


Which finishes and paint standards hold up best on cabinet doors?

The 2026 professional standard for painted cabinet surfaces is waterborne alkyd enamel. These products combine the hard, leveled finish of traditional oil-based paint with lower VOCs and water cleanup. Two products dominate professional and DIY recommendations:

Product Type Typical Price per Gallon
Sherwin-Williams Emerald Urethane Trim Enamel Waterborne alkyd $85–$100
Benjamin Moore Advance Waterborne alkyd $55–$65

Sherwin-Williams Emerald Urethane Trim Enamel is the pro standard: it levels exceptionally well, resists chipping, and holds up to repeated cleaning. Benjamin Moore Advance is the more accessible option for DIYers, with easier application and fewer visible brush marks on flat cabinet faces.

For kitchen cabinets, a satin or semi-gloss sheen is the practical choice. Satin hides minor surface imperfections while remaining easy to wipe down. Semi-gloss offers slightly more durability and is the better pick for high-traffic kitchens with young children.

Factory-finished custom doors vs. site painting: Factory-applied finishes on custom doors are generally more durable than most DIY results. The controlled spray environment produces a smoother, more consistent surface than brush or roller application at home. For a refacing project, ordering factory-finished doors from Tdm-thedoormaker means you skip the prep, priming, and cure time entirely, and the finish arrives ready to install.


How do you choose the right color before ordering custom doors?

Work through these questions in order before committing to a color:

  1. What is your dominant fixed finish? Identify your countertop material and color, flooring tone, and major trim color. These don’t change, so your cabinet color needs to work with them.
  2. Which direction does your kitchen face? South and west-facing kitchens have warm, strong light. North and east-facing spaces need colors that don’t go flat or cold.
  3. How large is the space? Smaller kitchens benefit from lighter, warmer colors that reflect light. Large kitchens can absorb deeper tones without feeling closed in.
  4. What finish are your appliances? Stainless steel reads cooler and pairs well with whites and blue-grays. Matte black appliances suit warmer tones and wood finishes.
  5. What is your resale horizon? Selling within two years? Stick to warm off-whites or natural wood tones. Staying long-term? You have more room to choose a color you genuinely love.
  6. What cabinet profile are you ordering? Shaker doors read differently in a deep navy than in a warm white. Flat-front doors suit bolder colors; raised-panel profiles tend to favor softer tones.

Once you’ve answered those questions, use this decision flow:

  • Bright south-facing kitchen + white quartz counters → warm off-white (White Dove or Pure White)
  • Limited light + warm wood floor → natural stain or Alabaster
  • Contemporary kitchen + neutral stone → muted sage or soft blue-gray
  • Well-lit kitchen, want drama → deep navy or charcoal island

Ordering sample doors from Tdm-thedoormaker: Select your top one or two color and style combinations, then order a sample door in each. Hang the sample door on an existing cabinet, view it at morning, midday, and evening under both natural and artificial light, and photograph it in situ before placing your full order. Confirm your hinge hole placement and hardware finish at the same time.


Why 2026 design consensus favors longevity over trend colors

The clearest signal from designers and trend summaries this year is a shift away from seasonal fad colors toward palettes built around architectural harmony. Warm earthy neutrals have gained notable popularity in recent kitchen designs, while more experimental colors declined. The reasoning is straightforward: a kitchen reface is a significant investment, and colors that work with a home’s existing architecture and materials hold their appeal far longer than colors that track a single season’s mood board.

Trend-forward choices still make sense in specific contexts. An island, a powder room, or open shelving are lower-stakes surfaces where a bolder color can be refreshed more easily. Perimeter cabinets in a main kitchen are not. For those, the safer and more durable approach is a timeless base palette — warm off-white, natural wood, or a muted neutral — with trend accents introduced through hardware, lighting, or accessories.

Pro Tip: If you want a color that feels current without the risk of dating your kitchen, choose a muted version of a trend color. Sage green rather than bright olive. Dusty blue rather than cobalt. The muted version reads as architectural; the saturated version reads as seasonal.

Check out cabinet door design trends for a broader look at how door style and color interact in current kitchen designs.


How to test colors and what to expect for timeline and cost

Step-by-step color testing:

  1. Start with paint chip samples from Benjamin Moore or Sherwin-Williams to narrow your shortlist to two or three options.
  2. Buy large peel-and-stick paint samples (at least 12" x 12") and place them directly on your cabinet faces.
  3. Order a sample door from Tdm-thedoormaker in your top finish and style.
  4. Hang the sample door and view it at different times of day — morning, midday, and evening under your kitchen’s artificial lighting.
  5. Photograph the door in place and review the photos on your phone screen, which is how you’ll see it most often after the reface.
  6. Confirm hardware finish and hinge placement before placing the full custom order.

Timeline signals for refacing projects:

  • Custom door lead times vary by supplier; factory-finished doors typically ship within a few weeks of order confirmation.
  • Waterborne alkyd finishes require a full cure of several days before heavy use, relevant if you’re site-painting rather than ordering factory-finished doors.
  • A full kitchen reface (doors, drawer fronts, and hardware) can usually be completed in a long weekend once the doors arrive.

Cost signals: Sherwin-Williams Emerald Urethane Trim Enamel is typically $85–$100 per gallon, and Benjamin Moore Advance is $55–$65 per gallon. A typical kitchen requires 1–2 gallons for doors and drawer fronts. For a cost comparison between refacing and full replacement, the savings on a reface project are substantial. Following a proper sample-door workflow significantly reduces color-change requests after installation.

For a broader look at the cost and effort trade-offs, the budget kitchen cabinet upgrade guide covers affordable approaches in useful detail.


Quick color picks by homeowner goal

Goal Recommended Color Family Typical Finish Hardware Pairing
Resale-focused Warm off-white (White Dove, Pure White) Satin Brushed nickel or matte black
Cozy, traditional, or older home Warm off-white or natural wood stain Satin Oil-rubbed bronze or brass
Contemporary or modern Muted sage, soft blue-gray, or charcoal island Semi-gloss Matte black
Small or low-light kitchen Warmer whites (Alabaster, Cloud White) Satin Brushed nickel
Two-tone statement Warm white uppers + navy or forest green lowers Satin uppers, semi-gloss lowers Matte black

Key Takeaways

Matching your cabinet color to your dominant fixed finishes — countertop, flooring, and trim — is the single most reliable way to choose a color that holds up over time.

Point Details
One-step color rule Match your color family to your countertop, flooring, and trim before considering trends.
Top color families Warm off-whites, natural wood tones, muted greens/blues, and deep tones for islands.
Paint standards Sherwin-Williams Emerald Urethane ($85–$100/gal) and Benjamin Moore Advance ($55–$65/gal) are the 2026 benchmarks.
Test before ordering Order a sample door, hang it in your kitchen, and view it at multiple times of day before placing a full order.
Tdm-thedoormaker Offers 130+ colors, 30+ styles, precise custom sizing, and sample doors to validate your color choice before committing.

The case for slowing down before you commit

Color selection for a refacing project is the step most homeowners rush, and it’s the one that causes the most regret. The instinct is to pick a color from a chip, match it to a photo you saved online, and order. The problem is that a kitchen is a specific environment with its own light, its own fixed materials, and its own undertone relationships — none of which a chip or a photo can fully replicate.

What the data consistently shows is that a disciplined sample process eliminates most post-installation color regret. That’s not a marketing claim; it’s a practical reality that any experienced refacing professional will confirm. The extra week it takes to hang a sample door and live with it is far less disruptive than ordering a full set of doors in a color that looks wrong once it’s installed.

The other thing worth saying: longevity and personal preference are not opposites. A warm off-white or a natural wood tone isn’t a compromise — it’s a choice that tends to look better over time as your kitchen’s other elements evolve. The colors that age poorly are usually the ones chosen to match a single moment’s trend rather than the room’s actual character.


Tdm-thedoormaker makes color validation easy before you order

Choosing the right color is only half the decision. Getting it right on your actual doors, in your actual kitchen, is where most refacing projects succeed or stall. Tdm-thedoormaker gives you a direct path from color shortlist to confident order: order custom cabinet doors online in over 130 colors and 30+ styles, sized to 1/10,000" precision, with sample doors available so you can validate your choice before committing to a full set.

Tdm-thedoormaker

The online configurator walks you through style, color, sizing, and hinge options in a single session. If you’re still narrowing down colors, start with a sample door in your top two finishes. Hang them, photograph them, and confirm your hardware pairing. When you’re ready, your full order ships factory-finished and ready to install. Visit Tdm-thedoormaker to configure your doors or order a sample door today.


Useful sources

  • Benjamin Moore: White Paint Colors for Kitchen Cabinets
  • Kylie M Interiors: The 6 Best White Paint Colors for Cabinets
  • Good Housekeeping: Kitchen Cabinet Color Trends 2026
  • FacadeColorizer: Most Popular Kitchen Cabinet Colors 2026
  • DreamLine Cabinetry: Top Kitchen Cabinet Colors 2026
  • Smile Kitchens: Trending Kitchen Cabinet Colors 2026
  • Tdm-thedoormaker: Kitchen Refacing Color Trends for 2026
  • West Magnolia Charm: Best White Paint Colors for Cabinets
FROM THE SAME CATEGORY

Sep 8 2026 BY Ksenija Lebec, Blog

Landlords: inspect cabinets, run vacancy based ROI, budget $1,000–$13,000, and plan 1–3 day refacing installs with bulk order tips.

Build a Door MADE TO FIT YOU!