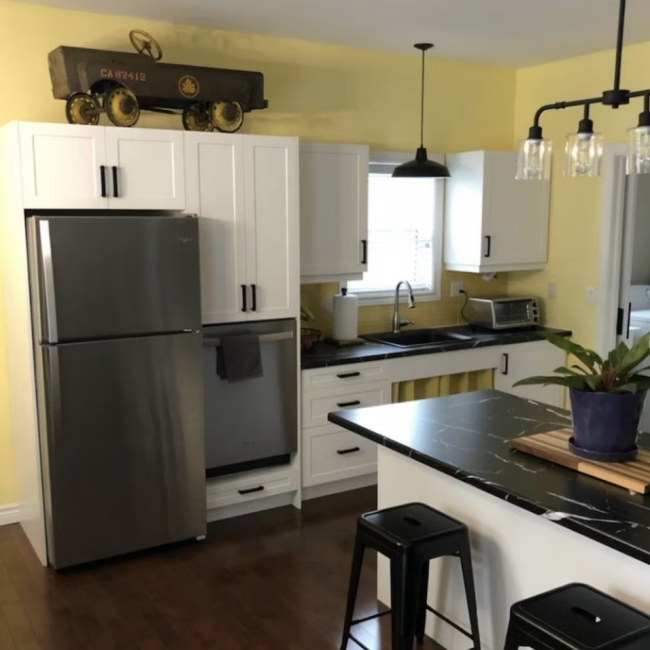

White kitchen cabinets are still the most popular choice of colour for homeowners. It will have your kitchen feeling bigger and brighter. White cabinet doors are a fresh colour that will keep your kitchen sparkling like new for years to come.
White cabinets are very versatile. First off, the handle and knob options are endless. There a many different colours and styles to choose from to complement your white cabinets. Secondly, you can add a pop of colour to an all-white kitchen with a contrasting kitchen island or colourful appliances. This White High Gloss kitchen has a very modern and fresh design. We love how it is accented with gold handles.
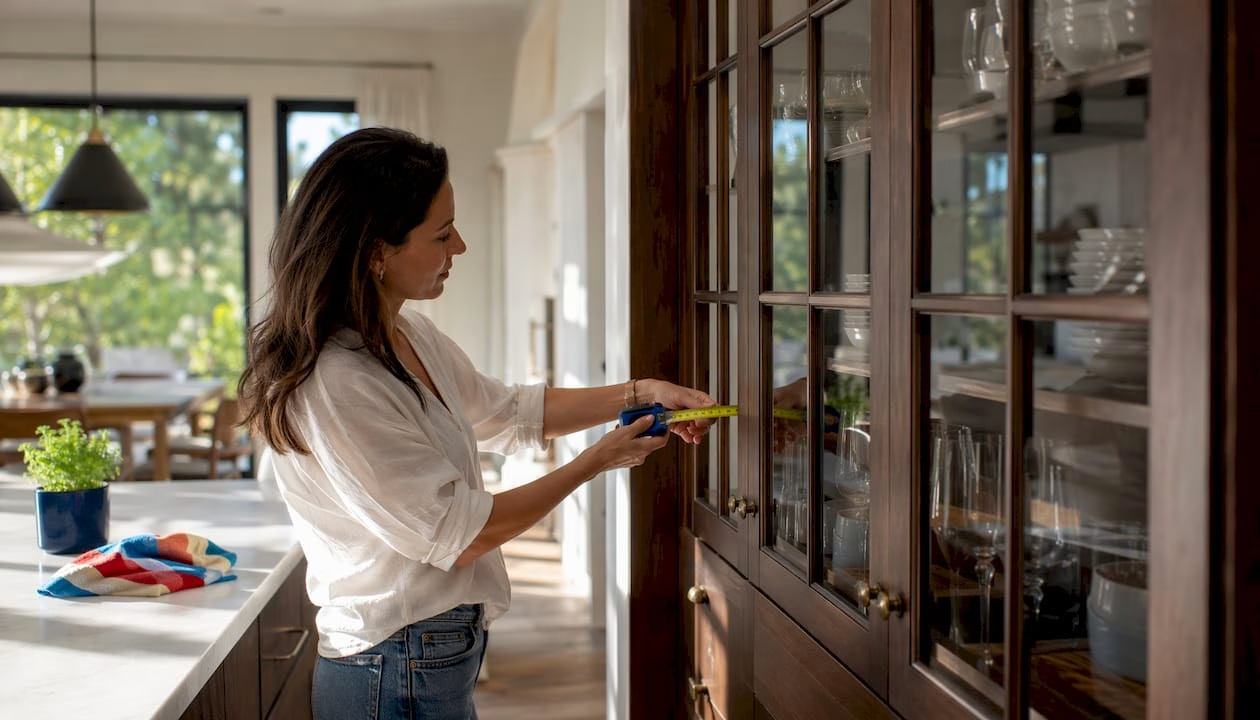
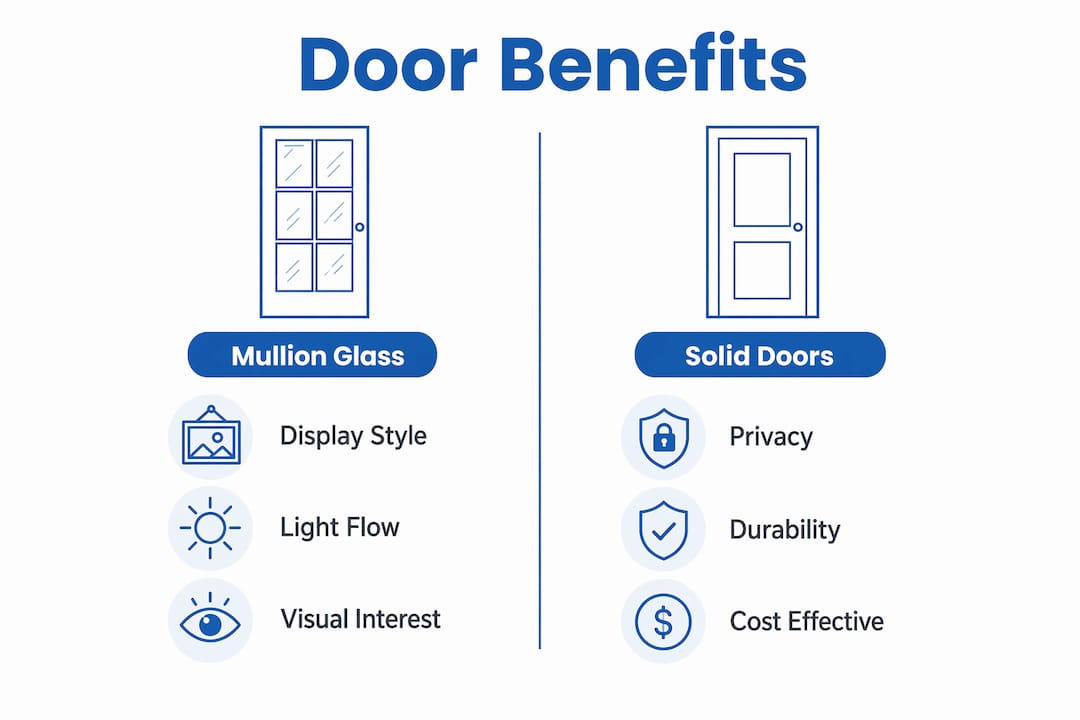
Adding mullions and frames can give your white kitchen an extra wow factor. There are a variety of inserts to choose from, like glass, frosted glass, or a mirror. Glass frames are great for displaying fancy tableware. This Nordic White kitchen features the Darby frame with a mirror insert.
Nordic White is one of our best-sellers. Homeowners love this finish because it’s crisp and clean. It’s not a stark white. The colour does have a touch of warmth to it, making it a very inviting colour.
If white cabinets are too stark for your taste, switch things up with a white wood grain. This classy black and white kitchen features Ash White. This colour adds a bit of detail to your cabinet door and also feels like wood.
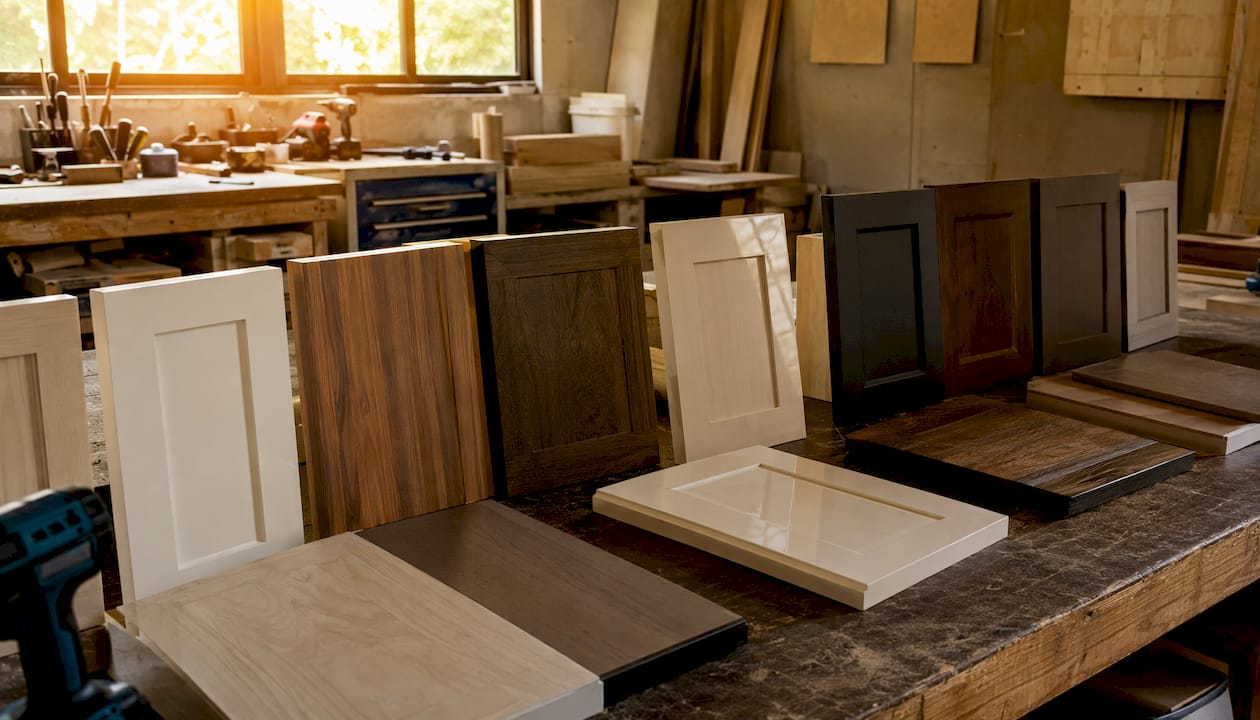
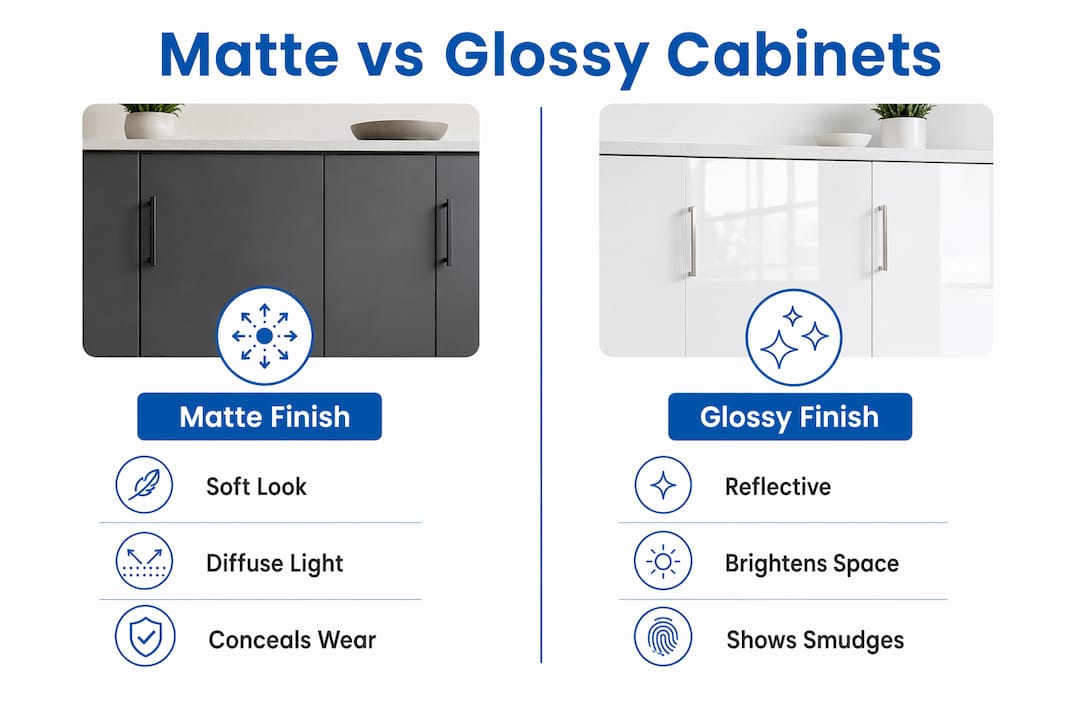
At The Door Maker, we have many shades of white to choose from, like bright whites, white with a hint of grey undertone, or off-whites. We also have different finish options, like textured, matte, wood grain, and high gloss to suit your taste.
Consider the mood you wish to create in your kitchen. Many homeowners opt for creamy white colors paired with shiny silver accents, which can provide a clean and modern appearance. It’s also important to reflect on how the kitchen remodel aligns with your home’s overall personality. The kitchen should express your unique style and evoke the emotions you want to feel when you enter the room.
Lighting in your kitchen
The lighting in your kitchen plays a vital role in how colors appear. A small kitchen with low light combined with dark colors may come across as dreary. On the other hand, ample lighting can enhance both the space and the colors within it. When selecting a color for your kitchen cabinet doors, take into account the natural and artificial lighting available in your kitchen.
Scope of the Remodel in your kitchen
Consider what elements you are remodeling in your kitchen. Are you updating everything or just the cabinet doors? Viewing the kitchen remodel as a cohesive project can help in making color decisions. Think of the room as a collection of smaller art pieces that, when combined, create a beautiful overall design. The goal is to ensure that all components work together harmoniously.
Wall Color vs cabinet color
It’s essential to choose a cabinet color that complements the wall color. The cabinet doors should coordinate with other elements in the room to create a unified look. Therefore, consider the existing wall color as you select a color for your kitchen cabinet doors.
At the Door Maker, you’ll find a wide variety of kitchen cabinet doors to choose from, including various door profiles, mullions, and frames. As a leading cabinet door manufacturer in Ontario, we pride ourselves on providing cost-effective solutions that are easy to use. Contact us today to request a quote!
When renovating or updating your kitchen with Custom Cabinet Doors one detail that can significantly impact both style and usability is the choice between handles and knobs for your cabinet doors. These seemingly small hardware pieces do more than just open doors—they set the tone for your space and influence daily convenience. Whether you’re outfitting a brand-new kitchen or giving your cabinets a fresh look, choosing the right hardware is a crucial decision for Canadian homeowners.
Handles (sometimes called pulls) are typically elongated pieces that attach at two points, allowing you to grip with your whole hand. Knobs are smaller, round or square fixtures fastened with a single screw, suitable for grasping with your fingers.
Handles: Best for large doors or drawers; offer a modern or streamlined look.
Knobs: Ideal for smaller doors; often suit classic or vintage styles.
Factors to Consider When Choosing Hardware
Style and Design
Cabinet hardware should complement your kitchen’s overall aesthetic. For example, sleek stainless steel handles may suit a contemporary kitchen in downtown Toronto, while classic brass knobs can enhance a more traditional Vancouver home. Consider your cabinet colour and finish, as well as the look of your appliances and fixtures.
Functionality
Think about how you use your kitchen. Handles are easier for opening heavy drawers, while knobs might be sufficient for lighter cupboards. Handles can also be more accessible for children or those with limited dexterity.
Size and Placement
Larger handles can add drama and ease of use to wide drawers, whereas smaller knobs work well on upper cabinets. Always measure your cabinet doors or drawers to ensure the hardware is proportionate and doesn’t look awkward.
Material and Finish
Popular materials in Canada include stainless steel, brushed nickel, and matte black. For a cottage or rustic vibe, consider wood or ceramic. Choose a finish that resists fingerprints and is easy to clean, especially in high-traffic areas like the kitchen.
Budget
Prices range widely—knobs can be as affordable as a loonie, while designer handles might cost several toonies each. Don’t forget to factor in the cost if you’re updating all cabinet doors and drawers, not just a few.
Mixing and Matching
Many Canadian designers recommend mixing knobs and handles for a custom look. For example, use handles on lower drawers for easier access and knobs on upper cabinets for a balanced, cohesive style. Just ensure the finishes and styles coordinate well together.
Use a template or jig to ensure consistent placement on every door or drawer.
Measure twice, drill once—uneven hardware is a common mistake.
Consider hiring a professional installer for large projects to guarantee a polished finish.
Conclusion
Choosing the right handles or knobs for your cabinet doors can refresh your kitchen’s look, improve everyday function, and even boost your home’s value. Take your time to explore options, test out samples in your space, and don’t hesitate to blend styles for a personalized touch. Whether you’re in Halifax or Calgary, thoughtfully selected hardware makes a world of difference in your kitchen.
Choosing Your Kitchen Style: From Contemporary to Traditional
The kitchen is often considered the heart of the home, and choosing the right style can reflect both your personality and lifestyle. With so many options, from sleek contemporary designs and cozy farmhouse vibes to rugged industrial looks and elegant traditional spaces, it’s easy to feel overwhelmed. So, how do you decide which kitchen style is right for you?
Contemporary Kitchens: Clean Lines and Modern Flair
If you love clutter-free spaces, integrated appliances, and a minimalist approach, contemporary kitchens might speak to you. These kitchens often feature smooth surfaces, neutral tones, and innovative technology, making them both stylish and functional for modern living.
Farmhouse Charm: Warmth and Welcome
Prefer a kitchen that feels warm, inviting, and lived-in? The farmhouse style could be your match. Think shaker cabinets, apron sinks, and natural materials like wood and stone. Add open shelving and vintage accents for a true Canadian homestead feel—perfect for gathering around with family and friends.
Industrial Edge: Urban and Unfinished
For those who appreciate an edgier aesthetic, consider an industrial kitchen. Exposed brick, stainless steel, and concrete elements combine to create a space that’s both raw and sophisticated. This style is ideal for open-concept lofts or anyone who wants a hint of city chic in their home.
Chic and Elegant: Refined Living
Chic kitchens are all about timeless elegance. Glossy surfaces, statement lighting, and high-end finishes bring a feeling of luxury and refinement. If you lean towards the finer things and want your kitchen to make a statement, this style might be for you.
Traditional Appeal: Classic and Enduring
Traditional kitchens never go out of style. Featuring detailed cabinetry, classic tiles, and warm colour palettes, they evoke a sense of comfort and permanence. This style is ideal if you appreciate enduring design and want your kitchen to feel timeless.
What’s Your Kitchen Style?
Choosing a kitchen style is a personal journey. Consider what feels comfortable and inspiring to you, and don’t be afraid to mix elements from different styles for a truly custom look. Whether you’re in love with the crisp lines of contemporary design, the warmth of farmhouse, the boldness of industrial, the sophistication of chic, or the tradition of classic kitchens, there’s a perfect kitchen waiting to come to life in your home. So, what’s your style?
Build a Door (BaD). Build Your Dream Kitchen, Closet, Pantry, or Home Office with Style and Flexibility
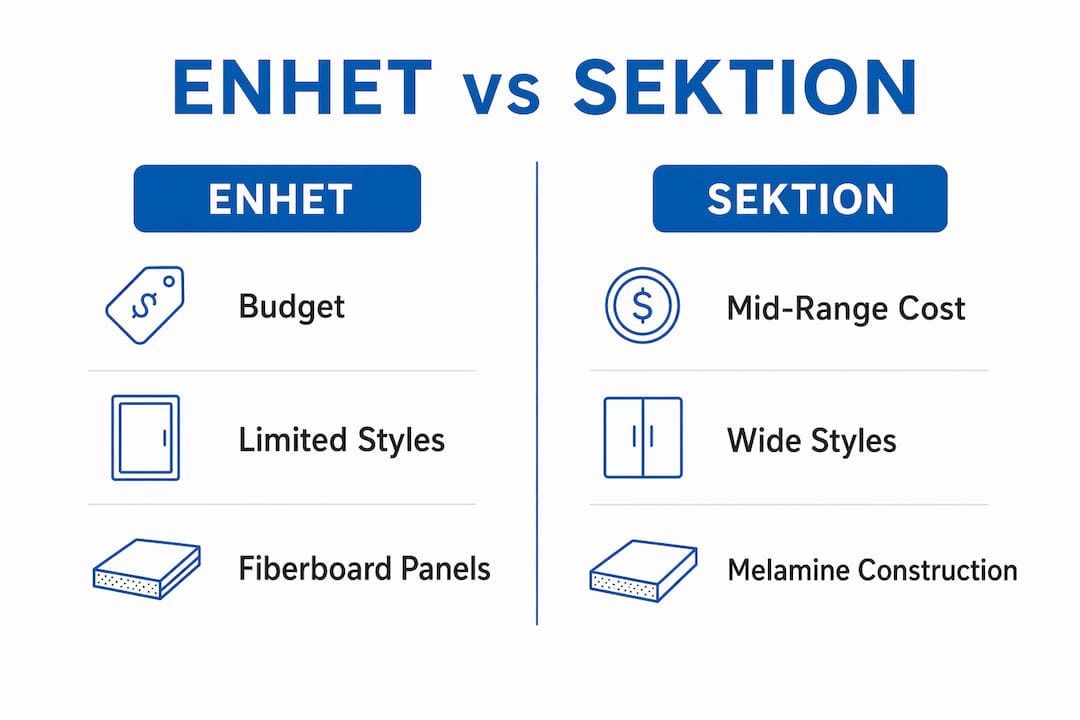
Ksenija Lebec states, renovating your home doesn’t have to break the bank. When you combine the affordability and versatility of Ikea cabinets with the endless customization options from The Door Maker. Whether you’re planning a sleek new kitchen, an organized closet, a practical pantry, or a stylish home office, this approach gives you the best of both worlds. Solid, modular cabinetry and stunning, tailor-made doors in a vast array of colours and finishes.
Step 1: Plan Your Space with Ikea Cabinets
Begin by designing your layout using Ikea’s highly-regarded cabinet systems. SEKTION for kitchens, PAX for closets, and BESTÅ for media and home office units. https://www.ikea.com/ca/en/cat/ These systems offer exceptional flexibility, enabling you to mix and match sizes and configurations to maximize every corner of your home. Utilize Ikea’s online planning tools to visualize your space effectively and ensure you’re optimizing every centimetre.
Step 2: Order Your Cabinet Boxes from Ikea
Once you’ve finalized your layout, order only the cabinet boxes, shelves, and hardware from Ikea. Skip the doors and drawer fronts for now; you’ll add your own custom flair later. This approach simplifies your installation since Ikea cabinets are engineered for easy assembly and mounting. Making the process straightforward for both DIYers and professionals.
Step 3: Choose Custom Doors from The Door Maker
The Door Maker sets itself apart by offering a much larger selection of cabinet doors than Ikea, with more colours, finishes, and styles to match any décor. Even better, their doors are fully customizable in size, ensuring a perfect fit for any Ikea cabinet model and even unique layouts. Browse their catalogue for modern, classic, or shaker-style doors, and pick from dozens of trending hues and textures to create a truly bespoke look.
Step 4: Order and Install Your Custom Doors
Measure your Ikea cabinet frames with precision—The Door Maker allows you to order the exact sizes you need online without any hassle. Once your doors arrive, installation is a breeze; most options come pre-drilled to fit Ikea’s hinge systems, ensuring you can attach them swiftly and effortlessly. Complete the look with coordinating panels, toe kicks, and trim for a polished, built-in appearance.
Why Choose This Approach?
Cost-Effective: Save on cabinet boxes while investing in premium, custom doors for a high-end look.
Custom Style: Access a broader palette of colours and finishes, including Canadian-inspired options, beyond Ikea’s offerings.
Perfect Fit: Enjoy truly made-to-measure solutions for kitchens, closets, pantries, or home offices of any size.
DIY-Friendly: Modular cabinet assembly and pre-drilled door options mean you can take charge of your project.
Get Started Today
Refresh your space? Start by mapping out your layout with Ikea cabinets. Unleash your creativity with custom doors from The Door Maker. Whether you’re dreaming of a bold kitchen, an organized wardrobe, a functional pantry, or a productive home office, this combination delivers the look and function you want—Canadian style, flexibility, and value included.
Countertop or Cabinet Door Style: What Comes First in Kitchen Design?
Making Smart Choices for a Cohesive and Beautiful Kitchen
Renovating a kitchen is one of the most exciting yet challenging home improvement projects according to Ksenija Lebec. With countless decisions to make, two of the biggest questions homeowners face are: Should you choose your countertop or your cabinet door style first? And should you start with colours or the overall design scheme? This blog will explore these pivotal choices, offering practical advice to help you create the kitchen of your dreams—whether you’re in Toronto, Vancouver, or anywhere across Canada.
Countertop vs. Cabinet Door Style: Which Should You Choose First?
The Case for Starting with Cabinet Door Style
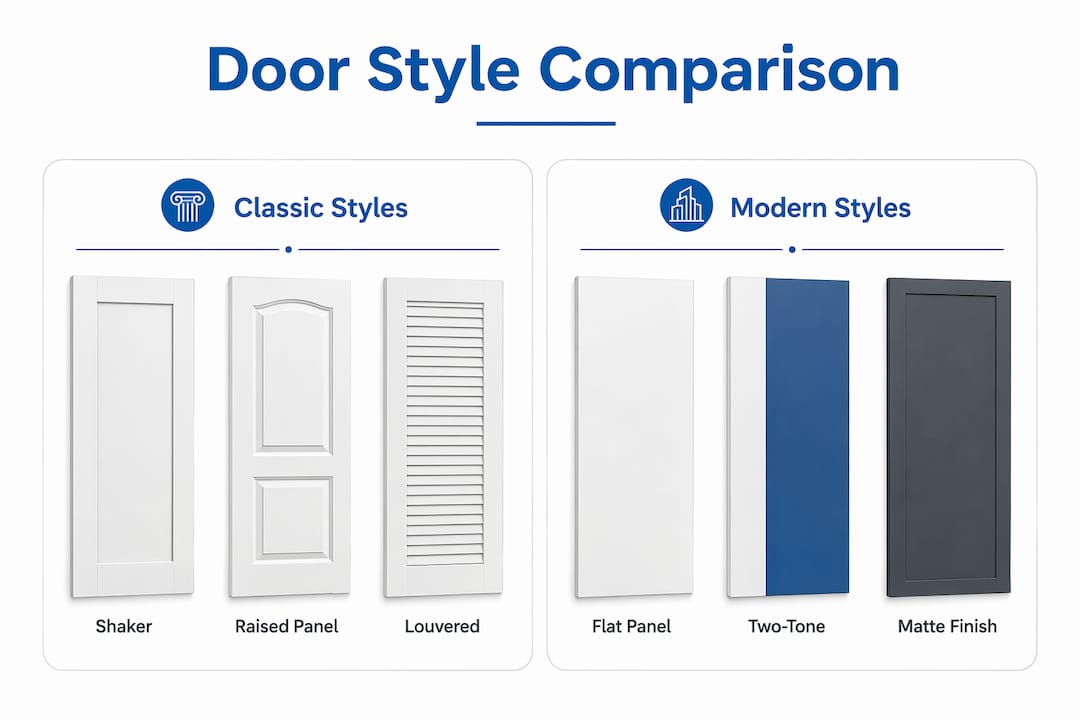
Cabinets are often the largest visual element in the kitchen, covering significant wall space and forming the backbone of your design. Doors The style of cabinet doors—whether shaker, flat-panel, or raised—sets the tone for your kitchen’s overall aesthetic. Choosing custom cabinet doors first can simplify subsequent decisions, as it narrows down suitable countertop materials and colours. For instance, a modern flat-panel cabinet pairs well with sleek quartz or granite, while a more traditional door style might suit natural stone or butcher block.
Why Countertops Might Lead the Way
On the other hand, countertops are a major investment and play a critical functional role. The material—be it quartz, granite, laminate, or solid surface—often dictates not only colour but also the feel and durability of the kitchen. If you fall in love with a particular countertop, especially one with distinct veining or patterns, you may prefer to build your cabinet style and colour choices around it. This approach is popular with homeowners who want the countertop to be the kitchen’s showpiece.
A Balanced Approach
Ultimately, the best method is to consider both elements together. Visit showrooms and bring samples home to see how countertop materials look against different cabinet doors. In Canadian kitchens, it’s common to select a cabinet style first for its broad design impact, then choose a countertop that complements it. However, if you have a strong preference for a specific countertop material or colour, let that lead the way and select cabinets that harmonize with it.
Colours or Scheme of Design: What’s the Starting Point?
Start with a Design Scheme
Before diving into colours, it’s wise to establish your overall design scheme. Do you prefer a traditional, transitional, or contemporary kitchen? Are you drawn to a farmhouse look with open shelving and wood finishes, or do you want something sleek and modern with minimalist cabinetry and bold surfaces? This overall vision will guide your choices and ensure a cohesive outcome.
Choosing Colours: Practical Tips for Canadian Homes
Once you have your design scheme, narrow down your colour palette. Canadian homes often feature neutral hues—whites, greys, and taupes—to maximize light and create a welcoming feel, especially during our long winters. Then add accent colours with details like backsplashes, hardware, or even a painted island. If you’re undecided, start with cabinet and countertop samples in your chosen scheme and experiment with paint swatches under different lighting conditions. Remember, natural light varies across Canada—what looks great in a Vancouver condo may feel different in a Halifax bungalow.
Putting It All Together
Designing a kitchen is a balancing act. Begin by defining your overall design scheme, then decide whether your priority is the cabinets or the countertop. Let one element guide your choices but always consider how the two interact. Finally, choose a colour palette that suits your style, your home, and your locale. Whether you start with cabinets or countertops, colours or scheme, the key is to make thoughtful choices that create a harmonious and functional space you’ll love for years to come.
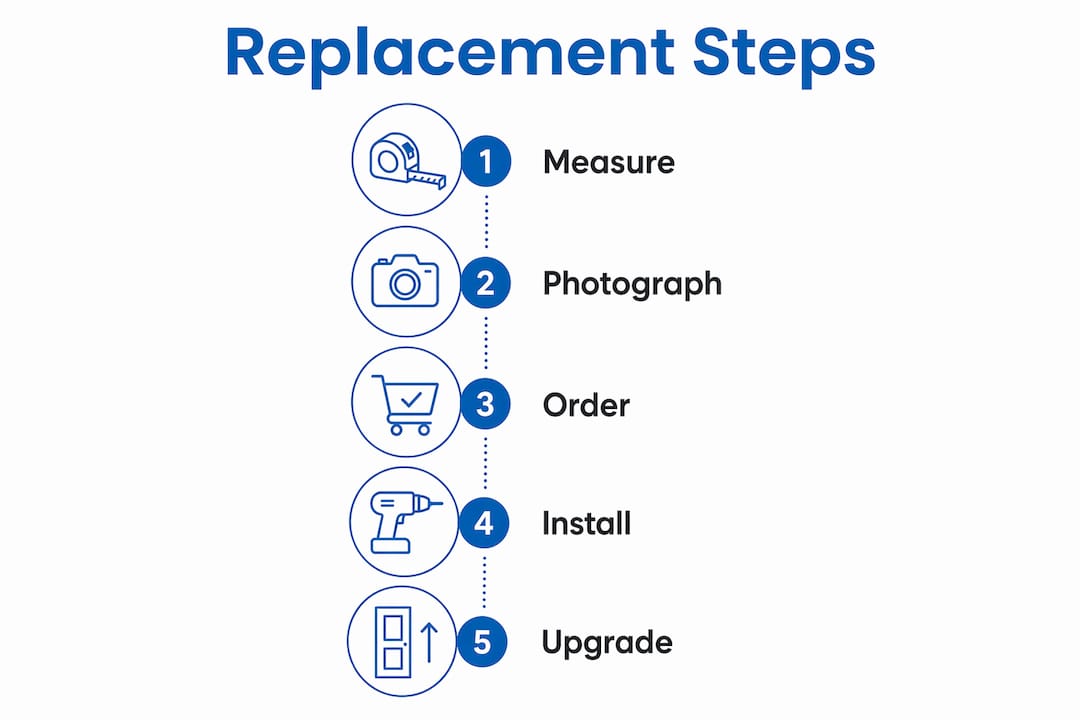
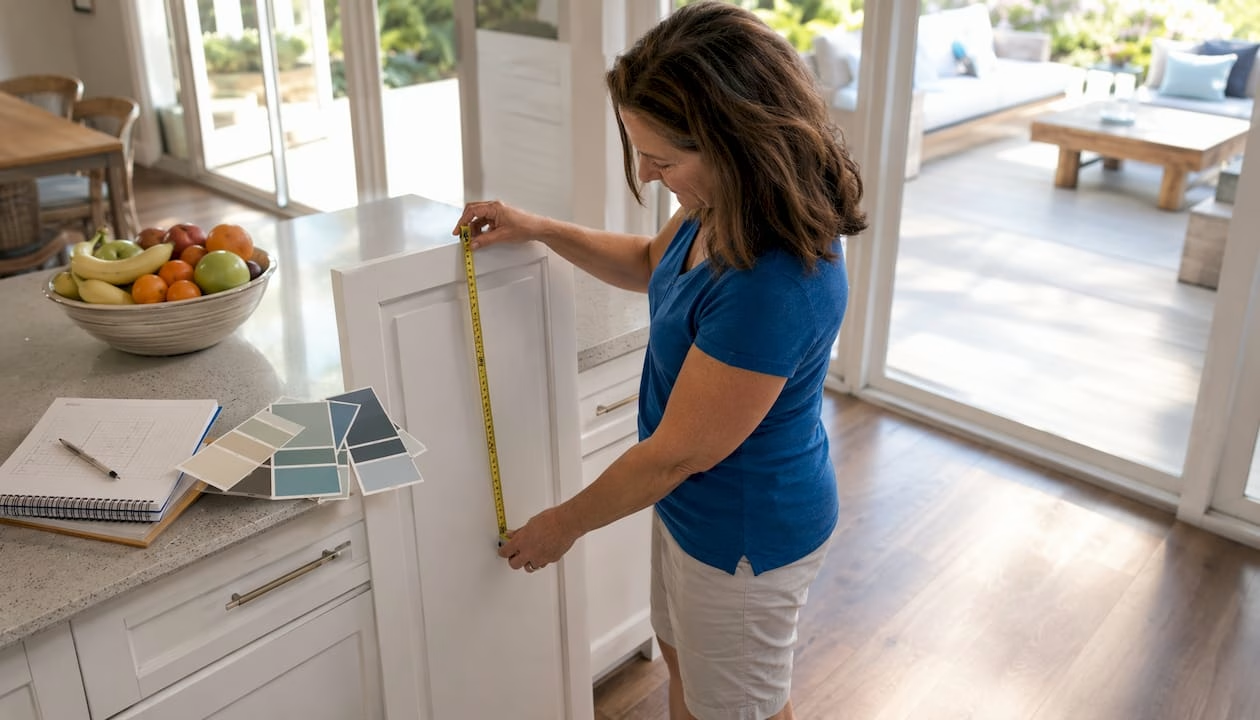
Alright, before you even think about measuring, let’s get your gear in order. David Adrian thinks a little prep work here goes a long way and honestly makes the whole process smoother and more accurate.
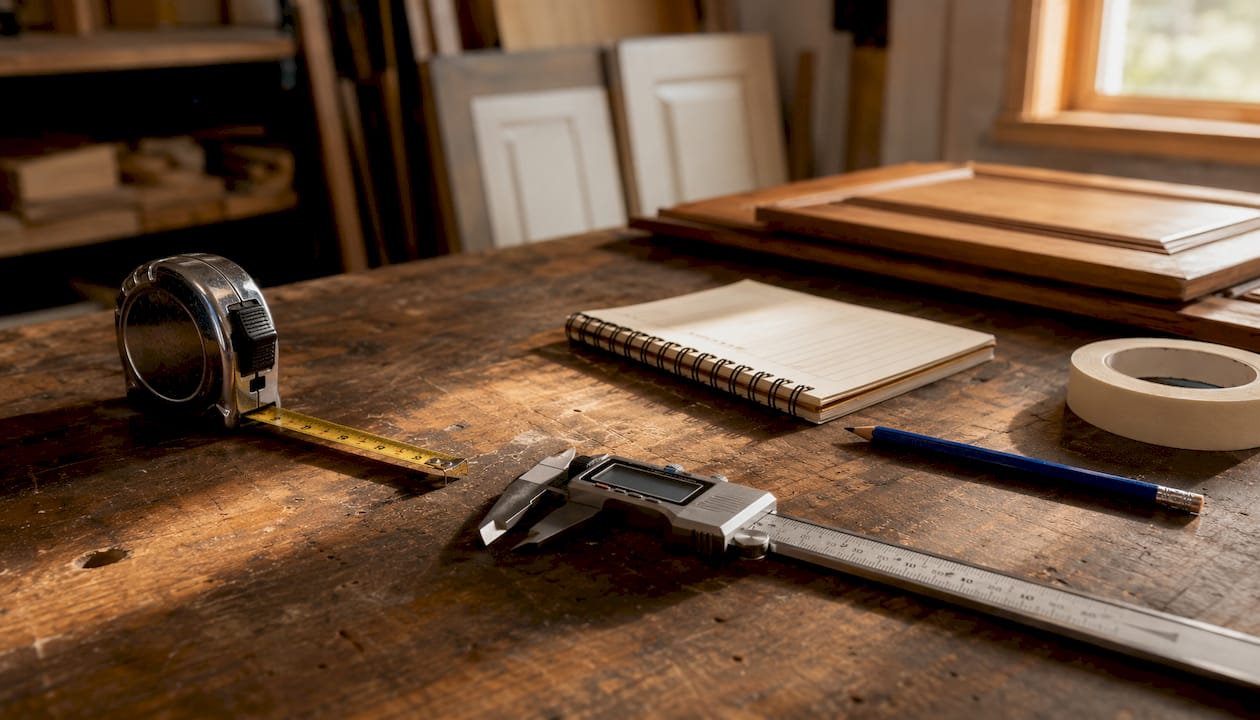
Gathering the Right Tools for the Job
A few minutes of organization now will save you from a ton of frustrating do-overs later. You only need a few simple things, but they need to be the right things.
A flimsy, old tape measure just won’t cut it. They can sag or even stretch, which is a recipe for disaster when you’re ordering custom doors. Your most important tool is a high-quality steel tape measure. It gives you the rigidity you need for a perfectly straight, precise reading, especially when you’re measuring a wide opening.
Next, grab a simple notepad and a pencil. It’s tempting to just jot numbers down on a scrap of wood or punch them into your phone, but don’t. A dedicated notepad keeps your width and height measurements organized and easy to read, which seriously cuts down on the chance of mixing them up. For example, a note like “Upper Cabinet #1: 18″ W x 32″ H” is much clearer than a random “18×32” in your phone’s notes.
Pro Tip: Always double-check if your cabinet frames are square. This is a big one, especially in older homes where things have had time to settle. Just hold a small level against the frame—it’ll tell you instantly if it’s plumb. This quick check can save you a headache and explain why you might be getting different measurements at the top and bottom of an opening.
Here’s a quick rundown of what you’ll want on hand:
Steel Tape Measure: This is non-negotiable for accurate, consistent readings.
Notepad & Pencil: To keep every measurement clear and organized.
Straight Edge or Level: Perfect for checking if frames are square and helping you draw straight lines if needed.
I once had a client who used a fabric sewing tape for their measurements. It sounds silly, but it happens. Their numbers were off by nearly a quarter-inch, and that tiny error made their beautiful custom doors completely unusable. Using the right tools is truly the first—and most important—step to getting this project done right.
How to Measure Existing Doors for a Perfect Match
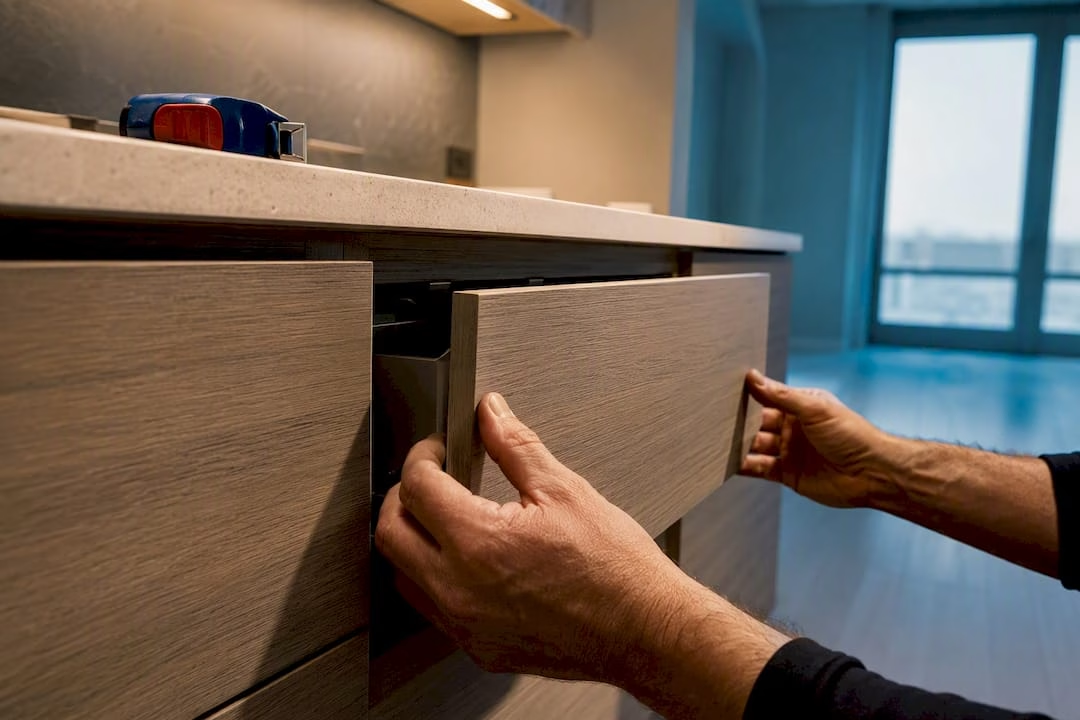
If you’re already happy with how your current doors fit and you’re just looking for a style upgrade, measuring your existing doors is a fantastic shortcut. But there’s definitely a right way to do it. The biggest mistake I see people make is trying to measure a door while it’s still hanging on the hinges—it’s a surefire way to get inaccurate numbers.
To get a perfect measurement, you have to take the door off first. Lay it down on a flat, stable surface like a workbench or even a clean spot on the floor. This gets rid of any sag from the hinges and guarantees your tape measure lies perfectly straight. Once it’s flat, carefully measure the exact height and width down to the nearest 1/16th of an inch.
Don’t Forget Hinge Placement
Getting the height and width is only half the battle. The most critical step—and the one people often forget—is to measure for your hinge placements. If you skip this, your new doors won’t line up with the existing hinge holes on your cabinet frames, and that’s a massive headache you don’t want.
You’ll need to record the distance from both the top and bottom edge of the door to the center of each hinge cup hole. That’s the large, round recess where the hinge itself sits.
For example, if your top hinge cup is 3 inches from the top edge of the door, and the bottom hinge is 3 inches from the bottom edge, you need to write those exact numbers down. This precision is what turns the project into a seamless swap instead of a frustrating struggle.
This step is an essential part of the process when you want to transform your kitchen by replacing cabinet doors without the pain of redrilling your cabinet frames. A few extra moments of careful measuring here will pay off big time.
To make sure you don’t miss anything, just follow this simple checklist for each door:
Door Width: Measured flat, to the nearest 1/16″.
Door Height: Measured flat, to the nearest 1/16″.
Top Hinge: Distance from the top edge to the center of the hinge cup.
Bottom Hinge: Distance from the bottom edge to the center of the hinge cup.
Capturing these four key dimensions ensures your new custom doors will be a perfect match, ready to hang on your existing cabinets with zero issues.
Common Measuring Mistakes and How to Avoid Them
Even with the best intentions, a few simple mistakes can derail your entire cabinet door project. We’ve seen it happen. Let’s walk through the common traps people fall into and, more importantly, how you can sidestep them for a flawless result. These small details are often the difference between a professional finish and a frustrating redo.
One of the most frequent slip-ups is just mixing up the width and height measurements on your notepad. It sounds basic, but in the middle of a project, it happens more than you’d think. Always, always label your numbers clearly—something like “15” W x 30” H“—to avoid any confusion when it’s time to place your order.
Overlooking the Details
Another classic mistake is forgetting to correctly account for your overlay or necessary clearance gaps. We once had a homeowner who measured perfectly for a set of inset doors but forgot to subtract the crucial 1/8-inch clearance gap on all sides. The result? Beautiful new doors that were just slightly too big and wouldn’t close. A real headache.
The old carpenter’s mantra, “Measure twice, cut once,” is the golden rule here. Before you finalize anything, do yourself a favor and double-check every single number on your list against the actual cabinet frames. This one final check is your best insurance policy against costly errors.
Getting these measurements right is absolutely vital. The global cabinet door market was valued at around USD 17 billion in 2025, a figure that shows just how massive this industry is. Improper sizing doesn’t just affect your project; it contributes to waste and installation issues that have a ripple effect.
Avoiding these common pitfalls is a huge step toward a successful project. For those looking to dive deeper, our guide on refacing kitchen cabinet doors offers even more tips that can help ensure a smooth process from start to finish.
Answering Your Cabinet Measurement Questions
Even with the most detailed guide, there are always a few questions that pop up right when you think you’re done measuring. We’ve been there. To help you get over that final hurdle, we’ve pulled together the most common questions we hear from customers and installers alike.
To make life easy when using Ikea cabinets.
Order the doors according to Ikea’s catalogue guide.
Ready to turn those perfect measurements into the perfect doors? At The Door Maker, our “Build a Door” tool makes it simple to design the exact custom cabinet doors you’ve been imagining. Start your project today at https://tdm-thedoormaker.com.
Testing Your Measurements and Installation Skills the Practical Way
When renovating a kitchen, updating a bathroom, or simply refreshing your storage spaces, ordering cabinet doors is a key step. Many suppliers offer sample doors to help you judge finish and style. But is a sample door really the best option for do-it-yourselfers or those looking for a hands-on trial? In most cases, choosing a real, small cabinet door is far more valuable than a sample piece that may never see actual use.
The Limitations of Sample Doors
Sample doors are designed to showcase material, colour, and style according to Ksenija Lebec. Typically, they’re smaller than a standard cabinet door—often just a segment or a panel. While they may help with colour matching and aesthetic decisions, they fall short in providing a true sense of the final product’s fit and function. After all, you’re not installing a panel—you’re installing a full door.
Why Actual Cabinet Doors Are Superior
Real-World Measurement Testing
Ordering a real small cabinet door lets you verify your measuring skills in a tangible way. You can check the fit against your cabinet frame, confirm hinge placement, and ensure the door opens and closes smoothly. This is a critical step, especially for first-time installers or those working with tricky, older cabinetry. Unlike a sample, a real door gives you the opportunity to identify and correct measurement errors before committing to a full order.
Installation Practice
Installing a cabinet door isn’t just about screwing it into place. You need to align hinges, check for level, and ensure the door sits flush with neighbouring cabinets. With a real door, you can practice these installation steps and develop confidence in your abilities. A sample can’t give you this experience.
Immediate, Practical Use
Unlike samples that often get tossed in a drawer or left on a shelf, a small cabinet door can be put to real use. Whether you fit it to a small cabinet, use it as a test piece, or even repurpose it later, you get more value for your money.
Validating Supplier Quality
By ordering a true cabinet door, you can assess the manufacturer’s craftsmanship, finish quality, and hardware compatibility. You’ll know exactly what you’re getting before you invest in a full set of doors for your project.
How to Order and Test a Small Cabinet Door
When placing an order, select the smallest cabinet door size that matches your project specs. Use your standard measuring tools—metric tape measures are best for accuracy—and follow supplier instructions for hinge boring and hardware placement. After receiving the door, install it on a cabinet that closely matches your target cabinets. Take note of any fit issues, installation challenges, or adjustments needed. This trial run can save you stress and money in the long run.
Conclusion
While sample doors have their place, they’re no substitute for the hands-on learning and confidence you gain from ordering and installing a real cabinet door—even a small one. By putting your measuring and installation skills to the test, you ensure a smoother renovation or upgrade, and you’re less likely to end up with costly mistakes. In the world of home improvement, practical experience is always better than a pretty sample.
When it comes to home renovations, especially in kitchens and bathrooms, cabinet doors play a crucial role in both the aesthetics and functionality of the space. (Medium Density Fiberboard) MDF cabinet doors have gained popularity due to their affordability, versatility, and durability. Whether you’re a homeowner planning a DIY project or working with a professional, understanding the advantages of choosing MDF cabinet doors can help you make an informed decision.
Medium Density Fiberboard, or MDF, is an engineered wood product made by breaking down hardwood or softwood residuals into wood fibers. These fibers are then combined with wax and a resin binder under high pressure and heat to form panels. MDF is denser than plywood and offers a smooth, uniform surface that is perfect for cabinet doors.
Key Advantages of MDF Cabinet Doors
Cost-Effectiveness
In David Adrian’s experience one of the most significant advantages of MDF cabinet doors is their cost-effectiveness. MDF is generally less expensive than solid wood, making it an ideal choice for budget-conscious homeowners. Despite its affordability, MDF does not compromise on quality, offering a comparable aesthetic to more expensive materials.
Versatility in Design
MDF cabinet doors provide great design versatility. They can be easily cut, routed, and customized to fit your specific design needs, whether you’re looking for traditional or modern styles. This flexibility makes MDF a popular choice for custom MDF cabinets, allowing homeowners to achieve a bespoke look without the high costs associated with custom solid wood doors.
Smooth Surface Finish
The smooth and uniform surface of MDF makes it an excellent substrate Build a Doors 130 plus thermofoil finishes. Unlike solid wood, MDF does not have grain, which means it can be painted or veneered to achieve a flawless finish. This feature is particularly appealing for those looking to create modern MDF doors with sleek, clean lines.
Durability and Stability
MDF is known for its durability and stability. Unlike solid wood, MDF does not warp or crack with changes in humidity and temperature, making it a reliable choice for kitchen and bathroom environments. Its density also provides a solid, substantial feel, similar to that of real wood, which is why solid MDF cabinet doors are a preferred option for many.
Eco-Friendly Option
For environmentally-conscious homeowners, MDF offers an eco-friendly alternative. MDF is made from wood fibers and resin, often utilizing wood byproducts that would otherwise go to waste. By choosing MDF cabinet doors, you’re supporting the use of sustainable materials.
Comparing MDF to Other Materials
MDF vs. Solid Wood
While solid wood is a traditional choice for cabinet doors, it comes with a higher price tag and potential for warping and cracking. MDF offers a more affordable and stable alternative, with a smooth surface that can mimic the appearance of painted wood.
MDF vs. Plywood
Plywood is another common material used for cabinet doors. While it is stronger than MDF, it doesn’t provide the same smooth finish. MDF’s uniform surface is better suited for painted finishes and intricate designs, making it a popular choice for modern styles.
DIY and Customization Opportunities
For DIY enthusiasts, MDF cabinet doors offer an excellent opportunity for customization. Raw MDF cabinet doors can be easily sanded and painted to match any interior design scheme. Whether you’re looking to add a splash of color or prefer a classic white finish, MDF provides a blank canvas for creativity.
Where to Find MDF Cabinet Doors
MDF cabinet doors are widely available and can be purchased from home improvement stores, specialized cabinet manufacturers, and online retailers. For those located in Canada, MDF cabinet doors Canada suppliers offer a range of options to suit different design preferences and budgets.
Conclusion
MDF cabinet doors offer numerous advantages that make them a popular choice for homeowners and professionals alike. Their affordability, design versatility, smooth finish, and durability make them an excellent option for any home renovation project. Whether you’re looking to create custom MDF cabinets or simply update your kitchen with modern MDF doors, the benefits of MDF are clear. By choosing MDF, you’re investing in a material that delivers both style and substance.
Consider exploring the variety of MDF board for cabinet doors available to find the perfect fit for your next project. Embrace the possibilities that MDF cabinet doors offer and transform your space with confidence.
Alright, before you even think about measuring, let's get your gear in order. A little prep work here goes a long way and honestly makes the whole process smoother and more accurate.
Gathering the Right Tools for the Job
A few minutes of organization now will save you from a ton of frustrating do-overs later. You only need a few simple things, but they need to be the right things.
A flimsy, old tape measure just won't cut it. They can sag or even stretch, which is a recipe for disaster when you're ordering custom doors. Your most important tool is a high-quality steel tape measure. It gives you the rigidity you need for a perfectly straight, precise reading, especially when you're measuring a wide opening.
Next, grab a simple notepad and a pencil. It's tempting to just jot numbers down on a scrap of wood or punch them into your phone, but don't. A dedicated notepad keeps your width and height measurements organized and easy to read, which seriously cuts down on the chance of mixing them up. For example, a note like "Upper Cabinet #1: 18" W x 32" H" is much clearer than a random "18×32" in your phone's notes.
Pro Tip: Always double-check if your cabinet frames are square. This is a big one, especially in older homes where things have had time to settle. Just hold a small level against the frame—it'll tell you instantly if it's plumb. This quick check can save you a headache and explain why you might be getting different measurements at the top and bottom of an opening.
Here's a quick rundown of what you'll want on hand:
Steel Tape Measure: This is non-negotiable for accurate, consistent readings.
Notepad & Pencil: To keep every measurement clear and organized.
Straight Edge or Level: Perfect for checking if frames are square and helping you draw straight lines if needed.
I once had a client who used a fabric sewing tape for their measurements. It sounds silly, but it happens. Their numbers were off by nearly a quarter-inch, and that tiny error made their beautiful custom doors completely unusable. Using the right tools is truly the first—and most important—step to getting this project done right.
Cracking the Code on Cabinet Overlays
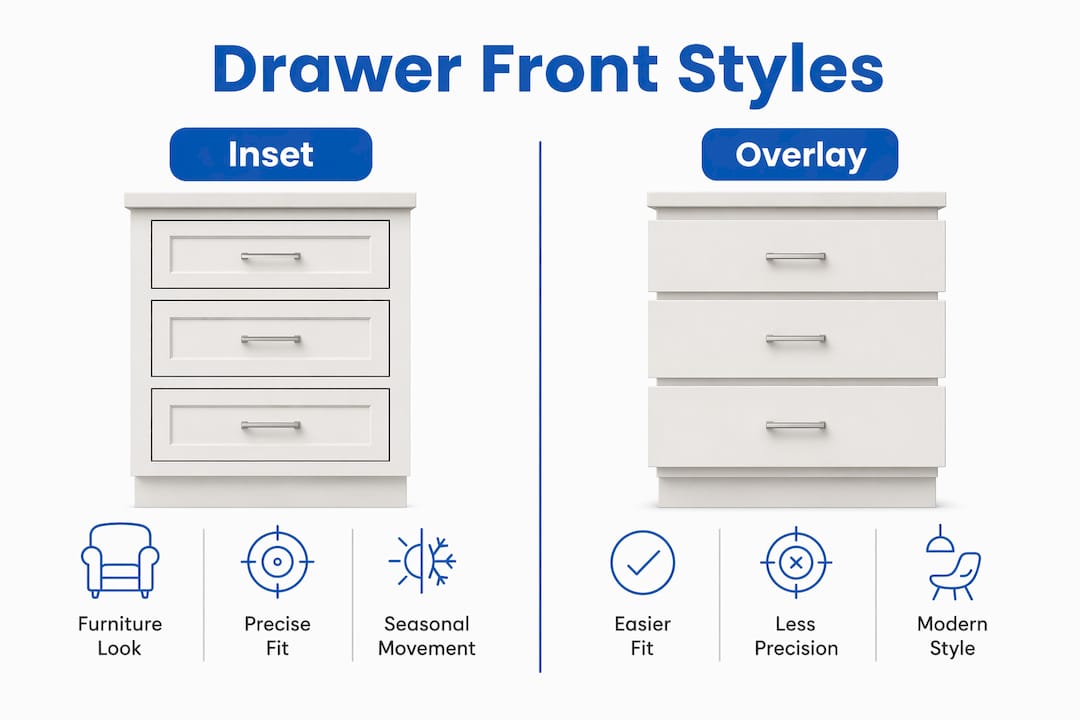
Before you even think about touching a tape measure, you need to understand how your doors sit on the cabinet frame. This is called overlay, and it’s the single biggest factor in getting your door sizes right. A measurement for one style will be completely wrong for another, so this is a critical first step.
Simply put, overlay describes how much of the cabinet face frame the door covers when closed. Getting this right dictates the entire formula for your final door dimensions.
Full Overlay Doors
Just like the name says, full overlay doors cover almost the entire cabinet face frame. This gives you that modern, seamless look with very tight gaps between doors. When you look at the cabinets, you see door, door, door—and very little of the frame behind them.
To measure for a single full overlay door, you’ll take the opening's width and height, then add the overlay amount to each dimension. A very common overlay is 1/2 inch, which means you’d add a total of 1 inch to the final width and height measurements (1/2 inch for the left side, 1/2 inch for the right, and so on).
Here's a real-world example: If your cabinet opening is 16 inches wide by 30 inches high, and you want a standard 1/2 inch overlay:
Door Width: 16" + 1" = 17"
Door Height: 30" + 1" = 31"
Partial Overlay Doors
Partial overlay is the classic style you’ve probably seen in countless kitchens. Also known as traditional or standard overlay, the door only partially covers the face frame. This design leaves a good portion of the frame—usually 1 to 1.5 inches—exposed around each door.
The measuring process is the same as for full overlay, but you're just adding a smaller amount. For instance, with a 3/8 inch overlay, you'd add a total of 3/4 inch to the opening's width and height.
Practical Example: For that same 16-inch wide by 30-inch high opening, but with a 3/8-inch partial overlay:
Door Width: 16" + 3/4" = 16 3/4"
Door Height: 30" + 3/4" = 30 3/4"
A small mistake here can throw everything off. You could end up with doors that collide with each other or have sloppy, uneven gaps, completely ruining the professional look you're after. Nail the overlay, and the rest of the job becomes much easier.
Inset Doors
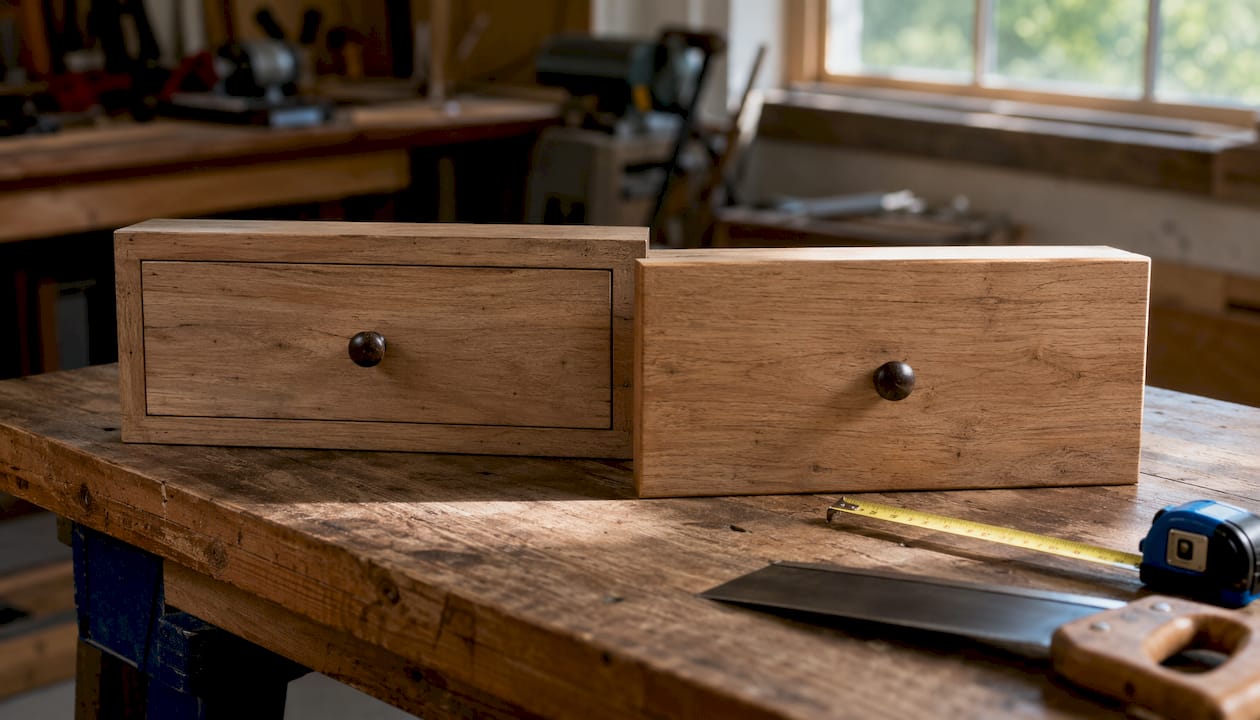
Inset doors are in a class of their own. They don't sit on top of the frame at all—they sit perfectly flush inside the cabinet opening. The face of the door is level with the cabinet frame, giving it a high-end, custom furniture appearance.
Measuring for inset doors is the opposite of the other styles; you subtract instead of add. You'll measure the opening precisely and then subtract a small amount, typically 1/8 inch total from both the width and height. This creates a tiny, consistent clearance gap so the door doesn't scrape against the frame.
Let's use our example opening: For a 16-inch wide by 30-inch high opening:
Door Width: 16" – 1/8" = 15 7/8"
Door Height: 30" – 1/8" = 29 7/8"
This kind of precision is more important than ever. The global cabinet market is projected to grow from USD 17.4 billion in 2025 to nearly USD 23.9 billion by 2033, and much of that growth is driven by a demand for accuracy that reduces waste and ensures a perfect fit.
To make things easier, here’s a quick-reference table that breaks down the math for each style.
Door Style
Measurement Approach
Example Calculation
Full Overlay
Opening + (Overlay x 2)
16″ Opening + (1/2″ x 2) = 17″
Partial Overlay
Opening + (Overlay x 2)
16″ Opening + (3/8″ x 2) = 16 3/4″
Inset
Opening – Clearance Gap
16″ Opening – 1/8″ = 15 7/8″
Keep this guide handy when you’re taking your measurements. It’s a simple way to double-check your work and ensure you order doors that will fit perfectly.
Measuring Cabinet Openings Like a Pro
Alright, let's get to the most important part: measuring your cabinet openings. This is where a little bit of precision goes a long way. I’m going to walk you through the same process the pros use to make sure every door hangs perfectly, and it all comes down to what we call the "rule of threes."
One thing you learn quickly is that cabinet frames, especially in older homes, are almost never perfectly square. Houses settle, wood shifts over the years, and things can get a bit skewed. Just measuring in one spot is a classic rookie mistake that leads to doors that scrape, bind, or have weird, uneven gaps.
The Rule of Threes in Practice
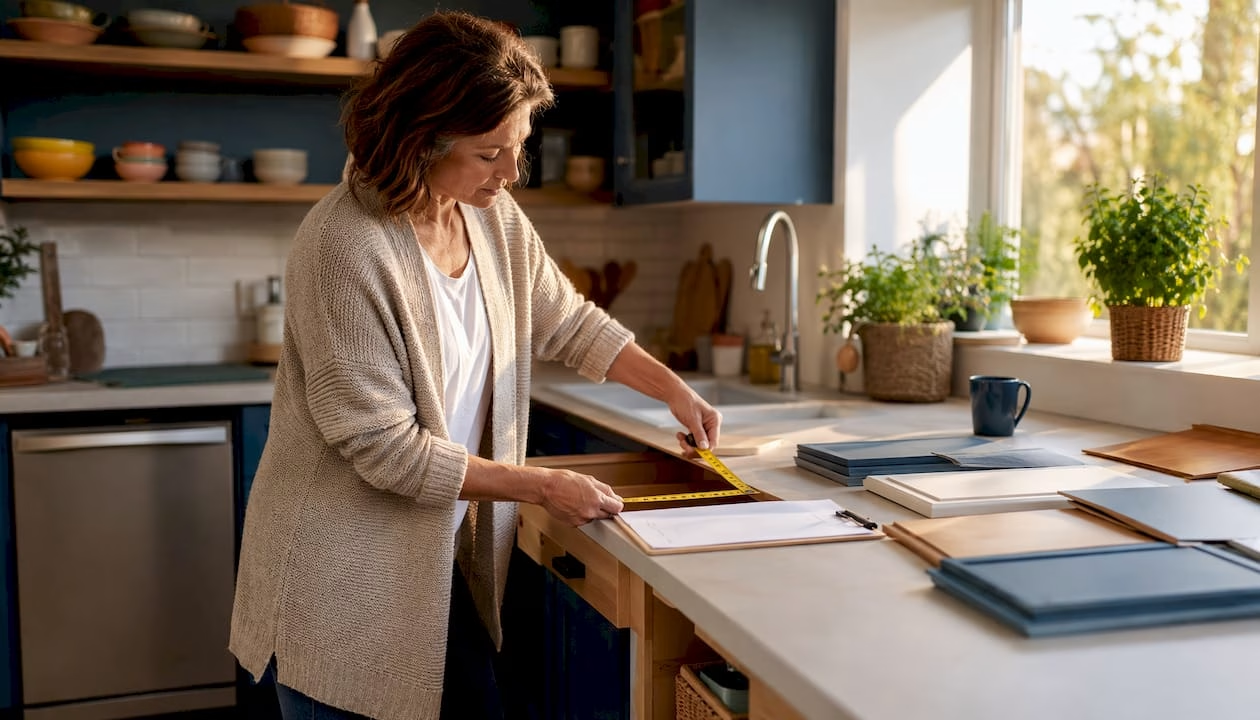
To work around any of these imperfections, you need to measure the width at the top, middle, and bottom of the opening. Then, you'll do the same for the height by measuring the left, middle, and right sides. This approach gives you the full story of the opening's actual shape, not just a single snapshot.
Once you have your three width and three height measurements, the rule is simple: always use the smallest measurement of the set. This is your safety net. It guarantees your new door will fit into the tightest point of the opening without any trouble.
Let’s say you measure the width and get these numbers:
Top: 15 inches
Middle: 15 1/16 inches
Bottom: 14 15/16 inches
In this case, you’d lock in 14 15/16 inches as your final width. That's the number you'll use when you calculate the final door size based on your chosen overlay.
This image really drives home the idea of capturing both the vertical and horizontal dimensions to get that perfect fit.
It’s a great visual reminder that both height and width need that same level of careful attention. These two dimensions are the foundation of your whole project.
Measuring for Double Doors
What about those wide openings that need a pair of doors? The process starts the same but has one extra step to make sure they meet perfectly in the center without clashing.
First, measure the opening's width using the rule of threes and take the smallest dimension, just like before. Now, you need to account for a small gap between the two doors so they don't smack into each other. A standard gap is 1/8 inch.
To figure out the width for each individual door, you'll add 1 inch for the overlay (assuming a standard 1/2-inch overlay on both sides), subtract the 1/8-inch gap, and then divide the whole thing by two.
Here's a practical example: Your opening is 30 inches wide.
Add Overlay: 30" + 1" = 31"
Subtract Gap: 31" – 1/8" = 30 7/8"
Divide by Two: 30 7/8" ÷ 2 = 15 7/16" Each of your two doors should be 15 7/16 inches wide.
For a little more guidance, checking out an expert guide on how to measure kitchen cabinets can give you some extra tips and comprehensive techniques. Nailing these foundational skills is what makes for a flawless installation.
How to Measure Existing Doors for a Perfect Match
If you're already happy with how your current doors fit and you're just looking for a style upgrade, measuring your existing doors is a fantastic shortcut. But there's definitely a right way to do it. The biggest mistake I see people make is trying to measure a door while it's still hanging on the hinges—it’s a surefire way to get inaccurate numbers.
To get a perfect measurement, you have to take the door off first. Lay it down on a flat, stable surface like a workbench or even a clean spot on the floor. This gets rid of any sag from the hinges and guarantees your tape measure lies perfectly straight. Once it's flat, carefully measure the exact height and width down to the nearest 1/16th of an inch.
Don't Forget Hinge Placement
Getting the height and width is only half the battle. The most critical step—and the one people often forget—is to measure for your hinge placements. If you skip this, your new doors won't line up with the existing hinge holes on your cabinet frames, and that's a massive headache you don't want.
You'll need to record the distance from both the top and bottom edge of the door to the center of each hinge cup hole. That's the large, round recess where the hinge itself sits.
For example, if your top hinge cup is 3 inches from the top edge of the door, and the bottom hinge is 3 inches from the bottom edge, you need to write those exact numbers down. This precision is what turns the project into a seamless swap instead of a frustrating struggle.
This step is an essential part of the process when you want to transform your kitchen by replacing cabinet doors without the pain of redrilling your cabinet frames. A few extra moments of careful measuring here will pay off big time.
To make sure you don't miss anything, just follow this simple checklist for each door:
Door Width: Measured flat, to the nearest 1/16".
Door Height: Measured flat, to the nearest 1/16".
Top Hinge: Distance from the top edge to the center of the hinge cup.
Bottom Hinge: Distance from the bottom edge to the center of the hinge cup.
Capturing these four key dimensions ensures your new custom doors will be a perfect match, ready to hang on your existing cabinets with zero issues.
Common Measuring Mistakes and How to Avoid Them
Even with the best intentions, a few simple mistakes can derail your entire cabinet door project. We’ve seen it happen. Let’s walk through the common traps people fall into and, more importantly, how you can sidestep them for a flawless result. These small details are often the difference between a professional finish and a frustrating redo.
One of the most frequent slip-ups is just mixing up the width and height measurements on your notepad. It sounds basic, but in the middle of a project, it happens more than you’d think. Always, always label your numbers clearly—something like "15” W x 30” H"—to avoid any confusion when it's time to place your order.
Overlooking the Details
Another classic mistake is forgetting to correctly account for your overlay or necessary clearance gaps. We once had a homeowner who measured perfectly for a set of inset doors but forgot to subtract the crucial 1/8-inch clearance gap on all sides. The result? Beautiful new doors that were just slightly too big and wouldn't close. A real headache.
The old carpenter’s mantra, "Measure twice, cut once," is the golden rule here. Before you finalize anything, do yourself a favor and double-check every single number on your list against the actual cabinet frames. This one final check is your best insurance policy against costly errors.
Getting these measurements right is absolutely vital. The global cabinet door market was valued at around USD 17 billion in 2025, a figure that shows just how massive this industry is. Improper sizing doesn't just affect your project; it contributes to waste and installation issues that have a ripple effect.
Avoiding these common pitfalls is a huge step toward a successful project. For those looking to dive deeper, our guide on refacing kitchen cabinet doors offers even more tips that can help ensure a smooth process from start to finish.
Answering Your Cabinet Measurement Questions
Even with the most detailed guide, there are always a few questions that pop up right when you think you’re done measuring. We’ve been there. To help you get over that final hurdle, we’ve pulled together the most common questions we hear from customers and installers alike.
Key Questions Answered
So, what’s the standard overlay for modern cabinets? While it can definitely vary, 1/2 inch is what you’ll see most often. This just means the door overlaps the cabinet frame by that amount on all four sides. But remember, the real boss here is your hinges—always check their specs before you lock in your final door size.
Another tricky spot we get asked about all the time is corner cabinets, especially those with bi-fold or lazy Susan doors. These can feel a little intimidating. The best way to tackle them is to measure each of the two door panels individually for both its width and height. For a practical example, a Lazy Susan door might consist of two panels, each measuring 10" x 30", hinged together to cover a larger corner opening.
The golden rule through all of this? Consistency. In the U.S., most suppliers, including us, work in inches down to the 1/16th. On the other hand, European-style cabinets are often measured in millimeters. It’s always smart to check with your door supplier to see what unit they prefer so you can avoid any frustrating conversion errors.
Ready to turn those perfect measurements into the perfect doors? At The Door Maker, our “Build a Door” tool makes it simple to design the exact custom cabinet doors you've been imagining. Start your project today at https://tdm-thedoormaker.com.
Used by Google Analytics to determine which links on a page are being clicked
30 seconds
_ga_
ID used to identify users
2 years
_gid
ID used to identify users for 24 hours after last activity
24 hours
_gat
Used to monitor number of Google Analytics server requests when using Google Tag Manager
1 minute
_gac_
Contains information related to marketing campaigns of the user. These are shared with Google AdWords / Google Ads when the Google Ads and Google Analytics accounts are linked together.
90 days
__utma
ID used to identify users and sessions
2 years after last activity
__utmt
Used to monitor number of Google Analytics server requests
10 minutes
__utmb
Used to distinguish new sessions and visits. This cookie is set when the GA.js javascript library is loaded and there is no existing __utmb cookie. The cookie is updated every time data is sent to the Google Analytics server.
30 minutes after last activity
__utmc
Used only with old Urchin versions of Google Analytics and not with GA.js. Was used to distinguish between new sessions and visits at the end of a session.
End of session (browser)
__utmz
Contains information about the traffic source or campaign that directed user to the website. The cookie is set when the GA.js javascript is loaded and updated when data is sent to the Google Anaytics server
6 months after last activity
__utmv
Contains custom information set by the web developer via the _setCustomVar method in Google Analytics. This cookie is updated every time new data is sent to the Google Analytics server.
2 years after last activity
__utmx
Used to determine whether a user is included in an A / B or Multivariate test.
18 months
SourceBuster is used by WooCommerce for order attribution based on user source.
Name
Description
Duration
sbjs_session
The number of page views in this session and the current page path
30 minutes
sbjs_udata
Information about the visitor’s user agent, such as IP, the browser, and the device type
session
sbjs_first
Traffic origin information for the visitor’s first visit to your store (only applicable if the visitor returns before the session expires)
session
sbjs_current
Traffic origin information for the visitor’s current visit to your store
session
sbjs_first_add
Timestamp, referring URL, and entry page for your visitor’s first visit to your store (only applicable if the visitor returns before the session expires)
session
sbjs_current_add
Timestamp, referring URL, and entry page for your visitor’s current visit to your store
session
sbjs_migrations
Technical data to help with migrations between different versions of the tracking feature
session
Marketing cookies are used to follow visitors to websites. The intention is to show ads that are relevant and engaging to the individual user.
Pinterest Tag is a web analytics service that tracks and reports website traffic.