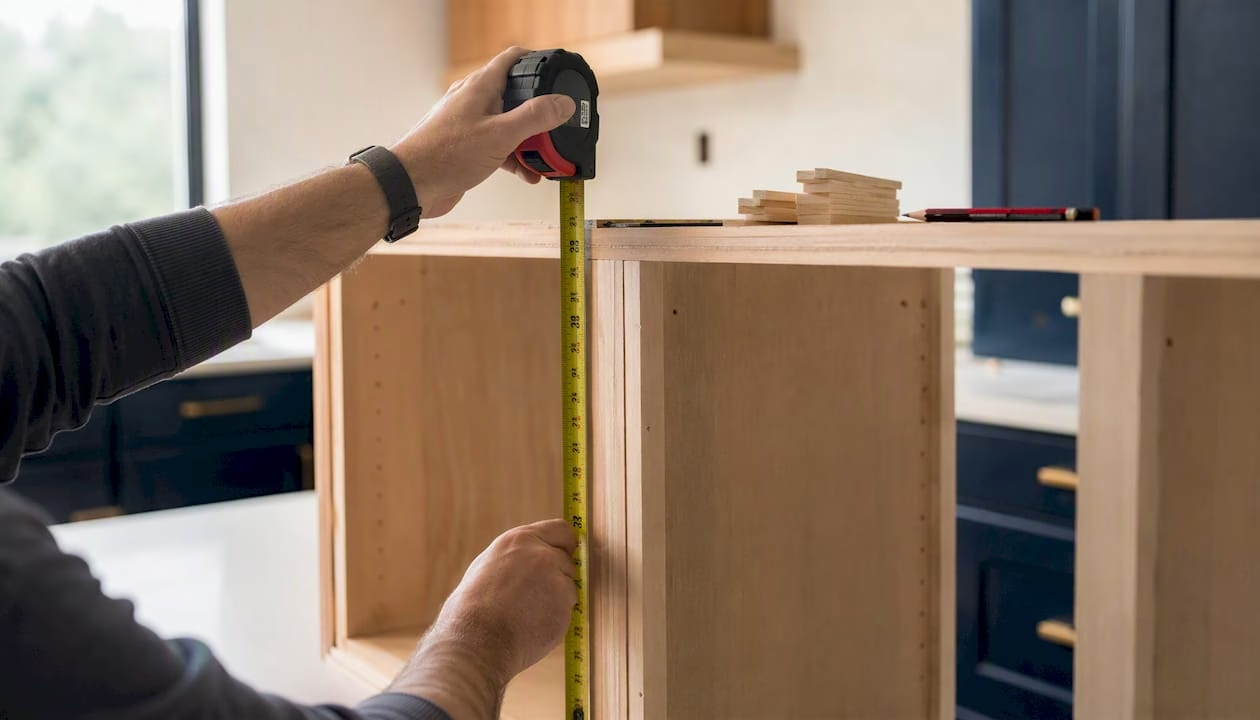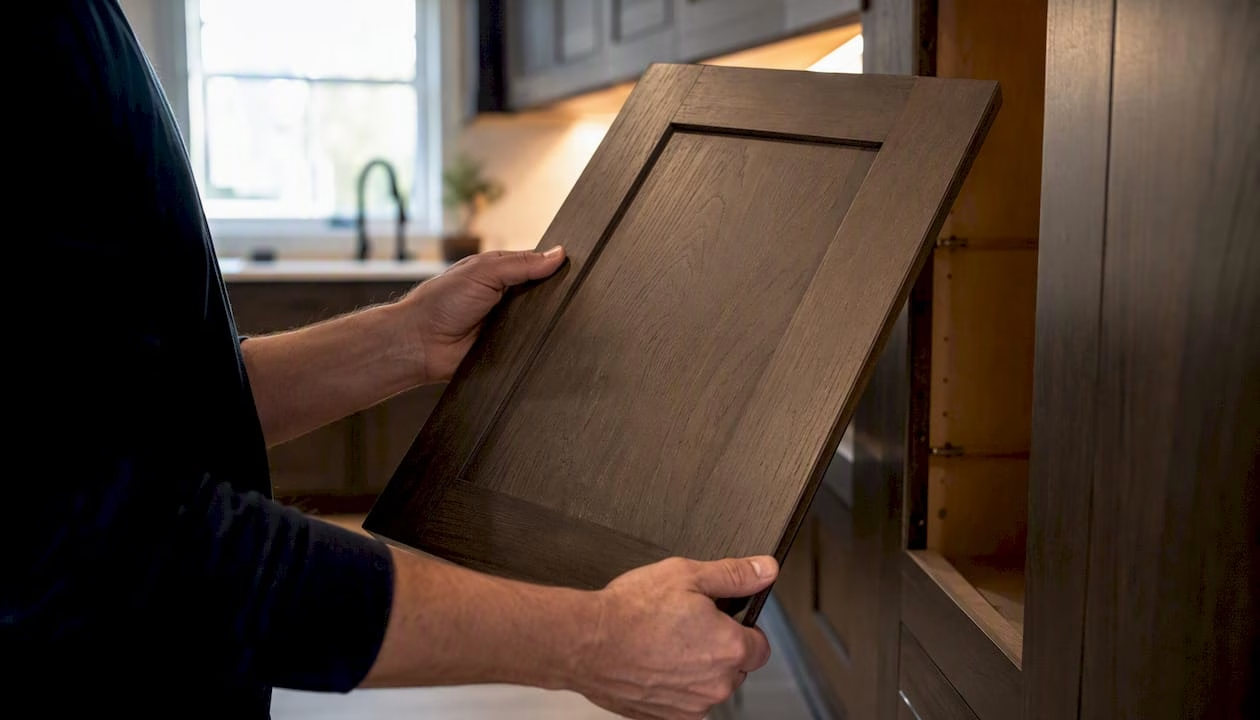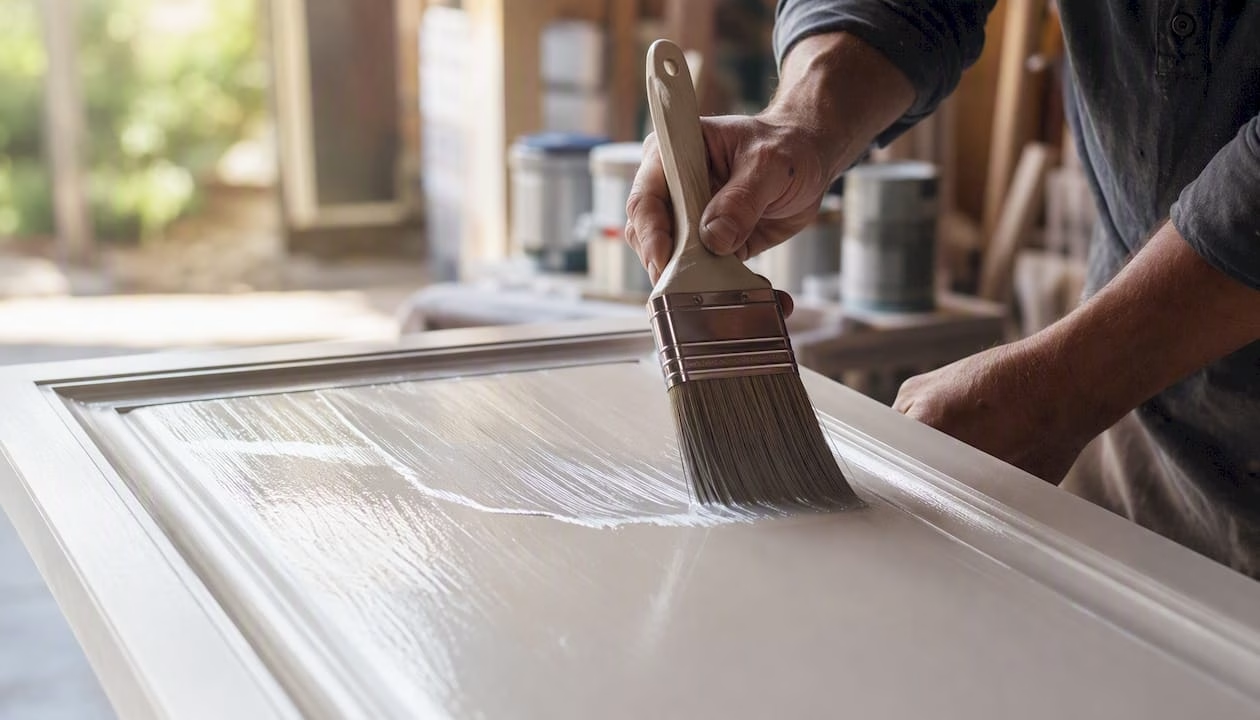

Yes, you can reface your kitchen cabinets yourself, and for most homeowners with basic-to-intermediate tool skills, it’s a genuinely worthwhile project. The core requirement is patience: accurate measuring, clean and stable cabinet boxes, and a willingness to spend more than one weekend on prep before a single door goes back on. According to Forbes, DIY timelines are commonly underestimated, so plan for a long weekend at minimum, or two to three weekends for an average kitchen.
What you’ll need to get started:
- Accurate measurements of every door opening, drawer front, and exposed end panel
- Structurally sound cabinet boxes (plywood or MDF, not crumbling particleboard)
- Veneer sheets or PSA (pressure-sensitive adhesive) veneer, plus adhesive and a roller
- Replacement doors and drawer fronts in your chosen style and finish
- Basic woodworking tools: tape measure, drill, screwdrivers, utility knife, sanding supplies, and clamps
- A long weekend for a small kitchen, or multiple weekends for a full kitchen
On cost: This Old House reports that refacing typically costs 30%–50% less than full cabinet replacement, making it one of the most cost-effective kitchen updates available. For Canadian homeowners, a DIY materials-only budget for an average kitchen generally requires a few thousand dollars CAD, while hiring a pro can significantly increase the total depending on kitchen size and finish choices.
Key Takeaways
Cabinet refacing is a cost-effective, lower-disruption alternative to full replacement when your cabinet boxes are structurally sound and your kitchen layout works for you.
| Point | Details |
|---|---|
| Verify box condition first | Press on interior walls and floors; any flex or soft spots means replacement, not refacing. |
| Measure every opening individually | Apply overlay math (opening + 2× overlay) to each door; never assume adjacent cabinets are identical. |
| Prep determines adhesion quality | Degrease twice, sand to 120-grit, and roll veneer firmly; skipping these steps causes bubbling and peeling. |
| Budget realistically in CAD | DIY materials for an average kitchen run a few thousand dollars CAD; pro-installed refacing runs — CAD. |
| Tdm-thedoormaker simplifies ordering | Custom doors sized to 1/10,000" with pre-bored hinge holes and sample doors reduce measurement errors and reorders. |
Table of Contents
- What is cabinet refacing, and is it right for your kitchen?
- What tools and materials do you need for DIY cabinet refacing?
- How do you measure for new doors and drawer fronts?
- How to remove, label, and prep your cabinet frames
- How do you apply veneer to cabinet face frames?
- How do you install new cabinet doors and drawer fronts?
- What finishing touches complete a refaced kitchen?
- What does DIY cabinet refacing cost in Canada?
- What are the pros and cons of cabinet refacing?
- How do you fix common DIY refacing mistakes?
- What a door manufacturer wants you to know before you order
- My honest take on DIY cabinet refacing
- Custom doors that fit your project, sized to the millimeter
- Sources
What is cabinet refacing, and is it right for your kitchen?
Cabinet refacing means replacing the visible surfaces of your cabinetry while keeping the existing cabinet boxes in place. You apply new veneer or laminate to the face frames, replace the doors and drawer fronts with new ones, and swap out the hardware. The boxes, interior shelves, and layout stay exactly as they are.
That distinction matters when you’re comparing your options. Full replacement tears out everything, including the boxes, and typically costs two to three times more. Repainting or “redooring” (swapping doors without veneering the frames) is cheaper and faster but leaves mismatched or worn face frames visible. Refacing sits between those two: it delivers a consistent, fresh look across every visible surface without the cost or disruption of a full gut.
When refacing makes sense: Your cabinet boxes are solid plywood or MDF with no warping, delamination, or structural damage. The layout works for your household. You want a significant visual upgrade without a full renovation budget. You’re comfortable with a multi-day DIY project or willing to hire a pro for installation.
Use this quick checklist to decide:
- Reface if: Boxes are sturdy, hinges and drawer slides work, and you’re happy with the kitchen’s layout and storage configuration.
- Repaint/redoor if: Boxes and frames are in good shape and you mainly want a color change on a tight budget.
- Replace if: Boxes are water-damaged, particleboard is crumbling, the layout no longer works, or you need to add storage.
Pro Tip: Before committing, open every cabinet and press firmly on the interior walls and floor. Any flex, soft spots, or visible delamination is a sign the box won’t hold hinges reliably after refacing. Refacing on a failing box is money wasted.
See how refacing compares to a full remodel for a side-by-side breakdown of costs and outcomes.
What tools and materials do you need for DIY cabinet refacing?
Gathering everything before you start prevents the most common project delay: mid-job supply runs. Here’s what you’ll need, organized by category.
Must-have tools:
- Tape measure and a fine-point pencil or marking knife
- Cordless drill and a full set of screwdrivers (Phillips and flat)
- Utility knife with fresh blades
- Veneer roller (J-roller) for pressing veneer flat and eliminating air pockets
- Random orbital sander with 80-, 120-, and 220-grit discs
- Clamps (at least four, preferably six or more)
- Router with a flush-trim bit, or a dedicated veneer trimmer
- Level and a combination square
Materials:
- PSA veneer sheets or prefinished veneer with contact cement, matched to your door finish
- 1/4" plywood for exposed end panels (recommended by The Home Depot to create a flush, bondable surface)
- New cabinet doors and drawer fronts in your chosen style
- Edge banding (iron-on or PSA) to finish exposed plywood edges
- Cup hinges (soft-close recommended) and mounting plates
- Cabinet pulls or knobs
- High-quality degreaser (TSP substitute or a dedicated cabinet cleaner)
- Wood filler or epoxy for any frame repairs
Optional tools that significantly speed the job:
- Veneer trimmer (faster and cleaner than a router for long runs)
- Laminate slitter for cutting veneer strips to width
- Hinge-boring jig for consistent, accurate cup-hinge holes
- Brad nailer for attaching trim and molding
For end panels specifically, a hinge-boring jig and a laminate slitter are worth renting from a tool rental shop if you have more than two or three exposed sides. The time savings on a full kitchen easily justify the rental cost.
Choosing the right cabinet door materials for your project affects both the look and the long-term durability of the finished result.
How do you measure for new doors and drawer fronts?
Accurate measurement is where DIY refacing projects succeed or fail. A door that’s 1/8" too wide won’t close; one that’s 1/4" too narrow leaves a visible gap. Take your time here, and measure every opening twice.
Setting up your measurement sketch
Start with a simple hand-drawn sketch of your kitchen layout. Number every cabinet opening from left to right, top to bottom. For each opening, record:
- Opening width: Measure the clear opening between the inside edges of the face frame stiles (vertical members).
- Opening height: Measure from the bottom of the upper rail to the top of the lower rail.
- Door type: Note whether you need full overlay, half overlay, or inset doors.
Overlay math explained
Most North American kitchens use overlay doors, meaning the door overlaps the face frame opening on all four sides. The most common overlay values are 1/2" and 1-1/4" per side.
To calculate door size for a full overlay door on a single opening:
Door width = Opening width + (2 × overlay) minus clearance
For example, with a 14" opening and 1/2" overlay on each side, your door width is 14" + 1" = 15". For two doors sharing one opening, divide the combined width by two and subtract 1/8" from each door for the center gap. The Family Handyman measurement guide walks through this math in detail for multiple door configurations.
| Measurement | What to record | Common value |
|---|---|---|
| Opening width | Inside stile to inside stile | Varies by cabinet |
| Opening height | Rail to rail (clear opening) | Varies by cabinet |
| Overlay per side | How far door covers face frame | 1/2" or 1-1/4" |
| Hinge bore diameter | Cup hinge hole size | 35mm (standard) |
| Hinge bore distance from edge | Center of bore to door edge | 3mm–5mm from edge |
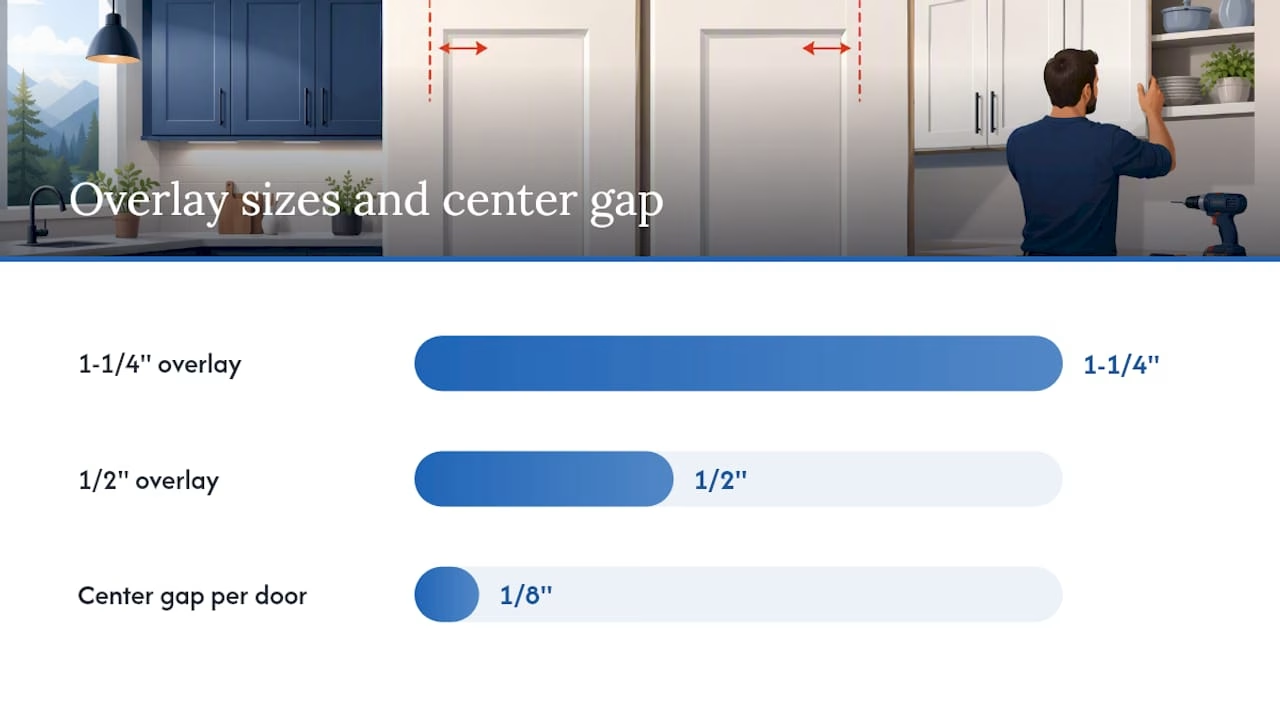
Pro Tip: Measure every opening individually, even if they look identical. Older kitchens often have openings that vary by 1/8" or more due to settling or original installation tolerances. Never assume two adjacent cabinets are the same size.
Ordering checklist
When placing your order, specify:
- Exact door width and height to 1/16" (or finer, if the supplier allows)
- Overlay value and hinge bore location (distance from edge and from top/bottom)
- Finish, color, and edge profile
- Whether you need pre-bored hinge holes (strongly recommended)
- Drawer front dimensions and attachment method
- Request sample doors or color swatches before committing to a full order
Many suppliers, including Tdm-thedoormaker, allow you to order pre-bored hinge holes and sample doors to confirm finish and fit before the full production run.
How to remove, label, and prep your cabinet frames
Disassembly is the step most homeowners rush, and it’s the one that causes the most reassembly headaches. A clear labeling system takes ten minutes to set up and saves hours later.
- Photograph everything first. Take wide shots of each cabinet run and close-ups of hinge positions, drawer slide types, and any existing hardware. These photos are your reference during reinstallation.
- Number every door and drawer front with a piece of painter’s tape on the interior face. Use a simple grid system: “U1” for upper cabinet 1, “L3” for lower cabinet 3, and so on. Family Handyman recommends labeling every component as it’s removed to avoid trial-and-error at reassembly.
- Remove doors by unscrewing hinges from the face frame, not from the door. Keep each hinge set with its door in a labeled zip-lock bag.
- Pull drawer fronts by removing the screws from inside the drawer box. Keep the screws with the front.
- Remove all hardware (pulls, knobs, catches) and store by cabinet number.
Prepping the frames for veneer or paint
Once the cabinets are empty and labeled, prep determines how well your veneer bonds and how long it lasts.
- Degrease thoroughly. Kitchen grease penetrates wood grain and prevents adhesive from bonding. Use a TSP substitute or a dedicated cabinet degreaser, and wipe every surface twice.
- Sand the face frames. Start with 80-grit to scuff the existing finish, then finish with 120-grit for a smooth substrate. Wipe away all dust with a tack cloth.
- Repair any damage. Fill splits, gouges, or loose stiles with wood filler or two-part epoxy. Let it cure fully and sand flush before proceeding.
- Inspect drawer slides. Replace any slides that feel rough, sticky, or loose. It’s far easier to do this now than after the new fronts are installed.
Pro Tip: Wear an N95 dust mask and safety glasses during sanding, and open windows or run a fan for ventilation. If your cabinets were painted before 1990, test for lead paint before sanding. Dispose of paint chips and sanding dust in sealed bags per your municipality’s guidelines.
How do you apply veneer to cabinet face frames?
Veneer application is the technical heart of a DIY refacing project. Done carefully, it produces a surface indistinguishable from a factory finish. Rushed, it bubbles, peels, or shows seams within months.
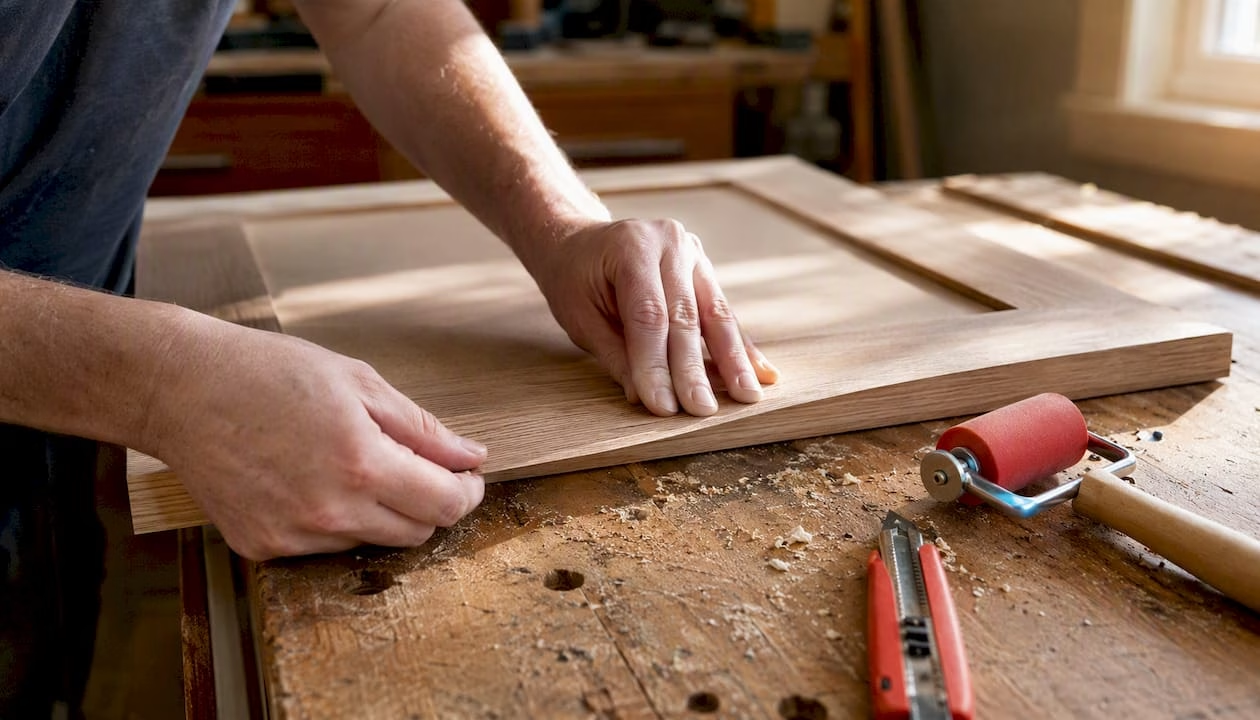
PSA veneer vs. contact cement
PSA (pressure-sensitive adhesive) veneer has a peel-and-stick backing. It’s faster and more forgiving for beginners because you can reposition it slightly before pressing it down fully. The trade-off is that PSA veneer is less tolerant of heat and humidity over time than a contact-cement bond.
Contact cement with prefinished veneer sheets creates a stronger, more permanent bond. You apply cement to both surfaces, let it tack off, then press the veneer into place. The catch: contact cement bonds on contact with no repositioning, so alignment before you press matters.
For most Canadian kitchens, PSA veneer is the practical choice for face frames. Use contact cement for large, flat surfaces like end panels where a stronger bond is worth the extra care.
The single biggest factor in veneer adhesion is surface prep, not adhesive type. A high-quality degreaser and a thorough sand are what prevent bubbling and edge lifting. Skipping either step is the most common reason veneer fails within the first year. A veneer roller pressed firmly across every square inch of the surface after application completes the bond.
Apply veneer in this order: end panels first, then face frame stiles (vertical), then rails (horizontal). This sequence means horizontal pieces overlap vertical ones at corners, which hides seams more effectively.
Trim each piece flush using a veneer trimmer or a router with a flush-trim bit. A utility knife alone leaves ragged edges that show through paint or stain. As Family Handyman notes, a veneer trimmer and flush-trim router produce much cleaner seams than a utility knife, and the difference is visible in the finished result.
Pro Tip: Work in sections no longer than 24" at a time. Longer runs are harder to align perfectly, and any bow in the veneer sheet becomes a bubble once it’s pressed. Cut your veneer slightly oversized (1/4" on each edge), press it down, then trim flush.
How do you install new cabinet doors and drawer fronts?
With the frames veneered and cured, door installation is where the project starts to look finished. The key is working methodically from one end of the kitchen to the other, checking alignment as you go rather than hanging all doors and adjusting at the end.
Hinge preparation
If you ordered pre-bored doors, your hinge cups drop straight into the existing holes. If not, use a 35mm Forstner bit in a drill press or a hinge-boring jig to drill the cup holes. A jig keeps every hole at the same distance from the door edge, which is what makes all your doors hang at the same depth.
Mount the hinge to the door first, then hold the door in position against the face frame and mark the mounting plate location with a pencil. Screw the mounting plate to the face frame, snap the hinge arm onto the plate, and check the door position before tightening fully.
Pro Tip: Avoiding common door installation mistakes starts with drilling hinge bores at a consistent distance from the door edge. Even a 1mm variation across multiple doors creates a visible depth difference when the doors are closed.
Alignment and adjustment
Modern cup hinges have three-way adjustment: in/out, up/down, and side to side. Use all three. Start by getting the gap between adjacent doors even (typically 3mm–4mm), then adjust depth so all doors sit flush. A consistent gap is what separates a professional-looking result from a DIY one.
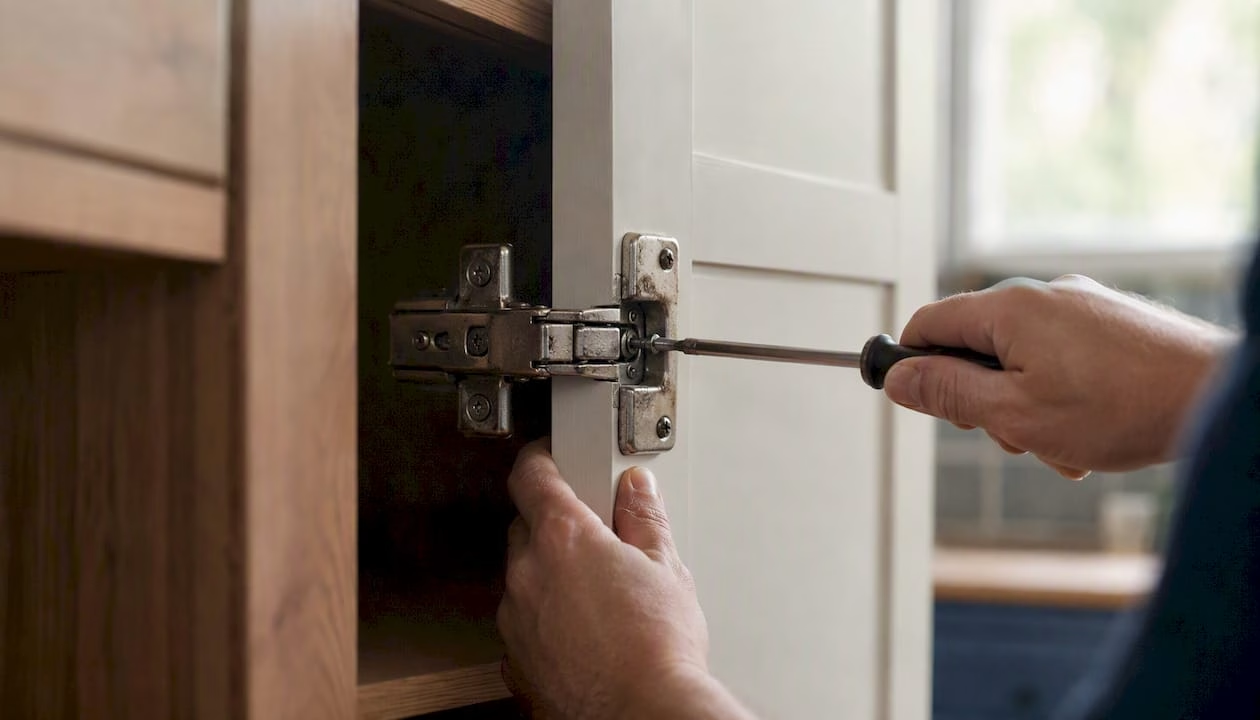
For pulls and knobs, make a simple drilling template from a piece of 1/4" plywood or cardboard. Mark the hole position once, then use the template on every door and drawer front. This keeps hardware positions consistent across the entire kitchen without measuring each door individually.
Attaching drawer fronts
Drawer fronts attach from inside the drawer box using screws through pre-drilled holes. Before tightening, hold the front in position with clamps or double-sided tape and check the gap on all four sides. The gap between a drawer front and the cabinet door below it should match the gap between adjacent doors. Tighten the screws once the position is confirmed, then check that the front doesn’t shift when the drawer is opened and closed.
Cup hinges adjusted correctly allow doors to hang with consistent 3mm–4mm gaps. That spec is worth checking with a small spacer cut from cardboard rather than eyeballing it.
What finishing touches complete a refaced kitchen?
The difference between a refaced kitchen that looks “done” and one that looks professionally finished usually comes down to trim, caulk, and hardware coordination.
- Crown or cove molding: Measure the top of each upper cabinet run and cut molding to length with a miter saw. Attach with a brad nailer and construction adhesive. Paint or stain to match the new doors before installation for a cleaner result.
- Filler strips and scribe molding: Use these to close gaps between cabinets and walls or ceilings. A 1/4" gap filled with scribe molding looks intentional; the same gap left open looks unfinished.
- Caulking: Run a thin bead of paintable latex caulk along every joint where veneer meets wall, ceiling, or countertop. Smooth with a wet finger and wipe excess immediately. For kitchen use, choose a caulk rated for high-humidity environments.
- Touch-up paint: Keep a small amount of your frame paint or stain for touch-ups after installation. Screw holes, minor dings from installation, and caulk edges often need a light coat.
- Hardware finish coordination: Match your pulls and knobs to your faucet and light fixtures for a cohesive look. Brushed nickel, matte black, and warm brass are all popular choices in Canadian kitchens right now.
Pro Tip: Under-cabinet lighting is easiest to install during a refacing project, before the new doors go on. LED strip lights or puck lights mounted to the underside of upper cabinets add both function and visual depth. Run the wiring before caulking so you can conceal it cleanly.
Explore kitchen refacing color trends for current finish and hardware pairings that work well with popular veneer choices.
What does DIY cabinet refacing cost in Canada?
Canadian costs vary by kitchen size, material choice, and whether you hire a pro or do the work yourself. The figures below reflect typical ranges for materials available through Canadian home improvement retailers and custom door suppliers.
Refacing saves roughly 30%–50% compared to full cabinet replacement, which on a full Canadian kitchen replacement budget of $15,000–$30,000 CAD represents a meaningful saving.
The biggest cost variables are door style and veneer choice. Thermofoil and MDF doors are generally the most affordable; solid wood doors in custom profiles cost more. Custom sizing, hinge boring, and specialty finishes add to the per-door price but reduce installation time and the risk of measurement errors.
For a detailed breakdown of cabinet refacing costs vs. replacing, including savings tips specific to Canadian homeowners, that resource covers the numbers in depth.
Timeline expectations: A small kitchen takes most DIYers one long weekend for prep and a second weekend for installation. An average kitchen runs two to three weekends. Forbes notes that professionals finish faster because they work in teams and have specialized tools, but the DIY timeline is manageable if you plan each phase before you start.
What are the pros and cons of cabinet refacing?
Refacing is a strong choice for the right kitchen, and the wrong choice for the wrong one. Here’s an honest accounting of both sides.
Pros:
- Costs 30%–50% less than full replacement, with significant additional savings when you DIY the labor
- Far less disruptive than a full renovation: no demolition, no weeks without a functional kitchen
- Wide finish palette, from thermofoil and painted MDF to real wood veneer and high-gloss lacquer
- More eco-friendly than replacement, since reusing existing cabinet boxes avoids sending large wood components to landfill
- Faster project timeline, especially with pre-made doors and pre-bored hinges
Cons:
- Won’t change your kitchen layout or add storage, as The Spruce makes clear
- Requires structurally sound boxes: particleboard that has begun to delaminate is a hard stop
- Veneer can bubble, peel, or show seams if prep is inadequate or adhesive is applied incorrectly
- Labor-intensive for DIYers, particularly the prep and measuring phases
- Doesn’t address plumbing, electrical, or countertop issues
Red flags that point to replacement instead:
- Cabinet boxes flex or feel soft when pressed
- Particleboard is swollen, crumbling, or shows water damage
- Drawer slides are built into the box sides and can’t be replaced without structural changes
- You want to move a wall, add an island, or reconfigure the layout entirely
Pro Tip: If one or two cabinets have minor damage but the rest are solid, you can often repair those specific boxes with wood filler and epoxy rather than replacing the whole kitchen. Spot repair plus refacing is a legitimate middle path.
How do you fix common DIY refacing mistakes?
Even careful work produces occasional problems. Most are fixable without redoing the entire job.
Bubbling veneer: Press the bubble firmly with a veneer roller. If it doesn’t flatten, use a heat gun on low to soften the adhesive, press flat, and hold with a clamp and a flat board until cool. For PSA veneer, a clothes iron on low heat (with a cloth between iron and veneer) works the same way.
Edge lifting: Apply a thin bead of wood glue or contact cement under the lifted edge with a toothpick or syringe applicator. Press flat, wipe excess, and clamp for at least 30 minutes. Avoid this problem in the first place by pressing edges firmly with a roller immediately after application.
Visible seams: Sand the seam lightly with 220-grit, apply wood filler, sand flush, and touch up with paint or stain. If the seam is at a corner, re-trim with a sharp veneer trimmer and re-glue the edge.
Misaligned doors: Modern cup hinges adjust in three directions. Loosen the hinge screws slightly, move the door to the correct position, and retighten. If the door is more than 3mm out of alignment in any direction, check whether the mounting plate is positioned correctly on the face frame before adjusting the hinge arm.
The most common refacing mistake isn’t a technique error — it’s skipping the degreasing step. Grease-contaminated wood looks clean but repels adhesive at the molecular level. If your veneer is peeling within weeks of application, the cause is almost always inadequate surface prep, not the adhesive itself. Strip the failed section, degrease twice, sand, and reapply.
For a broader look at DIY cabinet refacing pitfalls and how to avoid them, that resource covers the most common errors in detail.
Measurement errors that cause door misalignment are also covered in this guide on avoiding common pitfalls in DIY door replacement.
What a door manufacturer wants you to know before you order
Getting custom doors right the first time comes down to the information you provide when you order. Manufacturers can cut to any size, but they can only work with what you give them.
Manufacturer checklist before you place an order:
- Confirm your overlay value (1/2" or 1-1/4" per side) and apply it consistently to every door in the order
- Record hinge bore preferences: 35mm cup diameter, distance from door edge (typically 3mm–5mm), and distance from top and bottom of door
- Specify drawer front dimensions separately from door dimensions, and note the attachment method (screws from inside the drawer box)
- Order at least one sample door in your chosen finish before committing to the full run
- Request color swatches if you’re matching existing trim, flooring, or appliances
On tolerances: quality custom door suppliers cut to very tight tolerances, with Tdm-thedoormaker offering sizing precision to 1/10,000". That level of accuracy means a door ordered at 14-3/4" wide arrives at exactly that dimension, which matters when you’re working with older cabinets where openings vary by 1/8" or more.
Lead times vary by supplier and finish. Standard painted MDF doors typically ship faster than solid wood or specialty finishes. If your project has a hard deadline (a family event, a home sale), order doors before you start the prep work, not after. Most custom door orders take one to three weeks, and having the doors on hand before you start means you can verify fit before the frames are veneered.
Pro Tip: Order one or two extra drawer fronts if your kitchen has more than six drawers. Drawer fronts are the most likely component to get scratched during installation, and having a spare on hand avoids a second order with a separate lead time.
Tdm-thedoormaker’s online configurator walks you through how to reface cabinets yourself step by step, with measurement guidance built into the ordering process.
Why sample doors matter more than you think
A sample door lets you verify three things before the full order: the finish color under your kitchen’s lighting, the edge profile at actual scale, and the door weight (which affects hinge selection). Color swatches are useful for narrowing choices, but a full-size sample door is the only reliable way to confirm a finish before committing to 20 or more doors. The cost of a sample door is almost always less than the cost of returning and reordering a full set.
My honest take on DIY cabinet refacing
When the effort is worth it, and when it isn’t
DIY cabinet refacing rewards patience more than skill. The techniques are learnable by any homeowner who has hung a shelf or assembled flat-pack furniture. What separates a good result from a frustrating one is almost always the willingness to slow down during prep, measure twice, and not rush the adhesive cure time.
The projects that go wrong are usually the ones where someone skipped the degreasing step, measured once and ordered, or tried to hang all the doors in a single afternoon without checking alignment as they went. None of those mistakes are irreversible, but they add time and cost that erode the savings refacing was supposed to deliver.
My honest recommendation: if your cabinet boxes are solid and your layout works, DIY refacing is a genuinely good use of a few weekends. If you’re uncertain about your measuring accuracy or you have more than 25 doors, ordering a sample door and double-checking your overlay math before placing the full order will save you more money than any other single step in this process.
Custom doors that fit your project, sized to the millimeter
Tdm-thedoormaker takes the guesswork out of the ordering step. You get custom cabinet doors and drawer fronts sized to 1/10,000" precision, available in over 30 styles and 130+ colors and finishes, with pre-bored hinge holes added at checkout. The online configurator walks you through measuring, style selection, and order placement in three steps, and sample doors are available so you can confirm finish and fit before committing to a full run.

For Canadian homeowners doing their own refacing, that precision matters. Older kitchens with openings that vary by 1/8" need doors cut to exact dimensions, not rounded to the nearest standard size. Tdm-thedoormaker’s direct-to-consumer model also means pricing that typically undercuts larger retailers, with no middleman markup on custom sizing.
Order custom cabinet doors online and request a sample door to see the finish in your kitchen before you commit to the full order.
Sources
The following resources support the measurement, technique, and cost guidance in this cabinet refacing guide:
- Cabinet refacing demystified (The Spruce)
- Cabinet refacing: Everything you need to know (This Old House)
- How To Reface Kitchen Cabinets (Forbes)