Apr 1 2026 BY Ksenija Lebec, Blog
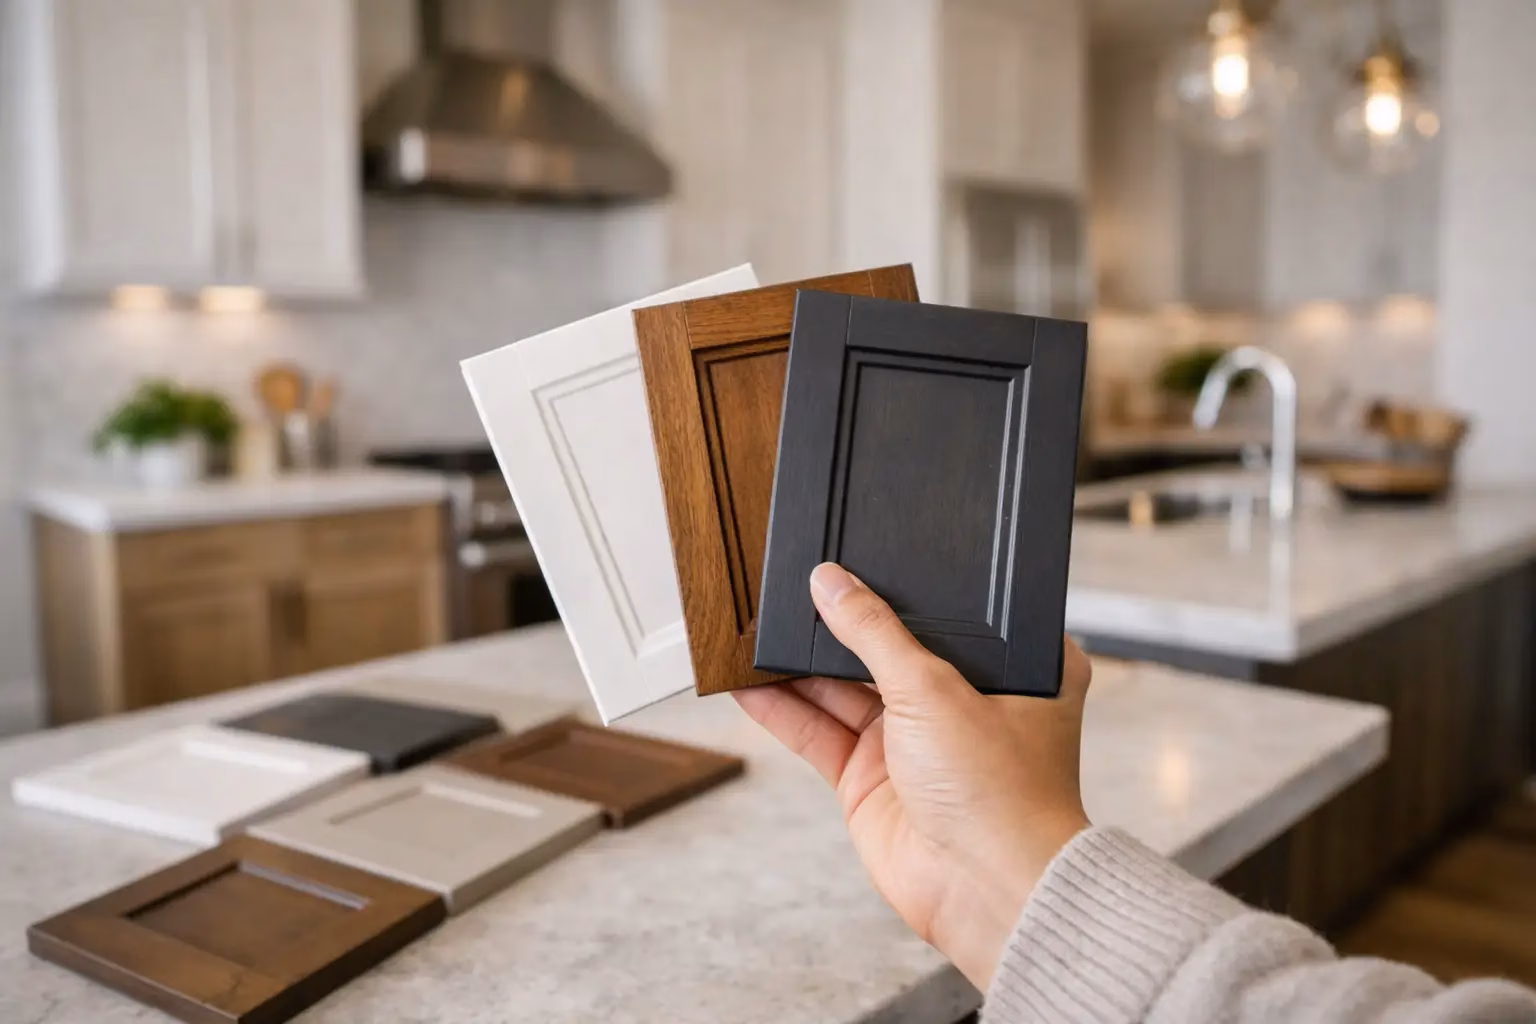
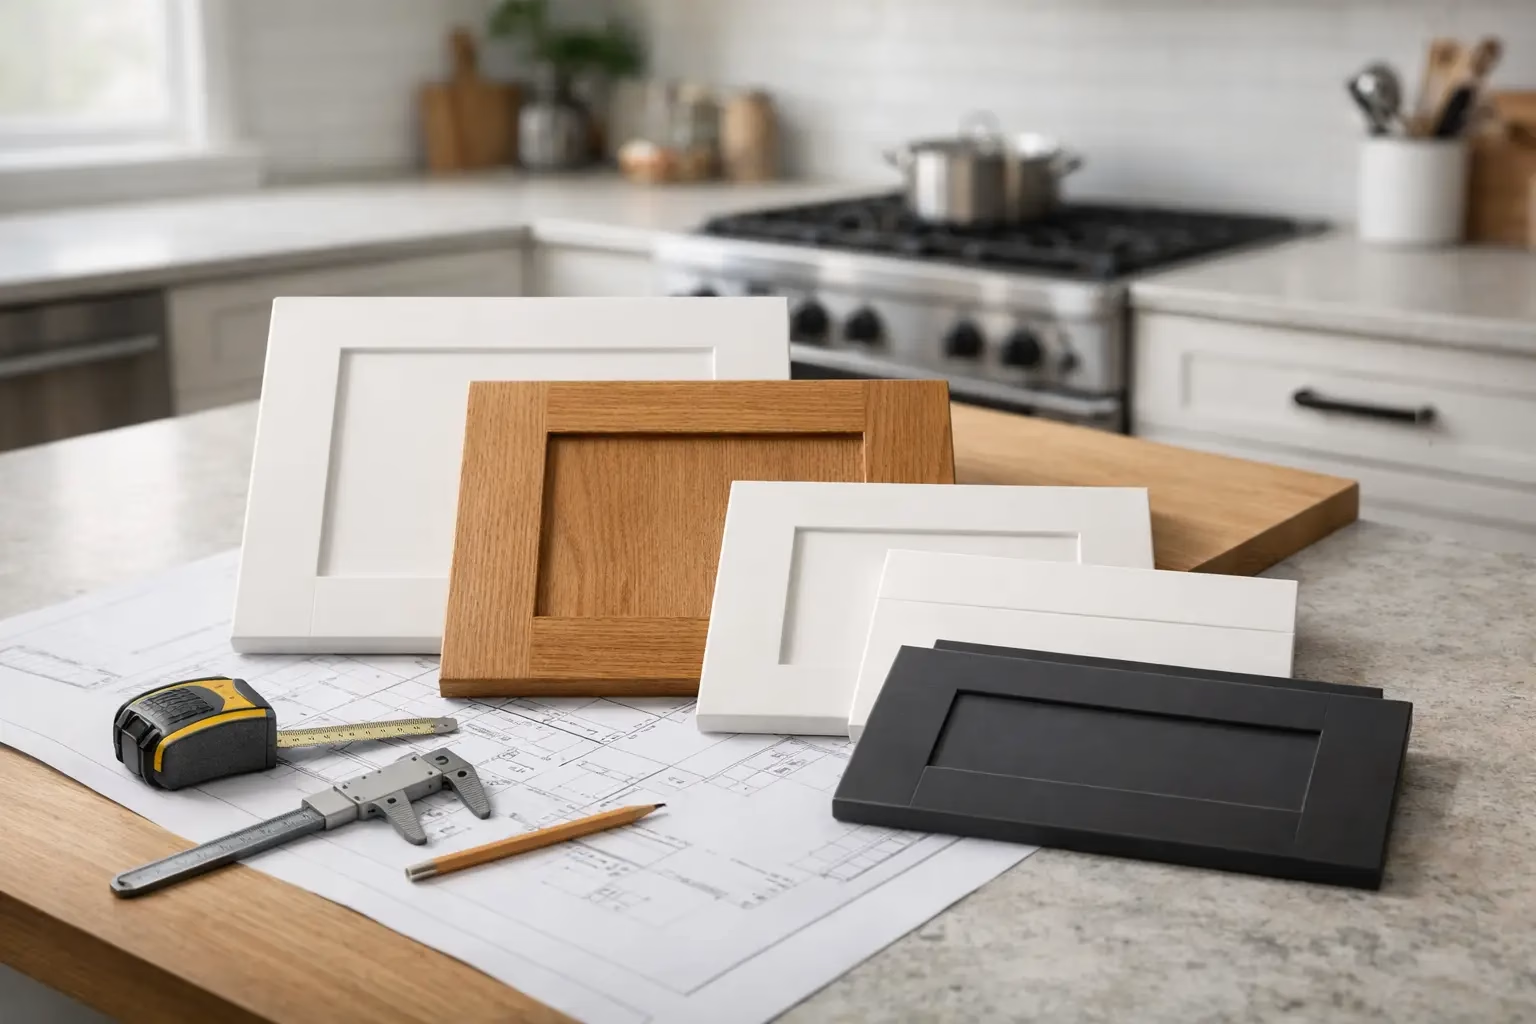
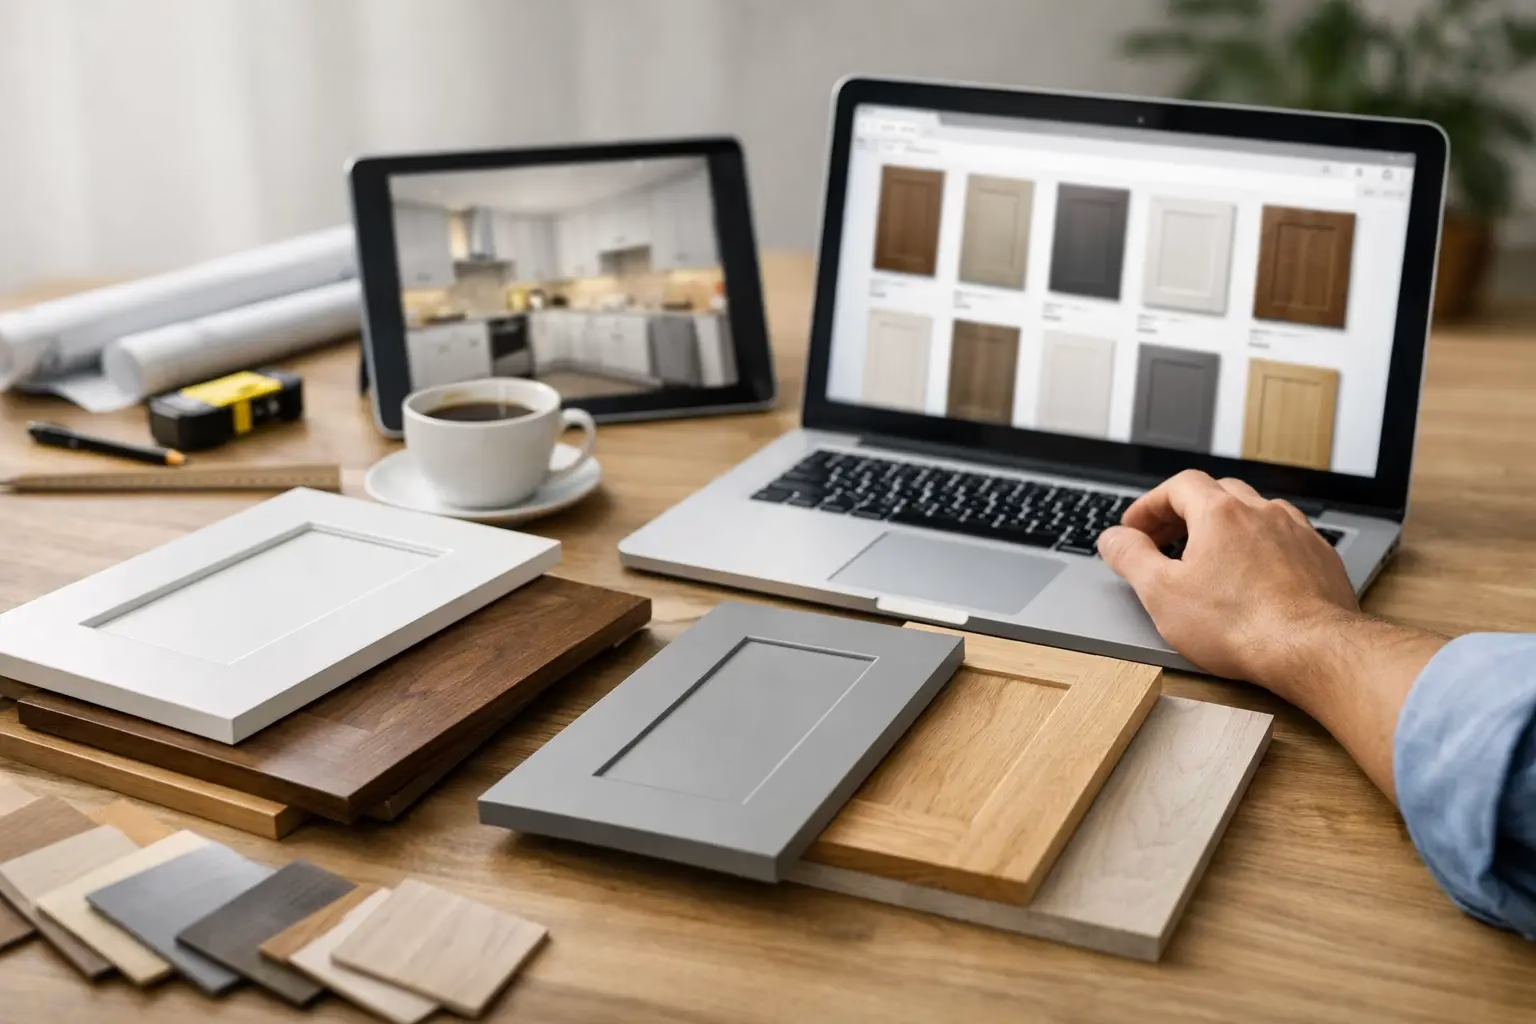
Picking a cabinet color from a screen is where a lot of good remodel plans go sideways. What looks like a warm white on your phone can turn cream in your kitchen, and a gray that felt modern online can read blue once it sits next to your flooring. That is exactly why cabinet door sample colors matter. They let you see the finish in your own light, against your counters, walls, and hardware, before you commit to a full order.
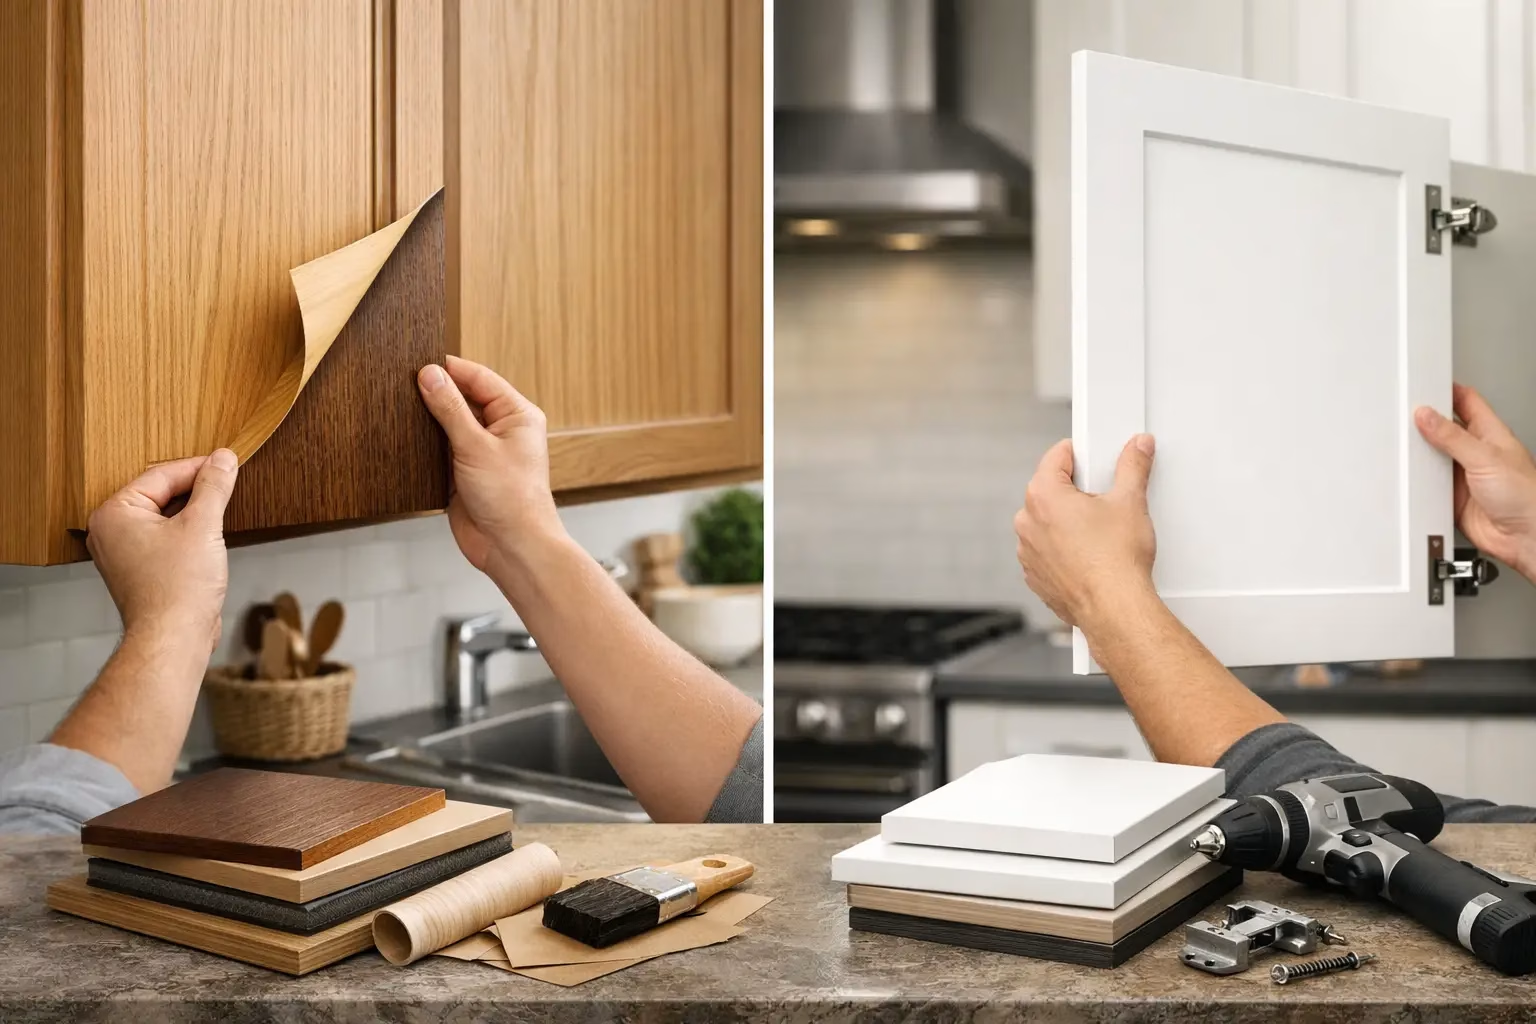
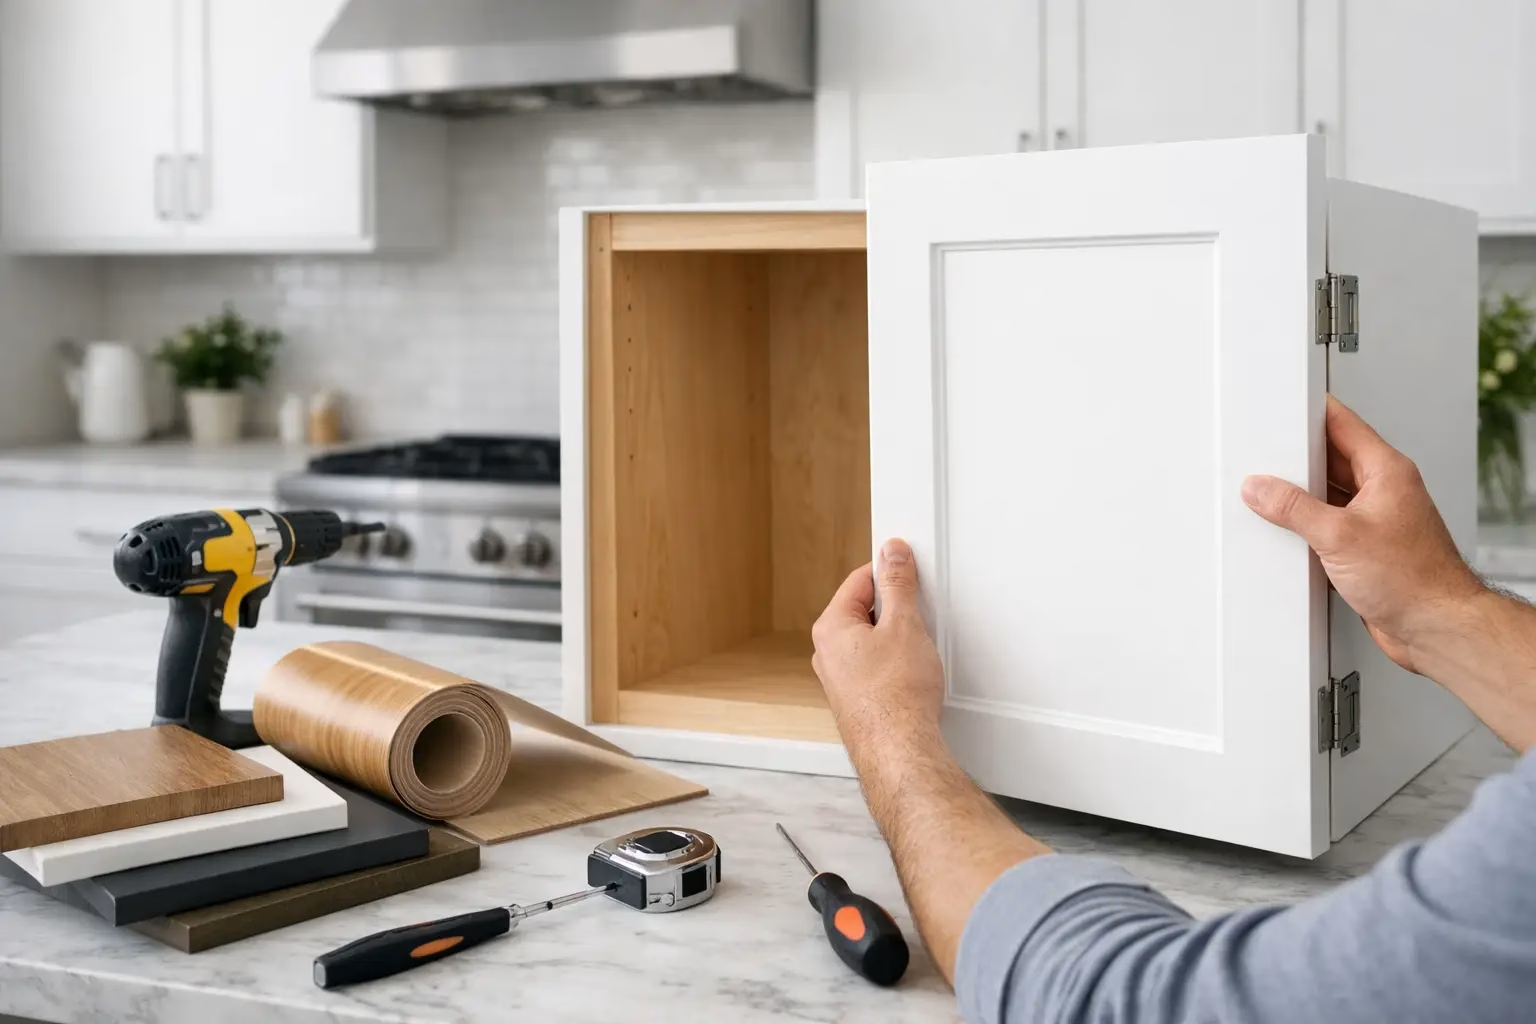
If you are refacing instead of replacing your cabinet boxes, color choice carries even more weight. You are not starting from scratch. You are working with existing flooring, backsplash, paint, and room layout, and the new doors have to make all of it feel intentional. A sample is not a small extra. It is one of the smartest parts of the project.
Why cabinet door sample colors matter more than online swatches
Digital swatches are useful for narrowing down options, but they are not reliable enough for final decisions. Every screen displays color differently. Brightness settings, device quality, and even the time of day can shift how a finish appears.
A physical sample gives you something much more useful - a real surface with real texture, sheen, and undertone. That matters because cabinet finishes do not live in isolation. A white door can look crisp next to marble but yellow next to a cool quartz. A wood-tone PVC finish can feel rich in daylight and muddy under warm recessed lighting. Sample colors let you test those changes before your order goes into production.
For DIY homeowners, samples also reduce the kind of mistake that gets expensive fast. Cabinet refacing saves money because you keep the boxes and replace what people actually see. If the color is off, the whole upgrade can feel disappointing even if the fit and style are perfect.
What to look for when comparing cabinet door sample colors
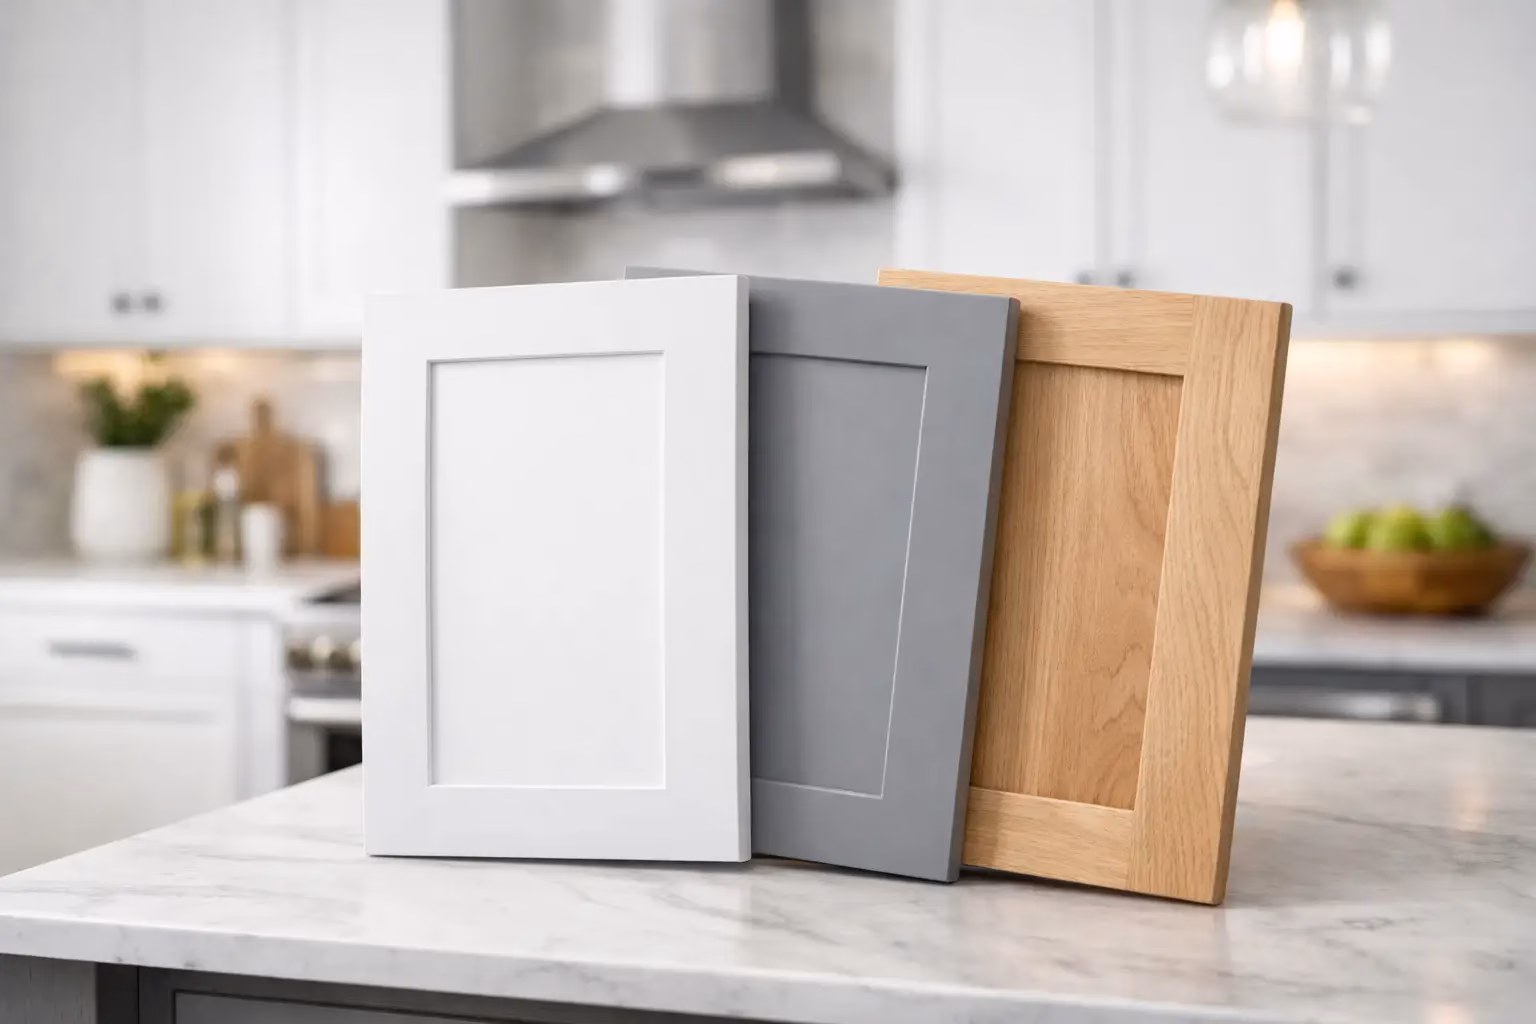
The first thing to pay attention to is undertone. Two colors can both be labeled white, gray, or beige and still behave very differently in a room. One white may lean creamy. Another may lean icy. One gray may carry a green base while another looks taupe. Those subtle differences are usually what decide whether a kitchen feels clean and current or slightly off.
Finish is the next factor. Matte, textured, and smoother surfaces reflect light differently. A color with a low-sheen finish often reads softer and more forgiving. A smoother or brighter finish can feel more modern, but it may also show fingerprints and glare more clearly depending on the room.
Then there is context. Hold samples next to the elements you are keeping. That usually means countertop material, wall paint, flooring, and backsplash. If you are adding new hardware, place the finish beside the sample too. Brushed gold, black, chrome, and bronze can all push the same cabinet color in a different visual direction.
How to test sample colors in your space
The best way to evaluate samples is simple. Move them around. Set them in the kitchen in the morning, again in the afternoon, and once more at night with the overhead lights on. Light is not consistent throughout the day, and your cabinet color will not be either.
Try placing the sample vertically as well as flat. Cabinet doors are seen upright, so a finish may catch light differently when held against the face of a cabinet box or wall. If possible, view it from a few steps back instead of only at arm’s length. That gives you a better sense of how the color will read across an entire run of cabinetry.
It also helps to compare fewer options at once. Homeowners often start with six or eight colors, which is fine for browsing, but final decisions are easier when you narrow it down to two or three. Too many samples side by side can make small differences feel bigger than they really are.
Popular directions homeowners take with cabinet color
Most cabinet projects fall into a few broad color directions, but each one comes with trade-offs.
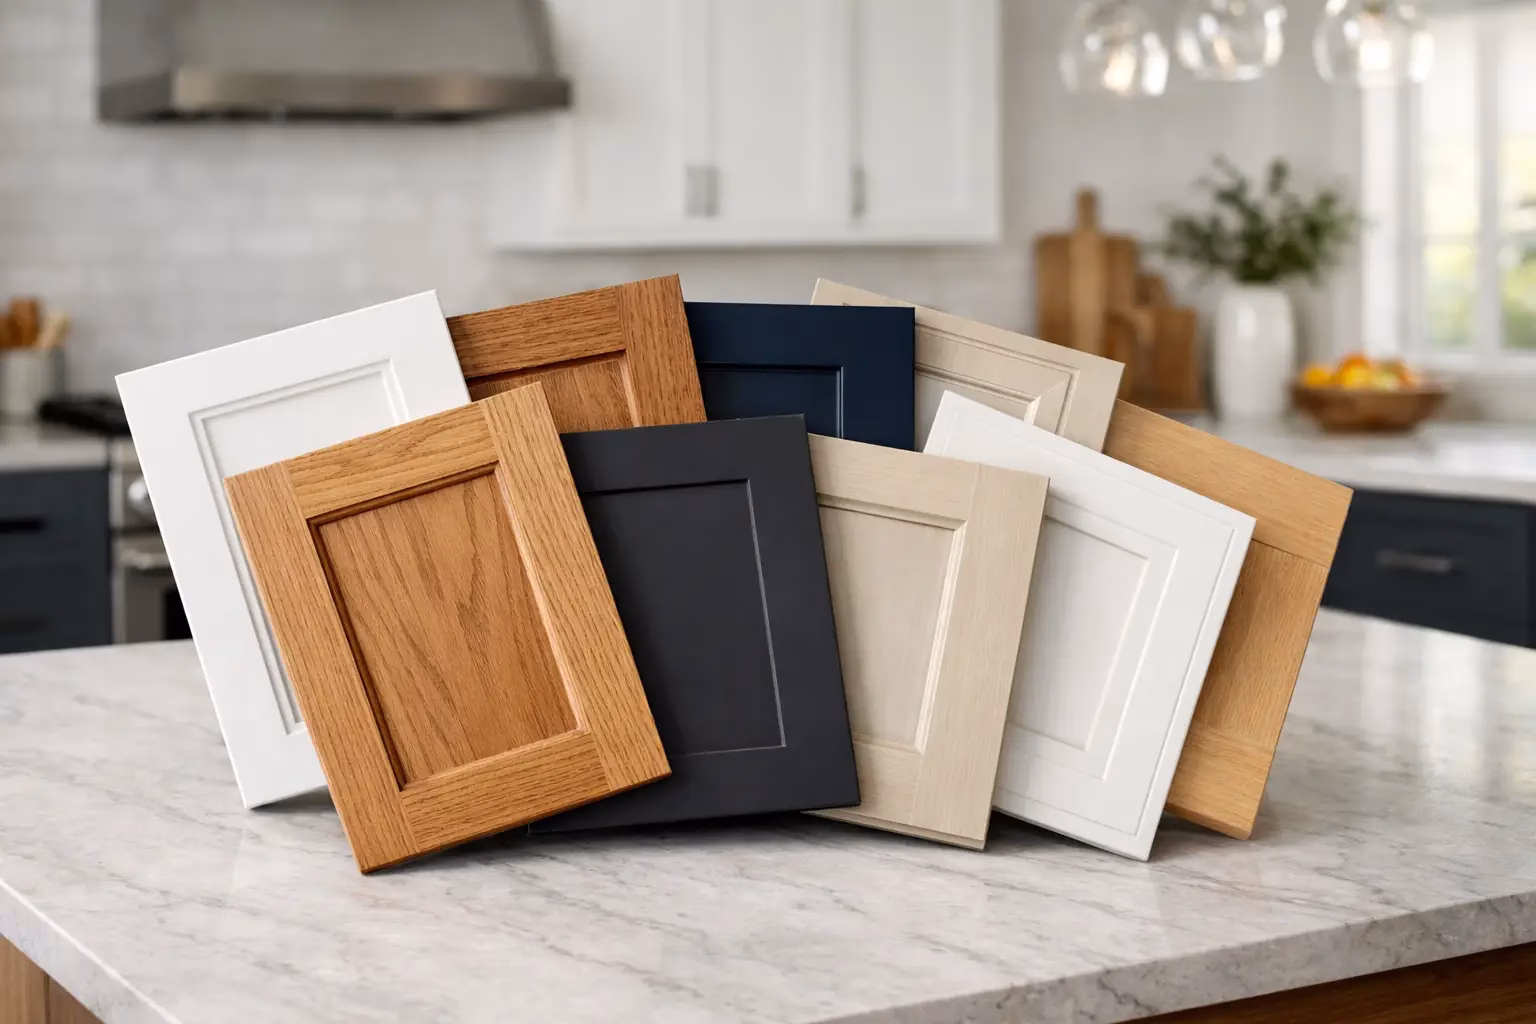
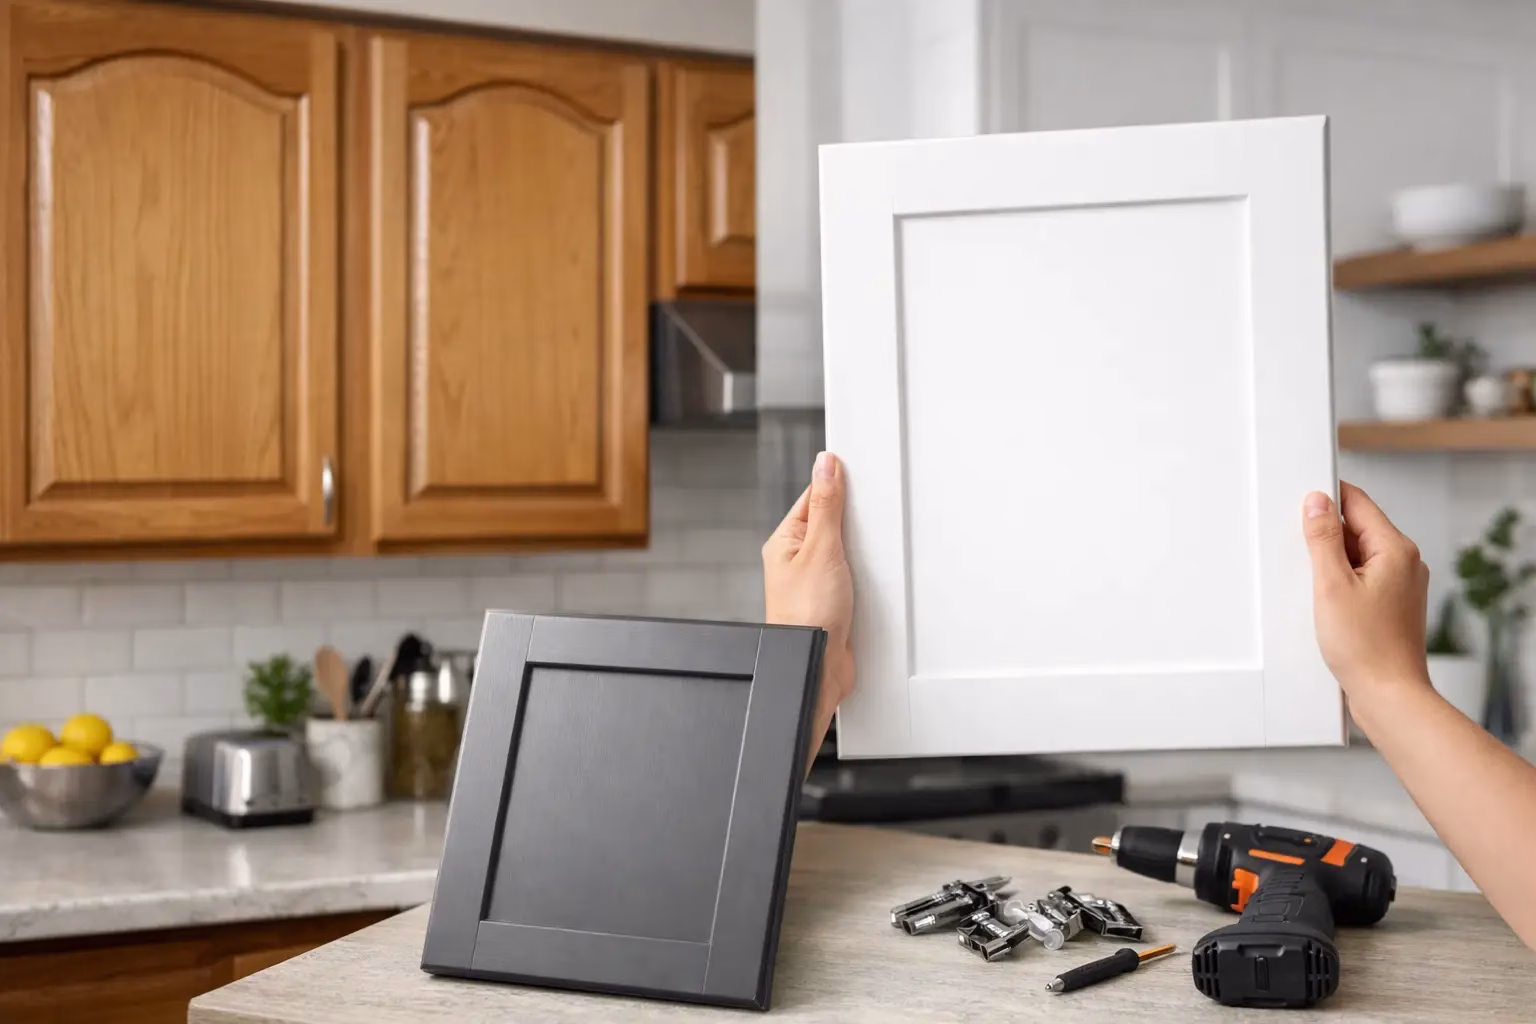
White and off-white finishes remain popular because they brighten a room and work with many design styles. They are especially strong for smaller kitchens, darker spaces, and homeowners who want a clean update without chasing a short-term trend. The trade-off is that whites are the most sensitive to undertone. A white that looks safe online can be the trickiest color to get right in person.
Gray tones still appeal to homeowners who want something neutral but less expected than white. They can feel tailored and contemporary, especially with simple shaker-style doors. The challenge is that some grays age better than others. A warm greige can feel timeless, while a cooler blue-gray may depend more heavily on the rest of the room.
Wood-look finishes and warm neutrals have gained ground because they add depth without making a space feel heavy. These colors work well in kitchens where people want warmth, especially when paired with white counters or lighter walls. The key is balance. Too much warmth in the floor, door finish, and paint can make the room feel dated instead of inviting.
Darker finishes create contrast and can look high-end in the right layout. They often work best where there is good natural light or when used selectively, such as on an island or lower cabinets. In a smaller or dim kitchen, going too dark across every cabinet can make the room feel tighter.
Matching sample colors to cabinet style
Color is only half the decision. Door style changes how that color feels once installed.
A shaker door in a soft white usually reads classic and versatile. The same color on a slab door looks cleaner and more modern. Raised panel doors can make traditional colors feel richer, while flatter profiles often support a simpler, more contemporary palette.
This is why sample colors should be considered alongside the door design you plan to order. A warm beige on an ornate door may lean formal. On a sleek, flat-front style, it may feel understated and current. When homeowners think a color is wrong, sometimes the issue is really the combination of style and finish.
Why samples help budget-conscious remodelers make better decisions
One of the biggest advantages of cabinet refacing is value. You keep the cabinet structure that still works and upgrade the visible pieces for a dramatic change without the cost of a full tear-out. But that value only holds if the final result looks right.
Ordering cabinet door sample colors first is a practical step that protects your budget. It is far less expensive to test colors up front than to second-guess a full custom order later. Samples also make decision-making faster once you are ready to choose your exact measurements, door style, and finish.
For homeowners comparing custom refacing against stock options from a big-box store, this is where custom often shows its strength. Stock cabinetry limits your sizing and finish choices. Custom doors let you tailor the fit and the look, but that flexibility works best when you use samples to confirm your direction with confidence.
Turning inspiration into a confident final choice
A good cabinet update is not about chasing the trend of the month. It is about choosing a finish that works in your home, with your lighting, your layout, and the features you are keeping. Cabinet door sample colors give you a chance to slow down and make that call based on what you actually see, not what a product image suggests.
If you are planning a refacing project, start with the room you have. Look at what stays, gather a few strong sample options, and test them honestly in real conditions. Once the right color becomes obvious, the rest of the project tends to move much more smoothly. At The Door Maker, that kind of clarity is what turns a DIY upgrade into a finished space that looks custom, feels intentional, and stays satisfying long after the install is done.
Mar 31 2026 BY Ksenija Lebec, Blog
When cabinet boxes are still solid but the fronts look tired, shaker cabinet doors custom made for your exact openings can change the whole room without dragging you into a full remodel. That matters even more in older homes, where stock sizes rarely line up cleanly and "close enough" usually turns into filler strips, uneven reveals, and frustration.
Shaker style has staying power for a reason. It is simple, balanced, and flexible enough to work in farmhouse kitchens, transitional bathrooms, home offices, laundry rooms, and built-ins. But the style only looks polished when the fit is right. A beautiful profile cannot fix a door that is undersized, oversized, or misaligned with your existing cabinet boxes.
Why custom shaker cabinet doors make more sense than stock
Stock cabinet doors seem convenient at first. You can compare a few sizes, pick a finish, and imagine the project moving quickly. The problem shows up when your cabinets were built decades ago, installed by a previous owner, or modified over time. Many homes have openings that are off by fractions of an inch, and those fractions matter.
Custom shaker cabinet doors are built to your measurements, not the other way around. That means better spacing between doors, cleaner lines around drawer fronts, and a finished look that feels intentional. If you are refacing instead of replacing cabinet boxes, custom sizing is often the difference between a project that looks updated and one that looks patched together.
There is also the value side. Replacing an entire kitchen because the doors are dated is expensive and wasteful when the cabinet structure is still in good condition. Refacing with custom doors lets you keep what works and upgrade what people actually see every day.
The appeal of shaker style is simple, but not basic
Shaker doors are known for a recessed center panel and clean frame. That simplicity is exactly why they work in so many spaces. They do not fight with countertops, backsplash tile, hardware, or flooring. They give a room structure without making it feel busy.
That said, not all shaker doors feel the same. Rail widths, stile proportions, panel details, edge profiles, and finish choices all affect the final look. A narrow frame can feel more contemporary. A wider frame can lean more classic. White remains a favorite, but wood tones, painted colors, and durable PVC options can shift the style dramatically.
This is where custom ordering helps again. You are not limited to whatever a store decided to stock. You can choose a look that fits your space instead of trying to force your space to fit a preset collection.
What to know before ordering shaker cabinet doors custom
The most important step is measuring. That sounds obvious, but it is where many refacing projects are won or lost. A door that is even slightly off can create uneven gaps or interfere with nearby doors and drawers. If you are ordering replacement fronts for existing cabinets, you need exact dimensions and a clear understanding of overlay.
Overlay affects how much the door covers the cabinet opening and frame. In a framed cabinet, that determines how much face frame remains visible. In a frameless cabinet, it affects spacing and swing clearance. If you are matching existing doors, you will want to measure current overlays carefully. If you are redesigning the look, you may have more flexibility, but the hinge choice still needs to match the plan.
You should also think through door thickness, hinge boring, drawer front sizes, and whether you want a matching style across the kitchen, bath, and other built-ins. Many homeowners start with the kitchen and then realize the pantry, laundry room, mudroom, or office would benefit from the same upgrade. Planning those spaces together often creates a more cohesive home and can simplify ordering.
Material and finish choices affect durability as much as style
A shaker profile can be made in different materials, and each option has trade-offs. Solid wood offers warmth and classic character, but like any natural material, it can respond to humidity and temperature changes. MDF is often chosen for painted finishes because it provides a smooth surface and avoids grain telegraphing through paint. Rigid thermofoil and PVC options can be attractive for homeowners who want consistent color and easier maintenance.
There is no one-size-fits-all answer here. A busy family kitchen may prioritize low-maintenance surfaces. A custom office or bar area may lean more toward a furniture-like wood finish. Bathrooms bring moisture into the equation, so finish performance matters there too.
The right choice depends on where the doors will be used, how the room is ventilated, and what kind of maintenance you are comfortable with. A good custom order is not just about what looks best on day one. It is about what will still look good after years of daily use.
Refacing works best when the details match the vision
Homeowners often think of cabinet doors first, but the finished result comes from the whole front-facing package. Drawer fronts, end panels, moldings, valances, mullions, and decorative accents can take a basic refresh and make it feel truly complete. If your goal is a high-end result without replacing cabinet boxes, these details matter.
For example, a kitchen with new shaker doors but old, worn drawer fronts will still feel incomplete. The same goes for exposed cabinet ends that do not match the new door style. On the other hand, when the fronts, panels, and trim are coordinated, the room reads as a full renovation rather than a compromise.
That is one reason many DIY homeowners prefer working with a custom manufacturer instead of piecing together parts from multiple sources. Consistency in sizing, style, and finish reduces the risk of mismatched tones or awkward proportions.
A better process makes a DIY project feel manageable
Most homeowners are not professional cabinet makers, and they should not have to be. The best custom ordering experience gives you a clear path from measurements to design to final order. That is especially helpful if you are comparing options against big-box stores, where support can be limited and custom choices may still feel surprisingly rigid.
A tool that lets you build your door, select your style, confirm dimensions, and choose finish options takes a lot of uncertainty out of the process. Just as important, educational support matters. Measuring guides, tutorials, and real customer service can save time and prevent expensive mistakes.
At TDM - The Door Maker, that practical support is part of the value. Homeowners want custom results, but they also want confidence that they are ordering the right product for the project in front of them.
When custom is worth it, and when it might not be
In most refacing projects, custom is the smart move because cabinets are rarely as standard as they seem. If your home has non-standard openings, older cabinet boxes, or a layout you want to preserve, custom shaker doors usually deliver a far better result than stock sizes.
There are cases where stock could work. If you have newer cabinets built around common dimensions and you are comfortable making visual compromises, a ready-made option may get you by. But that is usually a short-term decision based on convenience, not finish quality.
If you are investing time into repainting boxes, updating hardware, and improving the look of a room you use every day, the front-facing pieces should fit correctly. Doors are the first thing people see. They should not be the place where the project cuts corners.
Getting the look right without overspending
A full cabinet replacement can quickly push a renovation budget out of reach. Refacing with custom shaker doors gives you a more controlled investment while still delivering major visual impact. You are not paying to tear out usable cabinet boxes, replace countertops unnecessarily, or rework the room around new casework.
That makes custom refacing especially appealing for homeowners who want a tailored finish but still care about value. You can put your budget into the surfaces and details that create the biggest transformation. In many homes, that means new doors, drawer fronts, hardware, and a coordinated finish plan.
Good design does not always come from spending more. Often it comes from making smarter decisions about where precision matters most.
Shaker cabinet doors custom built for your project give you that precision. They respect the cabinet boxes you already have, solve sizing issues stock options cannot, and help you create a cleaner, more finished space without taking on the cost of a full replacement. If your cabinets are structurally sound and your style needs an update, that is a practical place to start.
Mar 30 2026 BY Ksenija Lebec, Blog
If your kitchen cabinets look tired but the boxes are still solid, the real question usually is not whether to update them - it is whether the money is better spent on refacing or full replacement. When homeowners compare cabinet refacing cost vs replacing, they are really weighing three things at once: budget, disruption, and how much change they actually need.
For many homes, especially older homes with cabinets that were built better than what you would buy off the shelf today, refacing can deliver the visual transformation people want without tearing out perfectly usable cabinet boxes. But that does not mean replacing is never the right call. The best choice depends on cabinet condition, layout goals, and how customized you want the final result to be.
Cabinet refacing cost vs replacing: what changes the price?
The price gap between refacing and replacing can be significant, but it is not just about materials. You are also paying for labor, demolition, disposal, installation complexity, and how far the project reaches beyond the cabinets themselves.
With cabinet refacing, you typically keep the existing cabinet boxes and update the visible exterior. That often means new custom cabinet doors, drawer fronts, matching veneer or end panels, updated hinges, and new hardware. If the cabinet frames are in good shape and the layout works, this approach removes a huge portion of the expense that comes with a full tear-out.
Replacing cabinets is a bigger project by nature. You are paying for new boxes, removal of old cabinetry, hauling debris away, and often adjustments to flooring, countertops, plumbing, or electrical depending on the new layout. Even when the new cabinets are stock units, the total can climb quickly once installation and finish details are added.
That is why a simple side-by-side price comparison can be misleading. Refacing costs less in many cases because you are preserving what is still working and investing only where the transformation shows.
When refacing is usually the better value
Refacing makes the most sense when your cabinet boxes are structurally sound, securely installed, and still function well. If the doors are outdated, the drawer fronts are worn, or the finish no longer matches the look you want, replacing those visible components can dramatically change the room.
This is where many DIY homeowners find the sweet spot. Instead of paying for entirely new cabinetry, they order made-to-size doors and drawer fronts, choose a style that fits the home, and update the cabinet exterior for a far lower total investment. In practical terms, you are putting your money into appearance and finish rather than rebuilding the whole system.
Refacing also tends to be a smart choice when your cabinet sizes are unusual. Older homes often have non-standard openings, and trying to replace those cabinets with stock options can create awkward gaps, fillers, or extra carpentry. Custom refacing keeps the original layout while giving you a more tailored look.
There is also a waste factor that matters. If the boxes are strong and serviceable, removing them just to change the style can be an expensive and unnecessary reset. Refacing lets you preserve the usable structure and still get a clean, updated result.
When replacing cabinets earns its higher cost
There are times when replacement is worth every extra dollar. If your cabinet boxes are water-damaged, sagging, poorly built, or badly out of square, refacing may only cover up deeper problems. A fresh exterior will not fix weak construction.
Replacement is also the better route if you want to change the kitchen layout in a meaningful way. If you plan to move appliances, add an island, rework storage zones, or improve traffic flow, keeping the existing boxes may hold the whole project back. In that case, full replacement supports a functional redesign, not just a cosmetic update.
Homeowners sometimes assume replacement automatically means better quality, but that depends on what you buy. A well-built existing cabinet box can outperform a lower-grade replacement cabinet. So the real comparison is not old versus new. It is solid structure plus custom updating versus starting over from scratch.
The hidden costs people forget
The biggest budgeting mistakes happen when people compare only product prices and ignore project costs around them.
With replacement, demolition is the obvious one. Old cabinets need to come out, and someone has to haul them away. Then come the adjustments. If flooring does not run under the old cabinets, a new layout may expose unfinished areas. Countertops may need to be removed and replaced. Backsplash repairs may follow. Small changes can trigger a chain reaction.
Refacing usually avoids much of that disruption. Since the cabinet boxes stay in place, the project can remain focused on doors, drawer fronts, panels, and finishing details. That often means less downtime in the kitchen and fewer surprise costs.
There is also the labor variable. A homeowner with accurate measurements, patience, and the right support can take on parts of a refacing project and reduce overall expense. Full cabinet replacement is much harder to simplify. Once removal, leveling, fitting, and layout corrections enter the picture, the skill requirement goes up fast.
How to decide if your cabinets are good candidates for refacing
A cabinet does not need to be pretty to be worth keeping. It needs to be sound.
Open the doors and look at the boxes themselves. Are the side panels stable? Do the shelves hold weight without bowing badly? Are the cabinet frames attached firmly? Do drawers open properly, even if the fronts are dated? If the answer is yes, refacing is often still on the table.
Surface wear is not usually the deal breaker. Chipped doors, faded finishes, old hinge styles, and out-of-date profiles are exactly the kinds of problems refacing is meant to solve. Structural issues are different. Water damage under sinks, severe warping, and cabinets pulling away from the wall point to replacement instead.
A lot of homeowners are surprised to learn how much the right doors can change the entire room. Door style, panel profile, finish, and hardware do most of the visual work. Once those elements are updated, the kitchen often feels custom without the cost of a full custom cabinet install.
Cost is important, but so is return on effort
The better question is not just, which option is cheaper? It is, which option gets you the result you want for the amount you want to spend and the amount of work you are willing to take on?
If you love your kitchen layout and want a major style upgrade without a major construction project, refacing usually gives you the strongest return. You can focus on custom sizing, better design choices, and cleaner finishes without paying for a full reset.
If your kitchen no longer works for your household, or the cabinets are failing, replacement gives you a chance to fix the underlying issues. It costs more because it solves more. That can be the right investment when function is the real problem.
For many DIY renovators, the best value sits in the middle: keep the cabinet boxes that still serve you well, then upgrade the parts that define the look every day. That is why custom-fit doors and drawer fronts matter. Precision sizing helps older cabinets feel new instead of patched together.
At TDM - The Door Maker, that is the advantage homeowners are after. They want the flexibility to choose the style, color, and fit that works for their space without being pushed into full replacement just to get a fresh look.
Which option makes sense for your home?
If your cabinet boxes are solid, your layout still works, and your goal is a dramatic visual update at a better value, refacing is often the smarter spend. If the boxes are damaged, storage is poorly planned, or you are redesigning the room from the ground up, replacement may justify the extra cost.
The key is to be honest about what is actually wrong. If the problem is mostly appearance, replacing everything can be overkill. If the problem is structure or function, refacing may only delay the bigger fix.
A good renovation decision feels clear once you separate cosmetic changes from structural ones. Start there, measure carefully, and choose the option that improves the space without paying for work you do not need.
Mar 29 2026 BY Ksenija Lebec, Blog
If your kitchen still has solid cabinet boxes but the doors look dated, the style of the door matters more than most homeowners expect. The best cabinet door styles for kitchens can completely change the feel of the room without the cost, mess, and downtime of tearing everything out.
That is why cabinet refacing works so well when the layout still functions. You keep what is structurally sound, then update the visible surfaces with custom doors and drawer fronts that fit your space exactly. The right door style does more than improve appearance. It sets the tone for the whole kitchen, from classic and formal to clean and modern.
How to choose the best cabinet door styles for kitchens
Start with the character of your home, not just what is trending online. A door style that looks great in a brand-new modern build may feel out of place in a traditional colonial, and a detailed raised panel may overwhelm a small galley kitchen that needs a lighter look.
The practical side matters just as much. Some cabinet door styles collect more dust and grease in corners and profiles. Others are easier to wipe down and better suited for busy family kitchens. If you cook often, have kids, or simply want a low-maintenance finish, those trade-offs are worth thinking through before you order.
Custom sizing is another big part of the decision. Many older homes have cabinet openings that do not play nicely with stock replacement options. Choosing a style is only half the job. Getting that style made to the exact size is what gives a refacing project its finished, built-for-your-home look.
1. Shaker cabinet doors
Shaker is still one of the most popular choices for a reason. It has a recessed center panel with a simple frame, which gives it enough detail to feel finished without looking busy. That balance makes it work across a wide range of kitchens.
If you want flexibility, Shaker is hard to beat. Painted white or soft gray, it leans classic and clean. In a stained wood finish, it can feel warm and craftsman-inspired. In darker colors or a slim-profile version, it can even move toward a more modern look.
This style is especially strong for homeowners who want an update that will age well. It is not overly trendy, and it pairs easily with different hardware, countertops, and backsplashes.
2. Slim Shaker cabinet doors
Slim Shaker takes the familiar Shaker layout and narrows the frame for a more current appearance. The result is cleaner and a little sharper, which makes it a strong fit for transitional and modern kitchens.
For smaller kitchens, this style can also help the room feel less visually crowded. The narrower frame keeps the eye moving, especially when paired with lighter colors. If standard Shaker feels a little too traditional but slab feels too plain, Slim Shaker often lands in the sweet spot.
3. Raised panel cabinet doors
Raised panel doors bring more depth and formality. The center panel is lifted rather than recessed, creating shadows and detail that stand out more than Shaker-style doors.
This is a good option if your kitchen has a traditional design language and you want the cabinetry to feel richer or more furniture-like. Raised panel doors often work well in larger kitchens where the extra detail has room to breathe.
The trade-off is maintenance and visual weight. In a compact kitchen, heavily detailed doors can make the room feel busier. They also have more edges and profiles to clean.
4. Recessed panel cabinet doors
Recessed panel doors cover a broad range of styles, including Shaker, but the wider category is worth calling out because it offers lots of flexibility. A recessed center panel gives you dimension without the heavier look of a raised panel.
For many homeowners, this is the safest place to start. It can feel traditional, transitional, or even slightly modern depending on the frame width, edge profile, finish, and hardware. If you want a style with staying power and broad appeal, recessed panel designs deserve a close look.
5. Slab cabinet doors
Slab doors have a flat front with no frame and no panel detailing. They are minimal, streamlined, and easy to clean. If your goal is a contemporary kitchen with crisp lines, slab doors are one of the strongest choices.
They also work well in utility-minded spaces where simplicity matters, such as laundry rooms, home offices, and secondary kitchens. A smooth surface keeps visual clutter low and makes day-to-day cleaning straightforward.
That said, slab doors are less forgiving if the rest of the kitchen still leans very traditional. They look best when the surrounding finishes support the same clean, modern direction.
6. Beadboard cabinet doors
Beadboard doors add vertical groove detailing that gives the kitchen a more casual, cottage, or farmhouse feel. They can bring charm to a space that feels plain, especially in smaller kitchens, islands, or accent areas.
This style works best when used with intention. In the right home, it feels inviting and timeless. In the wrong setting, it can read overly themed. Many homeowners find beadboard most effective when mixed with simpler door styles rather than used wall-to-wall.
7. Glass-ready cabinet doors
If you want to break up a run of solid cabinetry, glass-ready doors are worth considering. They add visual openness and give you a place to display dishes, glassware, or decorative pieces without replacing all your doors with something more ornate.
This is less about a full-kitchen style and more about balance. A few glass-front upper doors can lighten the room and make a refaced kitchen feel more custom. They are especially useful in kitchens with a lot of upper cabinetry that might otherwise feel heavy.
8. Mullion cabinet doors
Mullion doors use divided sections over glass, creating a more decorative and architectural look. They can feel traditional, classic, or even slightly European depending on the pattern and finish.
These are statement doors, so placement matters. They usually make the most impact on a small number of cabinets rather than across every upper. If your kitchen needs a focal point, mullion doors can provide it without requiring a full redesign.
9. Arched cabinet doors
Arched doors soften the look of cabinetry by introducing a curved top profile. They are often associated with traditional kitchens and can add elegance where square lines feel too plain.
The decision here comes down to how much ornament you want. A subtle arch can look refined and custom. A more pronounced shape may feel dated if the rest of the kitchen is moving toward a cleaner, simpler style.
10. Contemporary textured or PVC-finished doors
For homeowners looking beyond paint-grade and stain-grade wood alone, contemporary doors in PVC finishes open up more color and surface options. These are often used for sleek, modern kitchens where consistency and durability matter.
A smooth matte finish, wood-look texture, or bold contemporary color can dramatically change the space. This route is especially appealing if you want a custom look that stands apart from basic big-box choices. The key is making sure the door style and finish work together. A modern finish usually looks best on a clean-profile door, not one with heavy traditional detailing.
Which cabinet door style is best for your kitchen?
The honest answer is that it depends on the look you want, the size of your kitchen, and how you use it every day. If you want the broadest long-term appeal, Shaker and recessed panel doors are usually the safest bets. If you want a more updated edge, Slim Shaker often gives you that fresh look without feeling cold. If your home leans traditional, raised panel or arched doors may feel more natural.
For low-maintenance households, slab doors and simpler recessed panel styles are often easier to live with. For homeowners trying to create a custom designer feel, mixing styles can work well, such as solid doors around the perimeter and glass or mullion doors in a feature area.
This is where made-to-order cabinetry components make a real difference. When doors are built to your exact measurements, you are not forced to compromise on fit just because your kitchen has non-standard openings. That precision helps even a budget-conscious project look finished and intentional.
At TDM - The Door Maker, many homeowners start by narrowing the style first, then choosing the panel, finish, and sizing that match their project goals. That process keeps the project manageable and helps you move from inspiration to a door that actually works in your kitchen.
A better way to narrow your options
If you are stuck between two or three styles, stop looking at the door by itself. Picture it with your floor, wall color, countertop, backsplash, and hardware. The best choice is usually the one that fits the whole room, not the one that grabs the most attention in a sample photo.
You should also think about how long you want this update to last stylistically. A kitchen refacing project can deliver major value, but only if the result still feels right to you years from now. Simple, well-proportioned door styles tend to hold up best.
When the cabinet boxes are still solid, replacing the doors is often the smartest place to invest. Get the measurements right, choose a style that suits your home, and let the details do the work. A new kitchen does not always start with demolition. Sometimes it starts with better doors.
Mar 28 2026 BY Ksenija Lebec, Blog
A drawer front that is off by even a quarter inch can make an entire cabinet run look tired, uneven, or cheaply updated. That is why cabinet drawer fronts custom size options matter so much in a refacing project. When your cabinet boxes are still solid, replacing the visible fronts with the right measurements can change the look of your kitchen, bathroom, office, or built-ins without the cost and mess of tearing everything out.
For many homeowners, the biggest surprise is how often stock sizes fall short. Older homes, builder-grade cabinets, and previous remodels rarely leave you with perfectly standard openings. If you try to force a stock solution onto non-standard cabinetry, you usually end up compromising on reveals, alignment, or overall appearance. Custom sizing solves that problem at the source.
Why cabinet drawer fronts custom size options make such a difference
Cabinet refacing is all about keeping what still works and improving what you see every day. If the cabinet boxes are structurally sound, the fronts do most of the visual heavy lifting. Drawer fronts sit at eye level, they define the rhythm of the room, and they affect how polished the entire installation feels.
Custom sizing gives you control over that finished look. Instead of choosing the closest available option and hoping it works, you can order drawer fronts made for your exact dimensions. That means cleaner lines, more consistent spacing, and a result that looks intentional rather than patched together.
There is also a practical side to it. A properly sized drawer front helps maintain even gaps between drawers and doors, which matters for both function and appearance. In a full bank of drawers, small sizing errors add up quickly. One oversized front can throw off the visual balance of the entire stack.
When stock sizes are not enough
Stock drawer fronts work best in very specific conditions - usually newer cabinetry built around standard dimensions. But many homeowners are not working with brand-new boxes. They are updating oak cabinets from the 1990s, refreshing a bathroom vanity with unusual drawer widths, or trying to match an existing built-in that was never made to retail standards.
That is where custom sizing earns its value. It lets you work with the cabinets you already have instead of rebuilding around what a store happens to carry. If your goal is to improve the look of the room while staying on budget, that flexibility matters.
The trade-off is simple. Custom drawer fronts require accurate measurements, and accuracy matters. The good news is that measuring is very manageable when you approach it carefully. A little attention upfront saves time, money, and frustration later.
How to measure cabinet drawer fronts custom size accurately
The right size starts with the right method. In most refacing projects, you are measuring the existing drawer front, not the drawer box behind it. That visible front determines the look, reveal, and fit.
Start by measuring width and height in inches, and double-check each dimension. Measure the actual front piece, not just the opening, because the front usually overlays the cabinet frame or box. If you are replacing multiple drawer fronts in one section, measure each one individually. Cabinets that look identical are not always identical.
It also helps to pay attention to the overall layout. Are your current reveals even? Do you want to keep the same overlay, or are you refining the look during the update? If your old fronts were poorly sized, copying them exactly may repeat the same visual issues. In that case, it makes sense to review spacing and sizing before ordering.
For slab fronts, measurement is straightforward, but for more decorative styles, precision becomes even more important because proportions affect the final appearance. A shaker drawer front with the wrong dimensions can technically fit and still look awkward next to surrounding doors.
If you are ordering unfinished or paint-grade products, remember that surface preparation and finishing will not fix incorrect sizing. Finish can enhance the front. It cannot make a bad fit look custom.
Choosing the right style for your space
Sizing gets the fit right, but style is what changes the room. The best cabinet drawer fronts custom size projects balance both. A clean slab front can modernize a dated kitchen quickly. A shaker profile offers flexibility and works in transitional, farmhouse, and more contemporary spaces. Raised panel styles tend to suit traditional rooms where you want more detail and depth.
The right choice depends on the room, the cabinet doors around it, and the finish you want. If you are replacing only drawer fronts, matching the door style closely is essential. If you are doing a full reface, you have more freedom to reshape the overall design.
Color and material also affect the result. Painted finishes can brighten an older kitchen and make it feel more current. Wood species and stains bring warmth and character, especially in offices, bars, and built-ins. PVC options can be a smart choice when you want consistency, durability, and a clean, low-maintenance surface.
There is no single best option for every home. A white shaker kitchen may feel fresh and timeless in one house, while a natural wood finish suits another better. The strongest results come from choosing a style that fits the architecture of the space and the way you want it to feel every day.
What custom sizing saves you compared with full replacement
Many homeowners start shopping for cabinet upgrades expecting they need all new cabinetry. Then they realize the boxes are still usable, the layout still works, and the biggest issue is appearance. That is where custom drawer fronts and cabinet doors create real value.
Replacing fronts is usually far less expensive than a full cabinet replacement, and it avoids many of the disruptions that come with demolition. You are not paying to remove solid cabinet boxes just because the style is dated. You are updating what people actually see.
There is also less waste. Keeping existing cabinet structures in place can be a smarter renovation move when the goal is visual transformation rather than a complete redesign. You still get a tailored look, especially when the fronts are made to your exact dimensions.
That said, refacing is not the answer for every project. If cabinet boxes are damaged, poorly installed, or the layout no longer works for your household, full replacement may be the better long-term move. But if the bones are good, custom fronts often give you the best return for the money.
Ordering with confidence
The part that stops many DIY customers is not style. It is the fear of getting the numbers wrong. That hesitation is understandable, but it should not keep you from a better result. A clear process makes custom ordering much easier than most people expect.
Measure carefully, confirm your dimensions, choose your style, and review material and finish options based on how the space is used. Kitchens and bathrooms usually need durability and easy maintenance. Offices and built-ins may give you more room to prioritize design details.
If you are comparing custom products against big-box options, look beyond the initial price tag. Stock fronts can seem cheaper until you factor in compromise, wasted time, filler solutions, or a finished look that never feels quite right. Precision has value, especially in visible areas like drawer banks and vanity cabinets.
At TDM - The Door Maker, the goal is to make that custom process easier for homeowners who want professional-looking results without taking on a full cabinet replacement. When you can measure, design, and order to fit your actual space, the project becomes a lot more practical.
A better fit looks better because it is better
Home improvement projects do not always need a bigger scope. Sometimes they need a more precise one. Cabinet drawer fronts made to custom size give you the chance to refresh a room with accuracy, style, and better value, especially when your existing cabinets still have plenty of life left in them.
If you are standing in your kitchen or bathroom looking at solid cabinet boxes and dated fronts, that is not a dead end. It is usually the starting point for a smarter upgrade - one that fits your space the way it should have from the beginning.
Mar 27 2026 BY Ksenija Lebec, Blog
If your cabinet boxes are still solid but the fronts look dated, unfinished cabinet doors can be the difference between a full gut remodel and a smart, high-impact upgrade. They give you a clean slate - custom-sized doors you can paint or stain yourself - without paying for brand-new cabinetry you may not need.
That flexibility is exactly why so many homeowners consider them during a kitchen, bath, office, or built-in refresh. But they are not the right choice for every project. The value is real, especially in refacing, yet the best result depends on your finish goals, your timeline, and how comfortable you are with prep work.
What unfinished cabinet doors actually offer
Unfinished doors arrive sanded and ready for the next step, but not coated with paint, stain, or clear finish. In practical terms, that means you control the final look. If you want a specific white that matches trim elsewhere in the house, a custom stain that works with existing flooring, or a furniture-style painted finish, unfinished doors give you room to make those decisions yourself.
For DIY renovators, that control matters. Stock products often force you into a handful of standard sizes and a small color palette. Older homes rarely cooperate with standard sizing, and even newer homes can have cabinet openings that vary enough to make off-the-shelf replacements frustrating. Custom unfinished doors solve the fit problem first, then let you handle color on your terms.
There is also a cost conversation here. When you buy a door unfinished, you are typically not paying for factory finishing. That can reduce upfront cost, although the total project cost depends on the materials, tools, and time you invest to finish them properly. If you already paint or stain with confidence, the savings can be meaningful. If you need to buy spray equipment, workspace protection, primers, and topcoats from scratch, the math can shift.
When unfinished cabinet doors make the most sense
The strongest case for unfinished doors is a cabinet refacing project where the boxes are in good shape and the goal is visual transformation, not layout change. Maybe your oak kitchen screams 1996, but the cabinets are structurally sound. Maybe your bathroom vanity has builder-grade doors that never looked right. Maybe your office built-ins need a cleaner, more tailored style. In those situations, replacing only the doors and drawer fronts can produce a dramatic change for far less than full replacement.
They also make sense when color matching is non-negotiable. Factory-finished options are convenient, but they may not line up with surrounding trim, island cabinetry, or a design palette you already committed to. Unfinished doors let you work backward from the exact finish you want.
Another good fit is when you want more customization than a big-box store can offer. If your project includes mullion doors, a specific panel profile, or non-standard dimensions, custom manufacturing matters. A precise fit is what makes refacing look intentional rather than patched together.
Where unfinished doors can be the wrong choice
The biggest trade-off is labor. Unfinished means unfinished. You still need to inspect, prep, prime if painting, apply finish evenly, and allow proper cure time before daily use. If your schedule is tight or your space cannot be out of commission for long, a prefinished option may be the better path.
Skill level matters too, especially with darker paints, smooth modern styles, and stain-grade wood. A shaker door painted navy or black will show flaws more readily than a softer neutral. Stain can be even less forgiving because wood grain, species variation, and sanding technique all affect the final appearance. If you want a flawless furniture-grade finish and do not enjoy finish work, outsourcing that part or ordering finished products may save frustration.
Humidity, dust, and workspace can also work against you. A garage project in the middle of summer or winter may not give you ideal finishing conditions. Good results are possible, but conditions matter more than many first-time DIYers expect.
How to choose the right unfinished cabinet doors
Start with fit, not style. Before you fall in love with a profile, make sure you have accurate measurements for each opening. Refacing succeeds on precision. A beautiful door with the wrong overlay or hinge bore setup will slow the whole project down.
Next, think honestly about the final finish. Paint-grade and stain-grade are not interchangeable decisions. If you plan to paint, choose a door and wood option suited to painted finishes. If you want stain, pay close attention to wood species and grain character. Maple, red oak, and other species do not absorb stain the same way or deliver the same look.
Style should support the house and the room, not just current trends. A slim shaker door can modernize a kitchen quickly, while a raised panel may better fit a more traditional home. Neither is automatically right. The better question is what will still feel correct after the excitement of the remodel wears off.
Finishing unfinished cabinet doors without regret
A good finish starts before the first coat. Even if the doors arrive well prepared, inspect every surface in good light. Light sanding, careful dust removal, and patience during prep often make the difference between an average result and a professional-looking one.
For paint, primer matters. Use one that bonds well and creates a smooth base, especially if the doors will live in kitchens or bathrooms where moisture and cleaning are part of daily life. Apply thin, even coats and respect dry and cure times. Rushing recoat windows is one of the fastest ways to create a finish that chips, gums up, or prints under normal use.
For stain, test first on a sample or hidden area if possible. The same stain color can look dramatically different depending on wood species and application method. A pre-stain conditioner may help in some cases, but not every species needs it. What matters most is consistency from door to door.
Spraying usually delivers the smoothest painted finish, but high-quality brushing and rolling can still work when done carefully. If you are painting shaker doors, a small foam roller and quality brush may be enough. If you are finishing a whole kitchen and want a factory-smooth appearance, spraying becomes more attractive.
Why custom sizing changes the whole outcome
This is where many DIY projects either look custom or look compromised. Cabinets in real homes are not always built to stock assumptions. Openings can vary by fractions of an inch, hinge requirements can differ, and decorative details need proportion to feel right.
Custom unfinished cabinet doors let you solve those issues before finishing starts. That is especially important if you are updating older cabinetry, adding decorative components, or trying to carry one style across a kitchen and nearby built-ins. Precision in the order stage reduces headaches later, and it protects the investment you make in finishing.
At The Door Maker, the strongest advantage for homeowners is not just product choice. It is the ability to configure doors to your exact measurements and design preferences so the finished project looks intentional from every angle. That is what separates a simple parts swap from a real transformation.
Cost, value, and the DIY reality check
Unfinished cabinet doors can absolutely be a better value than replacing entire cabinets, but value is not just the product price. It includes your time, your confidence with finishing, and the result you are aiming for.
If you enjoy hands-on projects, already have basic tools, and want control over color and sheen, unfinished doors are often a smart buy. If you are trying to minimize labor and finish uncertainty, paying more upfront for a finished option may be worth every dollar.
The middle ground is common too. Some homeowners order custom doors and drawer fronts, then hire out only the painting or staining. That hybrid approach can still save money compared with full cabinet replacement while protecting the final look.
What matters most is choosing a path that matches your project, not someone else’s. A budget kitchen can still look high-end when the measurements are right, the door style fits the space, and the finish is handled with care.
Unfinished cabinet doors are not just a product choice. They are a project choice - one that rewards precision, patience, and a clear plan. If you want to keep your existing cabinet boxes, control the final color, and create a more custom look without taking on a full replacement, they can be one of the smartest upgrades in the room. Start with accurate measurements, be honest about your finishing skills, and give yourself enough time to do it right. The payoff shows every time you open the door.
Mar 26 2026 BY Ksenija Lebec, Blog
When it makes sense to replace cabinet doors only
This option works best when your cabinet boxes are in good shape. If the frames are level, firmly attached, and free from major water damage, replacing the fronts can completely change the look without changing the footprint of the room. That matters more than many homeowners realize. Most kitchens do not feel outdated because the cabinet boxes are failing. They feel outdated because the door style, finish, or hardware no longer fits the home. Raised oak doors from the 1990s, chipped paint, or mismatched additions from previous remodels can make the whole room feel tired even when the underlying cabinetry is still doing its job. Bathrooms, laundry rooms, offices, mudrooms, and built-ins are good candidates too. Anywhere you have a solid cabinet structure but want a cleaner, more current look, new custom doors can make the space feel intentional again.When replacing only the doors is not the right move
There are cases where a full replacement makes more sense. If your cabinet boxes are warped, swollen from moisture, badly out of square, or poorly installed, new doors will not fix those underlying issues. The same is true if you want a totally different layout, need more storage function, or plan to move appliances and plumbing. There is also a middle ground. Some homeowners want the savings of refacing but also need a few modifications, such as adding drawer fronts, replacing exposed end panels, or updating moldings and trim for a more complete finished look. That is often still far more affordable than replacing everything, but it requires a little more planning.The real value of replacing cabinet doors only
The biggest advantage is not just price. It is the combination of cost control, customization, and visual impact. A full cabinet replacement usually brings demolition, dust, countertop complications, plumbing disconnects, wall repair, and a longer timeline. Replacing doors keeps the project focused. You preserve what is working and improve what people actually see every day. That can be especially valuable in older homes where cabinet openings are not standard sizes. Stock replacement doors often create more frustration than savings because they are built around standard dimensions. Custom-made doors solve that problem by fitting your existing cabinetry instead of forcing your cabinetry to fit the product. Design is another reason homeowners go this route. You are not limited to whatever is sitting in a warehouse. You can choose the style, profile, panel design, and color that fit your home, whether you want a simple Shaker kitchen, a more traditional raised-panel look, or a clean slab door for a modern space.How to know if your cabinets are good candidates
Before you order anything, inspect the cabinet boxes closely. Open every door. Check the hinges, face frames, side panels, and shelves. Look for sagging, soft spots, major cracks, or signs of repeated water exposure under sinks and around dishwashers. Then check alignment. If doors are currently rubbing because the cabinet opening is twisted or the box has shifted, replacing the door alone may not solve the problem. On the other hand, if the issue is just old hinges, bad finish wear, or an outdated style, new doors can be an excellent fix. You should also think about whether you like the current layout. Replacing cabinet doors only makes sense when the layout already serves your needs. If you have never had enough drawers, your corner cabinet is unusable, or the room needs a complete redesign, it may be time to consider a larger project.Measure carefully or the whole project gets harder
This is the step that deserves the most attention. Even the best-looking cabinet door will disappoint if the measurements are off. For overlay cabinet doors, the exact opening size and desired overlay determine the final door dimensions. Inset applications are even less forgiving because the fit has to be precise inside the opening. Drawer fronts also need to be measured with the final reveal and spacing in mind. That sounds technical, but it is manageable when you approach it methodically. Measure each opening individually, even if cabinets appear identical. Older homes often prove otherwise. Write everything down clearly, label each opening, and double-check before ordering. A good configuration process should make this easier, not more confusing.Style choices matter more than people expect
Once measurements are set, the style decision becomes the fun part. This is where the room starts to take shape. Shaker remains popular because it works with almost any home style and does not date quickly. Slim shaker profiles feel more contemporary, while wider rails and stiles lean more traditional. Raised panels add formality. Slab doors create a cleaner, simpler look. Mullion doors can break up a run of solid fronts and add visual interest in kitchens, bars, or built-ins. Color and finish also change the mood dramatically. Bright PVC finishes can make a small kitchen feel more open, while rich wood tones or darker colors create contrast and depth. Hardware should be considered at the same time, because door style and pull selection need to work together rather than compete.Replacing cabinet doors only can still look fully custom
One common concern is whether the project will look pieced together. It can, if you stop at doors and ignore the surrounding details. But when the project is planned well, it can look remarkably polished. Matching drawer fronts, coordinating end panels, updated hinges, fresh hardware, and the right trim pieces go a long way. In many spaces, adding crown molding, valances, or decorative components creates the difference between a basic refresh and a finished custom look. This is where made-to-order products have a clear advantage. You are not trying to compromise with the closest available option. You are building a coordinated result around your exact cabinet sizes and your design goals.DIY-friendly does not mean careless
Homeowners often choose this route because they want control over budget and timeline, but good DIY results come from patience and precision. That means confirming measurements, understanding your hinge type, planning your finish choices, and laying out the installation before the first door goes on. The installation itself is often very manageable. Remove old doors, prep the surfaces, install the new hardware, and hang the new fronts carefully. Fine adjustments are normal. You may need to tweak hinge alignment or spacing to get consistent reveals. What makes the project feel easier is working with a supplier that supports the process clearly. Tools that help you design the door, order the correct size, and understand your options remove a lot of the uncertainty that usually slows DIY projects down.Why custom often beats big-box convenience
Big-box stores can be useful for certain renovation supplies, but cabinet refacing is one of those projects where standard options often fall short. Many homes simply do not have standard openings, and even when they do, style choices may be limited. Custom doors give you more control over fit and appearance. That usually leads to a better finished result and fewer workarounds. It also helps you avoid a common renovation mistake: spending less up front, then spending more time and money trying to make an almost-right product work. For homeowners who want a more tailored result without moving into full custom cabinetry pricing, that balance matters. Companies such as The Door Maker are built around that exact need, combining made-to-order sizing with a process that is still approachable for DIY renovators.Is it worth it?
If your cabinet boxes are solid and your main frustration is the look of the room, the answer is often yes. Few upgrades change a kitchen or bathroom this dramatically without changing the entire structure. You keep what still works, improve what does not, and put your budget where it shows. The key is being honest about the condition of your cabinets and disciplined about measurements. Do that well, and replacing cabinet doors can feel less like a compromise and more like the smartest version of a remodel. A room does not need to be gutted to feel new. Sometimes the better renovation decision is the one that respects the bones of the space and upgrades it with precision.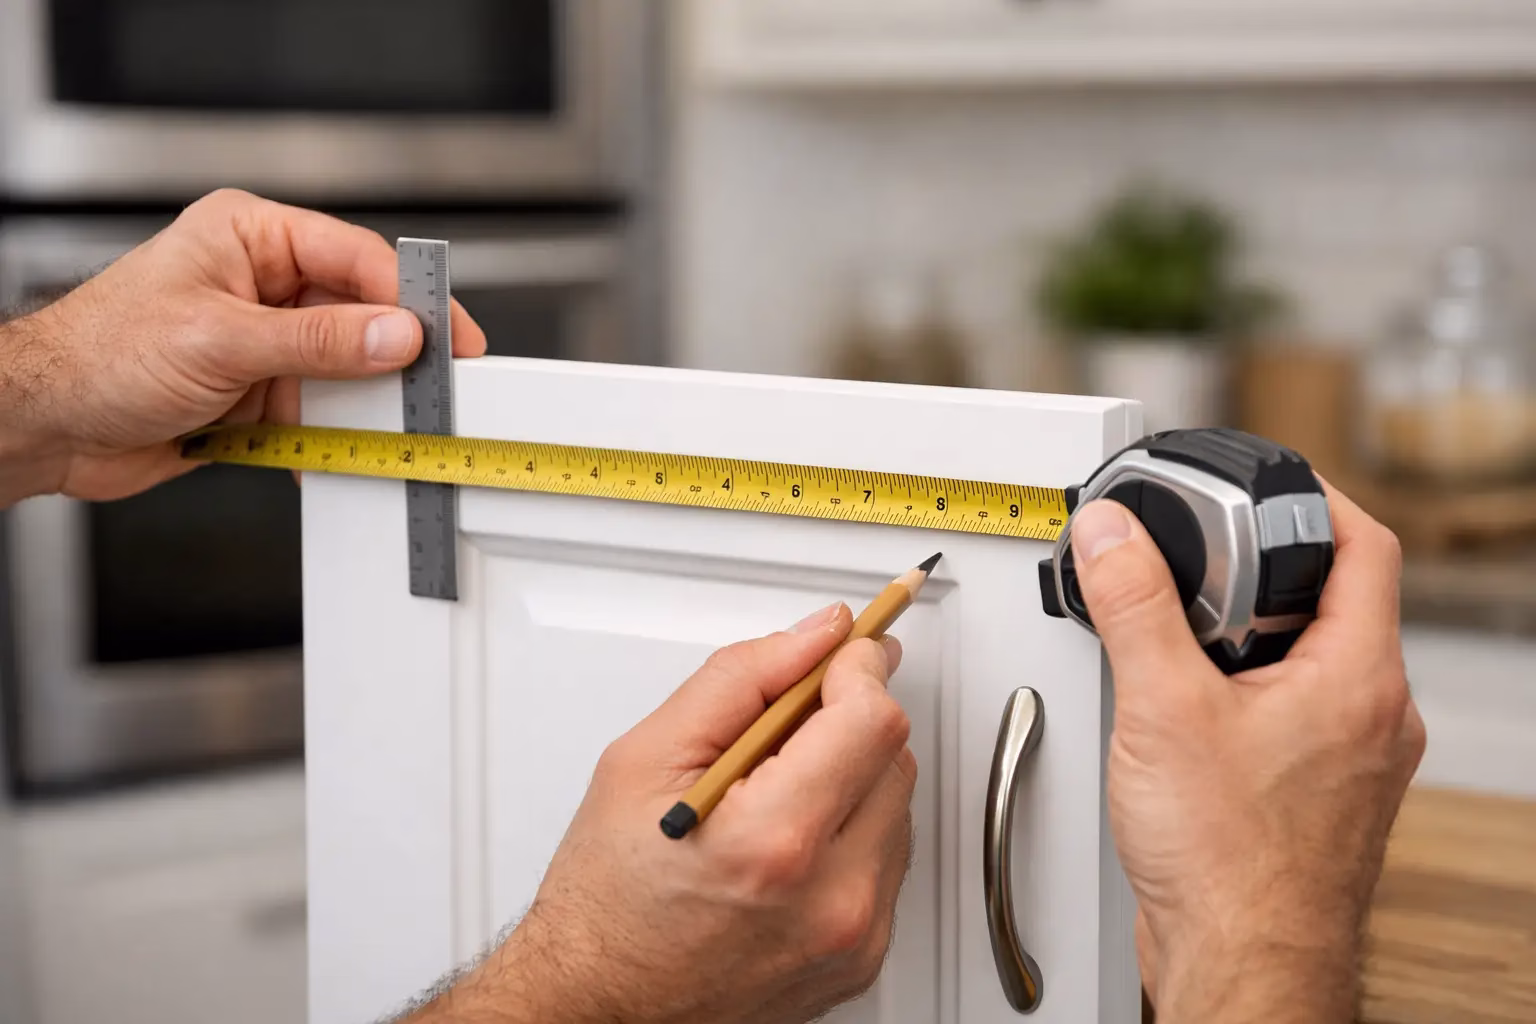
Mar 25 2026 BY Ksenija Lebec, Blog
A cabinet door that is off by even 1/8 inch can turn a smart refacing project into a frustrating one. If you're learning how to measure cabinet doors, the good news is that the process is straightforward once you know what you’re actually measuring - and why. The goal is not just to get numbers on paper. It’s to end up with doors that fit cleanly, look balanced, and give your cabinets that finished custom feel.
For most homeowners, the biggest mistake is measuring the old door and assuming that number should be reordered. Sometimes that works. Often, it doesn’t. Older homes, replacement hinges, sagging frames, and uneven reveals can all throw things off. A better approach is to measure the cabinet opening and determine the right overlay for your setup.
What you need before you measure
Keep it simple. You need a tape measure with clear 1/16-inch markings, a pencil, paper, and a way to label each opening. A small notebook works well if you’re measuring a full kitchen or bath. If you want extra peace of mind, a second person can help confirm numbers, but this is still very doable on your own.
Measure carefully and write everything down immediately. Do not trust memory, especially if several doors are close in size. One transposed number can hold up an entire project.
How to measure cabinet doors for the best fit
The first step is identifying what kind of cabinet you have. Most refacing projects involve framed cabinets, where a face frame surrounds the cabinet opening. In that case, your cabinet door usually overlays, or covers, part of that frame. The amount of overlay affects the final door size.
If you have a frameless cabinet, the process can be different because the door is sized relative to the cabinet box and hinge style. But for many US homes, framed cabinets are the standard, so that’s where most DIY measurements begin.
Start with the cabinet opening, not the old door
Measure the width and height of the cabinet opening itself. Take the width from inside edge to inside edge of the opening. Then measure the height from the inside top to the inside bottom. Write those numbers down for each cabinet.
This gives you the true opening size. From there, you add overlay to determine the door size. That matters because the visible proportions of the finished cabinet depend on consistent overlay, not just matching whatever was there before.
Understand overlay before you calculate size
Overlay is how much the door extends beyond the cabinet opening. A common example is a 1/2-inch overlay on all four sides. If your opening is 12 inches wide and 20 inches high, and you want 1/2 inch overlay on each side, the finished door size would be 13 inches wide by 21 inches high.
That math works because you add the overlay twice - once for each side. So the formula is simple: opening width plus left overlay plus right overlay, and opening height plus top overlay plus bottom overlay.
Where people get tripped up is assuming every cabinet should use the same overlay without checking hinge requirements and spacing between doors. It usually does, but not always.
Choosing the right overlay for your cabinets
If you’re replacing doors on an existing cabinet and want the same look, measure how much the current door overlays the frame. Close the door and measure from the edge of the opening to the edge of the door. Do that on the hinge side, the top, and the bottom. Then confirm whether the reveal, or visible frame around adjacent doors and drawers, looks consistent.
If the cabinets were installed well and the old doors fit properly, matching that overlay is often the safest route. If the doors are misaligned, rubbing, or visibly uneven, use the opening measurements and plan your overlay more intentionally.
Single doors versus double doors
For a single door cabinet, the calculation is fairly direct. You measure the opening and add the chosen overlay.
For a pair of doors on one opening, there’s one extra consideration: the gap between the two doors. You still start with the opening width, add the total overlay, and then divide by two. But you also need to allow for a clean center gap so the doors can open without rubbing.
That gap is usually small, but it matters. Too tight and the doors may bind. Too wide and the center line can look sloppy. This is one of those cases where precision pays off.
Watch for hinge and clearance issues
A beautiful door is only beautiful if it opens properly. Before finalizing your measurements, check for nearby walls, appliances, moldings, and inside corners that could affect swing clearance. A wider overlay may look great on paper but create problems next to a refrigerator panel or a perpendicular wall.
Hinge style matters too. Concealed hinges, surface-mount hinges, and specialty hinges can all have different overlay requirements. If you are reusing existing hinges, measure with extra care to make sure your new doors are sized to work with that hardware. If you are replacing hinges as part of the refacing project, choose the hinge first or at least confirm the overlay it supports.
This is one of the biggest it-depends parts of learning how to measure cabinet doors. The correct number is not just about the opening. It also has to match the way the door will function.
Measuring drawer fronts is similar, but not identical
Many homeowners measure doors and drawer fronts at the same time, but don’t assume the same rules apply automatically. A drawer front may be sized to match surrounding doors visually rather than simply cover an opening with equal overlay on all sides.
For example, the top drawer above a sink base may need to align with neighboring reveals or account for false front construction. Measure each drawer front area individually and pay attention to the spacing around it. The goal is consistent lines across the whole cabinet run.
Best practices that prevent expensive mistakes
Measure every opening twice. If the two numbers don’t match, measure a third time. It sounds basic, but this step catches most problems before they turn into a reorder.
Label every cabinet clearly. Use a simple system like A1, A2, B1, and sketch a quick layout of the room. On a full kitchen project, this keeps your measurements organized and makes ordering much easier.
Record width first, then height, every time. Staying consistent prevents mix-ups. Also write measurements to the nearest 1/16 inch if needed. Rounding casually may not seem like much, but cabinet doors are custom parts, not rough framing lumber.
It also helps to check whether your cabinet openings are square. Measure diagonally from top left to bottom right, then top right to bottom left. If those numbers are noticeably different, the opening may be out of square. That does not always stop the project, but it tells you to expect some installation adjustment and to pay close attention to reveals.
When measuring the old door does make sense
There are cases where measuring the existing door is useful. If the current doors fit well, the hinges are staying the same, and you want an exact replacement in the same style, the old door can serve as a reference point. Still, it should be a reference, not the only source of truth.
Compare the old door size against the cabinet opening and overlay. If everything checks out, you can move forward with more confidence. If it doesn’t, trust the cabinet structure over a worn or previously replaced door.
If you’re ordering custom doors online
Custom ordering works best when your measurements are organized before you start selecting styles and finishes. Once you have each opening, overlay, and door size mapped out, the rest of the process gets much easier. That’s where a tool like the Build a Door feature at TDM - The Door Maker can help turn your measurements into a clear, made-to-order plan without forcing you into stock sizes.
If you’re unsure about one or two openings, pause and verify them before placing the order. Most homeowners do very well with DIY measuring, but confidence should come from checking the details, not rushing through them.
A simple measuring example
Let’s say your cabinet opening measures 14 inches wide by 24 inches high, and you want a 1/2-inch overlay on all sides. Your finished door size would be 15 inches wide by 25 inches high.
Now let’s say the same opening has two doors instead of one. Add the total overlay first, giving you 15 inches overall width, then allow for the center gap and divide into two equal doors. That extra step is why double-door openings deserve a little more attention.
A good measuring process should leave you feeling certain, not confused. Take your time, check the opening rather than guessing from the old door, and make sure your overlay works with your hinges and surrounding clearances. When the numbers are right, everything that follows - design, ordering, and installation - gets a whole lot easier.
Mar 24 2026 BY Ksenija Lebec, Blog
If your cabinet boxes are still solid but the doors look dated, chipped, or mismatched, replacing the entire kitchen is usually more project than you need. Buying custom cabinet doors online gives you a way to dramatically change the look of a room without tearing out cabinets that still have years of life left in them. For homeowners who want a cleaner style, a better fit, and more control over cost, that matters.
Cabinet refacing sits in a smart middle ground. It is more tailored than buying stock doors off the shelf, and far less expensive than a full custom cabinet replacement. That is why so many DIY renovators turn to made-to-order doors when they want their kitchen, bathroom, laundry room, or home office to feel updated without turning the project into a full remodel.
Why custom cabinet doors online make sense
The biggest reason is fit. Many homes do not have perfectly standard cabinet openings, especially older homes or spaces that have been modified over time. Stock options can force compromises. You may find a style you like, but not the exact size. Or you may find a close size that still leaves uneven reveals and a less polished finish.
Custom ordering solves that problem by letting you order to your actual measurements. That changes the result in a visible way. Doors sit properly, drawer fronts align more cleanly, and the finished space looks intentional instead of pieced together.
There is also the convenience factor. Instead of driving from store to store and hoping a retailer can special order what you need, you can choose your style, dimensions, profile, and finish from home. For busy homeowners, that is not a small benefit. It makes comparing options easier and gives you more time to think through the details before placing an order.
The value is strong too. If your cabinet boxes are structurally sound, replacing only the visible front components can deliver a high-end visual upgrade at a much better price than full replacement. The trade-off is that refacing works best when the cabinet layout already functions well. If your storage plan is poor or your boxes are damaged, new doors alone will not fix that.
What to look for when ordering custom cabinet doors online
Not every online ordering experience is built for homeowners. Some are clearly geared toward trade professionals and assume you already know every specification. If you are doing this project yourself, look for a company that helps you move from measuring to design to ordering without making the process harder than it needs to be.
A good ordering experience starts with clear sizing guidance. You should be able to find help on how to measure existing doors and drawer fronts, how to determine overlay, and how to account for hinge style when needed. Good support reduces mistakes before they happen.
Style selection matters too, but not just in the aesthetic sense. You want enough flexibility to match the room and your budget. A simple shaker door will create a different feel than a raised panel profile or a slab front, and each option fits different homes. Traditional kitchens often benefit from more detail. Contemporary spaces usually look better with cleaner lines. Neither is automatically better. It depends on the room, the surrounding finishes, and how long you want the design to feel current.
Material and finish options should be practical, not overwhelming. Painted looks, wood species, and PVC finishes each have their place. If durability and consistency are top priorities, some homeowners prefer low-maintenance surface options. If natural grain and stain character matter most, wood may be the better fit. The right choice depends on the room, the amount of wear, and the look you want when the project is complete.
Measuring for custom cabinet doors online
This is the part that makes some DIY customers hesitate, but it is manageable when you approach it carefully. Precision matters because custom means the door is being made for your order. The goal is not to rush through measuring. The goal is to measure once, verify, and order with confidence.
Start by identifying exactly what you are replacing. Door openings, drawer fronts, and false fronts can all require different measurements. If you are matching an existing overlay, measure the current pieces and confirm how they sit on the cabinet box. If you are changing the overlay, take the time to understand how that will affect the final look and hardware clearance.
Measure each opening individually. Even in the same kitchen, cabinets that appear identical may vary slightly. That is common in older homes and in cabinets that were installed by different crews or adjusted over time. Assuming every door on a run is the same size can lead to frustrating mistakes.
A tape measure is fine, but careful note-taking is just as important. Label each opening so your order matches your layout. Many homeowners find it helpful to sketch the room and assign a number to every door and drawer front. That extra ten minutes can save a lot of second-guessing when you place the order.
Choosing a style that improves the whole room
The best cabinet door style is not always the one with the most detail. It is the one that works with the architecture of your home and the rest of the finishes in the space. If your counters, backsplash, and flooring already carry a lot of pattern, a simpler door style often creates balance. If the room is plain and you want more character, a profile with more definition may help the cabinetry feel more substantial.
Color plays a similar role. White and light neutrals remain popular because they brighten the room and work across many design styles. Warmer wood tones can make a kitchen feel grounded and less generic. Darker finishes can look dramatic and expensive, but they also show dust and fingerprints more readily in some spaces. There is always a trade-off.
This is where samples can be useful. A finish that looks perfect on a screen can shift under your kitchen lighting. Seeing the material in person helps you compare undertones, texture, and how the new doors will relate to your walls, counters, and flooring.
The real advantage over big-box options
Big-box stores can be useful for many home improvement purchases, but cabinet refacing often asks for more precision than an off-the-shelf system can offer. Homeowners comparing custom ordering to mass retail usually notice three differences right away: fit, design flexibility, and support for non-standard projects.
With true custom sizing, you are not limited to a narrow list of preset dimensions. That matters if your home has older cabinetry, unique built-ins, or cabinet runs that do not match standard sizing conventions. You also get more control over style details, which makes it easier to create a finished look instead of settling for the closest match available.
The other difference is confidence. When the process includes measuring help, configuration tools, tutorials, and direct product guidance, the project feels more doable. That support is often what helps a first-time buyer move forward. The Door Maker has built its process around that reality, giving DIY customers a clear path from measurement to design to order without requiring them to navigate a trade-only experience.
What makes an online cabinet door project successful
Successful projects usually have less to do with luck and more to do with planning. Homeowners get the best results when they treat the project like finish carpentry, not just online shopping. That means checking measurements carefully, choosing a style that fits the room, and thinking through hinges, drawer fronts, and finishing details before ordering.
It also helps to be realistic about the scope. Replacing doors and drawer fronts can completely change how cabinetry looks. It will not correct damaged cabinet boxes, failing drawers, or a poor room layout. If your cabinets are solid and the main problem is appearance, refacing is often a strong solution. If the structure is failing, you may need a larger renovation plan.
For many homes, though, custom cabinet doors online hit the sweet spot. They give you the freedom to update the visible parts of your cabinetry, the precision to get a tailored fit, and the value of keeping what still works. That is a practical kind of transformation - one that respects your budget, improves your space, and leaves you with a result that looks like you planned it that way from the start.
Mar 24 2026 BY Ksenija Lebec, Blog
If your cabinet boxes are still solid but the room looks stuck in another decade, diy cabinet refacing is usually the smarter move than tearing everything out. You keep the structure that still works, replace the parts everyone sees, and end up with a cleaner, more custom look without paying for a full cabinet install.
That appeal is real, but so is the difference between a refacing project that looks professionally finished and one that still feels obviously patched together. The good news is that the biggest factor usually is not whether you are handy enough. It is whether you make the right decisions before you order a single door.
What diy cabinet refacing actually changes
Cabinet refacing is not a shortcut version of a full remodel. It is a different strategy. Instead of removing the cabinet boxes, you update the visible surfaces - typically the doors, drawer fronts, hinges, hardware, and exposed cabinet ends. In many projects, homeowners also cover the face frames and side panels so the old finish does not compete with the new design.
That means the success of the project depends on one basic truth: your cabinet boxes need to be worth keeping. If they are square, stable, and laid out in a way that still works for your kitchen, bathroom, office, or built-ins, refacing can deliver a major visual upgrade for a fraction of the cost and disruption of replacement.
If the boxes are water-damaged, sagging, badly out of level, or the layout itself is the real problem, refacing may not be the fix. That is where many homeowners get tripped up. They try to solve a functionality issue with a cosmetic project. Sometimes that works. Often, it does not.
Why homeowners choose diy cabinet refacing
The biggest reason is value. Full cabinet replacement is expensive, especially once demolition, disposal, installation, trim work, countertops, and schedule delays enter the picture. Refacing lets you direct your budget toward what changes the appearance most.
The second reason is customization. Stock doors can work in some spaces, but older homes and built-ins rarely follow stock sizing. Custom-sized replacement doors and drawer fronts give you a fitted look that feels intentional, not improvised.
The third reason is control. A lot of homeowners want a better result than big-box options offer, but they do not want to hand over the entire project. Refacing sits right in that sweet spot. You can manage the transformation yourself while still getting professionally made components.
Start with the part that matters most - measuring
A beautiful door in the wrong size is still the wrong door. That is why measuring deserves more attention than style at the beginning.
You need accurate door and drawer front dimensions, but you also need to understand your overlay, hinge type, and whether your cabinet openings are consistent. Small errors show up fast on cabinetry. Reveals look uneven. Doors rub. Gaps call attention to themselves.
This is also where homeowners discover whether their current setup should be copied exactly or improved. Maybe your old doors had an outdated partial overlay and you want a fuller, more modern face. Maybe a pair of doors would work better as one larger door. Maybe false drawer fronts should become functioning drawers later. Those choices affect measurements, hardware, and the finished look.
When people say a refacing job looks custom, they usually mean the sizing and spacing look intentional. Precision creates that impression.
Choosing door styles without regretting them later
Style matters, but proportion matters more. A door style that looks great in a showroom photo can feel too busy in a smaller kitchen or too flat in a larger one.
Shaker and other clean-panel profiles remain popular because they work in a wide range of homes. They can read modern, transitional, or classic depending on color and hardware. More decorative profiles can look excellent too, especially if the house already has traditional trim details. The key is making sure the door style matches the architecture of the room and the amount of visual detail already present.
Color and finish deserve the same level of restraint. Light finishes can open up a darker room. Wood tones can add warmth where white cabinetry feels too stark. PVC and other low-maintenance surface options appeal to DIY homeowners because they offer consistency and durability, but the right choice depends on traffic, moisture, and the overall design direction.
Samples help here because cabinet finishes behave differently under kitchen lighting than they do on a screen. What looks crisp online may read yellow, gray, or too glossy in person.
The parts homeowners forget to plan for
Doors get the attention, but the supporting pieces decide whether the room looks complete. If you refinish the front and ignore the cabinet sides, toe kicks, fillers, moldings, or valances, the project can stop short of the transformation you wanted.
This does not mean every project needs decorative extras. It means the visible surfaces should feel coordinated. A simple kitchen can look polished with nothing more than well-sized doors, matching drawer fronts, clean end panels, and updated hardware. A more detailed space may benefit from crown molding, light rail, mullion doors, or other finishing elements.
Think of refacing as a system, not just a door order. The strongest results come from treating the room that way.
DIY cabinet refacing installation - where results are won or lost
Installation is less about advanced carpentry and more about patience. Old hinges come off, surfaces get cleaned and prepped, new components are test-fitted, and alignment is adjusted carefully. You are not just attaching doors. You are creating consistent reveals and a uniform face across the entire run of cabinetry.
Most installation problems come from rushing. Homeowners hang one door, feel good, and move too quickly through the rest. Then small inconsistencies stack up. One door sits high, another drifts left, drawer fronts do not line up, and the room loses that custom feel.
Pre-finished replacement doors help because they eliminate a lot of mess and variability. You are not trying to paint around hinges in your garage and hope every panel cures the same way. You are installing finished parts made to the dimensions you ordered. That saves time and usually produces a cleaner result.
It is also worth being honest about your comfort level. A confident DIYer can absolutely handle cabinet refacing. But if your cabinets are significantly out of square or your project includes layout modifications, that raises the difficulty level. The smartest DIY projects are the ones that match your skill set.
Cost savings are real, but only if you avoid common mistakes
DIY cabinet refacing is often chosen to save money, and it can. But the savings narrow quickly when homeowners make avoidable errors.
Ordering based on rough measurements is one of the biggest ones. Another is trying to reuse old hinges or hardware that do not suit the new door style. Skipping side panels or face frame finishing is another common issue, because it leaves the room half-updated. And sometimes the budget gets thrown off by choosing replacement doors after paint, counters, and backsplash are already selected, making coordination harder than it needs to be.
A better approach is to decide early what stays, what gets covered, and what gets replaced. Then build the project around those decisions. That gives you a realistic number and a cleaner path from measuring to installation.
For homeowners who want custom sizing without the custom-cabinet price, that is where a made-to-order approach pays off. The Door Maker, for example, helps DIY customers move through a simple process of measuring, designing, and ordering so the finished project feels tailored to the space instead of forced to fit it.
When refacing makes the most sense
Refacing tends to be the right choice when your cabinet layout is still practical, the boxes are structurally sound, and your biggest problem is appearance. It is especially effective in kitchens with dated oak fronts, bathrooms with worn vanity doors, home offices with tired built-ins, and laundry rooms where replacement would be hard to justify.
It also makes sense when you want more design flexibility than off-the-shelf products offer. Custom widths, heights, panel styles, and finish options let you respect the space you have rather than redesigning the whole room around standard inventory.
What surprises many homeowners is how dramatic the change can be. New doors, drawer fronts, and finishing components can completely alter the character of a room, even though the original cabinet boxes remain in place.
The best part of DIY cabinet refacing is not just saving money. It is getting a result that looks intentional, fits your home correctly, and feels like an upgrade every time you walk into the room. If you take your time with measuring, choose styles that suit the space, and treat the project like a finish job instead of a shortcut, the end result can look far more expensive than it was.
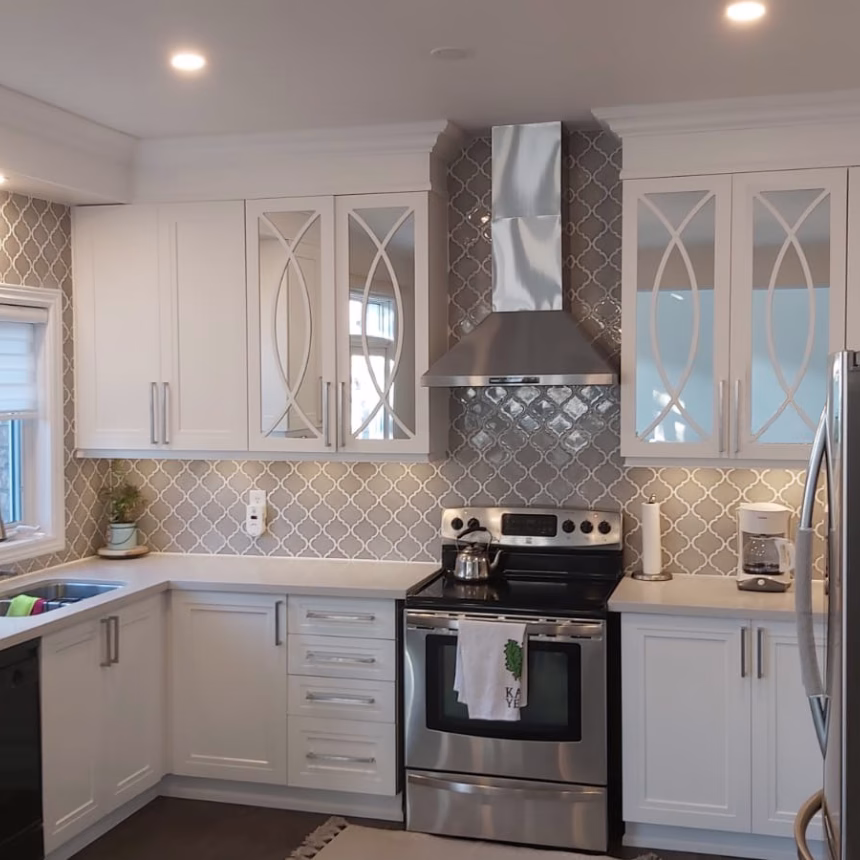
Mar 19 2026 BY Ksenija Lebec, Blog
White Kitchen Cabinets
White kitchen cabinets are still the most popular choice of colour for homeowners. It will have your kitchen feeling bigger and brighter. White cabinet doors are a fresh colour that will keep your kitchen sparkling like new for years to come.
White cabinets are very versatile. First off, the handle and knob options are endless. There a many different colours and styles to choose from to complement your white cabinets. Secondly, you can add a pop of colour to an all-white kitchen with a contrasting kitchen island or colourful appliances. This White High Gloss kitchen has a very modern and fresh design. We love how it is accented with gold handles.
Adding mullions and frames can give your white kitchen an extra wow factor. There are a variety of inserts to choose from, like glass, frosted glass, or a mirror. Glass frames are great for displaying fancy tableware. This Nordic White kitchen features the Darby frame with a mirror insert.
Nordic White is one of our best-sellers. Homeowners love this finish because it’s crisp and clean. It’s not a stark white. The colour does have a touch of warmth to it, making it a very inviting colour.
If white cabinets are too stark for your taste, switch things up with a white wood grain. This classy black and white kitchen features Ash White. This colour adds a bit of detail to your cabinet door and also feels like wood.
At The Door Maker, we have many shades of white to choose from, like bright whites, white with a hint of grey undertone, or off-whites. We also have different finish options, like textured, matte, wood grain, and high gloss to suit your taste.

Mar 10 2026 BY David Adrian, Blog
Mood and Personality in your kitchen
Consider the mood you wish to create in your kitchen. Many homeowners opt for creamy white colors paired with shiny silver accents, which can provide a clean and modern appearance. It's also important to reflect on how the kitchen remodel aligns with your home's overall personality. The kitchen should express your unique style and evoke the emotions you want to feel when you enter the room.Lighting in your kitchen
The lighting in your kitchen plays a vital role in how colors appear. A small kitchen with low light combined with dark colors may come across as dreary. On the other hand, ample lighting can enhance both the space and the colors within it. When selecting a color for your kitchen cabinet doors, take into account the natural and artificial lighting available in your kitchen.Scope of the Remodel in your kitchen
Consider what elements you are remodeling in your kitchen. Are you updating everything or just the cabinet doors? Viewing the kitchen remodel as a cohesive project can help in making color decisions. Think of the room as a collection of smaller art pieces that, when combined, create a beautiful overall design. The goal is to ensure that all components work together harmoniously.Wall Color vs cabinet color
It’s essential to choose a cabinet color that complements the wall color. The cabinet doors should coordinate with other elements in the room to create a unified look. Therefore, consider the existing wall color as you select a color for your kitchen cabinet doors. At the Door Maker, you’ll find a wide variety of kitchen cabinet doors to choose from, including various door profiles, mullions, and frames. As a leading cabinet door manufacturer in Ontario, we pride ourselves on providing cost-effective solutions that are easy to use. Contact us today to request a quote!
Feb 26 2026 BY Ksenija Lebec, Blog
Introduction
When renovating or updating your kitchen with Custom Cabinet Doors one detail that can significantly impact both style and usability is the choice between handles and knobs for your cabinet doors. These seemingly small hardware pieces do more than just open doors—they set the tone for your space and influence daily convenience. Whether you’re outfitting a brand-new kitchen or giving your cabinets a fresh look, choosing the right hardware is a crucial decision for Canadian homeowners.
Handles vs. Knobs: What’s the Difference? https://www.richelieu.com/
Handles (sometimes called pulls) are typically elongated pieces that attach at two points, allowing you to grip with your whole hand. Knobs are smaller, round or square fixtures fastened with a single screw, suitable for grasping with your fingers.
- Handles: Best for large doors or drawers; offer a modern or streamlined look.
- Knobs: Ideal for smaller doors; often suit classic or vintage styles.
Factors to Consider When Choosing Hardware
- Style and Design
- Cabinet hardware should complement your kitchen’s overall aesthetic. For example, sleek stainless steel handles may suit a contemporary kitchen in downtown Toronto, while classic brass knobs can enhance a more traditional Vancouver home. Consider your cabinet colour and finish, as well as the look of your appliances and fixtures.
- Functionality
- Think about how you use your kitchen. Handles are easier for opening heavy drawers, while knobs might be sufficient for lighter cupboards. Handles can also be more accessible for children or those with limited dexterity.
- Size and Placement
- Larger handles can add drama and ease of use to wide drawers, whereas smaller knobs work well on upper cabinets. Always measure your cabinet doors or drawers to ensure the hardware is proportionate and doesn’t look awkward.
- Material and Finish
- Popular materials in Canada include stainless steel, brushed nickel, and matte black. For a cottage or rustic vibe, consider wood or ceramic. Choose a finish that resists fingerprints and is easy to clean, especially in high-traffic areas like the kitchen.
- Budget
- Prices range widely—knobs can be as affordable as a loonie, while designer handles might cost several toonies each. Don’t forget to factor in the cost if you’re updating all cabinet doors and drawers, not just a few.
Mixing and Matching
Many Canadian designers recommend mixing knobs and handles for a custom look. For example, use handles on lower drawers for easier access and knobs on upper cabinets for a balanced, cohesive style. Just ensure the finishes and styles coordinate well together.
Installation Tips https://tdm-thedoormaker.com/tutorials/
- Use a template or jig to ensure consistent placement on every door or drawer.
- Measure twice, drill once—uneven hardware is a common mistake.
- Consider hiring a professional installer for large projects to guarantee a polished finish.
Conclusion
Choosing the right handles or knobs for your cabinet doors can refresh your kitchen’s look, improve everyday function, and even boost your home’s value. Take your time to explore options, test out samples in your space, and don’t hesitate to blend styles for a personalized touch. Whether you’re in Halifax or Calgary, thoughtfully selected hardware makes a world of difference in your kitchen.
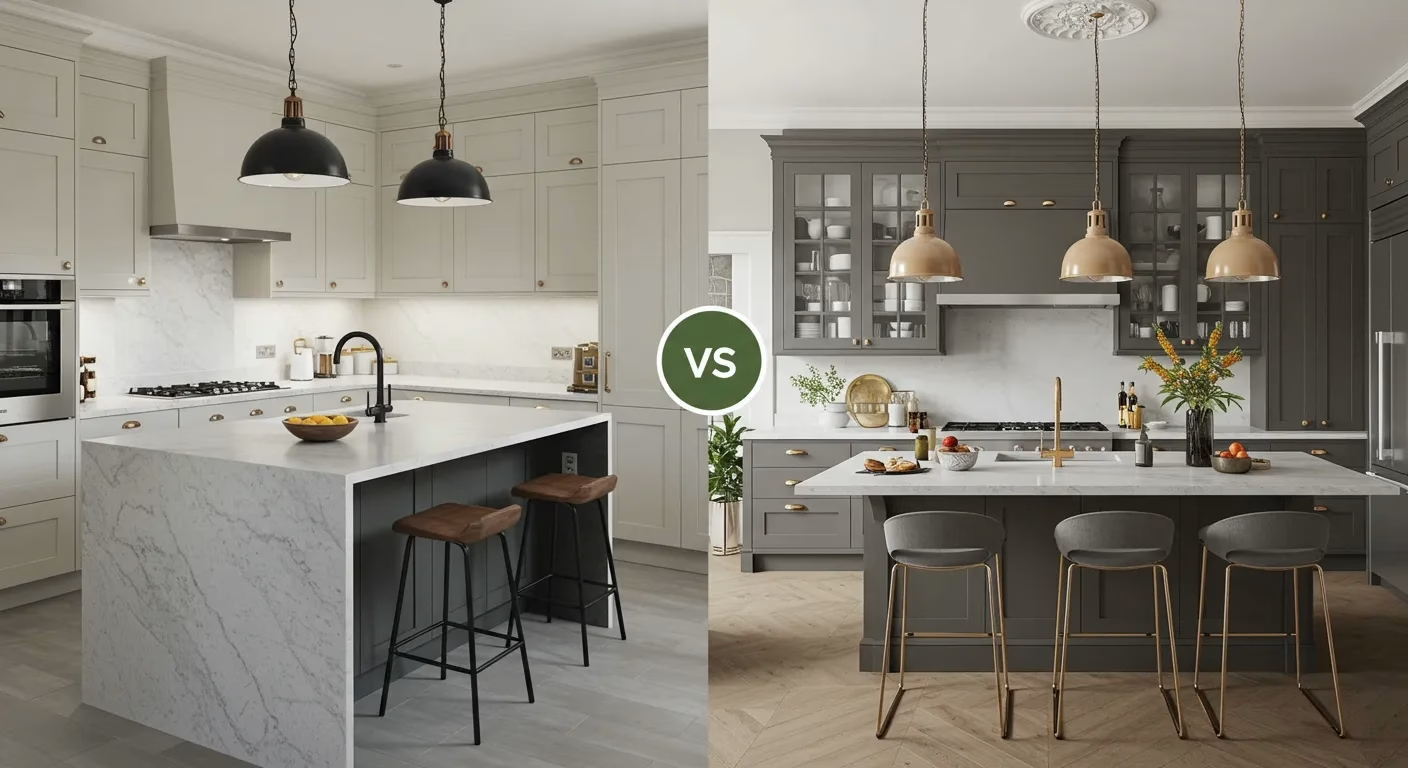
Feb 13 2026 BY Ksenija Lebec, Blog
Choosing Your Kitchen Style: From Contemporary to Traditional
The kitchen is often considered the heart of the home, and choosing the right style can reflect both your personality and lifestyle. With so many options, from sleek contemporary designs and cozy farmhouse vibes to rugged industrial looks and elegant traditional spaces, it’s easy to feel overwhelmed. So, how do you decide which kitchen style is right for you?
Contemporary Kitchens: Clean Lines and Modern Flair
If you love clutter-free spaces, integrated appliances, and a minimalist approach, contemporary kitchens might speak to you. These kitchens often feature smooth surfaces, neutral tones, and innovative technology, making them both stylish and functional for modern living.
Farmhouse Charm: Warmth and Welcome
Prefer a kitchen that feels warm, inviting, and lived-in? The farmhouse style could be your match. Think shaker cabinets, apron sinks, and natural materials like wood and stone. Add open shelving and vintage accents for a true Canadian homestead feel—perfect for gathering around with family and friends.
Industrial Edge: Urban and Unfinished
For those who appreciate an edgier aesthetic, consider an industrial kitchen. Exposed brick, stainless steel, and concrete elements combine to create a space that’s both raw and sophisticated. This style is ideal for open-concept lofts or anyone who wants a hint of city chic in their home.
Chic and Elegant: Refined Living
Chic kitchens are all about timeless elegance. Glossy surfaces, statement lighting, and high-end finishes bring a feeling of luxury and refinement. If you lean towards the finer things and want your kitchen to make a statement, this style might be for you.
Traditional Appeal: Classic and Enduring
Traditional kitchens never go out of style. Featuring detailed cabinetry, classic tiles, and warm colour palettes, they evoke a sense of comfort and permanence. This style is ideal if you appreciate enduring design and want your kitchen to feel timeless.
What’s Your Kitchen Style?
Choosing a kitchen style is a personal journey. Consider what feels comfortable and inspiring to you, and don’t be afraid to mix elements from different styles for a truly custom look. Whether you’re in love with the crisp lines of contemporary design, the warmth of farmhouse, the boldness of industrial, the sophistication of chic, or the tradition of classic kitchens, there’s a perfect kitchen waiting to come to life in your home. So, what’s your style?
Author - Ksenija Lebec About Us
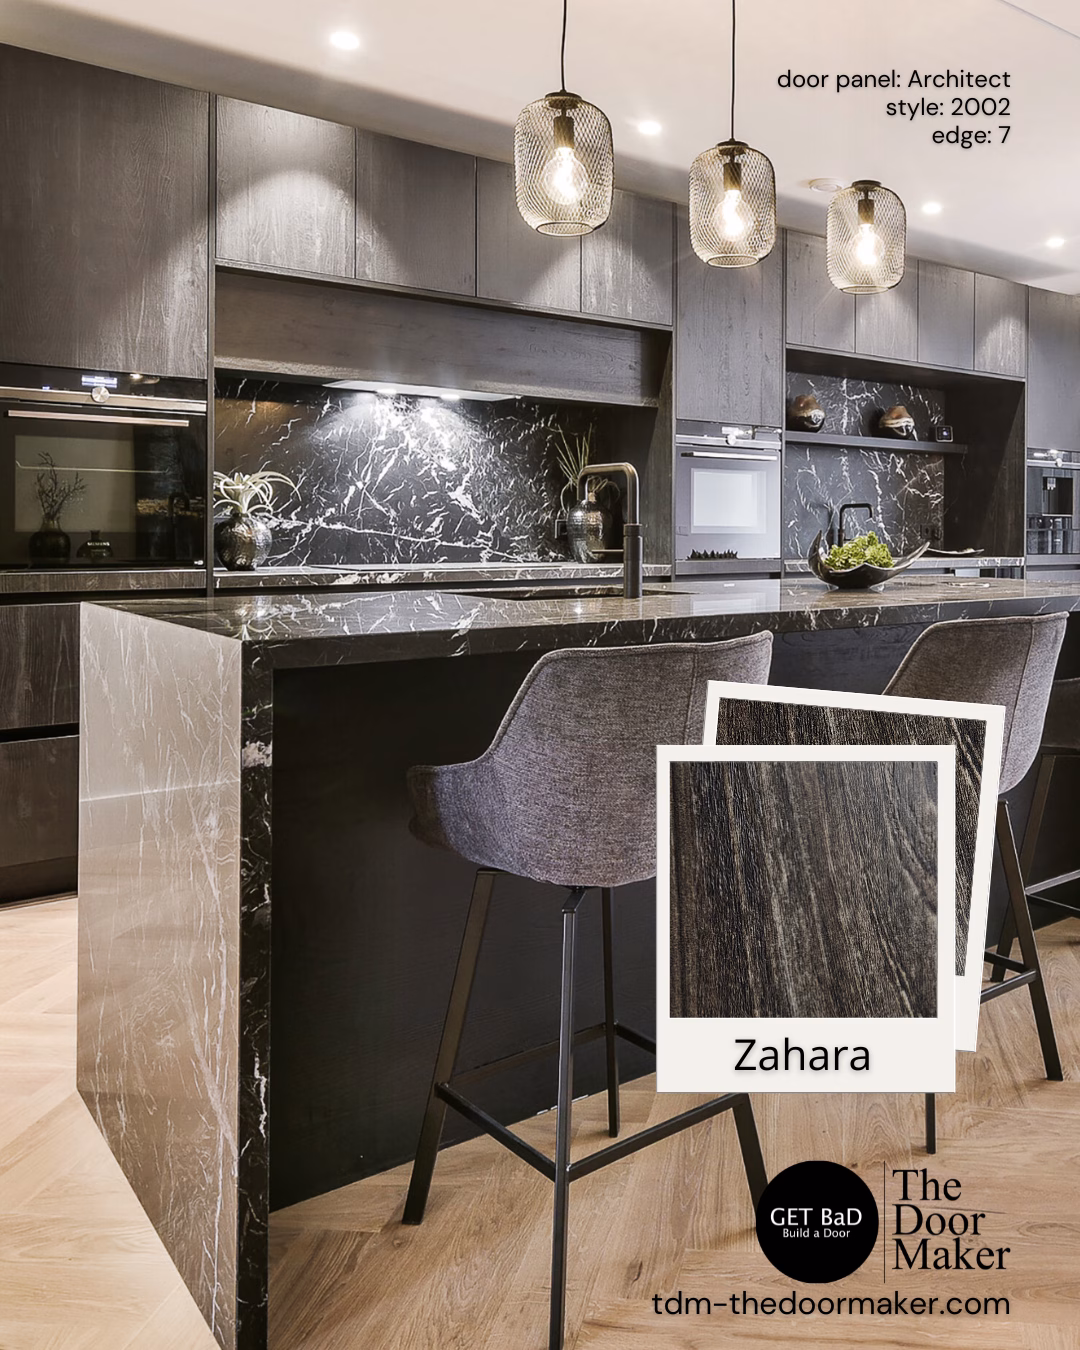
Dec 30 2025 BY Ksenija Lebec, Blog
Build a Door (BaD). Build Your Dream Kitchen, Closet, Pantry, or Home Office with Style and Flexibility
Ksenija Lebec states, renovating your home doesn’t have to break the bank. When you combine the affordability and versatility of Ikea cabinets with the endless customization options from The Door Maker. Whether you’re planning a sleek new kitchen, an organized closet, a practical pantry, or a stylish home office, this approach gives you the best of both worlds. Solid, modular cabinetry and stunning, tailor-made doors in a vast array of colours and finishes.
Step 1: Plan Your Space with Ikea Cabinets
Begin by designing your layout using Ikea’s highly-regarded cabinet systems. SEKTION for kitchens, PAX for closets, and BESTÅ for media and home office units. https://www.ikea.com/ca/en/cat/ These systems offer exceptional flexibility, enabling you to mix and match sizes and configurations to maximize every corner of your home. Utilize Ikea’s online planning tools to visualize your space effectively and ensure you’re optimizing every centimetre.
Step 2: Order Your Cabinet Boxes from Ikea
Once you've finalized your layout, order only the cabinet boxes, shelves, and hardware from Ikea. Skip the doors and drawer fronts for now; you'll add your own custom flair later. This approach simplifies your installation since Ikea cabinets are engineered for easy assembly and mounting. Making the process straightforward for both DIYers and professionals.
Step 3: Choose Custom Doors from The Door Maker
The Door Maker sets itself apart by offering a much larger selection of cabinet doors than Ikea, with more colours, finishes, and styles to match any décor. Even better, their doors are fully customizable in size, ensuring a perfect fit for any Ikea cabinet model and even unique layouts. Browse their catalogue for modern, classic, or shaker-style doors, and pick from dozens of trending hues and textures to create a truly bespoke look.
Step 4: Order and Install Your Custom Doors
Measure your Ikea cabinet frames with precision—The Door Maker allows you to order the exact sizes you need online without any hassle. Once your doors arrive, installation is a breeze; most options come pre-drilled to fit Ikea’s hinge systems, ensuring you can attach them swiftly and effortlessly. Complete the look with coordinating panels, toe kicks, and trim for a polished, built-in appearance.
Why Choose This Approach?
- Cost-Effective: Save on cabinet boxes while investing in premium, custom doors for a high-end look.
- Custom Style: Access a broader palette of colours and finishes, including Canadian-inspired options, beyond Ikea’s offerings.
- Perfect Fit: Enjoy truly made-to-measure solutions for kitchens, closets, pantries, or home offices of any size.
- DIY-Friendly: Modular cabinet assembly and pre-drilled door options mean you can take charge of your project.
Get Started Today
Refresh your space? Start by mapping out your layout with Ikea cabinets. Unleash your creativity with custom doors from The Door Maker. Whether you’re dreaming of a bold kitchen, an organized wardrobe, a functional pantry, or a productive home office, this combination delivers the look and function you want—Canadian style, flexibility, and value included.
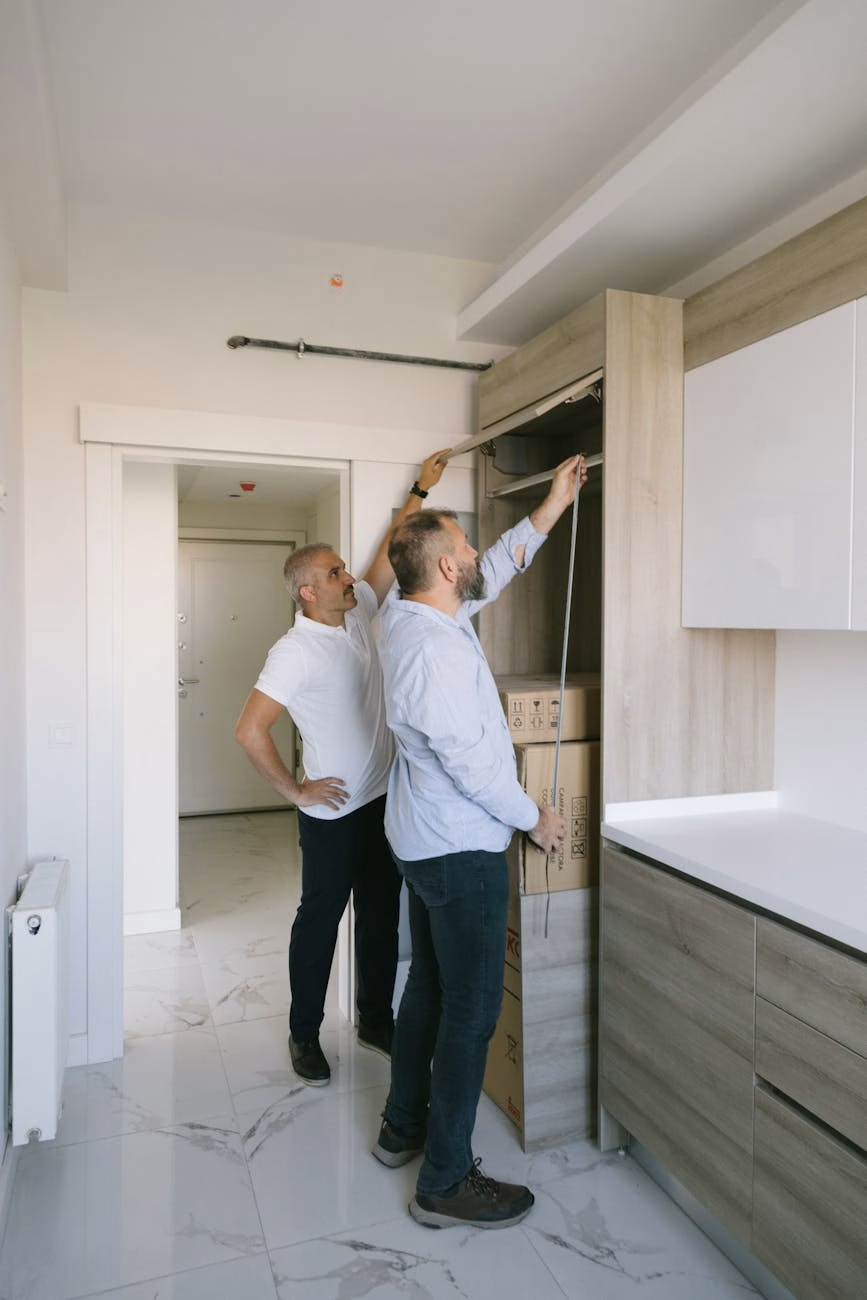
Dec 23 2025 BY Ksenija Lebec, Blog
Countertop or Cabinet Door Style: What Comes First in Kitchen Design?
Making Smart Choices for a Cohesive and Beautiful Kitchen
Renovating a kitchen is one of the most exciting yet challenging home improvement projects according to Ksenija Lebec. With countless decisions to make, two of the biggest questions homeowners face are: Should you choose your countertop or your cabinet door style first? And should you start with colours or the overall design scheme? This blog will explore these pivotal choices, offering practical advice to help you create the kitchen of your dreams—whether you’re in Toronto, Vancouver, or anywhere across Canada.
Countertop vs. Cabinet Door Style: Which Should You Choose First?
The Case for Starting with Cabinet Door Style
Cabinets are often the largest visual element in the kitchen, covering significant wall space and forming the backbone of your design. Doors The style of cabinet doors—whether shaker, flat-panel, or raised—sets the tone for your kitchen’s overall aesthetic. Choosing custom cabinet doors first can simplify subsequent decisions, as it narrows down suitable countertop materials and colours. For instance, a modern flat-panel cabinet pairs well with sleek quartz or granite, while a more traditional door style might suit natural stone or butcher block.
Why Countertops Might Lead the Way
On the other hand, countertops are a major investment and play a critical functional role. The material—be it quartz, granite, laminate, or solid surface—often dictates not only colour but also the feel and durability of the kitchen. If you fall in love with a particular countertop, especially one with distinct veining or patterns, you may prefer to build your cabinet style and colour choices around it. This approach is popular with homeowners who want the countertop to be the kitchen’s showpiece.
A Balanced Approach
Ultimately, the best method is to consider both elements together. Visit showrooms and bring samples home to see how countertop materials look against different cabinet doors. In Canadian kitchens, it’s common to select a cabinet style first for its broad design impact, then choose a countertop that complements it. However, if you have a strong preference for a specific countertop material or colour, let that lead the way and select cabinets that harmonize with it.
Colours or Scheme of Design: What’s the Starting Point?
Start with a Design Scheme
Before diving into colours, it’s wise to establish your overall design scheme. Do you prefer a traditional, transitional, or contemporary kitchen? Are you drawn to a farmhouse look with open shelving and wood finishes, or do you want something sleek and modern with minimalist cabinetry and bold surfaces? This overall vision will guide your choices and ensure a cohesive outcome.
Choosing Colours: Practical Tips for Canadian Homes
Once you have your design scheme, narrow down your colour palette. Canadian homes often feature neutral hues—whites, greys, and taupes—to maximize light and create a welcoming feel, especially during our long winters. Then add accent colours with details like backsplashes, hardware, or even a painted island. If you’re undecided, start with cabinet and countertop samples in your chosen scheme and experiment with paint swatches under different lighting conditions. Remember, natural light varies across Canada—what looks great in a Vancouver condo may feel different in a Halifax bungalow.
Putting It All Together
Designing a kitchen is a balancing act. Begin by defining your overall design scheme, then decide whether your priority is the cabinets or the countertop. Let one element guide your choices but always consider how the two interact. Finally, choose a colour palette that suits your style, your home, and your locale. Whether you start with cabinets or countertops, colours or scheme, the key is to make thoughtful choices that create a harmonious and functional space you’ll love for years to come.
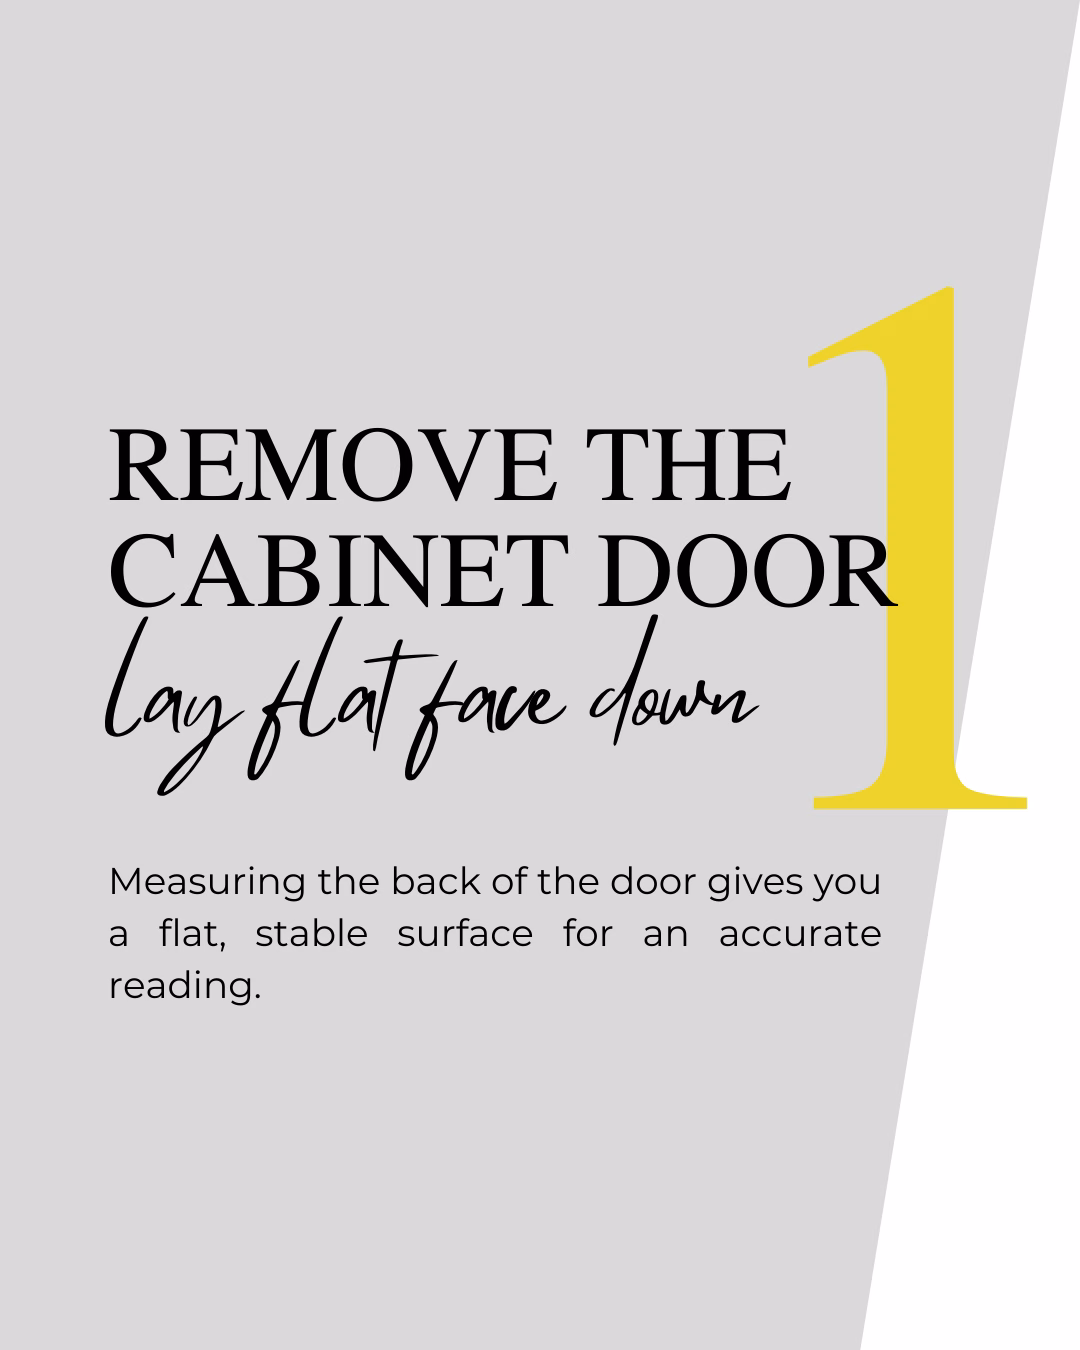
Nov 12 2025 BY David Adrian, Blog
Gathering the Right Tools for the Job
A few minutes of organization now will save you from a ton of frustrating do-overs later. You only need a few simple things, but they need to be the right things. A flimsy, old tape measure just won't cut it. They can sag or even stretch, which is a recipe for disaster when you're ordering custom doors. Your most important tool is a high-quality steel tape measure. It gives you the rigidity you need for a perfectly straight, precise reading, especially when you're measuring a wide opening. Next, grab a simple notepad and a pencil. It's tempting to just jot numbers down on a scrap of wood or punch them into your phone, but don't. A dedicated notepad keeps your width and height measurements organized and easy to read, which seriously cuts down on the chance of mixing them up. For example, a note like "Upper Cabinet #1: 18" W x 32" H" is much clearer than a random "18x32" in your phone's notes.Pro Tip: Always double-check if your cabinet frames are square. This is a big one, especially in older homes where things have had time to settle. Just hold a small level against the frame—it'll tell you instantly if it's plumb. This quick check can save you a headache and explain why you might be getting different measurements at the top and bottom of an opening.Here's a quick rundown of what you'll want on hand:
- Steel Tape Measure: This is non-negotiable for accurate, consistent readings.
- Notepad & Pencil: To keep every measurement clear and organized.
- Straight Edge or Level: Perfect for checking if frames are square and helping you draw straight lines if needed.
How to Measure Existing Doors for a Perfect Match
If you're already happy with how your current doors fit and you're just looking for a style upgrade, measuring your existing doors is a fantastic shortcut. But there's definitely a right way to do it. The biggest mistake I see people make is trying to measure a door while it's still hanging on the hinges—it’s a surefire way to get inaccurate numbers. To get a perfect measurement, you have to take the door off first. Lay it down on a flat, stable surface like a workbench or even a clean spot on the floor. This gets rid of any sag from the hinges and guarantees your tape measure lies perfectly straight. Once it's flat, carefully measure the exact height and width down to the nearest 1/16th of an inch.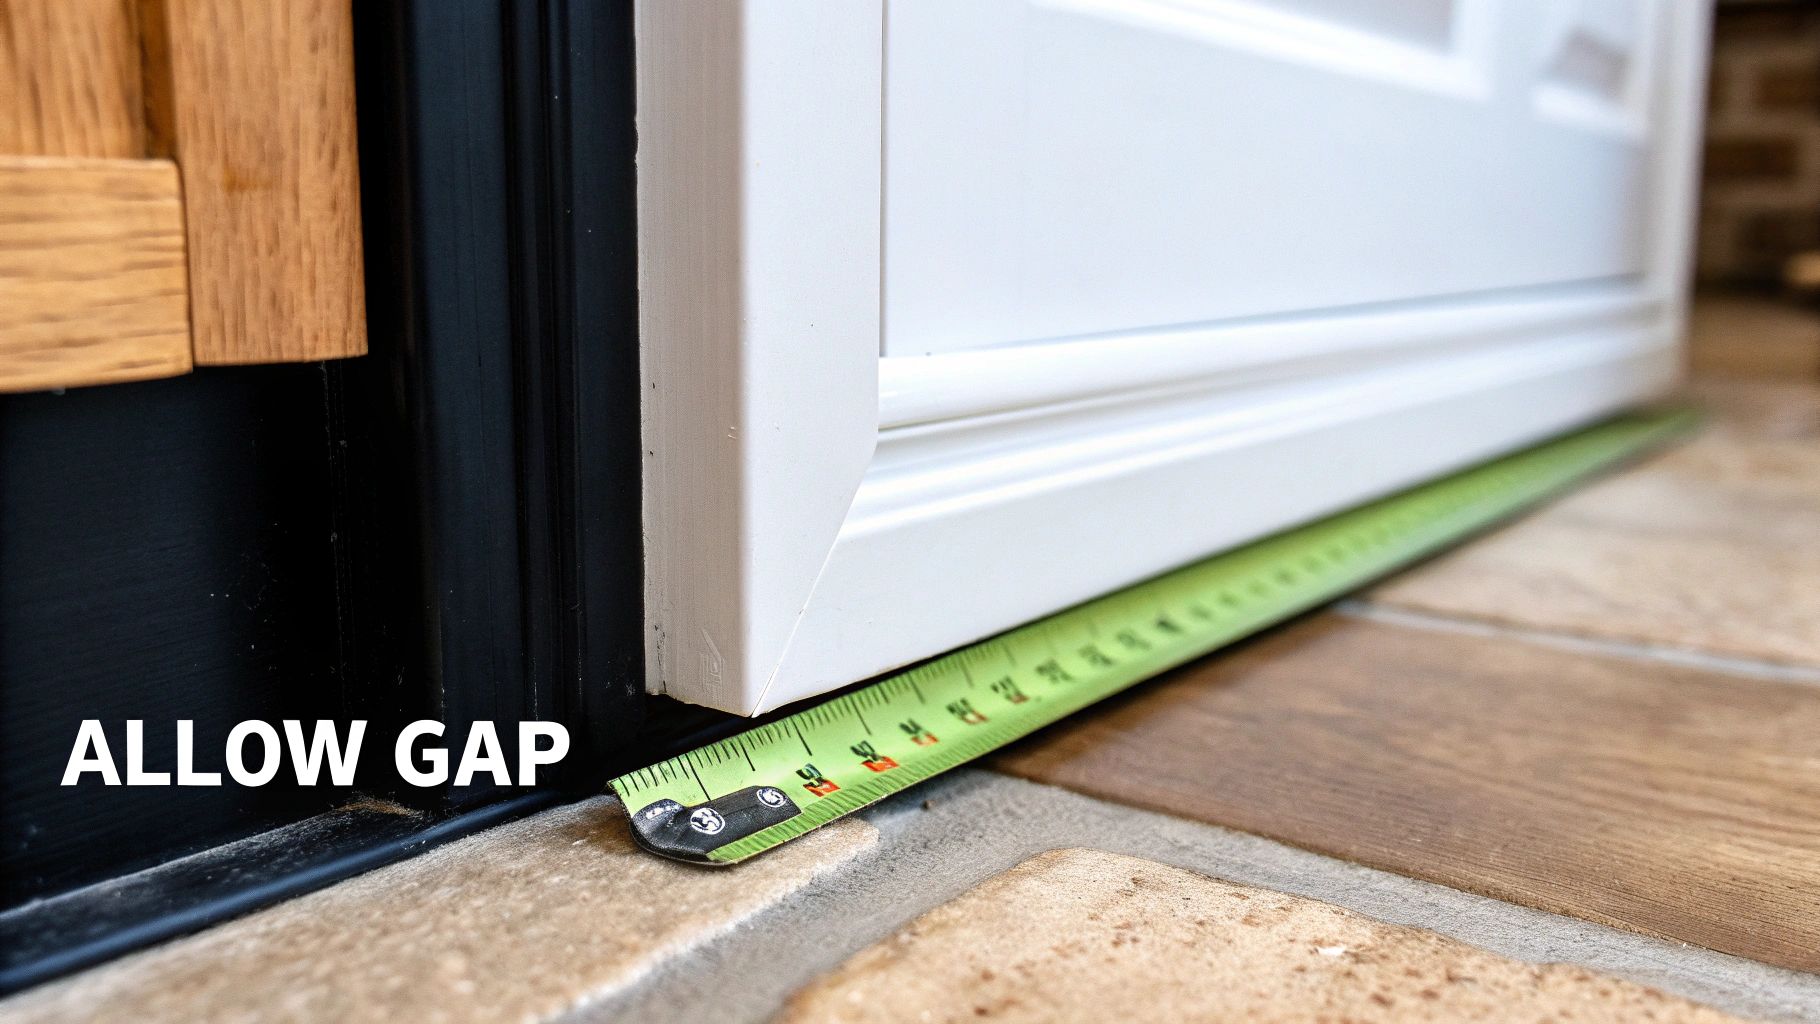
Don't Forget Hinge Placement
Getting the height and width is only half the battle. The most critical step—and the one people often forget—is to measure for your hinge placements. If you skip this, your new doors won't line up with the existing hinge holes on your cabinet frames, and that's a massive headache you don't want. You'll need to record the distance from both the top and bottom edge of the door to the center of each hinge cup hole. That's the large, round recess where the hinge itself sits.For example, if your top hinge cup is 3 inches from the top edge of the door, and the bottom hinge is 3 inches from the bottom edge, you need to write those exact numbers down. This precision is what turns the project into a seamless swap instead of a frustrating struggle.This step is an essential part of the process when you want to transform your kitchen by replacing cabinet doors without the pain of redrilling your cabinet frames. A few extra moments of careful measuring here will pay off big time. To make sure you don't miss anything, just follow this simple checklist for each door:
- Door Width: Measured flat, to the nearest 1/16".
- Door Height: Measured flat, to the nearest 1/16".
- Top Hinge: Distance from the top edge to the center of the hinge cup.
- Bottom Hinge: Distance from the bottom edge to the center of the hinge cup.
Common Measuring Mistakes and How to Avoid Them
Even with the best intentions, a few simple mistakes can derail your entire cabinet door project. We’ve seen it happen. Let’s walk through the common traps people fall into and, more importantly, how you can sidestep them for a flawless result. These small details are often the difference between a professional finish and a frustrating redo. One of the most frequent slip-ups is just mixing up the width and height measurements on your notepad. It sounds basic, but in the middle of a project, it happens more than you’d think. Always, always label your numbers clearly—something like "15” W x 30” H"—to avoid any confusion when it's time to place your order.Overlooking the Details
Another classic mistake is forgetting to correctly account for your overlay or necessary clearance gaps. We once had a homeowner who measured perfectly for a set of inset doors but forgot to subtract the crucial 1/8-inch clearance gap on all sides. The result? Beautiful new doors that were just slightly too big and wouldn't close. A real headache.The old carpenter’s mantra, "Measure twice, cut once," is the golden rule here. Before you finalize anything, do yourself a favor and double-check every single number on your list against the actual cabinet frames. This one final check is your best insurance policy against costly errors.Getting these measurements right is absolutely vital. The global cabinet door market was valued at around USD 17 billion in 2025, a figure that shows just how massive this industry is. Improper sizing doesn't just affect your project; it contributes to waste and installation issues that have a ripple effect. Avoiding these common pitfalls is a huge step toward a successful project. For those looking to dive deeper, our guide on refacing kitchen cabinet doors offers even more tips that can help ensure a smooth process from start to finish.
Answering Your Cabinet Measurement Questions
Even with the most detailed guide, there are always a few questions that pop up right when you think you’re done measuring. We’ve been there. To help you get over that final hurdle, we’ve pulled together the most common questions we hear from customers and installers alike.To make life easy when using Ikea cabinets.
Order the doors according to Ikea's catalogue guide.Ready to turn those perfect measurements into the perfect doors? At The Door Maker, our “Build a Door” tool makes it simple to design the exact custom cabinet doors you've been imagining. Start your project today at https://tdm-thedoormaker.com. Article created using Outrank
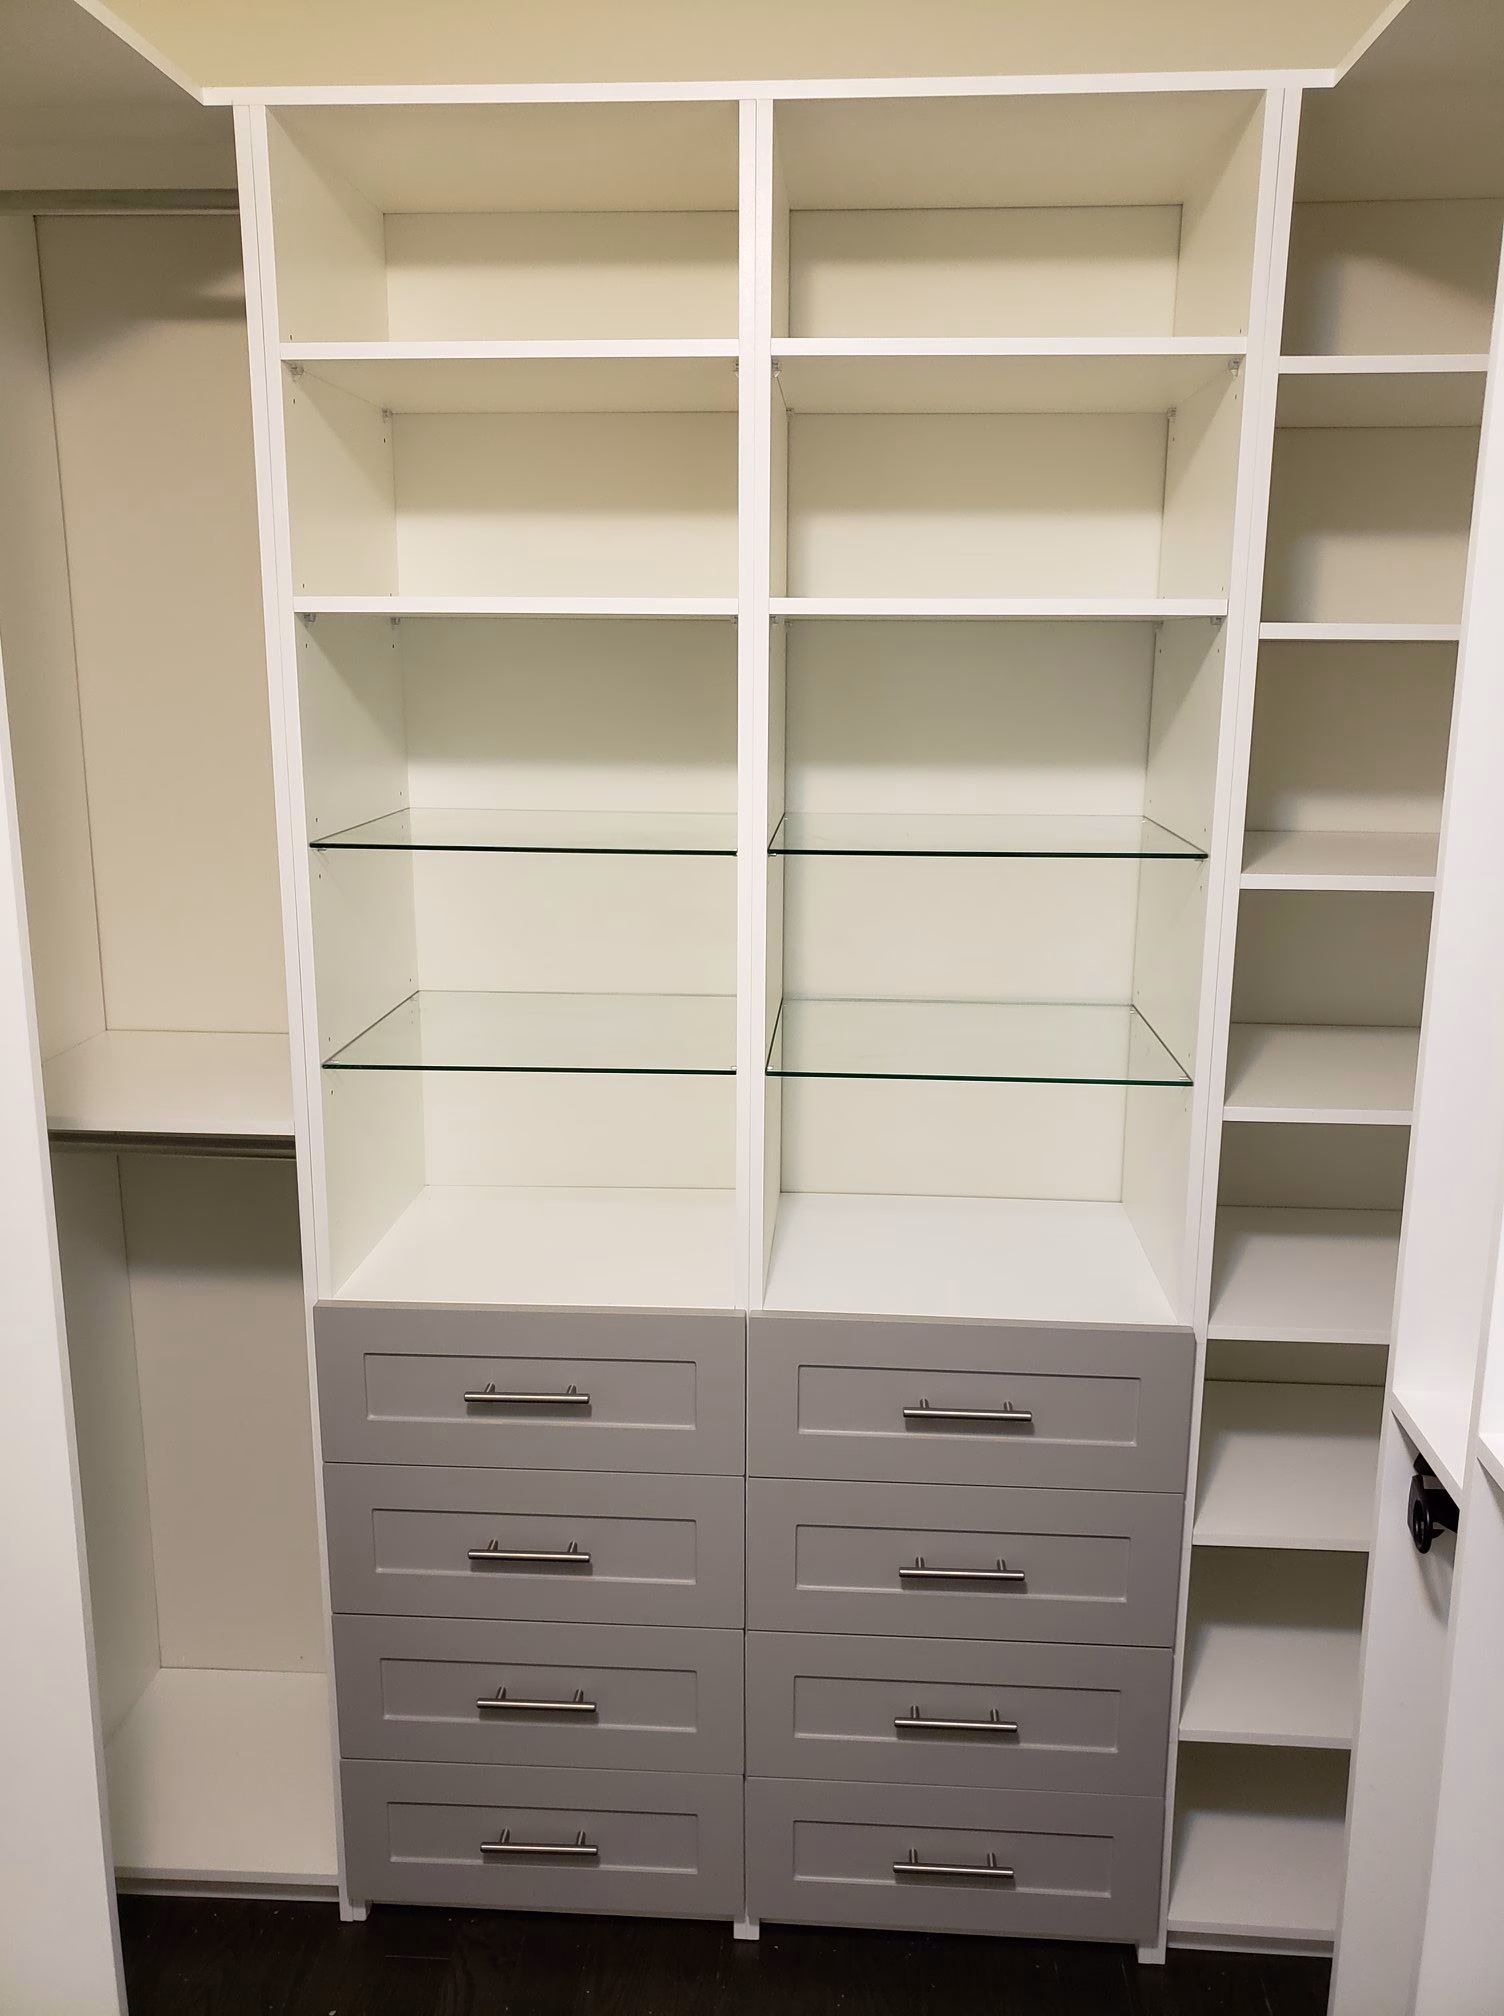
Nov 12 2025 BY Ksenija Lebec, Blog
Testing Your Measurements and Installation Skills the Practical Way
When renovating a kitchen, updating a bathroom, or simply refreshing your storage spaces, ordering cabinet doors is a key step. Many suppliers offer sample doors to help you judge finish and style. But is a sample door really the best option for do-it-yourselfers or those looking for a hands-on trial? In most cases, choosing a real, small cabinet door is far more valuable than a sample piece that may never see actual use.
The Limitations of Sample Doors
Sample doors are designed to showcase material, colour, and style according to Ksenija Lebec. Typically, they’re smaller than a standard cabinet door—often just a segment or a panel. While they may help with colour matching and aesthetic decisions, they fall short in providing a true sense of the final product’s fit and function. After all, you’re not installing a panel—you’re installing a full door.
Why Actual Cabinet Doors Are Superior
- Real-World Measurement Testing
- Ordering a real small cabinet door lets you verify your measuring skills in a tangible way. You can check the fit against your cabinet frame, confirm hinge placement, and ensure the door opens and closes smoothly. This is a critical step, especially for first-time installers or those working with tricky, older cabinetry. Unlike a sample, a real door gives you the opportunity to identify and correct measurement errors before committing to a full order.
- Installation Practice
- Installing a cabinet door isn’t just about screwing it into place. You need to align hinges, check for level, and ensure the door sits flush with neighbouring cabinets. With a real door, you can practice these installation steps and develop confidence in your abilities. A sample can’t give you this experience.
- Immediate, Practical Use
- Unlike samples that often get tossed in a drawer or left on a shelf, a small cabinet door can be put to real use. Whether you fit it to a small cabinet, use it as a test piece, or even repurpose it later, you get more value for your money.
- Validating Supplier Quality
- By ordering a true cabinet door, you can assess the manufacturer’s craftsmanship, finish quality, and hardware compatibility. You’ll know exactly what you’re getting before you invest in a full set of doors for your project.
How to Order and Test a Small Cabinet Door
When placing an order, select the smallest cabinet door size that matches your project specs. Use your standard measuring tools—metric tape measures are best for accuracy—and follow supplier instructions for hinge boring and hardware placement. After receiving the door, install it on a cabinet that closely matches your target cabinets. Take note of any fit issues, installation challenges, or adjustments needed. This trial run can save you stress and money in the long run.
Conclusion
While sample doors have their place, they’re no substitute for the hands-on learning and confidence you gain from ordering and installing a real cabinet door—even a small one. By putting your measuring and installation skills to the test, you ensure a smoother renovation or upgrade, and you’re less likely to end up with costly mistakes. In the world of home improvement, practical experience is always better than a pretty sample.
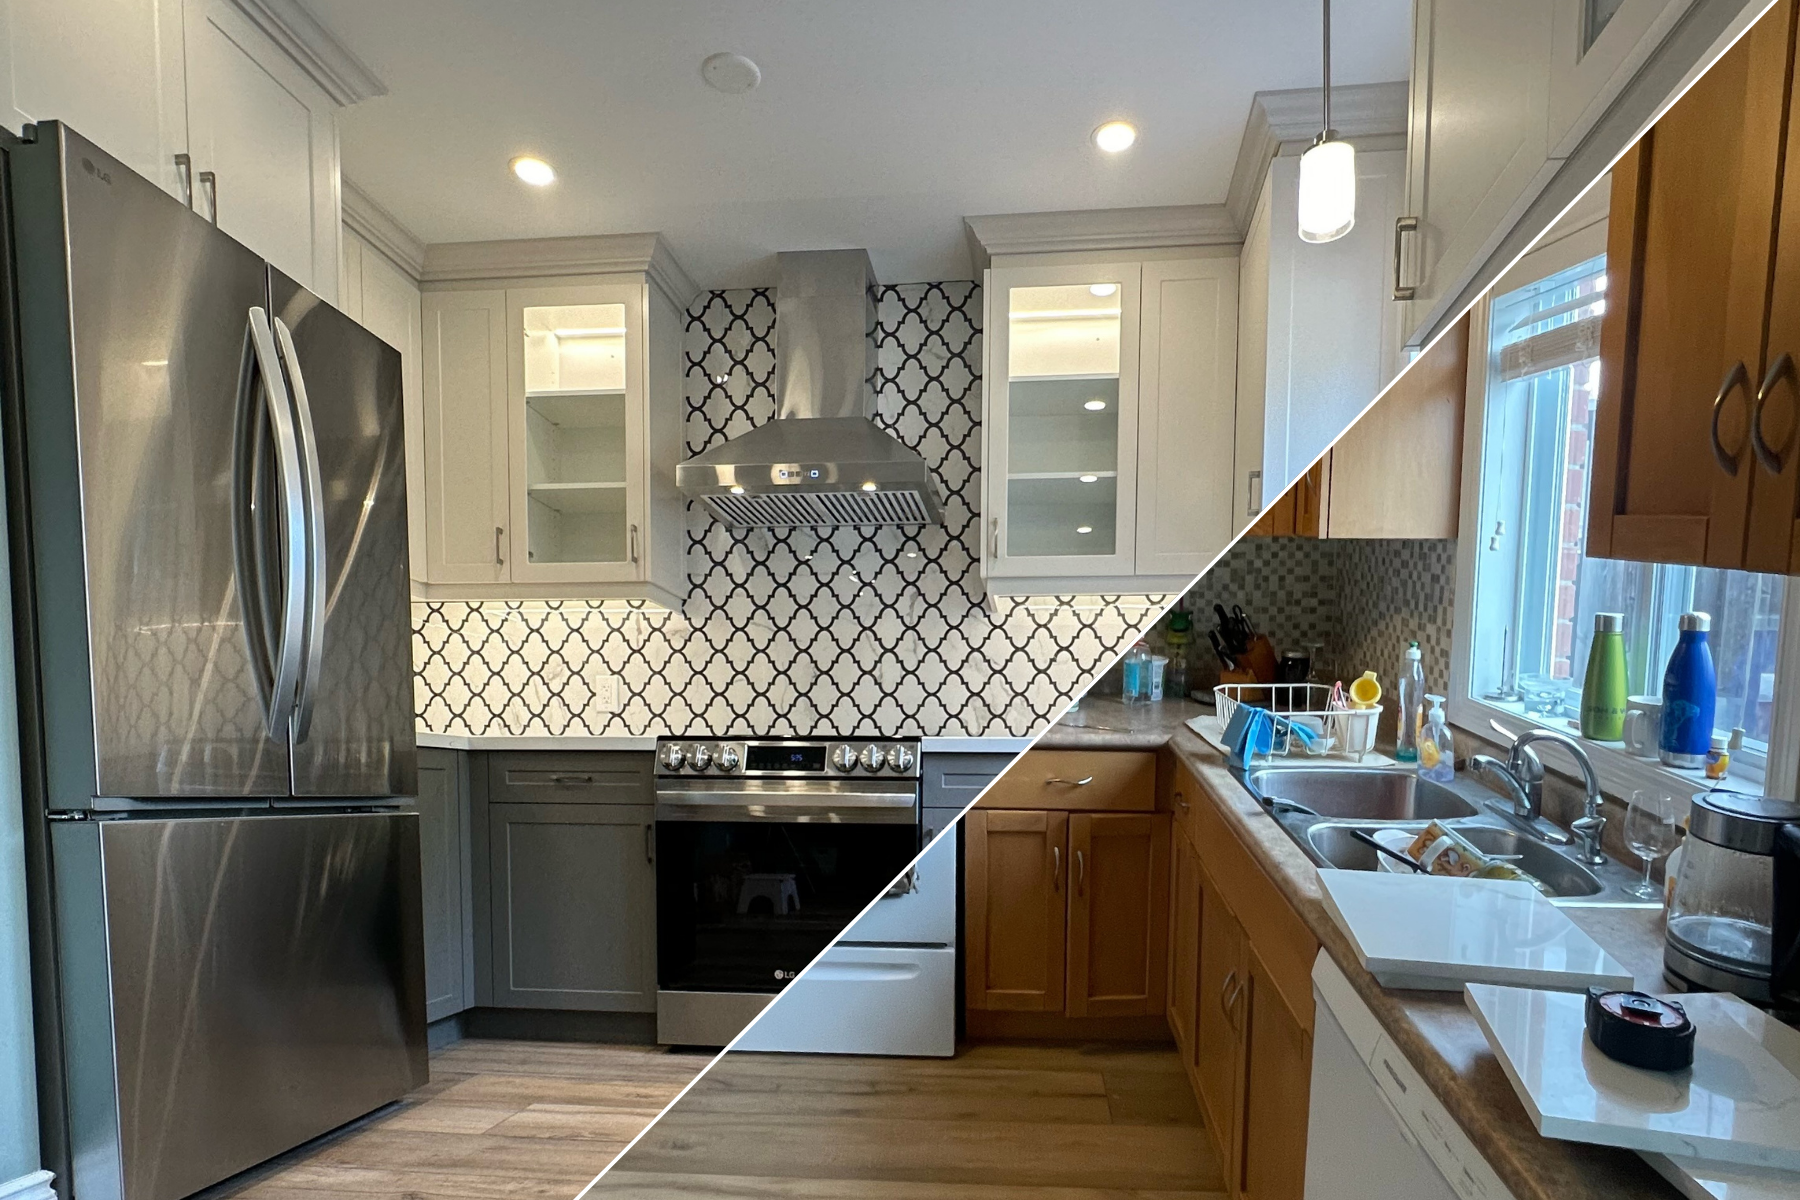
Nov 11 2025 BY David Adrian, Blog
Advantages of Choosing MDF Cabinet Doors
When it comes to home renovations, especially in kitchens and bathrooms, cabinet doors play a crucial role in both the aesthetics and functionality of the space. (Medium Density Fiberboard) MDF cabinet doors have gained popularity due to their affordability, versatility, and durability. Whether you’re a homeowner planning a DIY project or working with a professional, understanding the advantages of choosing MDF cabinet doors can help you make an informed decision. Medium Density Fiberboard, or MDF, is an engineered wood product made by breaking down hardwood or softwood residuals into wood fibers. These fibers are then combined with wax and a resin binder under high pressure and heat to form panels. MDF is denser than plywood and offers a smooth, uniform surface that is perfect for cabinet doors.Key Advantages of MDF Cabinet Doors
Cost-Effectiveness
In David Adrian's experience one of the most significant advantages of MDF cabinet doors is their cost-effectiveness. MDF is generally less expensive than solid wood, making it an ideal choice for budget-conscious homeowners. Despite its affordability, MDF does not compromise on quality, offering a comparable aesthetic to more expensive materials.Versatility in Design
MDF cabinet doors provide great design versatility. They can be easily cut, routed, and customized to fit your specific design needs, whether you’re looking for traditional or modern styles. This flexibility makes MDF a popular choice for custom MDF cabinets, allowing homeowners to achieve a bespoke look without the high costs associated with custom solid wood doors.Smooth Surface Finish
The smooth and uniform surface of MDF makes it an excellent substrate Build a Doors 130 plus thermofoil finishes. Unlike solid wood, MDF does not have grain, which means it can be painted or veneered to achieve a flawless finish. This feature is particularly appealing for those looking to create modern MDF doors with sleek, clean lines.Durability and Stability
MDF is known for its durability and stability. Unlike solid wood, MDF does not warp or crack with changes in humidity and temperature, making it a reliable choice for kitchen and bathroom environments. Its density also provides a solid, substantial feel, similar to that of real wood, which is why solid MDF cabinet doors are a preferred option for many.Eco-Friendly Option
For environmentally-conscious homeowners, MDF offers an eco-friendly alternative. MDF is made from wood fibers and resin, often utilizing wood byproducts that would otherwise go to waste. By choosing MDF cabinet doors, you’re supporting the use of sustainable materials.Comparing MDF to Other Materials
MDF vs. Solid Wood
While solid wood is a traditional choice for cabinet doors, it comes with a higher price tag and potential for warping and cracking. MDF offers a more affordable and stable alternative, with a smooth surface that can mimic the appearance of painted wood.MDF vs. Plywood
Plywood is another common material used for cabinet doors. While it is stronger than MDF, it doesn’t provide the same smooth finish. MDF’s uniform surface is better suited for painted finishes and intricate designs, making it a popular choice for modern styles.DIY and Customization Opportunities
For DIY enthusiasts, MDF cabinet doors offer an excellent opportunity for customization. Raw MDF cabinet doors can be easily sanded and painted to match any interior design scheme. Whether you’re looking to add a splash of color or prefer a classic white finish, MDF provides a blank canvas for creativity.Where to Find MDF Cabinet Doors
MDF cabinet doors are widely available and can be purchased from home improvement stores, specialized cabinet manufacturers, and online retailers. For those located in Canada, MDF cabinet doors Canada suppliers offer a range of options to suit different design preferences and budgets.
Conclusion
MDF cabinet doors offer numerous advantages that make them a popular choice for homeowners and professionals alike. Their affordability, design versatility, smooth finish, and durability make them an excellent option for any home renovation project. Whether you’re looking to create custom MDF cabinets or simply update your kitchen with modern MDF doors, the benefits of MDF are clear. By choosing MDF, you’re investing in a material that delivers both style and substance. Consider exploring the variety of MDF board for cabinet doors available to find the perfect fit for your next project. Embrace the possibilities that MDF cabinet doors offer and transform your space with confidence.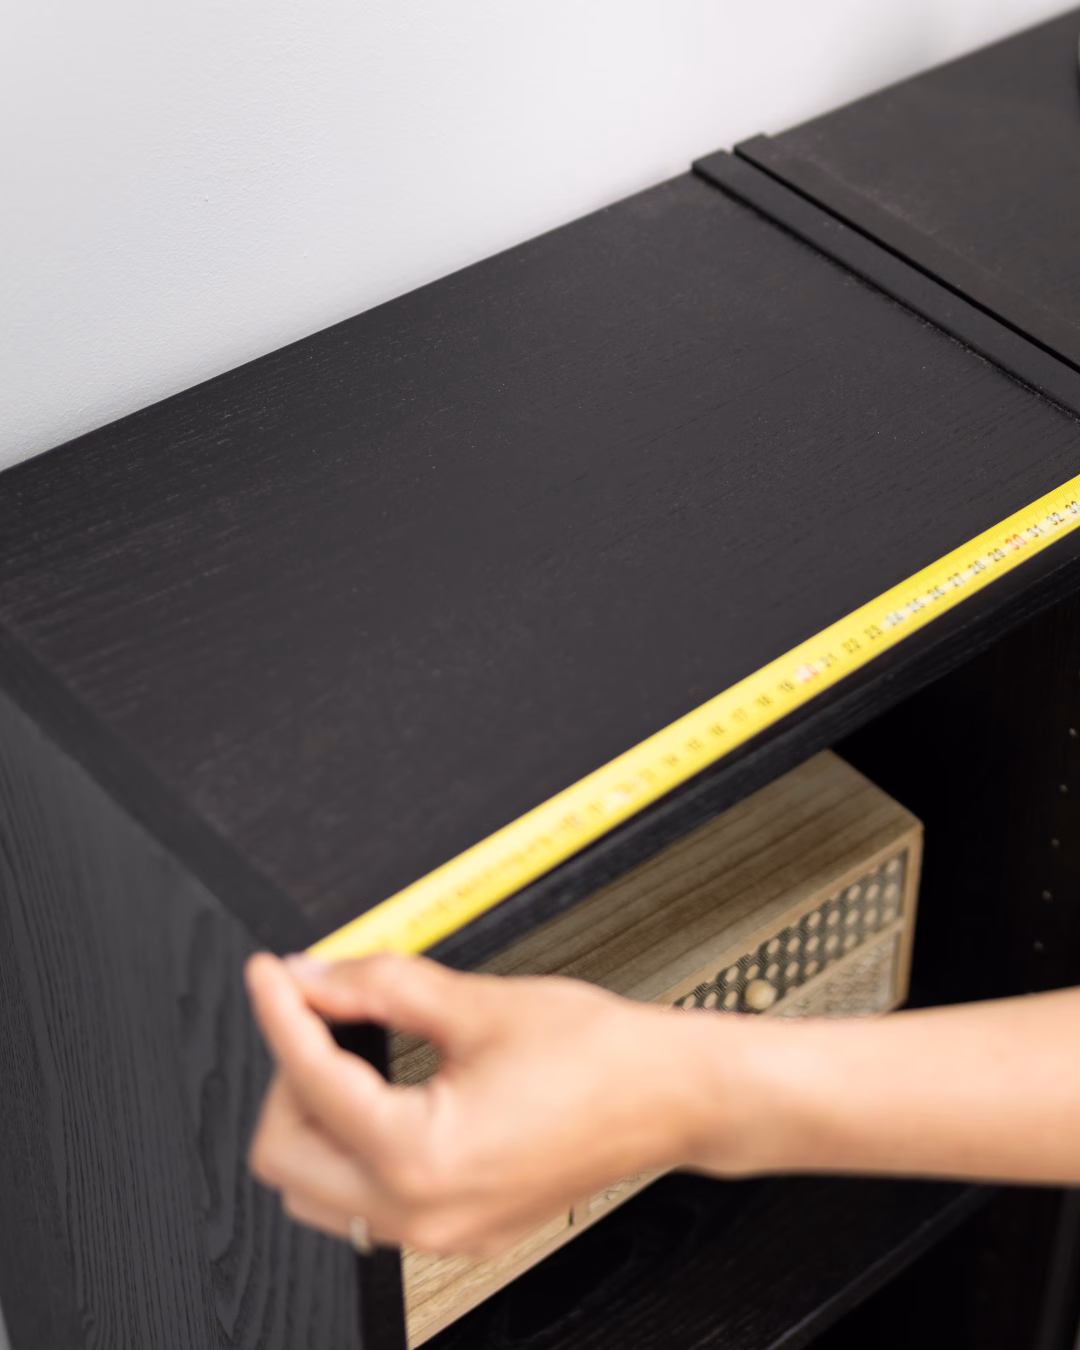
Nov 5 2025 BY David Adrian, Blog
Alright, before you even think about measuring, let's get your gear in order. A little prep work here goes a long way and honestly makes the whole process smoother and more accurate.
Gathering the Right Tools for the Job
A few minutes of organization now will save you from a ton of frustrating do-overs later. You only need a few simple things, but they need to be the right things.
A flimsy, old tape measure just won't cut it. They can sag or even stretch, which is a recipe for disaster when you're ordering custom doors. Your most important tool is a high-quality steel tape measure. It gives you the rigidity you need for a perfectly straight, precise reading, especially when you're measuring a wide opening.
Next, grab a simple notepad and a pencil. It's tempting to just jot numbers down on a scrap of wood or punch them into your phone, but don't. A dedicated notepad keeps your width and height measurements organized and easy to read, which seriously cuts down on the chance of mixing them up. For example, a note like "Upper Cabinet #1: 18" W x 32" H" is much clearer than a random "18x32" in your phone's notes.
Pro Tip: Always double-check if your cabinet frames are square. This is a big one, especially in older homes where things have had time to settle. Just hold a small level against the frame—it'll tell you instantly if it's plumb. This quick check can save you a headache and explain why you might be getting different measurements at the top and bottom of an opening.
Here's a quick rundown of what you'll want on hand:
Steel Tape Measure: This is non-negotiable for accurate, consistent readings.
Notepad & Pencil: To keep every measurement clear and organized.
Straight Edge or Level: Perfect for checking if frames are square and helping you draw straight lines if needed.
I once had a client who used a fabric sewing tape for their measurements. It sounds silly, but it happens. Their numbers were off by nearly a quarter-inch, and that tiny error made their beautiful custom doors completely unusable. Using the right tools is truly the first—and most important—step to getting this project done right.
Cracking the Code on Cabinet Overlays
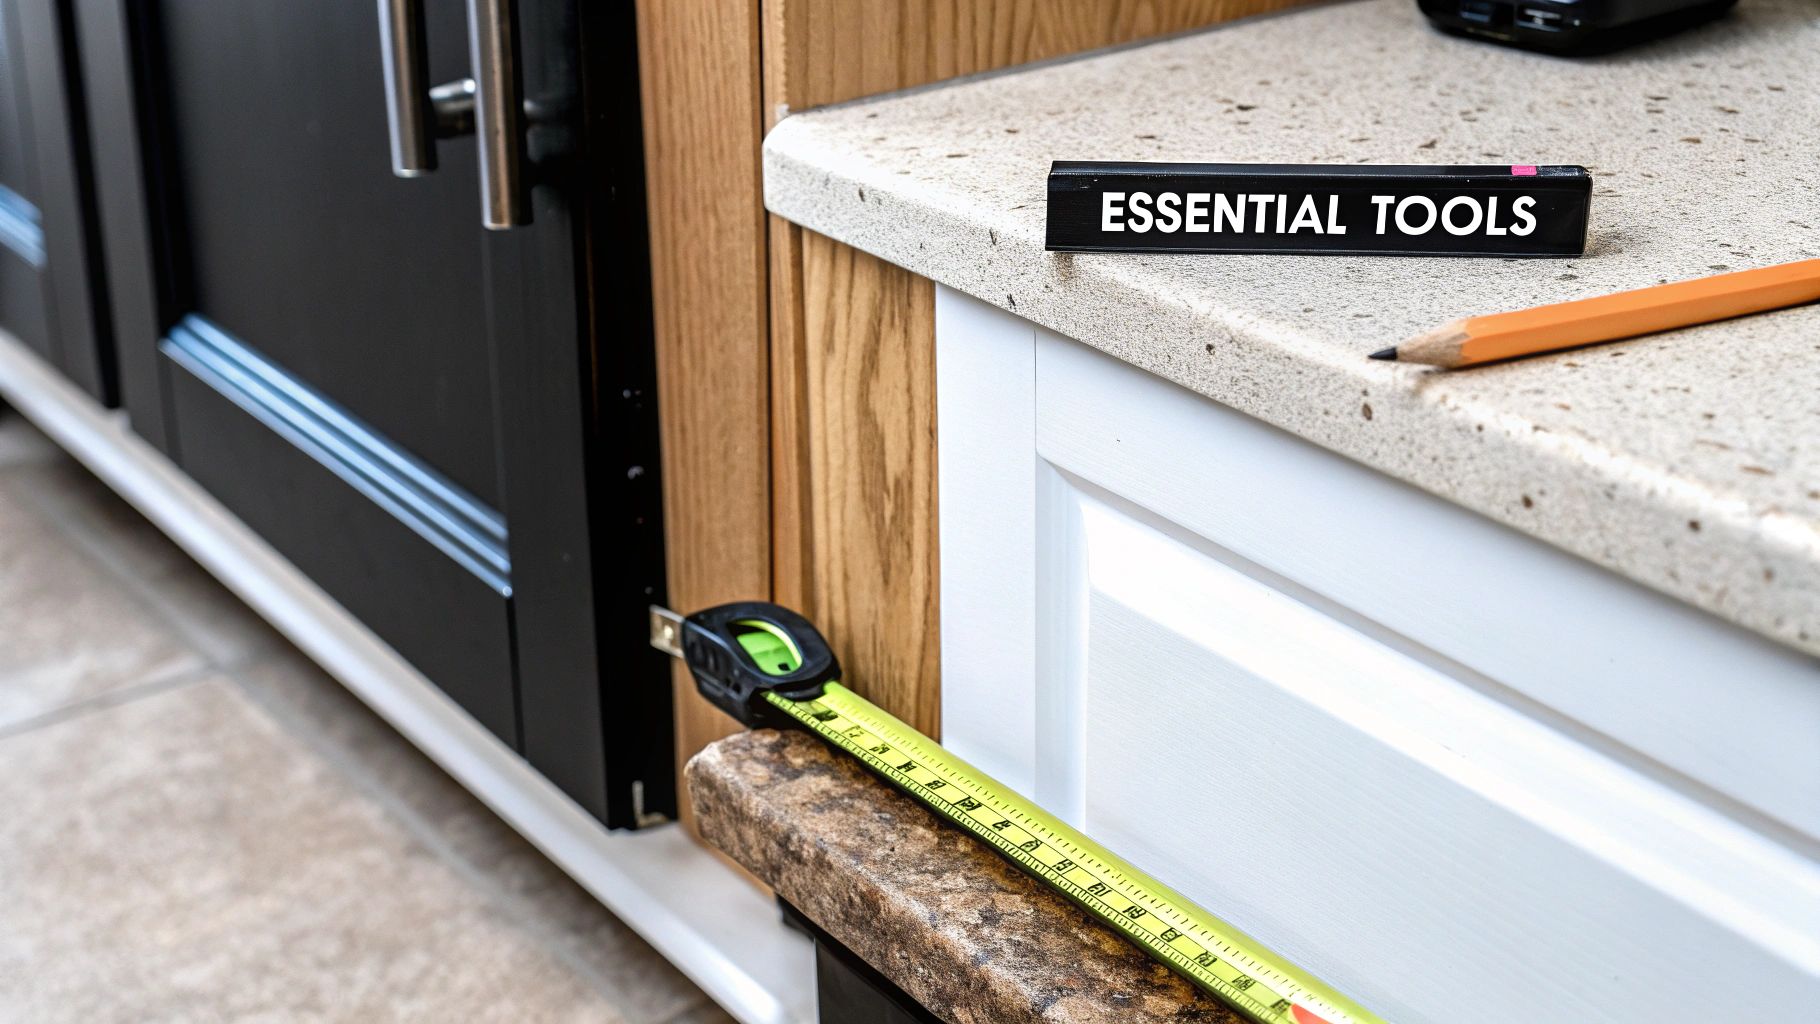
Before you even think about touching a tape measure, you need to understand how your doors sit on the cabinet frame. This is called overlay, and it’s the single biggest factor in getting your door sizes right. A measurement for one style will be completely wrong for another, so this is a critical first step.
Simply put, overlay describes how much of the cabinet face frame the door covers when closed. Getting this right dictates the entire formula for your final door dimensions.
Full Overlay Doors
Just like the name says, full overlay doors cover almost the entire cabinet face frame. This gives you that modern, seamless look with very tight gaps between doors. When you look at the cabinets, you see door, door, door—and very little of the frame behind them.
To measure for a single full overlay door, you’ll take the opening's width and height, then add the overlay amount to each dimension. A very common overlay is 1/2 inch, which means you’d add a total of 1 inch to the final width and height measurements (1/2 inch for the left side, 1/2 inch for the right, and so on).
Here's a real-world example: If your cabinet opening is 16 inches wide by 30 inches high, and you want a standard 1/2 inch overlay:
Door Width: 16" + 1" = 17"
Door Height: 30" + 1" = 31"
Partial Overlay Doors
Partial overlay is the classic style you’ve probably seen in countless kitchens. Also known as traditional or standard overlay, the door only partially covers the face frame. This design leaves a good portion of the frame—usually 1 to 1.5 inches—exposed around each door.
The measuring process is the same as for full overlay, but you're just adding a smaller amount. For instance, with a 3/8 inch overlay, you'd add a total of 3/4 inch to the opening's width and height.
Practical Example: For that same 16-inch wide by 30-inch high opening, but with a 3/8-inch partial overlay:
Door Width: 16" + 3/4" = 16 3/4"
Door Height: 30" + 3/4" = 30 3/4"
A small mistake here can throw everything off. You could end up with doors that collide with each other or have sloppy, uneven gaps, completely ruining the professional look you're after. Nail the overlay, and the rest of the job becomes much easier.
Inset Doors
Inset doors are in a class of their own. They don't sit on top of the frame at all—they sit perfectly flush inside the cabinet opening. The face of the door is level with the cabinet frame, giving it a high-end, custom furniture appearance.
Measuring for inset doors is the opposite of the other styles; you subtract instead of add. You'll measure the opening precisely and then subtract a small amount, typically 1/8 inch total from both the width and height. This creates a tiny, consistent clearance gap so the door doesn't scrape against the frame.
Let's use our example opening: For a 16-inch wide by 30-inch high opening:
Door Width: 16" - 1/8" = 15 7/8"
Door Height: 30" - 1/8" = 29 7/8"
This kind of precision is more important than ever. The global cabinet market is projected to grow from USD 17.4 billion in 2025 to nearly USD 23.9 billion by 2033, and much of that growth is driven by a demand for accuracy that reduces waste and ensures a perfect fit.
Of course, the way a door fits is also tied directly to its hardware. To learn more about that piece of the puzzle, check out this a comprehensive guide to cabinet door hinge types.
Cabinet Door Overlay Measurement Guide
To make things easier, here’s a quick-reference table that breaks down the math for each style.
Door Style | Measurement Approach | Example Calculation |
|---|---|---|
Full Overlay | Opening + (Overlay x 2) | 16" Opening + (1/2" x 2) = 17" |
Partial Overlay | Opening + (Overlay x 2) | 16" Opening + (3/8" x 2) = 16 3/4" |
Inset | Opening - Clearance Gap | 16" Opening - 1/8" = 15 7/8" |
Keep this guide handy when you’re taking your measurements. It’s a simple way to double-check your work and ensure you order doors that will fit perfectly.
Measuring Cabinet Openings Like a Pro
Alright, let's get to the most important part: measuring your cabinet openings. This is where a little bit of precision goes a long way. I’m going to walk you through the same process the pros use to make sure every door hangs perfectly, and it all comes down to what we call the "rule of threes."
One thing you learn quickly is that cabinet frames, especially in older homes, are almost never perfectly square. Houses settle, wood shifts over the years, and things can get a bit skewed. Just measuring in one spot is a classic rookie mistake that leads to doors that scrape, bind, or have weird, uneven gaps.
The Rule of Threes in Practice
To work around any of these imperfections, you need to measure the width at the top, middle, and bottom of the opening. Then, you'll do the same for the height by measuring the left, middle, and right sides. This approach gives you the full story of the opening's actual shape, not just a single snapshot.
Once you have your three width and three height measurements, the rule is simple: always use the smallest measurement of the set. This is your safety net. It guarantees your new door will fit into the tightest point of the opening without any trouble.
Let’s say you measure the width and get these numbers:
Top: 15 inches
Middle: 15 1/16 inches
Bottom: 14 15/16 inches
In this case, you’d lock in 14 15/16 inches as your final width. That's the number you'll use when you calculate the final door size based on your chosen overlay.
This image really drives home the idea of capturing both the vertical and horizontal dimensions to get that perfect fit.
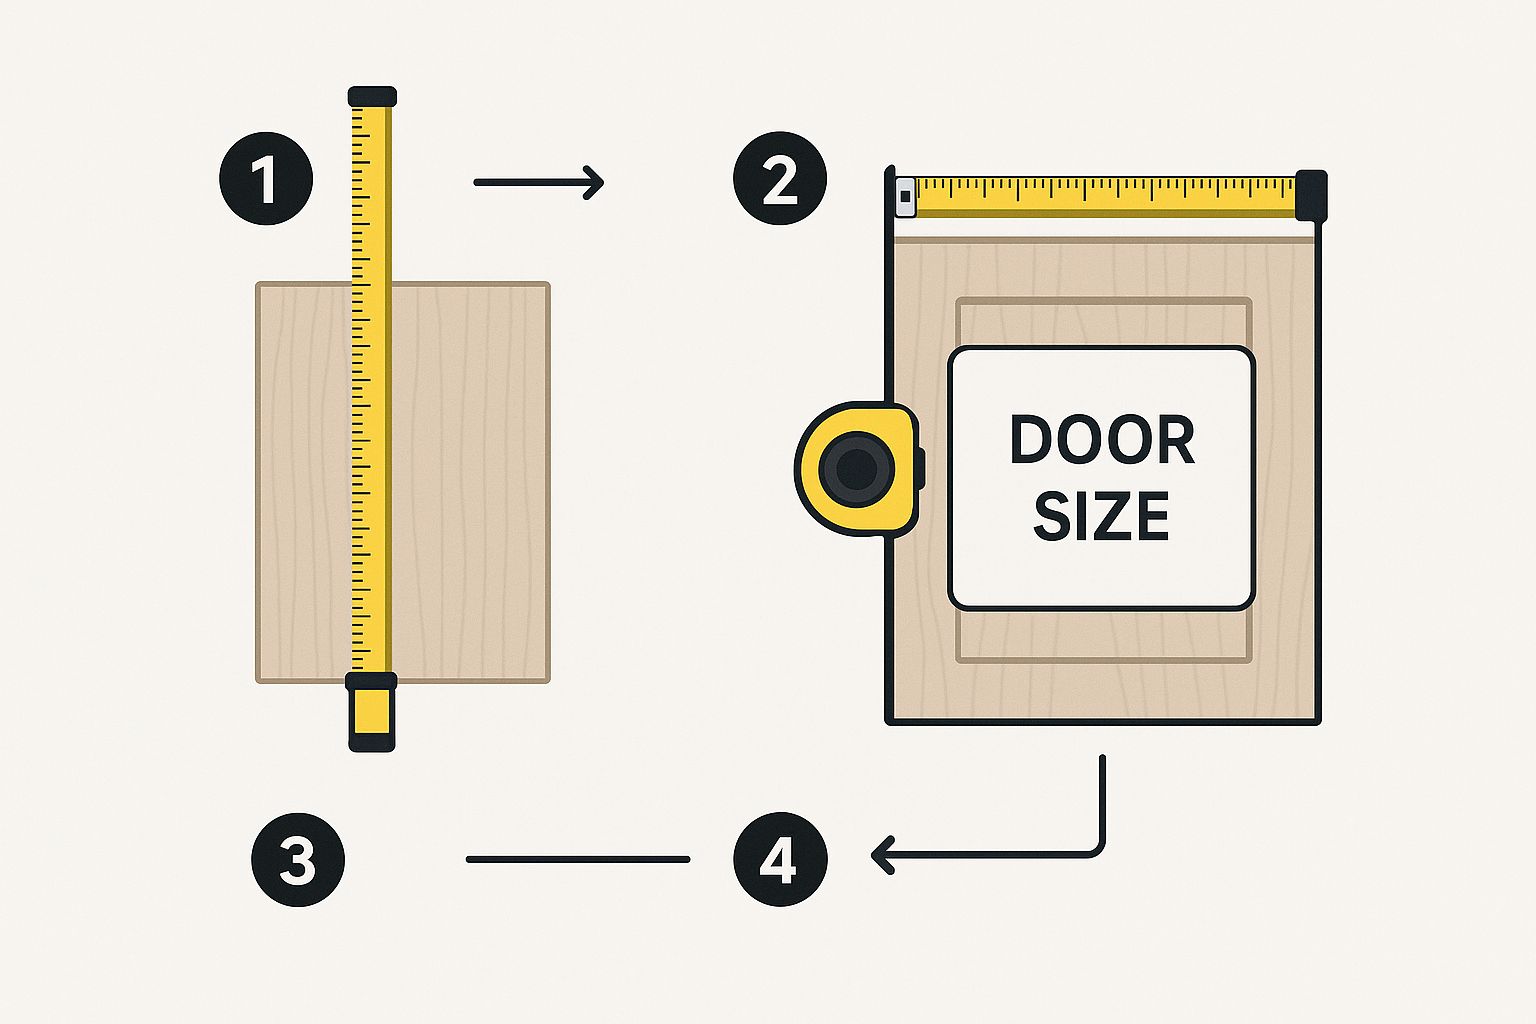
It’s a great visual reminder that both height and width need that same level of careful attention. These two dimensions are the foundation of your whole project.
Measuring for Double Doors
What about those wide openings that need a pair of doors? The process starts the same but has one extra step to make sure they meet perfectly in the center without clashing.
First, measure the opening's width using the rule of threes and take the smallest dimension, just like before. Now, you need to account for a small gap between the two doors so they don't smack into each other. A standard gap is 1/8 inch.
To figure out the width for each individual door, you'll add 1 inch for the overlay (assuming a standard 1/2-inch overlay on both sides), subtract the 1/8-inch gap, and then divide the whole thing by two.
Here's a practical example: Your opening is 30 inches wide.
Add Overlay: 30" + 1" = 31"
Subtract Gap: 31" - 1/8" = 30 7/8"
Divide by Two: 30 7/8" ÷ 2 = 15 7/16"
Each of your two doors should be 15 7/16 inches wide.
For a little more guidance, checking out an expert guide on how to measure kitchen cabinets can give you some extra tips and comprehensive techniques. Nailing these foundational skills is what makes for a flawless installation.
How to Measure Existing Doors for a Perfect Match
If you're already happy with how your current doors fit and you're just looking for a style upgrade, measuring your existing doors is a fantastic shortcut. But there's definitely a right way to do it. The biggest mistake I see people make is trying to measure a door while it's still hanging on the hinges—it’s a surefire way to get inaccurate numbers.
To get a perfect measurement, you have to take the door off first. Lay it down on a flat, stable surface like a workbench or even a clean spot on the floor. This gets rid of any sag from the hinges and guarantees your tape measure lies perfectly straight. Once it's flat, carefully measure the exact height and width down to the nearest 1/16th of an inch.
Don't Forget Hinge Placement
Getting the height and width is only half the battle. The most critical step—and the one people often forget—is to measure for your hinge placements. If you skip this, your new doors won't line up with the existing hinge holes on your cabinet frames, and that's a massive headache you don't want.
You'll need to record the distance from both the top and bottom edge of the door to the center of each hinge cup hole. That's the large, round recess where the hinge itself sits.
For example, if your top hinge cup is 3 inches from the top edge of the door, and the bottom hinge is 3 inches from the bottom edge, you need to write those exact numbers down. This precision is what turns the project into a seamless swap instead of a frustrating struggle.
This step is an essential part of the process when you want to transform your kitchen by replacing cabinet doors without the pain of redrilling your cabinet frames. A few extra moments of careful measuring here will pay off big time.
To make sure you don't miss anything, just follow this simple checklist for each door:
Door Width: Measured flat, to the nearest 1/16".
Door Height: Measured flat, to the nearest 1/16".
Top Hinge: Distance from the top edge to the center of the hinge cup.
Bottom Hinge: Distance from the bottom edge to the center of the hinge cup.
Capturing these four key dimensions ensures your new custom doors will be a perfect match, ready to hang on your existing cabinets with zero issues.
Common Measuring Mistakes and How to Avoid Them
Even with the best intentions, a few simple mistakes can derail your entire cabinet door project. We’ve seen it happen. Let’s walk through the common traps people fall into and, more importantly, how you can sidestep them for a flawless result. These small details are often the difference between a professional finish and a frustrating redo.
One of the most frequent slip-ups is just mixing up the width and height measurements on your notepad. It sounds basic, but in the middle of a project, it happens more than you’d think. Always, always label your numbers clearly—something like "15” W x 30” H"—to avoid any confusion when it's time to place your order.
Overlooking the Details
Another classic mistake is forgetting to correctly account for your overlay or necessary clearance gaps. We once had a homeowner who measured perfectly for a set of inset doors but forgot to subtract the crucial 1/8-inch clearance gap on all sides. The result? Beautiful new doors that were just slightly too big and wouldn't close. A real headache.
The old carpenter’s mantra, "Measure twice, cut once," is the golden rule here. Before you finalize anything, do yourself a favor and double-check every single number on your list against the actual cabinet frames. This one final check is your best insurance policy against costly errors.
Getting these measurements right is absolutely vital. The global cabinet door market was valued at around USD 17 billion in 2025, a figure that shows just how massive this industry is. Improper sizing doesn't just affect your project; it contributes to waste and installation issues that have a ripple effect.
Avoiding these common pitfalls is a huge step toward a successful project. For those looking to dive deeper, our guide on refacing kitchen cabinet doors offers even more tips that can help ensure a smooth process from start to finish.
Answering Your Cabinet Measurement Questions
Even with the most detailed guide, there are always a few questions that pop up right when you think you’re done measuring. We’ve been there. To help you get over that final hurdle, we’ve pulled together the most common questions we hear from customers and installers alike.
Key Questions Answered
So, what’s the standard overlay for modern cabinets? While it can definitely vary, 1/2 inch is what you’ll see most often. This just means the door overlaps the cabinet frame by that amount on all four sides. But remember, the real boss here is your hinges—always check their specs before you lock in your final door size.
Another tricky spot we get asked about all the time is corner cabinets, especially those with bi-fold or lazy Susan doors. These can feel a little intimidating. The best way to tackle them is to measure each of the two door panels individually for both its width and height. For a practical example, a Lazy Susan door might consist of two panels, each measuring 10" x 30", hinged together to cover a larger corner opening.
The golden rule through all of this? Consistency. In the U.S., most suppliers, including us, work in inches down to the 1/16th. On the other hand, European-style cabinets are often measured in millimeters. It’s always smart to check with your door supplier to see what unit they prefer so you can avoid any frustrating conversion errors.
Nailing these final details will help you figure out if this is a project you want to tackle yourself or if it’s time to call in a pro. Our guide on choosing between DIY and hiring contractors can help you make that call. For a wider perspective on getting dimensions right, you might find these expert tips on how to measure furniture for a perfect fit helpful, too.
Ready to turn those perfect measurements into the perfect doors? At The Door Maker, our “Build a Door” tool makes it simple to design the exact custom cabinet doors you've been imagining. Start your project today at https://tdm-thedoormaker.com.
Article created using Outrank
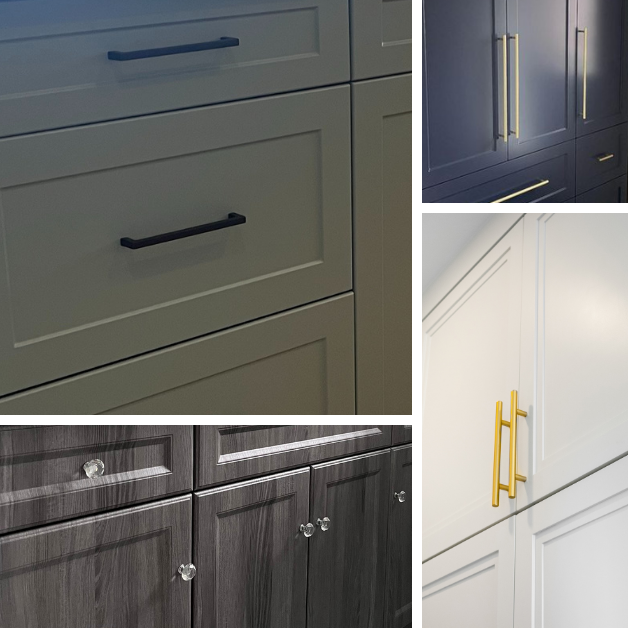
Nov 5 2025 BY David Adrian, Blog
Choosing the Perfect Cabinet Doors for Your Home
When it comes to designing your dream home, the details matter. One essential detail that can transform your space is the choice of cabinet doors. Whether you're renovating your kitchen, updating your bathroom, or designing a custom closet, the right cabinet doors can make all the difference.
In this guide, we'll explore different types of cabinet doors, materials, styles, and hardware options to help you make an informed decision.
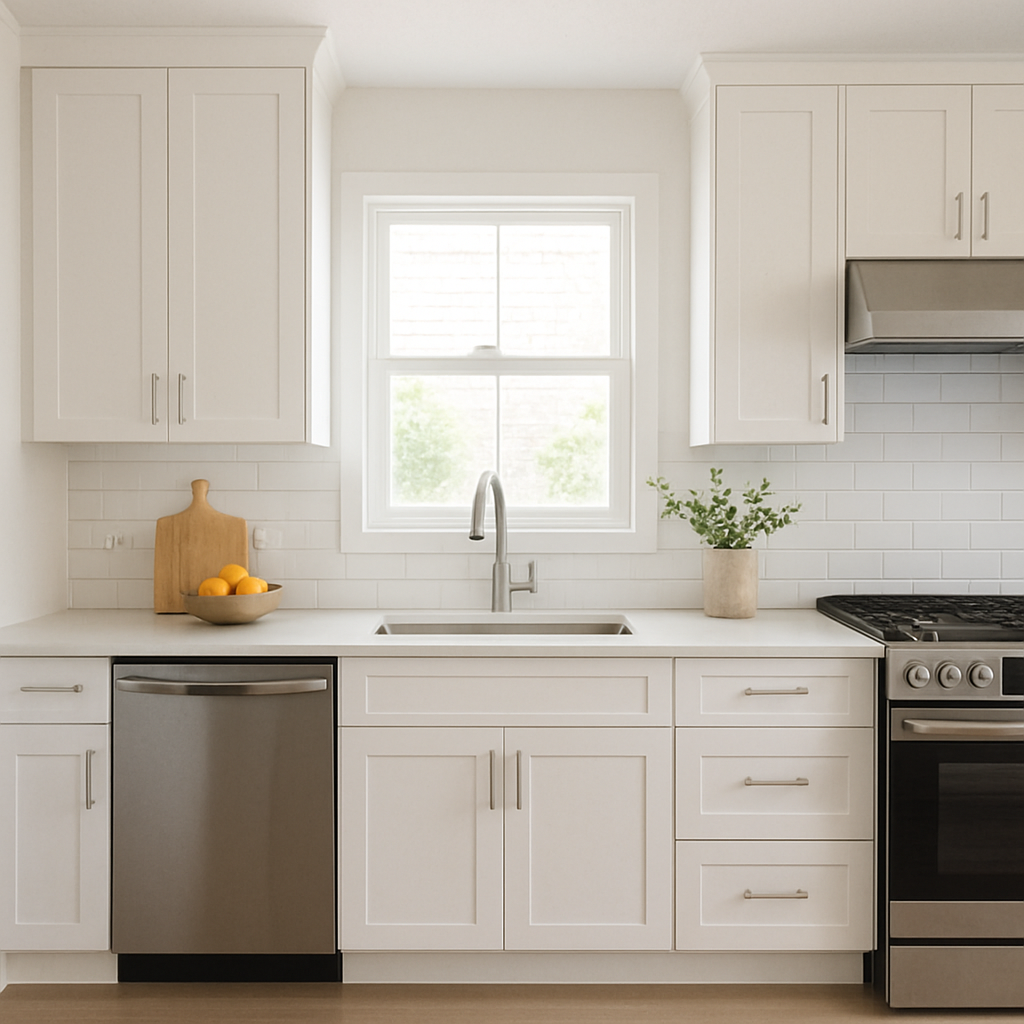
Understanding Cabinet Doors: The Basics
Cabinet doors are a key component of your storage solutions. They add style and functionality to any room. From kitchen cabinets to mudroom storage, the right doors can enhance the overall look and feel of your space.
Types of Cabinet Doors
- Shaker Cabinet Doors: Known for their simple, clean lines, shaker doors are versatile and complement various design styles from modern to traditional.
- Glass Door Cabinet Doors: Perfect for displaying your beautiful dishware or collectibles, glass door cabinets add an elegant touch to any room.
- Arched Cabinet with Glass Doors: These doors add a classic and sophisticated look, often found in traditional and vintage-inspired designs.
- Sliding Cabinet Doors: Ideal for tight spaces, sliding doors save space and offer a sleek, modern appearance.
- Thermofoil Cabinets: Coated with a plastic finish, these doors are durable and easy to clean, making them a great choice for busy kitchens.
Materials for Cabinet Doors
Choosing the right material is crucial for the durability and aesthetic of your cabinet doors.
- Wood: Offers warmth and natural beauty. Options include oak, maple, cherry, and more.
- MDF (Medium-Density Fiberboard): An affordable alternative to solid wood, MDF is smooth and easy to paint.
- Glass: Adds elegance and allows you to display items while keeping them protected.
- Thermofoil: A budget-friendly, easy-to-clean option that mimics the look of wood.
Style and Design Considerations
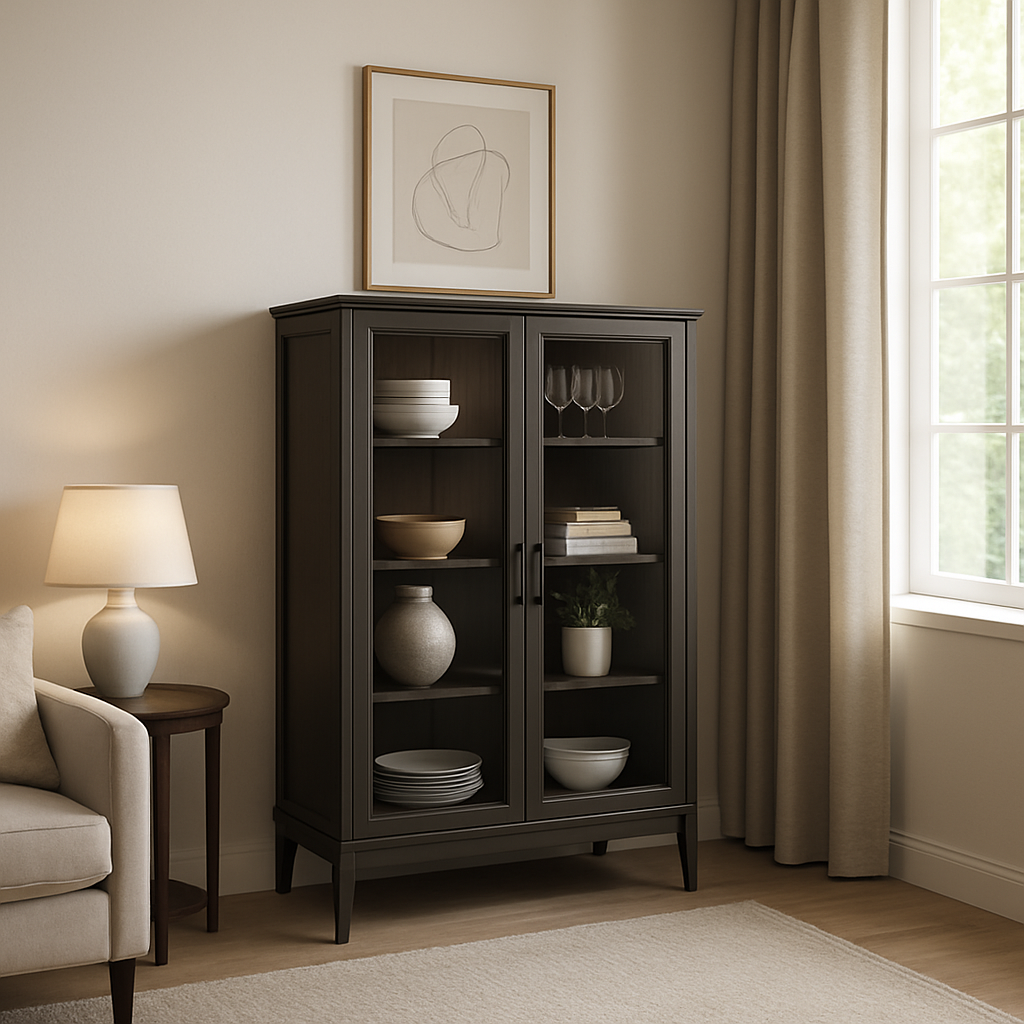
Your cabinet doors should reflect your personal style and the overall design of your home.
Color and Finish
- Natural Wood Finish: Brings warmth and a timeless look to your cabinetry.
- Painted: Offers endless color options, allowing you to match or contrast with your decor.
- Stained: Enhances the natural grain of the wood while adding a layer of color.
- Dove Grey: A popular choice for a neutral, sophisticated look that complements various decor styles.
Design Elements
- Mullions: These are the horizontal or vertical bars that divide the glass in a cabinet door, adding a decorative touch.
- Curio Cabinet with Glass Doors: Perfect for showcasing collectibles, providing a blend of open and closed storage.
- Accent Cabinet with Doors: These cabinets serve as a focal point in a room, often featuring unique designs and finishes.
Practical Considerations: Functionality and Hardware
Cabinet doors are not just about aesthetics; functionality is equally important.
Hardware Options
- Cabinet Door Hinges: Choose between standard or soft-close hinges for a seamless, quiet closing action.
- Cabinet Door Knobs and Handles: Available in various styles and finishes to complement your design.
- Cabinet Door Bumpers: These small but essential pieces prevent damage and reduce noise when closing doors.
- Cabinet Door Latches: Ensure your doors stay securely closed.
Customization
Consider custom cabinet doors if you have unique size requirements or want a specific design. Custom solutions allow you to tailor every aspect to your needs, from the material to the finish and hardware.
DIY Cabinet Doors: A Creative Project
If you're a DIY enthusiast, making your own cabinet doors can be a rewarding project.
How to Make Cabinet Doors
- Plan and Measure: Start by measuring your cabinet openings and deciding on the style and material of your doors.
- Gather Materials: You'll need tools like a saw, drill, and sandpaper, along with your chosen material for the doors.
- Cut and Assemble: Cut the panels and frames according to your measurements, then assemble them using wood glue and screws.
- Finish: Sand the surfaces smooth, then apply paint, stain, or a sealant to protect and enhance the wood.
- Install Hardware: Attach hinges and knobs or handles before hanging your doors.
Where to Buy Cabinet Doors

by Gabriela Fechet (https://unsplash.com/@pt_graphy)
When it comes to purchasing cabinet doors, you have several options:
- Home Improvement Stores: Retailers like Home Depot offer a wide selection of cabinet doors, from budget-friendly options to high-end designs.
- Door Suppliers Near Me: Local door suppliers can provide personalized service and custom options.
- Online Retailers: Websites like Fast Cabinet Doors offer a convenient way to browse and purchase doors from the comfort of your home.
Conclusion
Choosing the perfect cabinet doors for your home involves balancing style, functionality, and budget. Whether you're looking for shaker style cabinet doors, a curio cabinet with glass doors, or a custom closet design, the right doors can elevate your space. Consider your needs, explore your options, and invest in quality to ensure your cabinet doors serve you well for years to come.
By keeping these factors in mind, you'll find the ideal cabinet doors that blend seamlessly with your home's decor and meet your storage needs. Happy decorating!
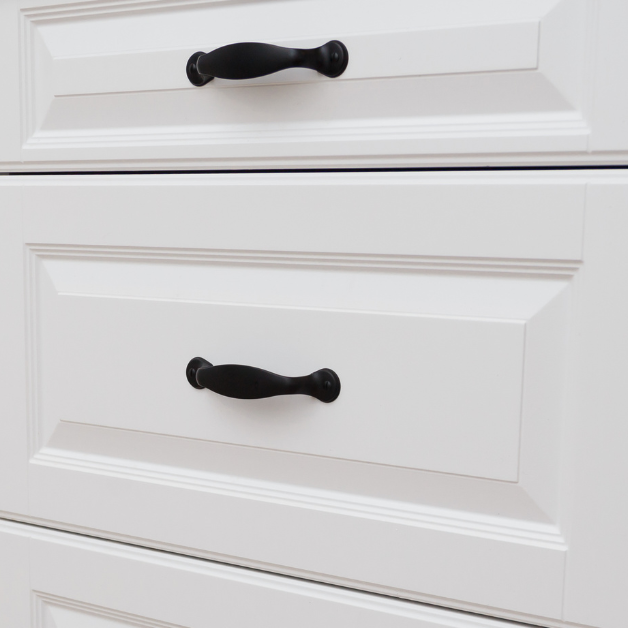
Oct 20 2025 BY David Adrian, Blog
White continues to be the top choice for kitchen color. Consider using Nordic White, a beautiful matte finish in a pure white hue, to elevate your space. By incorporating this color into your DIY kitchen project, you'll be on your way to creating a stunning environment that will surely impress your guests by the holidays. Start your transformation today!
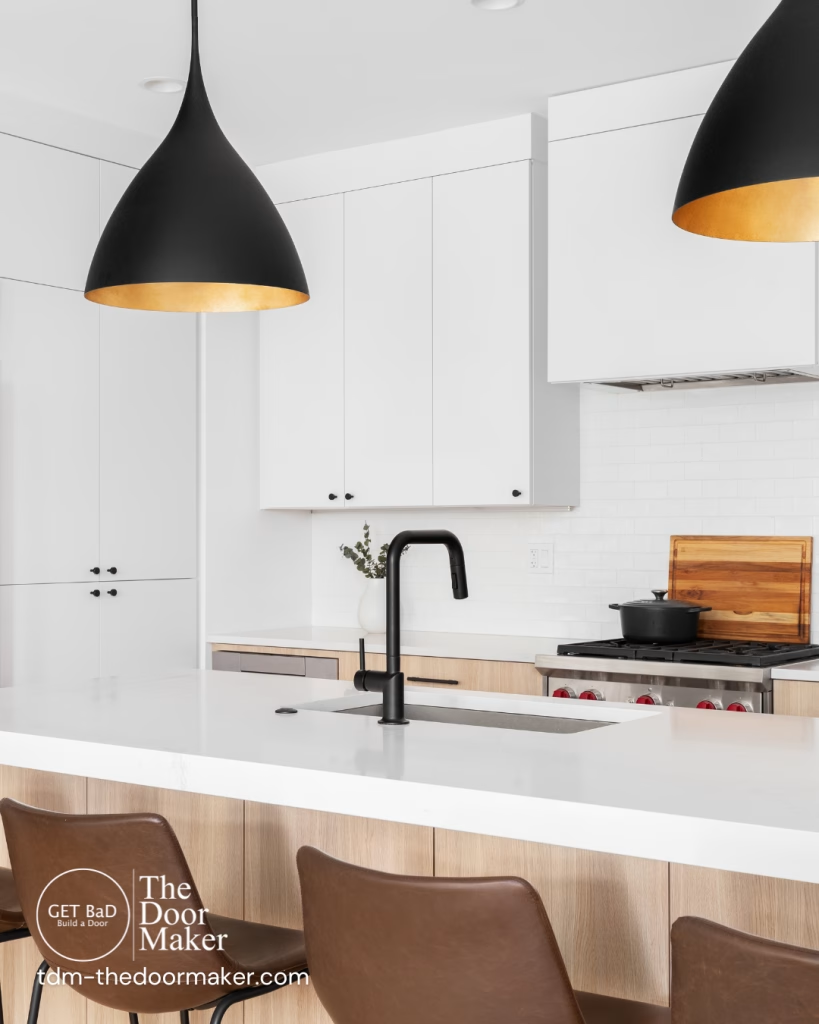
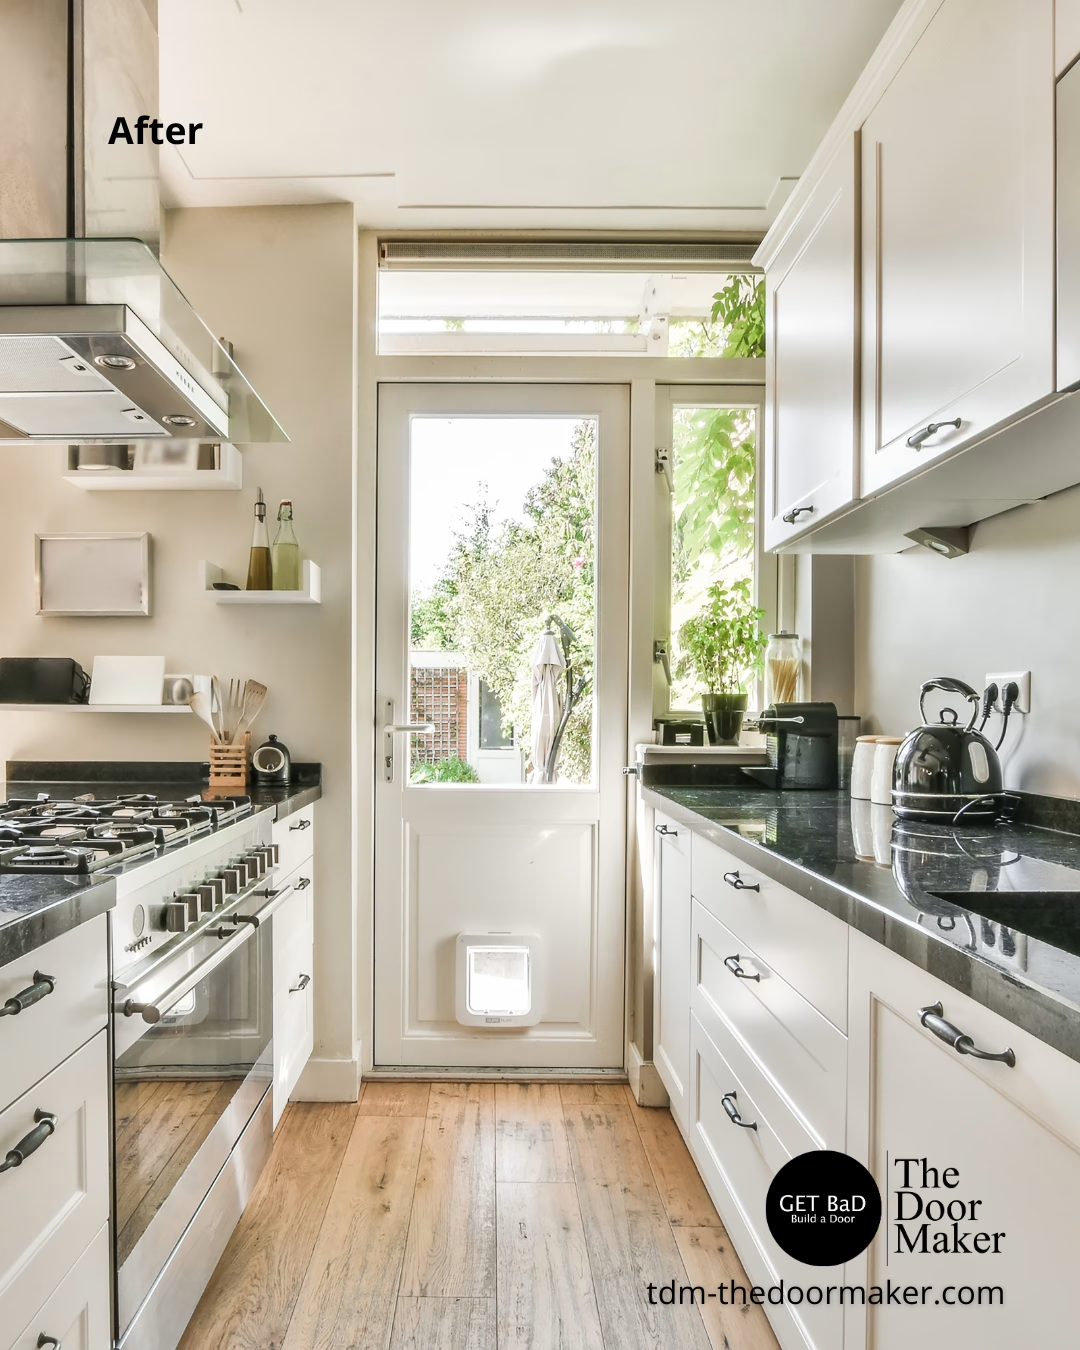
Oct 12 2025 BY David Adrian, Blog
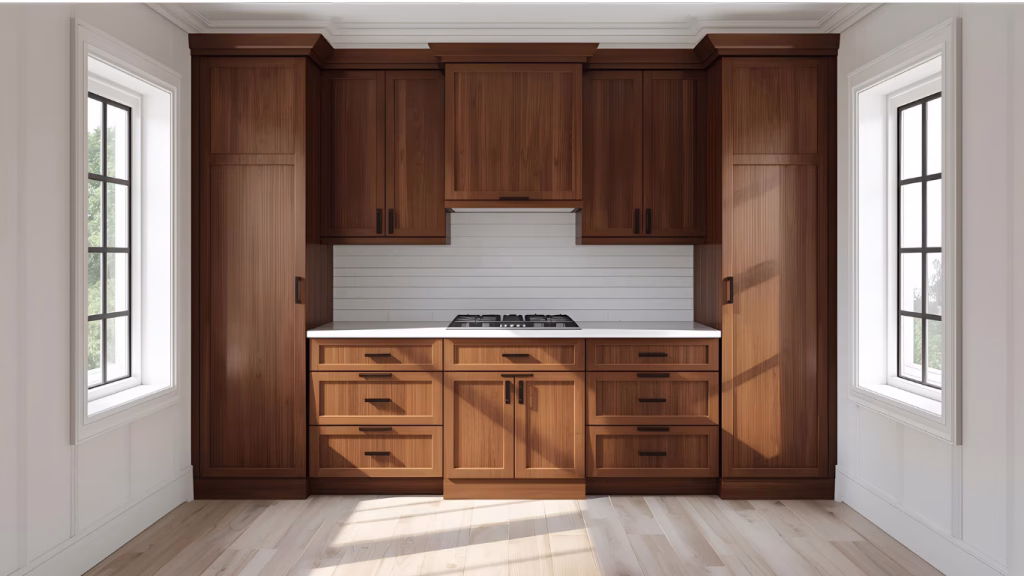
Living in a small space doesn’t mean you have to compromise on style or storage. IKEA® is already a favorite for compact homes, but pairing your IKEA® cabinets with custom doors can completely transform the look and feel of your space. The right door choice can make even the smallest condo or apartment feel open, airy, and designed with intention.
Here are some of our favorite small-space hacks using custom doors for IKEA® cabinets.
Open-Frame Doors to Create the Illusion of Space
Closed storage is important in small spaces, but too many solid doors can make a room feel boxed in. They make tight rooms appear larger—perfect for bedrooms, entryways, or studios. Open-frame layouts are a designer’s best friend when it comes to small interiors. Instantly, your storage can blend into the room rather than dominating it, creating a lighter, more breathable aesthetic.
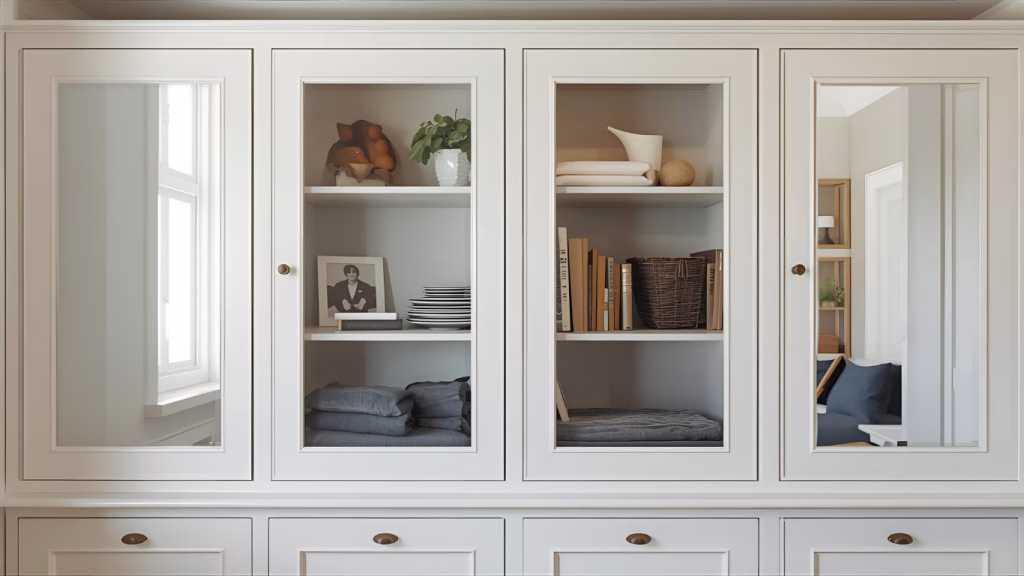
Light-Colored Fronts to Brighten Dark Corners
Swapping stock IKEA® doors for custom fronts in bright whites, creams, or soft matte pastels lifts a room and makes it feel larger.
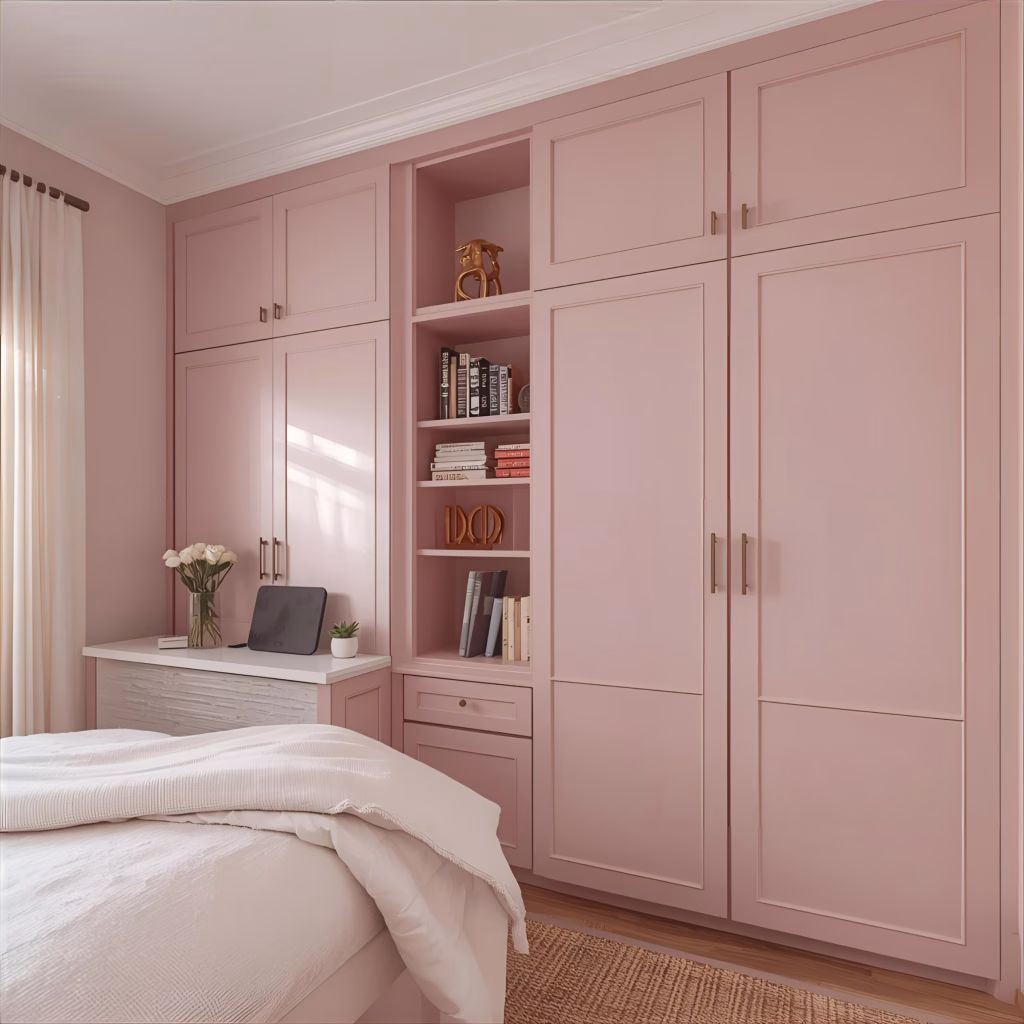
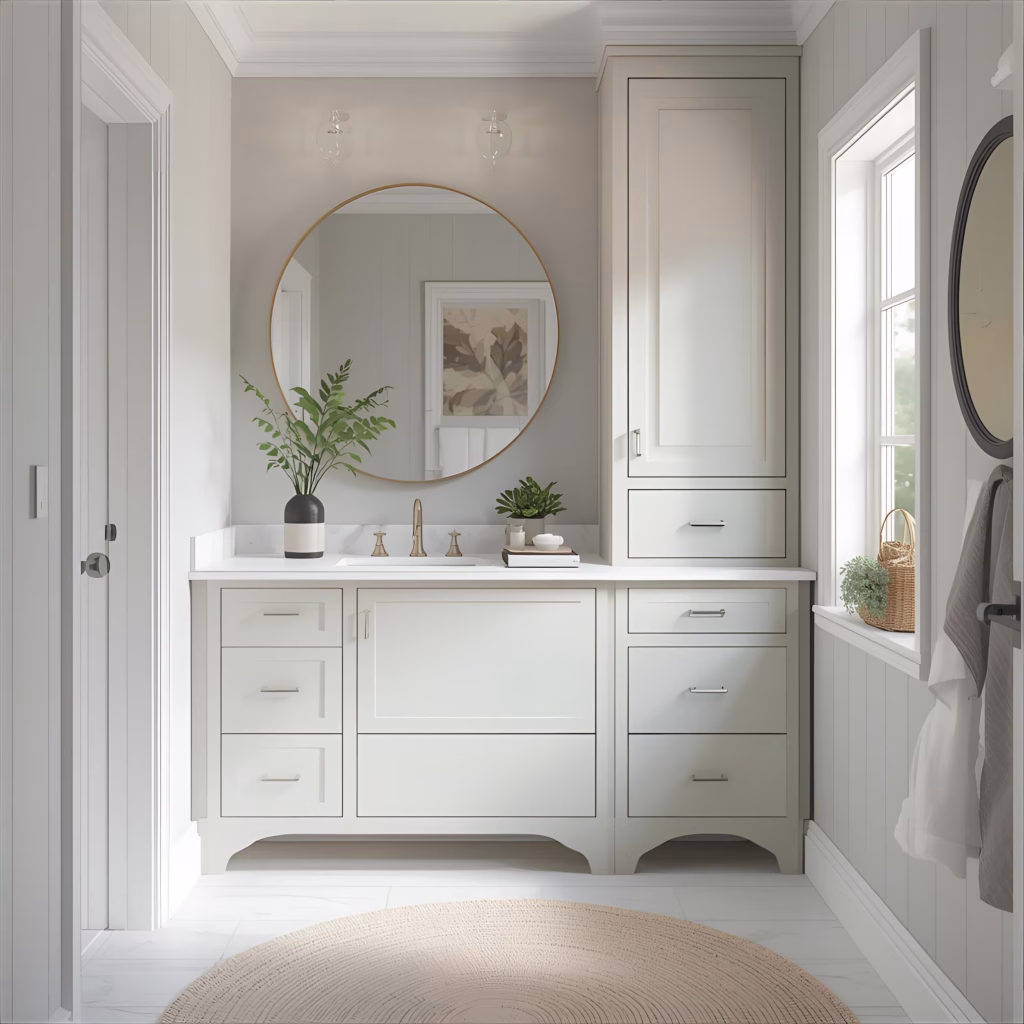
Built-In Storage with Panels & Toe Kicks
Maximize storage without losing cohesion by adding matching panels, toe kicks, and crown moulding. Custom trim pieces around IKEA® cabinets give the illusion of built-ins while also creating extra usable space.
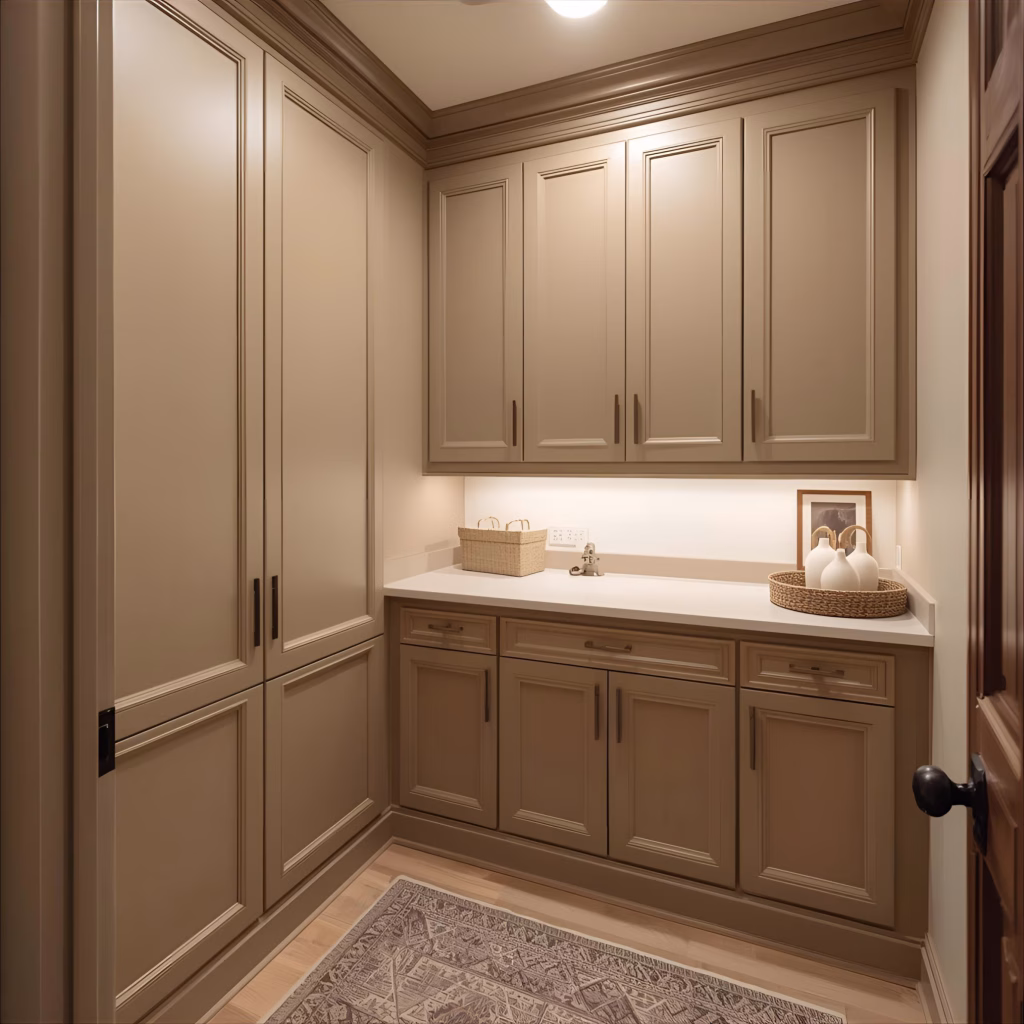

Small spaces can be stylish, functional, and uniquely yours with the right cabinet doors. Whether you’re outfitting a kitchen, bathroom, or living area, custom fronts are a simple yet impactful way to take IKEA® cabinets to the next level.
When you’re ready to maximize your space, Visit our Build a Door website to design the perfect custom doors for your IKEA® cabinets today! Learn more about us on our socials: Instagram Youtube Facebook
Aug 5 2025 BY David Adrian, Blog
If you are unsure of your ability to meassure and install the doors use an app.
www.jiffyondemand.com or www.angi.com can provide vetted contractors to do the job, allowing you to order the doors from Build a Door and have them installed professionally at a fraction of the time and cost of hiring a kitchen remodeling company.

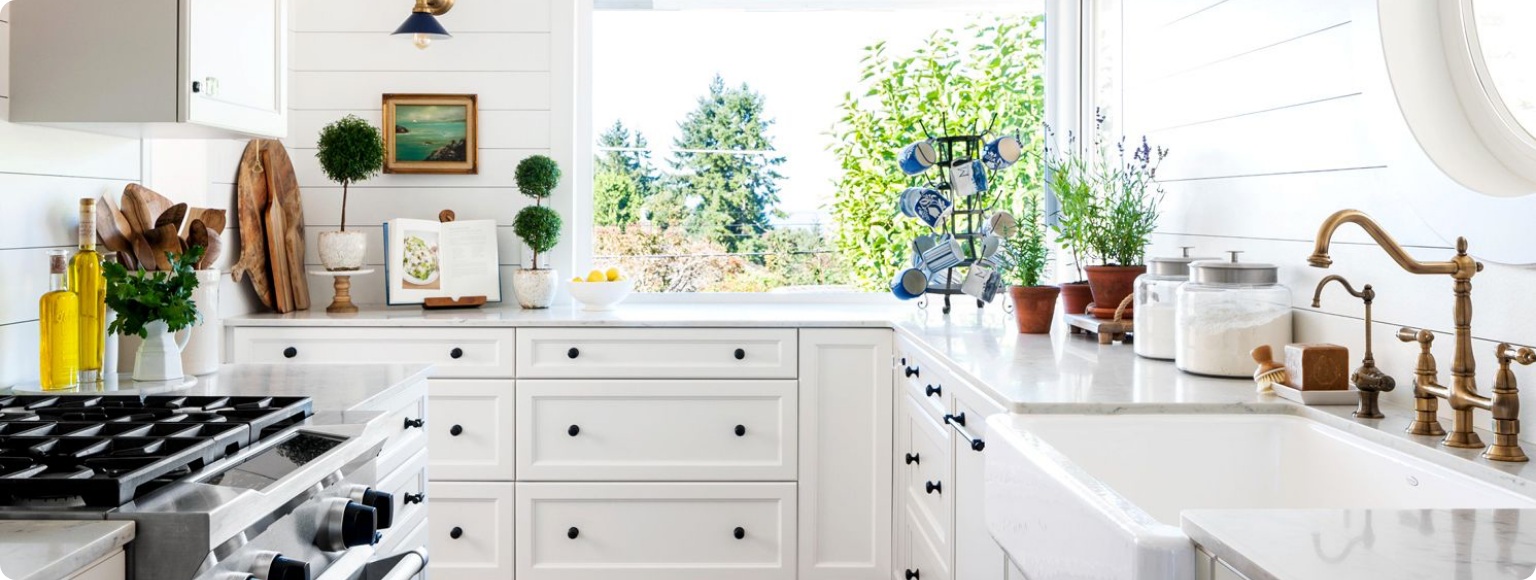
Jun 20 2025 BY David Adrian, Blog
1. Shaker Cabinet Doors
Shaker cabinet doors stand out as the go-to choice for both transitional and contemporary kitchens. Their hallmark five-piece construction—four slender frame pieces surrounding a flat recessed centre panel—strikes the perfect balance between simplicity and character. You’ll often spot crisp white Shaker doors in minimalist layouts, where they act as a neutral backdrop to statement lighting or sculptural countertops. Equally, dark-stained Shaker doors lend an industrial-modern vibe when paired with metal hardware and concrete surfaces. Pros:- Timeless design that never feels dated
- Highly adaptable to paint, stain or thermofoil finishes
- If every cabinet in the room is Shaker, the effect can seem overly uniform
What defines Shaker style?
At its core, Shaker style is all about proportion and function. The rails (top and bottom) and stiles (sides) of the frame are deliberately kept slim, typically around 2½" to 3", to maximise the flat panel’s presence without clutter. There’s no ornamentation—no scallops, no beading—just clean edges and perfectly square corners. This focus on utility reflects the Shaker ethos, where form follows function and the result is an understated elegance.Materials and finishes available for Shaker doors
Shaker doors can be crafted from a variety of substrates:- Solid wood: oak, maple or cherry for authentic grain and natural warmth
- MDF: a smooth, cost-effective base that resists warping
- Thermofoil on MDF: offers a uniform, easy-clean surface in hundreds of colours
Why Shaker doors suit modern kitchens
Clean lines are at the heart of contemporary kitchens, and Shaker doors deliver exactly that. Their simple profile allows bold countertops—think marble veining or terrazzo—to really pop. Shaker doors also pair effortlessly with modern hardware: long bar pulls emphasise the door’s geometry, while concealed handles maintain a seamless façade. In darker kitchens, a painted-white Shaker door can reflect natural light, making the space feel larger and airier.2. Flat Panel (Slab) Cabinet Doors
Flat panel—or slab doors—are the epitome of minimalist design. These cabinet fronts are crafted as one continuous piece, free from visible rails, stiles or grooves, making them perfectly suited to handleless kitchens or integrated-pull profiles. Picture a row of matte charcoal slabs that open with a gentle push or a run of high-gloss white panels reflecting daylight back into the room. Their monolithic look creates a sense of calm and simplicity, allowing hardware, lighting and adjacent materials to take centre stage. Beyond their visual appeal, slab doors pair beautifully with modern conveniences like touch-to-open mechanisms and recessed pull-out channels. A subtle bevel or eased edge can add just enough softness to the geometry, keeping the overall look clean yet approachable.Key characteristics of Flat Panel doors
Without the typical frame-and-panel construction, slab doors offer an uninterrupted plane of material. This absence of ornamentation emphasises:- A strong horizontal or vertical sweep across cabinet runs
- Sleek transitions from one surface to the next
- A perfect canvas for bold colours or dramatic textures
Material options and finishes
Slab doors can be realised in a wide array of substrates and finishes to suit both budget and performance requirements:- Painted MDF: A smooth base for any colour, from soft neutrals to vivid hues
- Laminate: Durable, budget-friendly and available in woodgrains, solids and patterns
- Thermofoil: Vinyl-wrapped MDF offering consistent colour and easy cleaning
- High-gloss acrylic: Ultra-reflective surfaces that catch light and enlarge small kitchens
Styling tips for Flat Panel doors
To keep a slab kitchen from feeling stark, consider layering textures and lighting:- Install under-cabinet LEDs to introduce warm pools of light and highlight countertop edges
- Mix in open shelving or glass-front cabinets to break up solid runs and display curated items
- Pair slab doors with natural stone or patterned tile backsplashes for added depth
3. Skinny Shaker (Slim Shaker) Cabinet Doors
Skinny Shaker doors distil the classic Shaker profile into a sleeker, more contemporary form. By trimming down the width of the stiles and rails, these doors introduce an airy, refined look that feels right at home in a modern kitchen. Imagine slender frames just wide enough to hint at structure, surrounding a flat centre panel that seems to float—this subtle shift in proportion brings a graceful lightness to the cabinetry, making walls of storage feel less imposing and more integrated with the overall design. Homeowners often choose Skinny Shaker for two-tone schemes—perhaps a crisp white perimeter contrasted by a warm woodgrain island—where the narrow frames draw the eye without commanding it. In compact kitchens, the reduced visual weight helps smaller layouts feel more spacious. And when paired with minimalist handles or hidden pulls, Skinny Shaker doors strike the perfect balance between tradition and forward-thinking style.Evolution from Classic to Skinny Shaker
Traditional Shaker doors feature stiles and rails commonly around 2½" to 3" wide. Slim Shaker, by contrast, typically utilises rails closer to 1½" in width. That cut in measurement may seem modest on paper, but in practice it produces a dramatically different effect. The narrower frame emphasises the flat panel’s uninterrupted surface, offering a subtler shadow line and a more delicate overall aesthetic. It’s a modern refinement of a century-old design principle, maintaining Shaker’s hallmark simplicity while refreshing its proportions.Benefits in modern kitchen design
- Enhanced minimalism: The slim rails keep visual distractions to a minimum, reinforcing the clean lines central to contemporary interiors.
- Perceived spaciousness: Narrow frames recede into the background, letting other elements—countertops, backsplashes, décor—take centre stage.
- Versatile compatibility: Works equally well with statement finishes or subdued palettes, and complements both matte and gloss surfaces without competing for attention.
Integration with custom features
Skinny Shaker profiles lend themselves to creative customisations. Consider swapping solid panels for frosted or clear glass inserts to break up cabinetry runs and introduce a hint of transparency. Or incorporate in-frame metal accents—such as slim brass inlays—to tie cabinet doors to decorative lighting or plumbing fixtures. For those who favour open shelving, a row of slender-framed glass doors can transition smoothly into display units, crafting a cohesive look across closed and open storage. These tailored touches elevate the pared-back form of Skinny Shaker doors into bespoke centrepieces of your kitchen design.4. Glass Insert Cabinet Doors
Glass insert cabinet doors add a layer of visual lightness to modern kitchens, breaking up solid runs of cabinetry and showcasing curated dishware or décor. Rather than closing off storage, they offer a peek inside without exposing clutter—an ideal solution for those who want a balance between display and concealment. Glass inserts are most often found in upper cabinets, where they catch and reflect natural light, giving the room a more open and airy feel. Installing glass-front doors can instantly elevate a kitchen’s aesthetic, providing contrast to opaque base cabinets or drawer banks. They pair beautifully with minimalist frames—such as Skinny Shaker profiles—or monolithic slab doors, creating a dialogue between transparency and structure. In contemporary layouts, glass inserts foster a sense of continuity, as reflections bounce between pendant lights, glossy backsplashes, and polished hardware. Beyond style, glass-insert doors also encourage thoughtful organisation. Since contents are partially visible, homeowners tend to arrange items deliberately—this translates to curated colour palettes, matching dish sets, or decorative accents that double as functional pieces.Types of Glass Inserts
- Clear glass: Offers the most transparent view, ideal for displaying fine china or glassware in pristine condition.
- Frosted glass: Provides a muted effect that obscures details while still diffusing light. Perfect for hiding everyday items without darkening the cabinet interior.
- Seeded glass: Characterised by tiny air bubbles, it lends a vintage touch and gently scatters light for a subtle glow.
- Textured/ribbed glass: Features linear patterns that distort shapes, adding depth and tactile interest to the door.
- Tinted glass: Comes in soft greys, ambers or greens to complement metallic finishes and dark cabinetry.
Functional and aesthetic benefits
Incorporating glass insert doors creates a sense of openness, counteracting the solid mass of cabinetry. This transparency can make smaller kitchens feel larger and more inviting. Displaying attractive items turns storage into décor, encouraging homeowners to swap out seasonal pieces or rotate collections. Glass doors also reflect light from windows and fixtures, amplifying brightness and adding a dynamic interplay of highlights across surfaces. From a functional standpoint, glass-front doors allow you to locate items quickly—no more opening every door to find that coffee mug. They’re particularly helpful above a beverage station or near the pantry, where visibility enhances convenience.Considerations for glass selection
While glass inserts look stunning, they require a bit more upkeep. Fingerprints, smudges and dust are more noticeable on clear or high-gloss glass, so plan for regular cleaning with a mild, streak-free cleaner. Frosted and textured options hide imperfections better, reducing cleaning frequency. To prevent a cluttered appearance, limit glass doors to a few key cabinets and keep interiors well-organised—consider using matching storage containers or decorative baskets to maintain a cohesive look.5. Beadboard Cabinet Doors
Beadboard cabinet doors bring a breath of cottage charm to contemporary kitchens, offering a subtle nod to traditional craftsmanship without overwhelming clean-lined layouts. Defined by a series of narrow, vertical grooves running down the centre panel, beadboard injects texture and visual interest into cabinetry runs. Whether you’re aiming for a softly modern take on farmhouse style or simply want to introduce a tactile element to flat-front doors, beadboard is a versatile choice that pairs beautifully with fresh paint colours, natural wood accents, and minimalist hardware. Often used on islands or lower cabinets, beadboard can break up expanses of smooth surfaces and create focal points in open-plan kitchens. A pastel-painted island clad in beadboard becomes an instant statement, while crisp white beadboard doors around the perimeter lend dimensionality without sacrificing a bright, airy feel. For DIY homeowners, these doors are easy to install and customise—just measure, pick your panel style and go. Below, we explore how to get the look right, from groove profiles to colour pairings and upkeep.Design features of Beadboard doors
Beadboard doors are distinguished by:- Consistent groove spacing: Typically 1/4" to 1/2" wide beads create a rhythmic texture across the panel.
- Groove depth: Between 1/16" and 1/8" depths strike a balance between subtle shadow lines and ease of painting.
- Framed centre panel: A simple four-piece frame surrounds the beadboard, keeping the overall profile clean and structured—perfect for modern layouts.
Matching styles and colour palettes
Beadboard doors shine when paired with complementary hues and finishes:- Soft neutrals: Creamy whites, pale greys or greiges allow the grooves to gently show through, adding warmth without high-contrast drama.
- Navy and jewel tones: Deep blues or emerald greens transform beadboard into a sophisticated accent—ideal for kitchen islands or tall pantry units.
- Pastel accents: Mint greens, blush pinks or light teals bring a playful twist, especially when balanced by matte black hardware or brushed brass fixtures.
Installation and maintenance tips
A few pointers will keep your beadboard doors looking crisp for years:- Painting grooves: Use a small angled brush to work paint into each bead, then back-brush with a foam roller for a smooth finish.
- Filling and caulking: Lightly fill any gaps at joints with a paintable caulk to prevent dust buildup and ensure clean lines.
- Dusting routines: Grooves collect dust more readily than flat panels—run a soft-bristle brush or microfiber cloth along the beads weekly to maintain that fresh-off-the-shelf appearance.
- Touch-up strategy: Keep a tiny pot of matching paint on hand for quick fixes to scuffs or nicks in high-traffic areas.
6. Thermofoil Cabinet Doors
Thermofoil cabinet doors deliver a sleek, uniform surface at a budget-friendly price point. By wrapping a thin layer of PVC vinyl around an MDF substrate, thermofoil creates a seamless front that resists moisture and simplifies maintenance—an ideal choice for busy kitchens where spills and steam are part of daily life. Below, we unpack how thermofoil works, its key advantages and limitations, and why The Door Maker’s extensive selection makes it a go-to for DIY renovations.Overview of Thermofoil technology
Thermofoil doors start with an engineered wood core—typically medium-density fibreboard (MDF)—that’s precisely cut and routed to the desired profile. A heat-activated vinyl film is then vacuum-pressed over the panel, conforming around edges and corners for a continuous finish. Once cooled, the bond between vinyl and MDF creates a hard-wearing surface that mimics painted or laminated doors, but without visible seams or grout lines.Benefits and drawbacks of Thermofoil
Pros:- Moisture resistance: The impervious vinyl layer repels water, making it well-suited for humid environments near sinks and dishwashers.
- Low maintenance: Wipe clean with a damp cloth—no special polishes or sealers required.
- Consistent finish: Vinyl comes in a wide array of colours and textures, guaranteeing uniformity across all door sizes.
- Cost-effective: More affordable than solid wood or lacquered finishes, while still delivering a premium look.
- Heat sensitivity: Prolonged exposure to high temperatures—especially around ovens or stovetops—can cause vinyl to lift or warp.
- Non-refinishable: Unlike solid wood, thermofoil cannot be sanded or repainted; damaged doors must be replaced.
- Edge vulnerabilities: Improper installation or cuts too close to heat sources may lead to peeling at seams.
TDM’s Thermofoil Options
At The Door Maker, you’ll find over 130 thermofoil colours and textures, including matte neutrals, realistic wood grains, subtle textures and high-gloss finishes. Our online Build a Door tool lets you:- Enter your exact measurements for doors and drawer fronts
- Choose from dozens of thermofoil styles with live previews
- Receive a free, no-obligation quote before you order
Care and cleaning guidance for Thermofoil
To keep thermofoil doors looking their best:- Use a mild dish soap and warm water solution applied with a soft cloth
- Avoid scouring pads, abrasive cleaners or bleach, which can scratch or dull the vinyl
- Keep cookware and heat sources at least a few inches away from cabinet faces to prevent heat damage
- Wipe up spills promptly to avoid moisture seeping into seams
7. Lacquered & Acrylic Cabinet Doors
Lacquered and acrylic cabinet doors bring a luxe, high-end feel to contemporary kitchens. Lacquer is applied as a liquid finish—sprayed or trowelled onto an MDF substrate—then sanded and polished between coats to achieve a flawless surface. Acrylic doors, by contrast, use a pre-manufactured sheet of PMMA (polymethyl methacrylate) that’s glued onto the face of the door, resulting in an ultra-smooth, mirror-like finish. Both options offer a choice of high-gloss or matte sheens, allowing you to dial in the exact level of reflectivity and colour saturation you desire. Modern kitchen designs often exploit these finishes to maximise light and create a sense of spaciousness. A row of gloss-lacquer upper cabinets can reflect pendant-light accents, while a matte acrylic island can anchor the room with subdued elegance. Though they may look similar at first glance, lacquered and acrylic doors have distinct performance profiles and price points, so understanding their differences is key to making the right choice.Distinguishing Lacquered from Acrylic finishes
Lacquer finishes are built up in multiple layers—each coat is sprayed, allowed to cure, then lightly sanded to remove imperfections. This labour-intensive process yields rich depth of colour and a silky-smooth feel. Lacquer can be tinted to any custom shade, making it ideal for bespoke colour schemes. However, because it’s a solvent-based system, it requires proper ventilation during application and professional equipment for best results. Acrylic doors are manufactured off-site: large sheets of coloured or clear acrylic are precision-cut and adhesively bonded to the door panel. This method guarantees consistent thickness and finish, while eliminating the need for on-site spraying. Acrylic’s inherent UV stability means colours resist yellowing over time, and the rigid surface is less prone to hairline cracks than lacquer.Aesthetic impact in modern kitchens
Both lacquered and acrylic doors excel in handleless kitchen layouts, where uninterrupted surfaces create a seamless visual flow. High-gloss lacquer amplifies natural light and bounces it around the room, making compact kitchens feel larger. Pair gloss white doors with dark stone countertops for a dramatic contrast, or choose deep charcoal lacquer to frame metallic accents in an industrial-chic setting. Matte acrylic, meanwhile, offers a soft-touch feel that’s perfect for creating tactile warmth. A matte-black island can serve as a sculptural focal point against pale perimeter cabinets, or a muted sage green can introduce subtle colour without overpowering a minimalist palette. For a truly contemporary statement, mix finishes: combine gloss doors on the upper tier with matte acrylic base cabinets to distinguish zones while maintaining cohesion.Durability and maintenance considerations
When it comes to durability, acrylic doors tend to be more resistant to scratches and chemicals than lacquer, but both finishes require gentle care. To clean:- Wipe surfaces with a soft microfiber cloth dampened with warm water and mild dish soap.
- Avoid abrasive sponges, scouring powders or solvent-based cleaners that can dull the finish.
- For stubborn marks on lacquer, a dedicated cabinet polish or a specialised lacquer cleaner can restore shine—test any product in an inconspicuous spot first.
- Acrylic repairs are limited; minor scratches can sometimes be buffed out with a proprietary acrylic polish, but deep gouges may require panel replacement.
8. Slatted Wood Cabinet Doors
Slatted wood cabinet doors introduce a rhythmic texture that transforms flat expanses into warm, tactile statements. Composed of evenly spaced wood slats—either horizontal or vertical—these doors evoke the artisanal quality of louvered shutters while serving practical purposes like airflow and sound diffusion. You’ll often see slatted panels used for pantry doors, appliance garages or utility cupboards, where they lend both character and function to a modern kitchen scheme.Styles of Slatted doors
Slatted styles vary widely in orientation and proportion. Horizontal slats create a sense of width, making cabinets appear broader and lower—ideal for island fronts or base units. Vertical slats, by contrast, emphasise height and draw the eye upwards, perfect for tall pantry doors or floor-to-ceiling storage. Slat widths can range from slim ½" strips for a refined, delicate texture to broader 2" boards that deliver a bolder, more graphic look. Spacing between slats also plays a role: tight gaps yield a subtle striped effect, while wider gaps lean into an open, breezy aesthetic.Functional advantages
Beyond their visual appeal, slatted wood doors offer practical benefits. The gaps between slats allow air to circulate freely, which is useful in ventilated appliance cabinets, wine storage or laundry areas. This design also contributes to acoustic dampening—sound waves break up as they pass through the channels, making slatted fronts a smart choice near dishwashers or recycling centres. Because the panels admit light and air, they can help prevent stale odours and moisture build-up, promoting a fresher environment inside closed storage units.Customisation options for Slatted doors
Slatted doors adapt easily to a range of wood species and finishes. Oak slats deliver pronounced grain patterns and pair beautifully with natural or light-stained looks. Maple offers a smooth, uniform appearance that works well in contemporary, minimalist kitchens. For richer hues, walnut or cherry slats bring depth and warmth. Finishes can be matte, satin or semi-gloss, depending on how much sheen you want; a clear protective coat preserves the natural texture, while tinted stains highlight the wood’s character. For a two-tone effect, combine slatted doors on lower cabinets with flat-panel fronts above, or alternate wood species on island and perimeter units to reinforce zoning in open-plan layouts.9. Melamine Cabinet Doors
Melamine cabinet doors bring together cost-effectiveness and robust performance, making them a smart choice for modern kitchen projects on a budget. At its core, melamine is a decorative surface material that’s bonded to a substrate—often particleboard or MDF—using heat and high pressure. The result is a hard-wearing front that resists scratches, moisture and everyday wear far better than raw wood or simple paint. Thanks to advances in printing and embossing technologies, melamine now comes in an astonishing array of patterns and finishes—from realistic woodgrains to solid colours and textured effects—so you don’t have to sacrifice style for savings. Homeowners appreciate melamine’s low-maintenance nature: it stands up to splashes at the sink, withstands moderate heat near stoves, and wipes clean with a damp cloth. Contractors and DIY renovators value its uniformity—each door looks identical, with no grain variations or knots to worry about. Let’s explore what makes melamine such a versatile option for contemporary cabinet door styles.What is Melamine?
Melamine starts life as paper sheets impregnated with melamine resin, a durable thermosetting polymer. These sheets are layered over an engineered core—usually particleboard or medium-density fibreboard—and pressed under heat to cure the resin. The pressure bonds the decorative paper to the substrate, creating a single, cohesive panel. Edge-banding is then applied around the door’s perimeter to seal the cut edges and prevent moisture infiltration. Unlike veneer or laminate, melamine is factory-finished, so each door arrives ready for installation without additional painting or sealing.Performance characteristics
Melamine cabinet doors excel in several key areas:- Scratch resistance: The cured melamine surface endures daily knocks from cookware, utensils and accidental impacts with minimal scuffing.
- Moisture resistance: A properly sealed edge-band protects the substrate from steam and splashes, making melamine suitable for kitchens and bathrooms alike.
- Heat tolerance: While not impervious to extreme heat, melamine handles normal cooking temperatures well—just avoid placing hot pans directly against the doors.
- Colour and pattern consistency: Factory production ensures every panel matches perfectly, whether you choose a woodgrain that spans multiple doors or a vivid solid hue.
Design possibilities with Melamine
Thanks to digital printing advancements, melamine doors now rival the look of real wood, stone and textured finishes at a fraction of the cost. Popular options include:- Woodgrain patterns: From subtle ash and oak to dramatic walnut and ebony, these prints emulate natural grain with remarkable authenticity.
- Solid colours: Clean whites, slate greys and even bold jewel tones are available in smooth or matt textures.
- Textured and patterned effects: Embossed textures mimic linen, hammered metal or stone, adding tactile interest to flat-panel doors.
10. Wood Veneer Cabinet Doors
Wood veneer cabinet doors combine the warmth and character of real timber with the stability and affordability of engineered substrates. A paper-thin slice of natural wood—known as veneer—is bonded to a sturdy core, giving you authentic grain patterns and tonal variation without the risk of warping or excessive cost that comes with solid slabs. Veneer doors offer the best of both worlds: genuine wood aesthetics, consistent quality, and a more sustainable use of forestry resources.Understanding Wood Veneer types
Veneers are cut from logs using two main techniques, each producing distinct looks:- Rotary-cut veneer is sliced in wide sheets by rotating the log against a stationary blade. This method yields broad, flowing grain patterns—sometimes referred to as “cathedral” or “crown” figures—that add drama and movement to large cabinet runs.
- Sliced veneer, also called plain or quarter-cut, involves slicing the log along its length. The resulting boards display straighter, more uniform grain lines, creating a refined, linear appearance that suits minimalist and contemporary designs.
Advantages over Solid Wood
Wood veneer doors enjoy several practical benefits compared to their solid-wood counterparts:- Dimensional stability: The thin veneer layer, bonded to a stable core such as plywood or MDF, resists seasonal movement and moisture-induced warping that can plague solid timber.
- Consistent appearance: Engineered cores and factory-controlled veneer cuts deliver uniform grain and colour across dozens of panels, eliminating the natural variations and knots you might find in solid wood.
- Cost efficiency: Since veneers use far less hardwood per door, they represent a more budget-conscious way to achieve a high-end wood look. This also makes exotic species, like ebony or rosewood, more accessible for full kitchen refacing.
- Eco-friendly: Veneers maximise each log’s yield, reducing waste and supporting responsible forestry practices.
Finishing and care tips for Wood Veneer
To preserve the natural luster of veneer cabinet doors, follow these guidelines:- Gentle cleaning: Wipe surfaces with a soft, lint-free cloth dampened in a mild soap solution. Avoid abrasive pads or harsh chemicals that could strip the finish.
- Moisture control: Keep cabinets away from direct water splashes and ensure adequate kitchen ventilation. If spills occur, blot immediately rather than rubbing vigorously.
- Protective coatings: Most veneer doors arrive pre-finished with durable lacquers or UV-cured varnishes. If you choose to refinish, opt for thin, even coats of water-based lacquer, lightly sanding between applications for a smooth result.
- Routine maintenance: Polish occasionally with a high-quality, pH-neutral wood polish to enhance depth and guard against minor scratches. Always test any new product in a discreet area first.
How to Choose the Right Contemporary Cabinet Door Style
Choosing the perfect cabinet door style means aligning your aesthetic goals with practical considerations—your kitchen’s layout, budget, material durability and maintenance routine. Start by evaluating your space: note how much natural light pours in, observe the flow between sink, stove and refrigerator, and consider existing finishes like countertops or flooring. Next, decide whether you want a look that’s distinctly modern (think flat-front slabs or handleless profiles) or a more transitional feel (Slim Shaker or mixed-material designs). Finally, order sample doors or full-scale mock-ups so you can see colours, textures and edge details in your actual kitchen setting before committing. Many homeowners wonder: “What is the most timeless cabinet door style?” Shaker and slab doors frequently top the list for their enduring simplicity, while beadboard and raised-panel designs offer a nod to tradition without feeling outdated. If a purely contemporary vibe is your aim, look for uninterrupted surfaces and minimal ornamentation—flat panels, integrated pulls and subtle edge bevels are key indicators of a modern silhouette. To help you narrow down options quickly, here’s a side-by-side comparison of popular contemporary styles:| Style | Material Options | Budget Level | Maintenance |
|---|---|---|---|
| Shaker | Solid wood, MDF, Thermofoil | Moderate | Low to moderate |
| Flat Panel (Slab) | MDF, Laminate, Acrylic, Thermofoil | Moderate to high | Low |
| Thermofoil | Vinyl-wrapped MDF | Low | Very low |
| Melamine | Particleboard or MDF core | Low | Low |
| Wood Veneer | Plywood/MDF core with real wood face | High | Moderate |
Assessing your kitchen layout and style goals
Analyse your work triangle and the amount of wall space you have for upper versus lower cabinets. In a compact galley kitchen, a row of lighter-coloured slab doors or narrow-framed Slim Shaker cabinets can prevent the room from feeling closed in. If your kitchen lives in an open-plan setting with abundant daylight, richer wood veneers or matte finishes can withstand darker cabinetry without overwhelming the space.Balancing budget and material performance
When pinpointing a “modern look” within your budget, map out the lifespan you expect from your cabinets. Thermofoil and melamine deliver the lowest upfront cost, while painted MDF and laminate slab doors occupy the mid-range. Wood veneers and high-gloss acrylic sit at the premium end but reward you with scratch resistance and refinishable surfaces. Chart your anticipated wear and tear: families with young children or frequent entertainers may prioritise ultra-durable, low-maintenance finishes, whereas more occasional cooks might invest in higher-end materials.Considering long-term maintenance and care
Every surface demands its own cleaning regimen. Thermofoil and melamine are practically wipe-and-go, resisting moisture and stains with just a damp cloth and mild detergent. Lacquered, acrylic and painted finishes, by contrast, benefit from soft microfiber cloths and gentle cleaners to preserve shine and avoid micro-scratches. Real wood veneers need cautious moisture control and occasional polishing, but they can also be lightly refinished if damage occurs. Make sure your choice complements not only your design dream but also the time you’re prepared to spend on upkeep.Quality & Safety Standards for Cabinet Doors
When selecting contemporary cabinet doors, it’s vital to consider indoor air quality, structural durability and regulatory compliance. In Canada, two benchmarks ensure peace of mind: Formaldehyde Emission Regulations for composite wood products and the Kitchen Cabinet Manufacturers Association (KCMA) A161.1 certification for performance. These standards protect health and guarantee your cabinetry will stand up to everyday use.Formaldehyde Emission Regulations in Canada
Canada’s Guidance Document on Formaldehyde Emissions from Composite Wood Products Regulations limits the release of formaldehyde—a common volatile organic compound (VOC) linked to respiratory irritation. Regulated product categories and their maximum allowable emissions are:- Hardwood plywood: ≤ 0.05 ppm
- Particleboard: ≤ 0.09 ppm
- Medium-density fibreboard (MDF): ≤ 0.11 ppm
Importance of KCMA Certification
The KCMA A161.1 standard subjects cabinet doors to rigorous trials that mimic long-term kitchen use. Key assessments include:- Door and drawer cycling: 100,000 open/close cycles to simulate years of wear.
- Static load testing: Verifying frame integrity under weight (e.g., heavy cookware).
- Impact resistance: Ensuring panels resist dents and cracks from daily knocks.
- Finish durability: Evaluating adhesion, chemical resistance and stain performance.
Ensuring your doors meet standards
Before committing to a supplier, verify that cabinet doors comply with both formaldehyde and KCMA requirements:- Check for visible labels or stamps on each door or its packaging referencing Canada’s emission classes and KCMA A161.1 certification.
- Request copies of third-party laboratory reports or certificates from recognized testing bodies.
- Confirm that markings include the product category (MDF, particleboard, etc.), the formaldehyde emission limit and the certifier’s identification.
Final Thoughts & Next Steps
From the understated elegance of Shaker and its slimmer Skinny Shaker cousin to the pure minimalism of slab doors, each of these ten contemporary cabinet door styles brings its own character and practical edge. Glass inserts and beadboard offer textural contrast, while thermofoil, melamine and acrylic deliver fuss-free, low-maintenance surfaces. Wood veneer and slatted doors introduce warmth and natural grain, rounding out a palette of options that suit every design ambition and budget. Before committing to a single style, take a moment to assess your kitchen’s layout, lighting and daily routines. Will you benefit from the openness of glass-front uppers? Do you need ultra-durable, easy-clean surfaces around busy cooking zones? How does your choice of finish interact with existing countertops, hardware and flooring? Ordering sample doors or full-scale mock-ups can save headaches later—seeing materials in your own environment helps you judge colour, texture and edge profiles with confidence. Ready to turn ideas into reality? Start by gathering measurements and snapping a few photos of your current cabinets. Use those insights to explore finishes, edge details and hardware options. Then head over to The Door Maker’s online Build a Door tool to design custom doors in minutes, get a free quote and take the next step in your kitchen refresh. Ready to transform your kitchen? Visit The Door Maker to build your custom cabinet doors today and bring your contemporary vision to life.
Jun 19 2025 BY David Adrian, Blog
Updating your kitchen, bathroom, or office doesn’t have to mean tearing out perfectly good cabinetry or blowing your renovation budget. For many Canadian homeowners and DIY enthusiasts, cabinet refacing has become the smart, cost-effective alternative to full cabinet replacement—retaining your existing cabinet boxes while giving your space a dramatic visual upgrade. But how much does cabinet refacing actually cost, and what are the options for saving money without sacrificing style or quality?
This comprehensive guide unpacks the true cost of cabinet refacing, offering seven distinct ways to estimate your project—from national averages and linear foot pricing to per-door calculations and material-specific breakdowns. You’ll find practical examples for every kitchen size, clear explanations of what’s included in professional quotes, and a detailed look at the real factors that drive costs up or down. Whether you’re considering a hands-on DIY approach or weighing the advantages of hiring a pro, you’ll also discover effective strategies for keeping your refacing budget in check, insights on return-on-investment, and important considerations for environmentally responsible disposal.
While The Door Maker doesn’t publish set prices online, you can build your own cabinet door design and get a tailored, obligation-free quote in minutes using their online “Build a Door” tool. Use this guide to plan your project with confidence, maximise your savings, and achieve a fresh new look—without the stress or expense of a full-scale renovation.
1. Average National Cost Range for Cabinet Refacing
Across Canada and North America, a full cabinet refacing project generally falls between $4,000 and $9,500. This all-inclusive price reflects the removal of existing doors, application of new veneers or laminates, installation of fresh hardware and the labour required to complete the transformation. While regional labour rates and material choices will cause some fluctuation, this range serves as a reliable benchmark for homeowners planning their renovation budget.
Although The Door Maker doesn’t list fixed prices online, viewing these nationwide averages can help you decide whether to request a no-obligation quote via the “Build a Door” tool. Refacing allows you to keep your existing cabinet boxes intact, reducing waste and often saving both time and money compared to a full cabinet replacement.
What the All-Inclusive Estimate Covers
A typical cabinet refacing quote will include:
- Replacement doors and drawer fronts
- Veneer or laminate applied to existing cabinet boxes
- Basic hinges, glides and pull hardware
- Skilled labour for removal, fitting and final adjustments
- Disposal of old materials and site cleanup
- Project management and quality inspections
2025 Cost Range Overview
According to industry research, homeowners can expect the following figures for a standard kitchen refacing project Source: Modernize:
- Low end: approximately $4,000 for smaller layouts or entry-level materials
- Mid range: around $6,750 for an average 200 sq ft kitchen with mid-grade finishes
- High end: up to $9,500 for larger kitchens, premium veneers or custom details
These benchmarks provide a solid starting point for comparing quotes, setting realistic expectations and planning a smooth, budget-friendly cabinet makeover.
2. Per Linear Foot Pricing
One of the most common ways professionals estimate cabinet refacing costs is by charging per linear foot (LF). Rather than quoting an entire kitchen as a lump sum, they measure the total length of cabinetry runs—essentially the continuous span of cabinets along walls and islands—and multiply it by a fixed rate. This approach makes it easy to tailor the quote to the exact size of your kitchen and simplifies comparisons between materials or installers.
How Linear Foot Pricing Works
A linear foot in the context of cabinet refacing refers to one foot of cabinet frontage, measured horizontally from one end of the run to the other. This includes doors, drawer fronts and any adjoining panels. By using a per-LF rate, contractors can account for:
- Material costs (veneers, laminates and edge banding)
- Labour time (surface preparation, veneer application and fitting)
- Basic hardware (hinges, glides and pulls)
- Disposal and site cleanup
Linear foot pricing streamlines the estimating process: once you know the total LF of your cabinets, you simply multiply by the agreed rate. It also helps homeowners see how choosing different quality levels (entry, mid or premium) affects the final cost.
Example Calculations
Below is a sample cost breakdown using representative rates of $100/LF, $175/LF and $250/LF. Adjust these figures to reflect your installer’s rates or the quality of materials you prefer.
| Linear Feet | Low ($100/LF) | Mid ($175/LF) | High ($250/LF) |
|---|---|---|---|
| 20 LF | $2,000 | $3,500 | $5,000 |
| 30 LF | $3,000 | $5,250 | $7,500 |
| 40 LF | $4,000 | $7,000 | $10,000 |
For example, a 30 LF kitchen refaced at a mid-range rate of $175/LF would cost about $5,250 in total. Knowing these per-LF figures allows you to mix and match material grades, compare quotes more easily and forecast how any design changes—like adding an island or extra wall cabinets—will affect your budget.
3. Per Cabinet Door and Drawer Front Pricing
When you want to drill down even further, some contractors will price refacing on a per-component basis—charging for each door and drawer front rather than per linear foot. This method can be helpful if your kitchen layout has a mix of full-size doors, smaller accessory doors, or extra-wide drawers, since it breaks the budget into bite-sized pieces.
Typical Cost Range per Door/Drawer
Most standard cabinet doors and drawer fronts fall within a similar price band:
- Low end: $100 each
- Mid range: $250 each
- High end: $400 each
These figures reflect the cost of the new door or drawer front (veneers or thermofoil), edge banding and basic hardware. Custom profiles or premium materials (for instance, glass inserts or textured finishes) can push a single door toward the upper end of this range.
Budgeting for a Standard Kitchen
To see how these costs add up, consider an average kitchen with:
- 20 cabinet doors
- 10 drawer fronts
First, calculate the number of components:
20 doors + 10 drawers = 30 pieces
Then multiply by the per-piece rate:
-
At $100 each:
30 x $100 = $3,000 -
At $250 each (mid range):
30 x $250 = $7,500 -
At $400 each:
30 x $400 = $12,000
So, for a standard kitchen configuration, you can expect to spend between $3,000 and $12,000 on door and drawer-front replacements alone. This breakdown makes it easier to swap in a few upgraded doors without reworking your entire linear-foot calculation—and gives you clear control over exactly where your budget goes.
4. By Kitchen Size Category
Kitchen footprint plays a significant role in your cabinet refacing budget. As the room grows, so do the number of doors, drawer fronts and the length of veneer required. Below is an overview of what you might expect to invest in a refacing project based on kitchen size:
Small Kitchen (100 sq ft)
In a compact kitchen—roughly 100 square feet—you typically have 10 to 20 linear feet of cabinets. Even with a modest layout, your refacing project can deliver a fresh appearance without breaking the bank.
- Estimated cost range: $1,000–$5,000
- Factors at this scale include fewer doors/drawers (often under 25 pieces) and minimal surface preparation.
- Entry-level laminate or thermofoil can keep costs near the lower end, while upgrading to mid-range veneers pushes you toward the upper limit.
Mid-Size Kitchen (200 sq ft)
A mid-sized kitchen of about 200 square feet usually contains 20 to 30 linear feet of cabinetry. This size represents the national average and matches the $4,000 to $9,500 bracket we discussed earlier.
- Estimated cost range: $4,000–$9,500
- Typical door/drawer count: 30–40 components.
- Mid-range materials and hardware are most common here, blending affordability with stylish finishes.
- If you add an island or extra pantry doors, expect the estimate to climb proportionally.
Large Kitchen (300 sq ft+)
For spacious kitchens exceeding 300 square feet—with 30+ linear feet of runs including islands and specialty units—you’ll be looking at a premium budget.
- Estimated cost range: $10,000–$15,000+
- High door and drawer counts (40+ pieces) plus potential under-cabinet lighting or crown moulding.
- Upgrading to wood veneer or solid wood can push your investment above the baseline.
- Custom layouts with corner units, built-in features or glass-front doors further influence the final total.
By matching your kitchen’s size category to these ranges, you can set realistic expectations before requesting a quote. Remember that these figures serve as guidelines—your exact cost will depend on material choices, labour rates in your area and any additional custom work you decide to include.
5. Material-Specific Cost Breakdown
Choosing the right material for your cabinet refacing project not only influences the overall price but also affects durability, maintenance and style. Here’s how the most common options stack up in terms of cost and characteristics. Source: Bob Vila
Laminate or Thermofoil
Laminate and thermofoil are the most budget-friendly choices, with projects typically ranging from $1,000 to $3,000 for an average kitchen. These materials consist of a printed or vinyl finish applied over engineered wood, making them resistant to moisture and easy to clean. While they offer a wide variety of colours and patterns, they can be prone to peeling or chipping if exposed to high heat or sharp impacts.
Wood Veneer
For a step up in authenticity and texture, wood veneer provides a real‐wood face bonded to an underlying substrate. Expect refacing costs in the $2,500 to $6,500 bracket. Veneers deliver the warmth and grain of natural wood—often oak, maple or cherry—at a fraction of the price of solid wood. They require slightly more careful maintenance (avoiding excess moisture) but offer a classic look that pairs well with both traditional and modern décor.
Solid Wood or Plywood
Premium refacing with solid wood or high-grade plywood doors and drawer fronts usually starts around $5,000 and can exceed $10,000 for larger layouts or exotic species. This option guarantees maximum longevity, repairability and premium aesthetics, as every panel is genuine wood throughout. Solid wood refacing often comes with custom milling options—raised panels, intricate beading and artisan profiles—that justify the higher investment and deliver a truly bespoke finish.
6. Labour Cost Breakdown
Labour often makes up the largest portion of a cabinet refacing budget, reflecting the skilled work required to remove old components, prepare surfaces, apply new materials and carry out precision installations. Understanding how labour factors into your overall cost can help you spot where efficiencies or savings might be found—and why experienced craftsmen command a significant share of the budget.
Percentage of Project Cost
On average, labour accounts for 50%–70% of the total cabinet refacing price. That means, for a mid-range project of around $6,750, you might see labour fees of anywhere from:
$6,750 × 50% = $3,375
to
$6,750 × 70% = $4,725
Regional wage differences, the installer’s reputation and the complexity of your kitchen layout will determine whether your project falls at the lower or higher end of this range. Custom finishes and intricate cabinet profiles typically push labour percentages upward, while simpler laminate or thermofoil jobs lean toward the lower end.
Breakdown of Tasks and Rates
To give you a clearer picture of where labour dollars go, here’s a breakdown of common refacing tasks and their typical rates:
-
Demolition & disposal:
$10–$20per linear foot
Removing and hauling away old doors, drawer fronts, hinges and any damaged veneer. -
Surface preparation:
$20–$50per linear foot
Cleaning, sanding and priming cabinet boxes to ensure a flawless bond with new veneers or laminates. -
Veneer application:
$30–$60per linear foot
Cutting, fitting and adhering the chosen material—whether wood veneer, laminate or thermofoil—followed by edge-banding and finishing. -
Door & drawer installation:
$20–$40each
Precisely mounting new doors and drawer fronts, adjusting alignment, depth and reveal for a uniform look and smooth operation. -
Hardware fitting:
$20–$30per labour hour, plus$2–$5per piece
Installing hinges, pulls and drawer glides; drilling, measuring and fine-tuning each fitting to factory standards.
Keep in mind these figures are ballpark estimates. If your project calls for higher-end veneers, decorative mouldings or integrated lighting, labour rates may be adjusted accordingly. By comparing detailed task breakdowns from multiple installers, you can zero in on the best balance of cost and craftsmanship for your refacing project.
7. Add-Ons and Upgrades Pricing
Once your cabinet shells and doors have been refaced, a few targeted upgrades can take functionality and style to the next level. These optional extras let you personalise your kitchen to suit your cooking habits and décor preferences—and each comes with its own price tag. Below is a breakdown of some of the most popular add-ons and what you might expect to invest.
Crown Moulding
Adding crown moulding brings a polished, built-in look to refaced cabinets. Installers will measure, cut and finish decorative trim along the top edge of your units, creating a seamless transition to the ceiling.
Cost range: $12–$20 per linear foot.
Factors influencing price include the complexity of the profile (simple ogee vs. layered designs), the wood species or MDF quality, and the number of inside corners that require precision mitre cuts.
Under-Cabinet Lighting
Under-cabinet lights are a game-changer for task visibility and evening ambience. Most setups use low-voltage LED puck lights or slim strip lights, complete with transformers and discrete wiring. Installation involves cutting small holes, securing fixtures, and routing cables to a switch or power outlet.
Cost per fixture: $230–$300.
This typically covers the light fitting itself, transformer, wiring labour and basic dimmer or switch hook-up. Premium options—like tunable white LEDs or touch-sensitive controls—may push you toward the higher end of the spectrum.
Glass Door Inserts
For a taste of showroom flair, swapping out solid door panels for glass inserts instantly brightens cabinet interiors and displays your favourite dishware. Options range from clear or frosted glass to decorative patterns or fluted designs.
Cost per door: $150–$200.
That price includes cutting the glass to size, installing a secure frame or glazing bead, and sealing around the edges. If you combine glass fronts with under-cabinet or interior cabinet lighting, you’ll accentuate this upgrade even more.
In-Cabinet Organisers
Custom organisers—such as pull-out trays, vertical dividers, spice racks and Lazy Susans—maximise storage efficiency and reduce rummaging. Each feature is fitted inside your existing boxes, sliding on metal tracks or rotating on lazy-Susan hardware.
Cost range: $70–$300 each.
Simple pull-outs (for trays or baking sheets) and corner-cabinet carousels sit at the lower end, while full-extension pull-outs, appliance garages or multi-tier spice racks can climb to the top of this range.
8. DIY vs Professional Cost Scenarios
Many homeowners wonder whether to tackle cabinet refacing themselves or bring in a professional. Each route has its own benefits—DIY can reduce upfront costs, while hiring a pro saves time and ensures a flawless finish. Here, we compare the typical expenses, advantages and potential pitfalls of DIY, professional and hybrid approaches so you can decide which suits your budget, skill level and timeline best.
DIY Material-Only Estimate
If you already own basic woodworking gear—a router or table saw, a reliable edge-banding iron and a shop vacuum—a DIY refacing project can cost between $1,000 and $3,000 for materials alone. This covers:
- Replacement doors and drawer fronts (thermofoil or veneer)
- Veneer or laminate sheets plus edge banding and adhesive
- New hinges, pulls and drawer glides
- Sandpaper, primer, brushes and finish
Remember, this figure excludes labour. Without professional experience, you risk problems such as bubbles under veneer, misaligned doors or uneven seams. Allow extra time for practice runs and potential reorders, and ensure you have a well-ventilated workspace to keep dust and fumes under control.
Professional Installation Estimate
Handing the job to a qualified installer brings predictability and speed. A full-service professional refacing project typically ranges from $4,000 to $9,500, covering:
- Detailed site measurement and custom door cutting
- Surface prep, sanding and perfect veneer or laminate application
- Precision hardware fitting and alignment
- Removal, disposal of old materials and thorough cleanup
- Project management, quality checks and often a workmanship warranty
Most pros can complete a standard kitchen in 3–5 days, so disruption is minimal. While the upfront price is higher than DIY, you gain the confidence of a uniform, factory-quality result—and avoid costly do-overs.
Hybrid Approach
A hybrid model combines the cost savings of DIY with the expertise of a professional installer. By handling straightforward tasks yourself—such as accurate measuring or the removal of old doors—you can shave 10% to 20% off a full-service quote. A typical arrangement might look like:
- You use TDM’s “Build a Door” tool to define quantities, styles and materials
- You remove and label existing doors/drawers for the installer
- The professional carries out veneer application, door hanging and final adjustments
This split allows you to control part of the process—and the budget—while ensuring critical steps are managed by someone with the right skills. For a precise hybrid quote, link your DIY measurements and designs directly through The Door Maker’s “Build a Door” platform and speak with an installer about your preferred scope of work.
9. Additional Factors Influencing Cabinet Refacing Costs
Beyond base estimates and material choices, a handful of external variables can push your cabinet refacing budget up or down. Understanding these nuances will help you set realistic expectations and get more accurate quotes.
Regional Variations
Labour and material expenses vary widely across Canada. Contractors in high-cost urban centres—like Vancouver or Toronto—typically charge 10 %–20 % more per hour than those in smaller towns or rural areas. Likewise, shipping specialty veneers or hardware to remote locations can incur extra freight fees. When comparing quotes, be sure to ask whether the installer’s rates reflect local market conditions or if any travel surcharges apply.
Kitchen Layout & Complexity
A straightforward run of cabinets along a single wall is far simpler—and less time-consuming—than a layout with corner units, angled sections or multiple islands. Each inside corner or non-standard run often requires custom trimming, additional edge banding and extra alignment checks. If your kitchen includes built-in features—such as a pantry wall or open shelving niches—plan for 5 %–15 % higher labour costs to cover the bespoke adjustments.
Project Duration & Scheduling
Most professional cabinet refacing jobs wrap up in 3–5 days, but timing can shift based on installer availability and project scope. Busy seasons (spring and early summer) may create scheduling bottlenecks, leading to longer lead times or premium rush fees. For a realistic timeline, review your installer’s calendar and inquire about potential delays. Mont-River recommends booking at least six weeks ahead to secure your preferred start date and to guarantee uninterrupted work.
Lead-Safe Work and Disposal Fees
Homes built before 1990 often contain lead-based paints. If your refacing project disturbs old finishes, local regulations may require a certified lead-safe contractor. These professionals follow strict protocols—containment, wet-sanding and HEPA vacuuming—that add roughly $300–$600 to the total cost. You may also face municipal disposal fees for hazardous waste, which typically range from $50 to $150 per cubic metre of debris. Factor these charges into your budget if you suspect lead-paint disturbance or unusual waste streams.
10. Top Savings Tips to Lower Your Cabinet Refacing Budget
Even a modest cabinet refacing project can add up quickly. By applying a few strategic cost-cutting measures, you can stretch your dollars further without compromising on style or quality. Here are our top recommendations:
Choose Affordable Materials
Opting for laminate or thermofoil veneers instead of solid wood can shave thousands off your overall bill. Low-maintenance foils are available in an ever-growing palette of colours and textures, and they resist moisture better than natural veneer. If you do want a wood look, consider a thin wood veneer over engineered core—it retains real-wood grain at a fraction of the price of solid panels.
Retain Existing Hardware
Before you trash old knobs, pulls and hinges, take stock of what still works. A thorough cleaning or a quick spray of satin-chrome can make well-worn hardware look practically new. If you do decide to switch styles, shop around local hardware stores or online wholesalers—many offer trend-right pieces at lower markup than specialty installers.
Bundle Projects
If you’re planning additional upgrades—like new countertops, backsplash installation or under-cabinet lighting—grouping them with your refacing job can yield volume discounts. Contractors often reward larger work orders with better rates on labour, delivery and waste removal. Even ordering slightly more veneer or doors while you’re at it can net you reduced per-unit costs.
Get Multiple Quotes
Don’t settle for the first number you receive. Aim to gather at least three detailed estimates that break down materials, labour and disposal fees. Comparing line-item pricing reveals where installers are marking up their services or materials, giving you bargaining power to negotiate a fairer deal or spot areas where you can downgrade to hit your budget.
Time Your Project
Scheduling your refacing during the industry’s slow season—typically late fall or mid-winter—can yield discounted labour rates and faster start dates. Keep an eye out for manufacturer promotions or holiday sales on veneers and hardware, and align your project timeline to take advantage of these offers. A little patience can translate into significant savings on both materials and installation.
11. How Cabinet Refacing Can Increase Your Home’s Value
Updating cabinets through refacing not only revitalises your space but can also bolster your home’s resale appeal. Potential buyers often notice freshly refaced cabinetry first, associating modern finishes and cohesive hardware with a well-kept property. Let’s explore how this relatively modest investment can translate into substantial returns when it comes time to sell.
Return on Investment Statistics
According to industry surveys, homeowners recoup roughly 70% to 80% of their refacing outlay in added property value. For example, a $6,000 cabinet refacing project could boost your home’s market price by $4,200 to $4,800. This level of ROI rivals other popular reno tasks—such as bathroom updates—yet costs considerably less than a full cabinet replacement.
Refacing vs Full Replacement ROI Comparison
While replacing kitchen cabinets might seem like the ultimate upgrade, it can carry price tags two to three times higher than refacing—and the ROI doesn’t always justify that expense. Refacing offers a quick refresh for a fraction of the cost, and the visual impact is immediate. In contrast, investing heavily in new custom cabinetry can yield diminishing returns at resale, as buyers are often unwilling to pay a premium for features beyond functional and aesthetic improvements.
Appeal to Potential Buyers
Freshly refaced cabinets give prospective buyers a strong first impression of care and attention to detail. Crisp edges, uniform hardware and on-trend finishes signal that the home has been maintained and updated. That sense of move-in readiness often encourages buyers to make offers more swiftly—and at closer to asking price—than homes with dated or worn cabinetry.
By choosing cabinet refacing, you can achieve a high-impact, wallet-friendly upgrade that resonates with today’s market demands. It’s a small change that can deliver a big boost to your home’s overall value and appeal.
12. Environmentally Responsible Disposal Practices in Canada
Cabinet refacing is already a win for the environment—it repurposes your existing cabinet boxes and significantly cuts down on new material usage. However, you’ll still end up with old doors, drawer fronts, veneers and hardware that need to be disposed of responsibly. In Canada, construction, renovation and demolition (CRD) waste is managed under a mix of federal guidelines and provincial/municipal regulations. By following these disposal best practices, you can minimise landfill contributions and often reduce your overall project costs.
Understanding CRD Waste Regulations
CRD waste encompasses anything removed or discarded during a renovation: wood scraps, MDF panels, metal fittings, laminate off-cuts and more. Although federal bodies like Environment Canada set broad objectives for waste reduction and diversion, each province—and in many cases individual municipalities—maintains its own rules about how this debris must be handled. Generally, you are required to:
- Separate waste streams on-site (e.g., wood, metal, plastics).
- Transport materials to certified transfer stations or recycling depots.
- Secure permits for large-volume or hazardous-waste disposal when necessary.
For an overview of best practices and policy goals around CRD waste in Canada, see Environment Canada’s guide on Reducing Municipal Solid Waste.
Municipal Recycling & Drop-Off Programs
Most Canadian cities provide convenient options for residents to recycle or safely discard renovation debris:
- Wood and untreated lumber: chipped or whole boards often accepted at green depots.
- Metal hardware: hinges, screws and drawer glides can be dropped off with metal recyclers.
- Clean laminate/veneer pieces: some facilities accept small, non-hazardous off-cuts.
To locate the nearest facility and understand any associated fees, check your municipality’s waste-management portal. For example, Vancouver residents rely on the Recycle BC network, while Metro Toronto publishes detailed instructions on its waste collection site. If you’re elsewhere, a quick search for “renovation waste disposal” plus your city or town name will point you to local drop-off centres.
Extended Producer Responsibility (EPR)
Extended Producer Responsibility (EPR) programmes shift the end-of-life management of materials back to manufacturers and suppliers. Several provinces in Canada have active EPR schemes that cover cabinetry and related products:
- British Columbia: Product Care’s Furniture and Carpet stewardship programme accepts laminates and wood-based panels.
- Ontario: The Resource Productivity and Recovery Authority (RPRA) coordinates the collection and processing of wood, MDF and other renovation materials.
- Quebec: Recyc-Québec runs initiatives for construction and demolition waste, including cabinetry components.
When planning your refacing project, ask your supplier if they participate in take-back or buy-back programmes. Many door manufacturers and distributors will coordinate the return of old materials, ensuring they’re repurposed or recycled rather than sent to landfill. Checking your provincial EPR registry can also help you find approved drop-off sites and stewardship organisations dedicated to cabinetry and building-material recycling.
13. Ergonomic and Safety Best Practices for DIY Cabinet Refacing
Refacing your own cabinets can be rewarding, but a lack of preparation or attention to ergonomics and safety can turn a satisfying project into a painful one. Prioritising tool upkeep, managing airborne dust, using the right protective equipment and adopting healthy work habits will help reduce the risk of injury and ensure you finish on time and on budget. Below are four key areas to focus on when tackling a DIY cabinet refacing job.
Tool Inspection & Maintenance
Before each work session, give your power tools and hand tools a thorough once-over. Inspect blades and bits for dullness or damage and replace them if necessary. Check power cords for frays or exposed wires and ensure moving parts on routers, sanders and drills spin freely without wobbling. A well-maintained tool not only cuts cleaner but also minimises kickback and binding—common causes of accidents. For more guidance on safe carpentry practices, see the CCOHS tool maintenance checklist.
Dust Control & Ventilation
Cabinet refacing generates fine wood and veneer particles that can irritate your eyes, lungs and skin. Set up a shop vacuum with a HEPA filter to capture dust at the source—whether it’s coming from a sander or a table saw. Keep windows and doors open to maintain a steady flow of fresh air, and avoid working in confined spaces without an extraction fan. Clearing dust as you go helps protect your respiratory system and prevents slippery floors that can lead to trips or falls.
Personal Protective Equipment (PPE)
Never underestimate basic PPE. At a minimum, equip yourself with:
- Safety glasses or goggles to shield your eyes from flying chips and splinters.
- A respirator or N95 mask when sanding or cutting to trap fine dust and volatile organic compounds from adhesives or finishes.
- Hearing protection—either earmuffs or earplugs—if you’re running loud tools for extended periods.
- Cut-resistant gloves when handling sheet materials or sharp-edged veneers; switch to grip-friendly work gloves for tool operation.
Choosing the appropriate level of protection not only safeguards your health but also boosts confidence and precision during installation.
Safe Work Practices
Staying mindful of your body’s posture and limits can save you from long-term aches. Position workpieces at waist height to avoid bending or overreaching; use adjustable sawhorses or workbenches if necessary. Alternate tasks every hour—switch from sanding to fitting doors, for instance—to engage different muscle groups. Secure loose clothing, remove jewellery that could catch on tools, and keep long hair tied back. Finally, take short breaks to stretch and hydrate, especially during longer sessions. These small habits go a long way in maintaining steady progress and preventing injury.
By incorporating these ergonomic and safety best practices into your DIY cabinet refacing project, you’ll work more efficiently, minimise health risks and achieve professional-looking results—without the common aches, strains or mishaps that cost time and money.
14. Your Next Steps for a Successful Cabinet Refacing Project
You’ve now seen the full spectrum of costs—from national averages and per-linear-foot rates to per-door pricing and DIY scenarios—along with the key factors that influence your budget, the most effective ways to save, and the safety and environmental considerations you’ll want to keep in mind. Armed with this knowledge, you can confidently approach your cabinet refacing project with a clear plan, realistic expectations and an eye for quality.
Begin by taking accurate measurements of your existing cabinet runs, doors and drawer fronts. Compare the options covered in this guide—entry-level thermofoil, mid-range veneers or premium solid-wood panels—and decide where to allocate your budget. Factor in any upgrades you’d like, such as crown moulding or under-cabinet lighting, and remember the savings tips: shop affordable materials, reuse existing hardware where possible and collect multiple quotes to ensure you get the best value.
Next, consider your ideal approach:
- If you’re a seasoned DIYer, gather the right tools, protective gear and workspace ventilation for a smooth, safe refacing job.
- If you prefer a hands-off experience, engage a professional installer to handle everything from removal and surface prep to precise veneer application and final hardware fitting.
- Or choose a hybrid route—use our “Build a Door” platform to design your doors and do the removal yourself, then let an expert take over the installation.
Now it’s time to turn your plan into reality. Head over to The Door Maker’s “Build a Door” tool, where you can configure every detail—style, finish, size—and receive a free, custom quote in minutes. Whether you’re refreshing a small pantry or refacing an expansive kitchen, The Door Maker makes it easy to get started and stay on budget. Ready to give your cabinets a fresh new look? Start designing today and take the first step toward a beautiful, budget-friendly renovation.
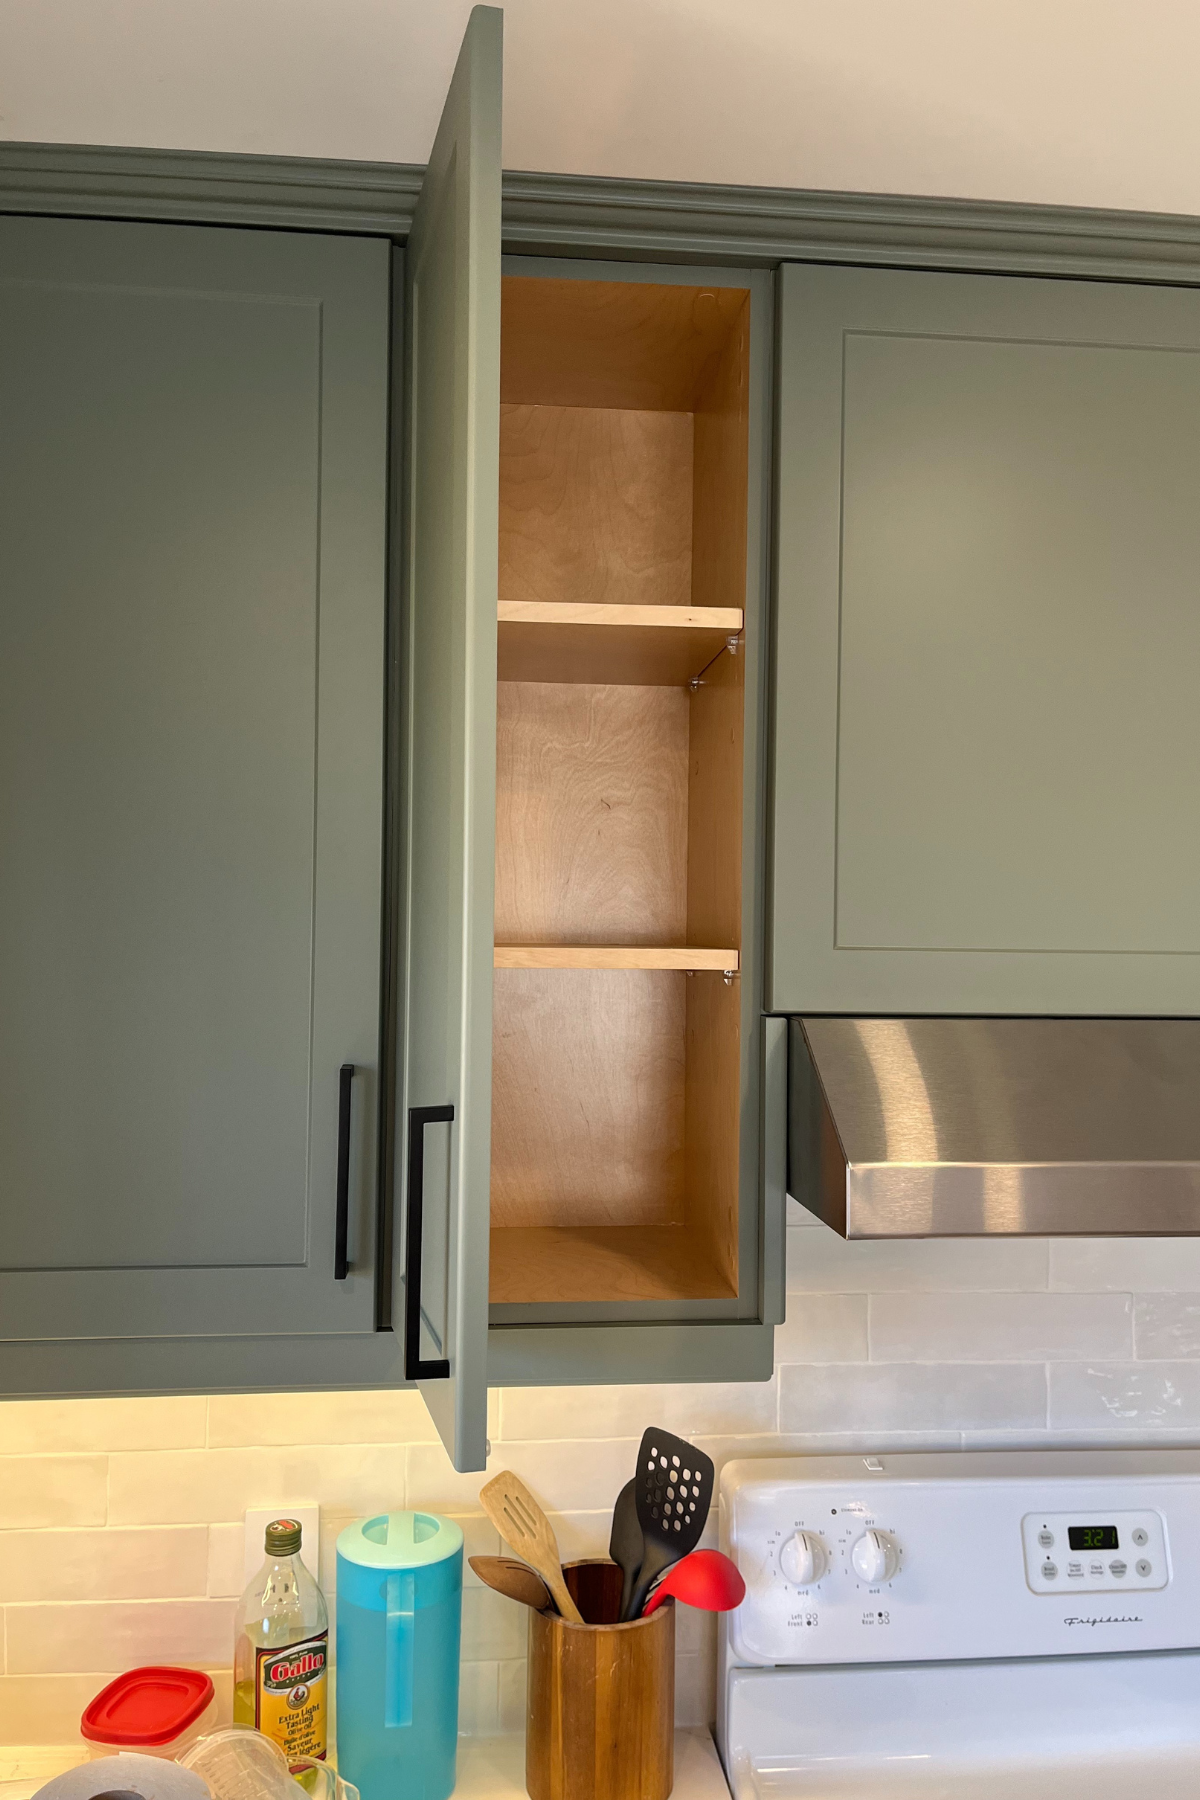
Jun 18 2025 BY David Adrian, Blog
Cabinetry does more than simply provide storage; it shapes how we use, enjoy, and experience our kitchens, bathrooms, and living spaces every day. Whether planning a fresh look for your home or seeking practical upgrades, the term “custom cabinetry” is bound to appear—often surrounded by confusion and a swirl of marketing claims. What does “custom” really mean when it comes to cabinets? How is it different from stock or semi-custom options, and why should these distinctions matter to you?
This guide peels back the jargon to reveal exactly what custom cabinetry is, how it compares to other choices, and what to expect in terms of design, quality, compliance, and cost. With clear definitions, side-by-side comparisons, and practical insights, you’ll discover the factors that set custom cabinetry apart, the benefits it offers, and the considerations to weigh before making your decision. Whether you’re a DIY enthusiast hunting for the perfect fit or a homeowner determined to maximise both style and functionality, understanding the real meaning of custom cabinetry is your essential first step.
Understanding Cabinetry: Definition and Scope
Before diving into the specifics of custom options, it helps to get a clear picture of what cabinetry actually is and why it matters. At its core, cabinetry blends craftsmanship and construction to create both functional storage and decorative features that shape the character of a room. With this foundation, you’ll be better equipped to appreciate how custom cabinetry goes a step further.
Defining Cabinetry
Cabinetry refers to the craft of designing and building fitted furniture, especially cabinets of high quality. Also called cabinetwork, carpentry or woodwork, cabinetry encompasses everything from the basic structure to the final decorative touches. In other words, cabinetry isn’t just about the box that holds your plates—it includes doors, mouldings, and even the choice of hardware that brings the design together.
Components of Cabinetry
Every cabinet is made up of several core parts, each playing its own role in both durability and appearance. Common materials are noted in parentheses:
- Cabinet box (case): The main enclosure, often constructed from plywood or medium-density fibreboard (MDF) for stability.
- Face frame: A solid-wood frame attached to the front of framed cabinets, providing extra strength and an anchor for hinges and doors.
- Doors: The visible panels, which may be solid wood, MDF with a veneer, or thermofoil; they set the style—flat, raised, shaker or more ornate profiles.
- Drawers: Built with dovetail or dowel joinery, drawer boxes are usually made from solid wood or plywood for long-lasting performance.
- Shelves: Adjustable or fixed boards, typically plywood or particleboard with a laminate or veneer finish, to support dishes, pantry items or office supplies.
- Hardware: Knobs, pulls, hinges and drawer slides, available in materials such as brass, stainless steel or engineered alloys, that influence both function and style.
Role of Cabinetry in Home Design
Cabinetry underpins both how a space works and how it looks. On the functional side, well-planned cabinets maximise storage, keep daily essentials within easy reach and allow homeowners to organise tools, cookware or linens. From a style perspective, the shape of the doors, colour of the finish and arrangement of mouldings set the tone for the entire room.
In the kitchen, cabinetry can define an island as the focal point or create a seamless run of units along a wall. In bathrooms, it offers under-sink storage and linen towers that blend practical needs with spa-like finishes. Even in a home office or living room, built-in cabinets can house books, hide cables behind closed doors or showcase decorative objects. Thoughtful cabinetry transforms ordinary rooms into customised environments tailored to how you live.
What Is Custom Cabinetry? Definition and Core Characteristics
Custom cabinetry stands out as the truly bespoke option in storage and furniture design. Instead of selecting from pre-set sizes or limited door styles, you work with designers and craftsmen to create pieces that align exactly with your space, aesthetic and functional requirements. From a snug nook under a sloping ceiling to an expansive wall of pantry cupboards, custom cabinets are built around your unique vision—and the one-off nature of each project calls for a closer look at what “custom” really means.
Core Definition of Custom Cabinetry
At its heart, custom cabinetry comprises “tailor-made storage solutions crafted to unique client specifications.” According to Studio Carney’s glossary, every dimension, detail and finish is selected to fit your exact needs, whether that involves an angled bay window, a curved island or a run of floor-to-ceiling units. (See Studio Carney's glossary for more.)
Key Characteristics of Custom Cabinetry
- Custom dimensions and layouts: Cabinets are measured on-site and drawn to match nooks, alcoves or soaring ceilings without awkward gaps or filler strips.
- Unlimited design freedom: You choose from an extensive palette of door profiles (shaker, raised panel, flat), finishes (paints, stains, veneers, thermofoils) and decorative mouldings to make each piece uniquely yours.
- Skilled craftsmanship: Artisans rely on time-tested joinery—dovetail drawers, mortise-and-tenon frames and precision routing—to ensure rigidity, longevity and a refined appearance that mass-produced units simply can’t match.
Distinguishing Custom from Other Cabinetry Types
Compared with stock units (built in fixed sizes and limited styles) and semi-custom lines (based on standard modules with a handful of tweaks), custom cabinetry occupies the top tier of personalisation. Later sections will break down how these three approaches differ in cost, lead times, material quality and installation options—but for now, remember: custom means no compromises on size, style or workmanship.
Types of Cabinetry: Stock, Semi-Custom, and Custom
When it comes to choosing cabinetry, understanding the three main categories—stock, semi-custom and custom—helps you match your needs with the right balance of cost, lead time and design freedom. Below, we break down each type so you can see how they differ in structure, style options and overall investment.
Stock Cabinetry: Ready-Made Solutions
Stock cabinets are off-the-shelf units built in standard sizes and popular door styles. They’re mass-produced, so you’ll usually find immediate availability at big-box retailers or cabinet showrooms.
-
Advantages
- Immediate pick-up or fast shipping (often within a week)
- Lower price point—around $160–$380 per linear foot
- DIY-friendly installation
-
Disadvantages
- Limited finishes and door profiles
- Fixed dimensions (widths in 3" increments, typical heights of 30"–36")
- Gaps, fillers or trim may be needed in irregular spaces
Semi-Custom Cabinetry: A Middle Ground
Semi-custom cabinets start with a stock platform but offer a selection of dimension tweaks and additional finishes. You might choose deeper boxes for oversized bakeware or swap in a premium door style without fully bespoke pricing.
-
Advantages
- More door styles, paints and stains than stock lines
- Adjustable widths and depths (usually in 1"–3" increments)
- Moderate lead times (4–8 weeks) and mid-range pricing
-
Disadvantages
- Height options and internal configuration may remain standard
- Some modifications can push costs close to custom levels
- Quality varies by manufacturer
Custom Cabinetry: Fully Bespoke Options
Custom cabinets are built from the ground up to your exact specifications. Every aspect—from overall layout to decorative mouldings—is crafted to fit your space and style.
-
Advantages
- Unlimited design freedom: any shape, size or finish
- Premium materials (solid woods, hardwood veneers, high-grade plywood)
- Skilled workmanship with artisanal joinery
-
Disadvantages
- Highest investment level—approximately $600–$2,500 per linear foot
- Longest lead times (6–12 weeks or more)
- More complex selection process
Quick Comparison Table
| Feature | Stock | Semi-Custom | Custom |
|---|---|---|---|
| Customisation Level | Minimal | Moderate | Unlimited |
| Cost Range (per linear ft) | $160–$380 | $250–$700 | $600–$2,500 |
| Lead Time | Immediate–1 week | 4–8 weeks | 6–12+ weeks |
| Materials Quality | Economy (particleboard, basic veneers) | Mixed grades (plywood, MDF, select veneers) | Premium (solid wood, high-grade plywood) |
| Installation Options | DIY or third-party | Often available through dealer | Usually included with manufacturer |
This comparison makes it clear where each cabinetry type sits on the spectrum of customization, cost and convenience. Whether you need a quick, cost-effective update or a fully personalized installation, choosing the right category ensures your cabinetry aligns with both your design vision and practical requirements.
Custom vs Stock Cabinets: Key Differences
Choosing between custom and stock cabinets goes beyond simply comparing prices. The decision affects how well your cabinetry fits, how it looks and how long it will last. Below, we break down the fundamental contrasts so you can see which option aligns best with your project goals.
Measurements and Fit
Custom cabinets are measured on-site to match your exact space, whether that means under a sloping ceiling, around a bay window or into an unusually shaped alcove. Every dimension is tailored, eliminating unsightly gaps and the need for filler strips.
Stock cabinets, by contrast, come in predetermined sizes—widths usually increase in 3-inch increments (e.g. 12", 15", 18") and heights often top out between 30" and 36". While these off-the-shelf dimensions can suit many rooms, awkward angles or odd corners may leave wasted space or require additional trim.
Design Freedom and Appearance
With custom cabinetry, you have free rein over door profiles, mouldings, finishes and hardware. Want a shaker door in a bespoke taupe paint with a hand-rubbed stain on the crown moulding? No problem. Decorative elements, inset doors or curved drawer fronts are all on the table.
Stock cabinets offer popular door styles—flat, shaker or raised panels—with a handful of finishes. If your design vision calls for something unique, you’ll be limited to the manufacturer’s catalogue, and mixing brands or sizes can lead to inconsistent looks.
Quality and Craftsmanship
Custom cabinets are built with premium materials chosen for durability and appearance. Solid-wood species (maple, oak, cherry), hardwood veneers and high-grade plywood form the structure, while skilled artisans employ dovetail joints, mortise-and-tenon frames and precise routing for a refined finish.
Stock cabinets typically use economy substrates such as particleboard or low-grade plywood, with thinner veneers or thermofoil coverings. Assembly methods are simpler and hardware is often basic, which helps keep costs down but may affect longevity under heavy use.
Lead Times and Availability
If speed is your priority, stock cabinets are hard to beat—many models ship within days or can be picked up in store immediately. You can complete a basic installation project before the next weekend arrives.
Custom cabinetry requires planning: manufacturing often takes 6–12 weeks, depending on the complexity of the order and material availability. While the wait can test your patience, the payoff is a perfectly fitted, one-of-a-kind installation.
Cost Implications
Price is one of the most visible differences. Stock cabinets range from approximately $160 to $380 per linear foot, making them an economical choice for budget-minded updates.
Custom cabinets typically start around $600 per linear foot and can climb to $2,500 or more, depending on wood species, finish and decorative features. Although the initial outlay is higher, custom solutions often add value through superior fit, enhanced durability and design uniqueness.
By understanding these key contrasts—measurements, design freedom, build quality, timelines and cost—you’ll be better positioned to decide whether stock or custom cabinetry is the right investment for your home.
Semi-Custom vs Custom Cabinets: Bridging the Gap
If you’re weighing design freedom against budget constraints, semi-custom cabinetry often emerges as the compromise. It borrows from both stock and fully bespoke approaches, letting you tailor certain elements without the full custom price tag—or the full custom decision fatigue.
Semi-Custom Defined
Semi-custom cabinets begin life on the same production lines as stock units but come with a menu of upgrades. You’ll usually find:
- Width and depth adjustments in smaller increments (often 1"–3")
- A broader selection of door styles and finishes (beyond the handful offered in stock lines)
- Standard box construction (face frame or frameless), with internal layouts that remain largely fixed
This hybrid model means you can order a deeper base cabinet for your oversized cookie sheets or swap in a premium shaker door without commissioning an entire line of bespoke pieces.
When Semi-Custom Makes Sense
Semi-custom cabinetry shines when you have just one or two non-standard requirements. For instance:
- Your vintage bakeware needs a few extra inches of depth but you’re happy with standard heights and widths elsewhere.
- You love a particular paint finish or door style that you can’t find off the shelf, yet your overall layout is fairly straightforward.
- You’re working with a moderate budget and want some personalisation without the full premium of custom joinery and exotic woods.
In these scenarios, semi-custom options let you fix the one or two pain points in your design without paying for infinite possibilities you don’t need.
Deciding Between Semi-Custom and Custom
If your wishlist starts to grow—think multiple dimension tweaks, unique mouldings, inset doors or special hardware—it’s wise to compare semi-custom and fully custom quotes side by side. In some cases, extensive add-ons to a semi-custom line can approach or even exceed the cost of a custom solution.
- Ask your cabinet provider for clear pricing on each modification, then total them up.
- Check lead times: semi-custom units typically ship in 4–8 weeks, while custom projects can take 6–12 weeks or more.
- Remember that a custom manufacturer will often include installation and on-site measurement services, whereas semi-custom may require additional fees.
By lining up both sets of numbers and services, you’ll see whether the extra flexibility of a full custom build justifies the wait—or if a semi-custom blend hits that sweet spot between price, timeline and personalisation.
Materials and Manufacturing Process: Building Quality Cabinets
Choosing the right materials and manufacturing techniques is crucial when you ask, “what is custom cabinetry?” It’s not just about aesthetics; the materials you select and the care taken during production determine the longevity, stability and overall performance of your cabinets. Below, we outline the common substrates and finishes used in custom builds, explain best practices in craftsmanship and highlight how material choices influence cost and durability.
Common Materials Used in Custom Cabinetry
Custom cabinetry offers a wide palette of materials, each coming with its own strengths and compromises:
-
Solid Wood Species
- Maple: Hard and light-coloured, prized for its subtle grain and resistance to wear.
- Oak: Durable and distinctive, available in red or white varieties with pronounced grain patterns.
- Cherry: A premium choice, known for rich tones and smooth grain that deepens over time.
- Alder: Softer than maple or oak but stable, with warm hues that accept stains evenly.
-
Plywood Grades
- Cabinet-grade plywood combines layers of hardwood veneer and void-free core plies, offering excellent strength-to-weight ratio and resistance to twisting or warping.
-
Medium-Density Fibreboard (MDF)
- Smooth and uniform, MDF is an economical base for painted doors and intricate routed profiles. It holds paint well but is heavier and less moisture-resistant than plywood.
-
Laminate and Thermofoil
- Thermofoil: A heat-formed vinyl layer bonded to an MDF door, delivering a seamless finish that’s easy to clean.
- Laminate: Tough, scratch-resistant surfaces in a variety of colours and patterns, ideal for worktops or high-traffic cabinetry.
Each material should be chosen with respect to the cabinet’s location (e.g. kitchen vs bathroom), expected humidity levels and daily use patterns. For example, plywood boxes with solid-wood face frames and doors provide a robust structure, while MDF doors wrapped in thermofoil can be a cost-effective option in low-moisture areas.
Manufacturing Best Practices and Craftsmanship
A quality custom cabinet starts long before assembly. According to insights from TBS Design Gallery, top manufacturers follow these steps:
-
Kiln-Drying and Acclimatisation
Lumber and veneers are kiln-dried to reduce moisture content, then stored in climate-controlled rooms to minimise expansion or shrinkage after installation. -
Precision Joinery
Dovetail drawer boxes, mortise-and-tenon face frames and tongue-and-groove back panels ensure tight joints and structural integrity. This craftsmanship stands up to heavy use and prevents cabinet sagging over time. -
Rigorous Quality Control
Components are inspected at every stage—from board selection to final finish—to catch defects early. Hardware, hinges and drawer slides undergo load-testing so each piece operates smoothly for years. -
Custom Finishing
Paints, stains and clear-coat applications are applied in multiple stages—sealing, colour coat and topcoat—to guarantee a consistent hue and durable surface.
By combining premium materials with time-tested techniques, skilled cabinetmakers can deliver products that outperform mass-produced alternatives in both form and function.
Impact of Materials on Cost and Durability
The materials you choose for custom cabinetry directly influence the final price per linear foot, as well as the expected lifespan:
-
Entry-Level Custom
MDF doors with standard veneer plywood boxes and simple stains might start around $600 per linear foot, offering a balance of affordability and reliability. -
Mid-Range Custom
Solid wood doors (maple or alder) paired with cabinet-grade plywood boxes generally range between $800 and $1,200 per linear foot, providing greater resilience and a richer appearance. -
High-End Custom
Exotic woods (cherry, walnut), speciality veneers and full-scale custom finishing can push costs above $1,500 per linear foot, but these investments often come with extended warranties and decades-long service lives.
Ultimately, selecting the right materials for your custom cabinetry is about balancing budget, performance and design ambitions. When you understand how each component contributes to strength, stability and visual impact, you can make informed choices that pay dividends in both daily enjoyment and long-term value.
Compliance and Sustainability Standards for Custom Cabinetry
Today’s homeowners expect more than beautiful cabinets—they seek peace of mind knowing the products in their homes meet health and environmental standards. In Canada, custom cabinet manufacturers must navigate strict regulations on emissions and material sourcing. Understanding these rules and certifications helps you choose cabinetry that’s both safe and sustainable.
Formaldehyde Emissions Regulations in Canada
Composite wood products—such as plywood, MDF and particleboard—often contain adhesives that release formaldehyde over time. To protect indoor air quality, Canada enforces the Formaldehyde Emissions Regulations under the Canadian Environmental Protection Act (CEPA). These rules, sometimes called CANFER, set maximum emission levels for different products:
- Hardwood plywood panels: 0.05 ppm
- Particleboard: 0.09 ppm
- Medium-density fibreboard (MDF): 0.11 ppm
Manufacturers must conduct third-party testing in accredited labs, clearly label compliant products, and keep records of test results and supplier declarations for at least five years. When you see cabinetry marked as meeting CANFER standards, you can be confident it won’t compromise your indoor air or family’s health.
Importance of Sustainable and Certified Timber
Choosing wood from responsibly managed forests helps preserve ecosystems, protect wildlife habitats and support local communities. The Forest Stewardship Council (FSC) is one of the most widely recognised certification schemes. FSC’s standards rest on ten principles, covering:
- Legal compliance and respect for indigenous rights
- Maintenance of high-conservation-value forests
- Protection of water, soils and biodiversity
- Responsible harvesting rates
- Fair wages and safe working conditions
- Transparency and traceability throughout the supply chain
When custom cabinetry carries an FSC-certified label, it guarantees that every board—from the forest to the factory floor—meets stringent social, environmental and economic criteria.
Choosing Compliant and Eco-Friendly Options
Here are a few tips to ensure your custom cabinets tick all the right boxes:
- Ask your cabinetmaker for a declaration of conformity to CANFER regulations and inspect product labels for emission ratings.
- Look for FSC, PEFC or equivalent forest-certification logos on both raw materials and finished goods.
- Consider low-emission finishes and water-based paints to further reduce volatile organic compounds (VOCs).
- Balance sustainability with budget by specifying certified plywood for your cabinet boxes and opting for reclaimed or bamboo accents on doors or mouldings.
By prioritising compliance and eco-friendly materials, you’ll enjoy cabinets that perform beautifully, protect your indoor air quality and help safeguard our forests for generations to come.
Design Flexibility and Customisation Options
Custom cabinetry isn’t just about picking your favourite door style and hardware—it’s about creating a solution that fits your life, your space and your taste down to the last millimetre. From the basic footprint of a pantry wall to the sweeping curves of an island, every detail can be adjusted so that your cabinets look and feel like they were always meant to be there. Whether you have an awkward corner to tame or a concept kitchen in mind, the possibilities are almost endless.
Custom Dimensions, Shapes, and Layouts
Imagine a corner that’s long plagued by wasted space—custom cabinets turn that challenge into an opportunity. By taking exact site measurements, craftsmen can design angled or pie-cut units that slot neatly into alcoves, sloping ceilings and bay windows. High or vaulted ceilings? You can extend cabinets all the way to the crown or add open shelving up top for plants and décor. Even curved walls or islands can be accommodated with bespoke cabinet carcasses and bent plywood panels, ensuring your layout flows seamlessly.
This level of precision means no filler strips, no awkward gaps and no improvising on the fly. Instead, your cabinetry will arrive ready to install, fitting like a glove around architectural quirks or appliances. With custom layouts, you can also plan zones for cooking, preparation and storage, positioning drawers and cupboards exactly where you need them most.
Material and Finish Selections
Once you’ve settled on the shape and size, it’s time to make your cabinets sing with the right surface treatments. You might choose a classic painted finish for a smooth, timeless look or go with a wood stain that highlights the grain of maple, oak or cherry. If low maintenance is paramount—especially in a busy kitchen—thermofoil or laminate doors deliver a tough, wipe-clean surface in virtually any colour or pattern.
Custom cabinets also open the door to exotic veneers, hand-rubbed oil finishes and even metallic paints that you won’t find in typical stock ranges. These choices don’t just affect appearance; they influence durability, ease of cleaning and resistance to dings or moisture. As designers at CabinetNow point out, fully bespoke cabinets give you the freedom to experiment with finishes that suit your lifestyle without settling for off-the-shelf options.
Specialty Features and Accessories
Beyond dimensions and finishes, custom cabinetry lets you integrate features that transform everyday tasks into moments of delight. Fancy a discreet wine rack built into a lower unit? Or perhaps an appliance garage with a tambour door to tuck away your mixer when not in use. Under-cabinet lighting—whether LED strips or puck lights—can create a warm glow for evening meals and spotlight your worktops when you’re prepping dinner.
Decorative mouldings, pilasters and open cubbies add personality, while interior accessories like tray dividers, spice racks and pull-out cutting boards keep everything organised. You can even specify built-in charging stations for phones and tablets, soft-close hinges for a whisper-quiet shut or toe-kick drawers for stashing seldom-used baking sheets. These little conveniences make all the difference when your cabinetry is custom-designed around how you actually live.
Finishes, Colours, and Hardware Choices
The finishing touches can make or break your custom cabinetry, turning a good design into something that truly feels tailored. From the type of finish protecting the wood to the exact shade on your doors and the hardware that punctuates each drawer, these elements work together to create a cohesive look—and they deserve careful consideration.
Finish Types and Their Benefits
When it comes to cabinet finishes, you have a few go-to options, each with distinct advantages:
-
Painted Finishes
Water-based or solvent-based paints provide a smooth, uniform surface and an almost infinite range of colours. They’re ideal if you crave a crisp, modern look or want to match cabinetry precisely to your wall colour. A quality topcoat ensures scratch resistance and easy cleaning. -
Stained Finishes
Stains penetrate the wood, accentuating the natural grain of maple, oak or cherry. They range from light washes that highlight subtle knots to rich, dark tones that lend a classic, heirloom feel. Sealed with clear coats, stained cabinets resist moisture and fade gracefully over time. -
Thermofoil
A thin vinyl layer is thermoformed over MDF doors, creating a seamless, wipe-clean surface that stands up well to everyday spills. Thermofoil excels in busy kitchens or bathrooms where durability and low maintenance are priorities. Just keep in mind it’s best suited for flat or gently profiled door styles. -
Clear-Seal Overlays
If you love the look of wood but want less upkeep, clear-seal lacquer or matte varnish preserves the timber’s natural character while adding a protective barrier. This is perfect for accent pieces—think open shelving or display cabinets—where you still want that tactile wood texture.
Colour Trends and Palette Selection
Choosing a cabinet colour is more than a matter of personal taste; it impacts how the entire room feels. Here are a few palettes making waves:
-
Two-Tone Schemes
Combine a darker hue on lower cabinets—such as charcoal or forest green—with crisp white or pale grey uppers. This approach adds depth, grounds the space and highlights architectural features like an island or range hood. -
Jewel Tones
Deep sapphire blues, emerald greens or inky teals bring a touch of drama without feeling over the top. Pair with brass hardware for a luxe vibe or black matte pulls for a contemporary spin. -
Soft Neutrals
Creams, greiges and muted pastels remain evergreen choices. They harmonise with natural stone countertops and wood accents, offering a soothing backdrop that adapts to changing trends. -
Monochrome Contrast
All-white cabinetry can look crisp and clean, while all-black units feel bold and sophisticated. Both work when balanced with warm wood floors or metallic details to avoid a flat appearance.
When you’re weighing colours, hold sample boards against countertop and backsplash remnants. Seeing finishes in your actual light—morning sun, overhead LEDs and evening glow—ensures you won’t be surprised by undertones or reflectivity once the job is done.
Hardware Options: Knobs, Pulls, Hinges, and More
Hardware is the jewellery of cabinetry. Size, style and finish all matter:
-
Knobs versus Pulls
Knobs offer a minimalist accent and work well on smaller drawers. Pulls, especially bar or cup pulls, provide a stronger visual line and can feel more substantial when opening larger drawers. -
Material Choices
- Brass: Warm and inviting, it patinates beautifully if left uncoated—or choose a lacquered version for lasting shine.
- Nickel and Stainless Steel: Sleek, modern and low-maintenance; ideal for contemporary or industrial looks.
- Matte Black: Striking on lighter doors, it brings crisp contrast and a hint of drama.
- Antique Bronze or Oil-Rubbed Bronze: Perfect in traditional kitchens, offering depth and subtle warmth.
-
Hinges and Slide Upgrades
Soft-close hinges are practically standard now, preventing slams and extending cabinet life. For drawers, look for full-extension, under-mount slides that keep your storage spaces accessible and quiet. Concealed European hinges let doors sit flush with the face frame, while exposed decorative hinges can underscore a rustic or farmhouse aesthetic.
Mixing metal finishes—say, pairing brass knobs with black hinges—can add visual interest, but keep to two complementary tones at most. Once you’ve narrowed down your finish and hardware style, order a few samples. Mount them on a spare door or a piece of plywood to test in your space and under varied lighting before committing to the full install.
By carefully selecting your finishes, colours and hardware, you’ll craft a look that not only complements your home’s style but also feels custom-made in every detail.
Functionality and Storage Innovations in Custom Cabinetry
Custom cabinetry isn’t just about aesthetics; it’s also about creating smarter storage that adapts to your daily routines. By integrating clever hardware, bespoke compartments and ergonomic features, bespoke solutions turn wasted nooks into efficient pantries, awkward corners into useful pull-outs and high shelves into accessible zones. These innovations streamline tasks, reduce clutter and make every inch of your kitchen—or any room—work harder for you.
Space Optimisation Techniques
One of the most celebrated advances in custom cabinetry is the variety of space-saving layouts tailored to even the trickiest corners. Pull-out corner units replace deep, hard-to-reach shelves with sliding trays that glide smoothly into view, so no rogue casserole dish gets forgotten at the back. Toe-kick drawers utilise the often-ignored plinth beneath base cabinets, offering a discreet spot for baking sheets or chopping mats. Roll-out trays—installed behind fixed doors—let you pull pots and pans forward in a single motion, eliminating awkward bending and rummaging.
Organisational Accessories for Cabinet Interiors
Inside custom cabinets, the devil is in the details. Built-in spice racks keep jars upright and visible, saving precious countertop space. Cutlery dividers, tray organisers and vertical plate holders turn drawers into tailor-made stations; everything has its own slot, so you can grab what you need without hunting through a jumbled pile. Even pantry units can be customised with clear pull-out bins, adjustable dividers and tiered wine racks, making it easy to categorise dry goods, snacks and beverages at a glance.
Accessibility and Ergonomic Features
Custom cabinetry can be fine-tuned to support comfort and accessibility for everyone in your household. Soft-close hinges and drawer slides prevent slamming and extend the life of your doors. Height-adjustable shelves mean you’re not locked into a single layout—reconfigure storage when appliances or cookware change. For those with limited mobility, lower-height base cabinets and pull-down shelf mechanisms bring items within easy reach, while concealed power strips or built-in charging stations ensure devices are always ready without cluttering counters. By combining these ergonomic touches, custom cabinetry adapts to how you live, making daily tasks smoother and more enjoyable.
Benefits and Drawbacks of Custom Cabinetry
Custom cabinetry sits at the premium end of the market for good reason—it delivers a level of quality, fit and personalisation that stock or even semi-custom lines simply can’t match. At the same time, it comes with its own set of challenges. Weighing these pros and cons will help you decide whether the investment in truly bespoke storage solutions suits your project and budget.
Benefits of Custom Cabinetry
-
Perfect Fit and Function
Every cabinet is designed around your space and lifestyle. Whether it’s angled units for a bay window or built-in charging stations at a convenient height, custom cabinets turn awkward nooks into useful storage and ensure nothing goes unused. -
Superior Craftsmanship
By working with skilled artisans, you benefit from time-tested joinery—dovetail drawers, mortise-and-tenon frames—and precision finishing processes. This attention to detail translates into cabinets that hold up under daily use and look great for years. -
Choice Without Compromise
From exotic wood veneers to specialised paints and mouldings, you won’t be limited by a manufacturer’s standard line. Every element—from toe-kick drawers to decorative corbels—can be tailored to your aesthetic, ensuring a one-off design that reflects your taste. -
Enhanced Home Value
Well-executed custom cabinetry is often seen as a premium upgrade by prospective buyers. It can boost curb appeal and resale value, especially when integrated into key areas like kitchens and bathrooms. -
Optimised Storage
Custom drawers, pull-outs and corner solutions make it easy to organise everything from spices to platters. By designing storage around your specific needs, you’ll keep clutter at bay and find what you need in a flash.
(Adapted from insights at American Craftsmen.)
Drawbacks and Considerations
-
Higher Cost
Custom solutions command a premium price—often ranging from $500 to $1,200 (and in some cases up to $2,500) per linear foot, depending on materials and complexity. For smaller budgets, these figures can feel daunting compared with stock or semi-custom options. -
Longer Lead Times
Crafting cabinets from scratch takes time. Expect typical manufacturing schedules of six to twelve weeks (or more), plus additional scheduling for delivery and installation. -
Decision Overload
With virtually unlimited choices comes the potential for overwhelm. Selecting wood species, finishes, hardware and interior accessories can be a lengthy process—one that benefits from a clear plan or professional guidance to avoid design fatigue. -
Dependency on Skilled Installers
Achieving that flawless, gap-free fit relies on accurate on-site measurements and expert installation. You’ll need to factor in the coordination and cost of a trusted carpenter or installer who understands the nuances of custom work. -
Maintenance Requirements
Some premium finishes and natural woods demand special care—periodic oiling, gentle cleaning products or humidity control—to preserve their appearance and integrity over time.
(Adapted from observations at LilyAnn Cabinets.)
By understanding these benefits and drawbacks up front, you can gauge whether custom cabinetry aligns with your priorities—be it an exacting design vision, top-tier durability or a more modest combination of style and function.
Frequently Asked Questions About Custom Cabinetry
Custom cabinetry often comes with its own set of mysteries and terms. Below are concise answers to some of the most common questions to help you navigate your options with confidence.
What is the difference between custom and regular cabinets?
Custom cabinets are built to your exact specifications. Every dimension, finish and hardware choice is tailored to suit your space and style. Regular (or stock) cabinets, by contrast, come in predetermined sizes—usually in 3 inch increments—and limited door profiles and finishes. While stock units can be picked up quickly and cost less (approximately $160–$380 per linear foot), they offer minimal flexibility. Custom cabinets start around $600 per linear foot and allow unlimited design freedom, premium materials and artisanal joinery for a perfect fit and finish.
How can I tell if my cabinets are custom?
You can spot custom cabinetry by looking for a few telltale signs:
- Non-standard dimensions: Cabinets that fit snugly around sloping ceilings, bay windows or curved walls.
- High-quality joinery: Dovetail drawers, mortise-and-tenon frames and tongue-and-groove back panels.
- Personalised details: Unique mouldings, inset doors or built-in features like wine racks and charging stations.
- Manufacturer’s label or stamp: Many bespoke shops affix a discrete badge or mark to indicate their craftsmanship.
What are the three types of cabinetry?
There are three main cabinetry categories:
- Stock Cabinets: Ready-made units in fixed sizes and finishes, available immediately at a low price point.
- Semi-Custom Cabinets: Based on stock models but offer limited dimension tweaks (usually in 1–3 inch increments) and a broader selection of door styles and finishes.
- Custom Cabinets: Fully bespoke solutions with unlimited size, shape, material and finish options, crafted to precise client requirements.
What does cabinetry mean?
At its simplest, cabinetry refers to the craft of designing and building cabinets and related storage furniture. Also known as cabinetwork or carpentry, it covers structural components (boxes, face frames) as well as aesthetic elements (doors, mouldings, hardware) that combine to create both functional storage and decorative features within a home.
Moving Forward with Custom Cabinetry Solutions
Now that you have a clear understanding of what custom cabinetry entails—from the precise measurements and premium materials to the sustainability standards and finish options—you’re in a strong position to begin planning your project. Start by revisiting your must-have features: the unique dimensions you need, the wood species or thermofoil finish you prefer, and the storage innovations that will simplify daily routines. Balancing these priorities against your budget and timeline will guide you to the cabinetry type that best suits your home.
If maximising personalisation and long-term durability top your list, custom cabinets deliver the perfect fit and finish. Remember to request detailed quotes that spell out materials, lead times and installation services. Compare these against any semi-custom options you’ve considered—sometimes a few targeted tweaks on a semi-custom line can satisfy most requirements at a lower cost, but extensive modifications may narrow the gap to a full bespoke solution.
Quality craftsmanship also hinges on selecting a reputable manufacturer. Look for clear CANFER compliance labels, FSC-certified wood, and evidence of precision joinery techniques like dovetail drawers or mortise-and-tenon frames. Don’t hesitate to ask for sample doors or finish swatches to see how colours and textures perform in your lighting. The more information you gather up front, the smoother your installation will go—and the less chance you’ll feel trapped by unexpected delays or design compromises.
Ready to bring custom cabinet doors and refacing components into your space? Explore The Door Maker’s Build a Door tool for free quotes and an unparalleled range of styles, finishes and sizes. With North America’s largest selection of thermofoil colours and over two decades of experience, The Door Maker makes it easy to design and order everything you need for a professional-looking DIY refacing project—right from home.
Jun 18 2025 BY David Adrian, Blog
Personalising a bathroom with custom cabinetry has become a defining renovation trend in 2025, as more homeowners seek spaces that reflect their tastes and make the most of every square inch. Off-the-shelf vanities rarely tick all the boxes—leaving many searching for storage solutions that truly fit their daily lives and unique floorplans. The appeal of bespoke bathroom cabinetry is clear: enhanced organisation, seamless integration with existing décor, and even a boost to property value, all without the compromise of one-size-fits-all designs.
What’s changed the game this year is how accessible customisation has become. Thanks to intuitive online design platforms, 3D configurators, and transparent pricing tools, you can now create your ideal vanity from the comfort of home. Whether you’re a DIY enthusiast wanting to take control, or a homeowner working closely with local experts, ordering custom bathroom cabinets online is easier, faster, and more reliable than ever.
To guide you through the options, this list spotlights the top 10 custom bathroom cabinetry companies online for 2025. Each provider has been evaluated on the breadth of their styles and materials, design flexibility, pricing clarity, production timelines, delivery options, warranty policies, and adherence to Canadian health and safety standards—like moisture control and low-VOC finishes. You’ll also find links to expert resources, such as the National Building Code of Canada’s moisture guidelines and Health Canada’s formaldehyde emissions standards, to help you make informed decisions.
While some companies deliver fully bespoke cabinetry and others offer ready-to-assemble solutions, don’t overlook innovative alternatives like The Door Maker (TDM). Their DIY cabinet refacing products—custom doors, accessories, and step-by-step tutorials—let you refresh your bathroom affordably, without the mess or disruption of a full renovation. You can start designing with their “Build a Door” tool or browse their extensive product range for inspiration.
Let’s explore the standout online sources transforming custom bathroom cabinetry in 2025.
1. Deslaurier Custom Bathroom Vanities
Deslaurier has been crafting high-quality bathroom cabinetry for over four decades, earning a reputation as one of Canada’s most trusted custom cabinetmakers. Unlike many firms that offer renovation services alongside cabinetry, Deslaurier focuses exclusively on bespoke bathroom vanities, guaranteeing that every unit is tailored to your specifications. With a purely custom-built approach, they serve both DIY homeowners and contractors seeking precise, made-to-order solutions.
Product Range and Customisation Options
Whether you prefer a wall-mounted floating vanity or a more traditional freestanding design, Deslaurier accommodates your layout and style. Choose from single, double and even specialty sink configurations, each available in a variety of door styles—raised-panel, recessed-panel and classic shaker. Hardwood species span from rich cherry to durable maple, with an extensive finish palette of paints and stains. Custom sizing across widths, depths and heights means you won’t have to shoehorn a standard unit into an awkward corner.
Online Design Tools and Support
Deslaurier makes it easy to visualise your project before placing an order. Their online showcase gallery and inspiration library help spark ideas, while virtual or in-person consultations with in-house designers ensure your measurements and aesthetic preferences are spot on. Should your project require a full renovation, Deslaurier partners with local contractors to integrate your vanity into a broader remodel—though the cabinetry itself remains their sole manufacturing focus.
Pricing, Warranty and Value
Expect transparent pricing that reflects the handcrafted nature of each piece. Entry-level double-sink vanities start around CAD 2,000, climbing to CAD 5,000 or more for premium configurations and exotic wood species. Every cabinet comes backed by a 20-year warranty, underscoring their confidence in durability and finish longevity. This long-term protection, combined with Canadian craftsmanship, delivers enduring value at a competitive price point.
Lead Times, Shipping and Returns
Custom orders typically require 8–12 weeks from design approval to delivery. Deslaurier’s extensive dealer network spans coast to coast, allowing you to collect your cabinetry locally or arrange for professional shipping. While Deslaurier does not handle direct returns, any post-delivery adjustments can be managed through your nearest dealer—ensuring that fit and finish meet the original specifications.
Unique Selling Points
- Over 40 years of dedicated Canadian manufacturing expertise
- Fully custom-built vanities with endless style, size and material choices
- A 20-year warranty that outlasts industry norms
- Dealer network for convenient pick-up, delivery and local support
Discover the range of Deslaurier Custom Bathroom Vanities and see how you can bring a tailored, long-lasting centerpiece to your bathroom.
2. Stonewood Bath Cabinetry
Stonewood Bath Cabinetry has carved out a niche as a premium provider of custom bathroom vanities and quartz tops across Canada. Operating through a network of authorised dealers, they blend craftsmanship with modern materials—making them a go-to choice for homeowners and designers who want both quality and style. From compact powder rooms to spacious ensuites, Stonewood’s collection speaks to projects of any scale.
Company Overview
Founded with a focus on high-end bathroom furniture, Stonewood offers everything from sleek modern vanities to more traditional looks. Their dealer-based model means you design locally but benefit from national manufacturing standards. Whether you’re in Vancouver or Halifax, you’ll work with a regional partner who handles measurement, installation and support.
Product Assortment and Finishes
Stonewood’s cabinetry lines boast an array of cabinet finishes—matte solids, wood grains and textured surfaces—paired with quartz countertop options in dozens of patterns. Hardware choices range from polished chrome to brushed brass. For tight spaces, their 18″ shallow-depth vanities maximise floor area without sacrificing storage, making them ideal for small-bathroom renovations.
Stonewood Studio Configurator
Planning your vanity is straightforward with the Stonewood Studio online tool. Choose your cabinet style, countertop, hardware and dimensions, then preview a 3D rendering you can print or save. Once you’re happy with the design, the configurator directs you to the nearest dealer—bridging the gap between digital planning and in-person service.
Sustainability and Promotions
Stonewood’s commitment to environmental stewardship shines through its Future Forests programme: for every vanity sold, one tree is planted to help restore Canadian ecosystems. Seasonal promotions often highlight discontinued lines—recent clearance colours included Dawn and Desert Oak—so you can score a premium vanity at a special price while supplies last.
Pricing, Lead Times and Dealer Locator
Custom orders typically take 6–8 weeks from sign-off to delivery. Price points vary with cabinet size, finish and countertop selection, but a mid-range single-sink vanity usually falls between CAD 2,500 and CAD 4,000. To find and contact a dealer in your region, use the Stonewood dealer locator.
Returns and Support
Clearance items are final sale, but current-production vanities come with full dealer backing. If anything arrives damaged or doesn’t match your specifications, your local dealer will coordinate adjustments or replacements—ensuring your project stays on track.
Unique Selling Points
- Premium quartz tops paired with high-quality cabinetry
- Shallow-depth models for small bathrooms
- Interactive 3D configurator with print-out options
- Future Forests sustainability initiative
- Nationwide dealer network for local service
Explore Stonewood Bath Cabinetry’s full range of designs and finishes at https://stonewoodbath.com/.
3. Cabinetsmith
Cabinetsmith is a family-run, Canadian cabinetmaker renowned for its blend of traditional craftsmanship and sustainable practices. Specialising in custom bath vanities, this artisan outfit caters to homeowners who value solid-wood construction and environmental responsibility. Whether you’re after a perfect fit for a powder room or a multi-sink ensemble for a master bath, Cabinetsmith offers tailored solutions with a focus on quality and conscience.
Company Background
For over two decades, Cabinetsmith has operated on a simple principle: build cabinets that last using locally sourced materials and time-honoured joinery techniques. As a proudly Canadian, family-owned business, they oversee every step—from milling the lumber to applying the final finish—right here in Canada. This vertical integration ensures both consistency and accountability, while supporting regional forestry initiatives.
Vanity Styles and Materials
Cabinetsmith’s portfolio spans an array of door profiles, including sleek flat panels, graceful arched styles and classic beaded designs. Each unit is crafted from solid hardwoods such as maple, oak and cherry, with optional eco-friendly plywood substrates that meet or exceed Health Canada’s formaldehyde emission standards. You'll find a versatile palette of paints and stains, all applied using low-VOC formulations to safeguard indoor air quality.
Custom Design Consultation
Navigating custom cabinetry can feel daunting, but Cabinetsmith simplifies the process with complimentary quote requests directly on their website. You can upload floor plans and photos, then schedule a virtual consultation with one of their design experts. During these sessions, they’ll walk you through material choices and layout options, ensuring that every dimension and detail aligns with your vision.
Pricing and Turnaround
Cabinetsmith’s offerings fall into the mid-range to premium bracket, with most cabinet units priced between CAD 700 and CAD 1,000, depending on size, species and finish. Once you approve the design, production typically takes 8–10 weeks. That timeline balances meticulous handcrafting with efficient scheduling, so you know exactly when to expect your delivery.
Shipping and Installation Guidance
Delivery is available across Canada, with sturdy packaging designed to protect corners and hardware during transit. To help with DIY installs, Cabinetsmith provides detailed assembly instructions and installation guides. If you prefer professional assistance, they can recommend certified installers in your area to guarantee a flawless fit.
Unique Selling Points
- Emphasis on handcrafted solid-wood cabinetry and traditional joinery
- Environmental certifications and low-VOC finishes for healthier indoor air
- Complimentary virtual consultations and transparent quote process
- Pan-Canadian delivery and optional installer referrals
Discover Cabinetsmith’s eco-conscious, custom bath vanities and request your free quote at their website: https://cabinetsmith.ca/vanities/
4. Fox Custom Woodworks
If you’re looking for truly one-of-a-kind cabinetry, Fox Custom Woodworks brings an artisan mindset to every bathroom and laundry project. Based in Ontario, this boutique shop specialises in fully bespoke vanities that reflect both your personal style and the craftsmanship you’ll appreciate for decades.
Company Overview
Fox Custom Woodworks is a family-run firm dedicated to creating custom cabinetry for bathrooms and laundry rooms. Their focus is squarely on design and build—no off-the-shelf units here. Every project begins with a blank slate, so you can tailor everything from overall dimensions to the smallest moulding detail.
Portfolio Highlight
Browse their online gallery and you’ll find projects ranging from clean, minimalist floating vanities to elegant, traditional pieces with fluted pilasters and crown moulding. Each installation is documented with high-resolution photos, so you can see how Fox blends premium materials, subtle hardware choices and precise joinery for a flawless result.
Materials and Craftsmanship
At Fox, quality starts with the wood. They work in select domestic and exotic hardwoods—think maple, walnut and European white oak—sourced for stability and grain character. Inside and out, cabinets feature solid-wood frames, dovetailed drawers and reinforced shelving. Finishes are applied in multiple coats with low-VOC stains and topcoats that comply with Health Canada’s air quality standards.
Quoting and Design Process
Getting started is simple: schedule an in-home or virtual consultation to discuss layout, storage needs and finish styles. Fox provides detailed 3D renderings and a line-item proposal so you know exactly what you’re getting—and what it costs—before fabrication begins. There are no hidden fees; any revisions are clearly outlined, keeping your budget on track.
Pricing, Lead Times and Delivery
Fox Custom Woodworks calculates costs by linear foot, with many bathroom vanities beginning around CAD 2,500. After design approval, production typically takes 10–14 weeks. They arrange delivery throughout Ontario, using padded, climate-controlled transport to safeguard your cabinets until they arrive at your door.
Installation Services
To ensure a seamless install, Fox offers two approaches: their own team of craftsmen will handle every detail, or they can recommend vetted, local partners. Whether it’s mounting floating vanities, installing solid-surface countertops or fine-tuning plumbing connections, you’ll have confidence in a professional finish.
Unique Selling Points
- Fully bespoke, from carcass construction to decorative trim
- Premium hardwoods and low-VOC finishes for lasting beauty
- Transparent, line-by-line quotes with 3D visualisations
- End-to-end service: design, build and installation
Explore the craftsmanship and bespoke styles at Fox Custom Woodworks.
5. Home Decorators Cabinetry (The Home Depot Build Your Vanity)
Home Decorators Cabinetry, powered by The Home Depot, brings a retailer’s scale to custom bathroom cabinetry. Their “Build Your Vanity” platform offers a user-friendly, web-based 3D configurator that guides you through every decision—from door style to hardware finish—while showing real-time pricing. It’s an accessible choice for homeowners who want the convenience of online design without sacrificing the reassurance of a well-known brand.
Build Your Vanity Overview
The heart of this service is the Build Your Vanity tool. In a few clicks, you can choose vanity dimensions, sink layout and cabinet components. As you tweak each option, the interface updates a realistic 3D model, so you know exactly how your finished piece will look. Plus, if your design doesn’t work out, you have a generous 90-day return window to send it back.
Product Styles and Options
You won’t be stuck with a single look. Home Decorators Cabinetry offers classic shaker doors alongside flat-panel and traditional raised-panel styles. There’s a palette of paint and wood-grain finishes to suit modern and timeless interiors alike. Complement your cabinetry with hardware in nickel, bronze or matte black—each option clearly displayed in the configurator so you can picture the final ensemble.
Customisation and Pricing Tool
One of the standout features is instant price feedback. As you adjust dimensions or select premium finishes, the tool recalculates costs on the spot. This transparency helps you stay within budget while experimenting with various combinations. Seasonal promotions and bundle deals—such as discounted countertop packages—often appear as you configure, making it easy to spot savings opportunities.
Ordering, Shipping and Pickup
Once your design is locked in, you can opt for direct-to-home shipping or free in-store pickup at any Home Depot location. Ship-to-home orders are typically processed within two to three weeks, depending on custom options. If you choose store pickup, you’ll receive alerts when your cabinetry arrives, and Home Depot’s staff can assist with loading and transport.
Warranty, Returns and Support
Home Decorators Cabinetry backs its products with a limited lifetime warranty on cabinet boxes and doors, providing peace of mind for long-term use. Should you need to return or exchange your vanity, Home Depot’s standard return policy applies—easy online returns or drop-offs at any store within 90 days of purchase. For design questions or troubleshooting, their customer service team is reachable via phone or chat.
Unique Selling Points
- Backing of a major home-improvement retailer, ensuring accessible customer support
- Intuitive 3D configurator with live pricing updates
- Generous 90-day return policy for custom orders
- Flexible delivery options: home shipping or free store pickup
By combining retailer reliability with custom-design flexibility, Home Decorators Cabinetry makes it straightforward to build a bathroom vanity that suits your style and budget.
6. The RTA Store
For homeowners keen on tackling installation themselves, The RTA Store offers a straightforward solution: ready-to-assemble bathroom vanities that arrive at your door in flat-pack form. By cutting out labour costs and shipping fully assembled cabinets, this model delivers significant savings and swift turnaround times. Whether you need a single vanity cabinet or a bank of units for a multi-bath project, The RTA Store’s DIY-friendly approach lets you customise—and install—without the premium price tag.
Vanity Collection and Materials
The RTA Store carries a broad selection of door styles and materials to suit nearly any décor:
- Thermofoil doors in classic shaker or sleek flat-panel designs
- Moisture-resistant MDF options in painted or wood-grain finishes
- Solid-wood face-frames and drawer fronts for those who prefer natural materials
- Standard cabinet heights (32" and 36") and depths (21" and 24") with matching base and tall-boy units
This range ensures compatibility with most plumbing layouts and bathroom footprints, so you won’t need to reinvent your space—or your measurements.
Assembly Instructions and Support
Putting together an RTA vanity might seem daunting, but The RTA Store backs every order with clear, step-by-step guides:
- Detailed printed instructions included with each kit
- Online video tutorials that walk through common assembly steps
- A dedicated customer-service line for troubleshooting and part replacements
Even first-time DIYers will find the process manageable, with pre-drilled holes and labelled components simplifying each connection.
Pricing, Bulk Discounts and Shipping
One of the biggest draws of The RTA Store is transparent, competitive pricing. Individual vanity cabinets start at under CAD 400, and the more you buy, the more you save:
- Volume discounts on orders of three cabinets or more
- Periodic promotions on door-and-drawer upgrades
- Free shipping to Canadian addresses for orders above CAD 1,000
Because the cabinets ship flat, transit times are typically faster and shipping costs lower than fully assembled units.
Returns and Warranty
Flexibility doesn’t end at purchase. The RTA Store offers:
- A 15-day return window on unopened, unassembled kits
- A one-year manufacturer warranty covering material defects and hardware failures
Should you discover a damaged panel or a missing hinge, replacement parts can be shipped separately—often at no extra charge.
Unique Selling Points
- Major cost savings compared to pre-built cabinetry
- Quick delivery of flat-pack units versus traditional manufacturing timelines
- DIY-oriented support with tutorials and responsive customer service
- Bulk-order incentives ideal for multi-bathroom upgrades
Explore the full range of ready-to-assemble bathroom vanities at The RTA Store:
https://www.thertastore.com/all-home-cabinetry/bathroom-vanities/ready-to-assemble-bathroom-vanities.html
7. BathEmp
BathEmp brings custom bathroom cabinetry expertise to the heart of Toronto, focusing exclusively on bespoke vanities that suit both contemporary and classic design sensibilities. With a showroom in the Greater Toronto Area, they pride themselves on hands-on consultations and local craftsmanship—making them an ideal partner for homeowners who want a truly personalised bathroom upgrade.
Company Background
Founded by a team of design professionals passionate about elevating Toronto homes, BathEmp offers end-to-end vanity solutions—from initial concept to final installation. They’re known for combining modern manufacturing techniques with time-tested joinery, ensuring each cabinet not only looks great but also holds up to daily use in humid bathroom environments.
Style Variations and Materials
Whether you’re after the clean lines of a modern floating vanity or the warmth of a traditional freestanding piece, BathEmp covers three primary styles: modern, traditional and transitional. Their finish library includes custom paint options in every hue, alongside authentic wood-grain veneers in oak, walnut and more. Accessories such as integrated lighting valances and textured hardware add the finishing touches that make each design uniquely yours.
Customisation Process
BathEmp simplifies custom orders with a complimentary quote service. After you submit basic measurements online, their team arranges an in-home visit to confirm dimensions and discuss layout considerations. From there, designers prepare digital renderings for your review, allowing for revisions until you’re completely satisfied with the look and functionality of your vanity.
Pricing and Lead Times
Positioned in the mid-range tier, BathEmp’s vanities typically start around CAD 1,800 for single-sink models and CAD 3,500 for more elaborate double-sink configurations. Once the design is approved, production runs on an approximate eight-week timeline—striking a balance between careful craftsmanship and project deadlines.
Shipping and Installation Support
Deliveries cover the entire GTA, with sturdy packaging that protects your cabinets in transit. BathEmp also maintains a curated list of recommended installers, should you prefer professional fitting over a DIY approach. Their coordination with local trades means plumbing cut-outs and mounting brackets arrive pre-drilled and ready to secure.
Unique Selling Points
- Deep Toronto-area expertise, reflecting local design trends and space constraints
- Complimentary in-home measurement and design review services
- Mid-range pricing that balances quality materials with accessible budgets
- A design-consultation focus, ensuring every detail—from finish selection to shelf layout—matches your vision
Explore BathEmp’s custom vanity offerings and book a free quote at BathEmp Bathroom Vanities.
8. RONA Custom Bathroom Vanities with Top
RONA brings the convenience of a big-box retailer to the custom cabinetry market with its range of Custom Bathroom Vanities with integrated tops. These units combine cabinetry and countertop into a single solution, available in both single-sink and double-sink configurations. Whether you’re refreshing a small powder room or upgrading a master ensuite, RONA’s offering simplifies the search for matching finishes and dimensions.
Design and Pricing Experience
Planning your vanity is seamless thanks to RONA’s online configurator. You can choose cabinet size, sink layout and countertop style, then see a live preview and price breakdown in real time. As you adjust options—such as adding extra drawers or swapping sink styles—the tool instantly updates the total, so you can fine-tune your design to fit both space and budget.
Material and Finish Options
RONA’s custom vanities come in a variety of cabinet finishes—from classic whites and neutrals to wood-grain laminates—and coordinate with multiple countertop materials. Select from engineered quartz for its durability and low maintenance; natural stone such as granite for a premium look; or cost-effective laminate surfaces in a range of textures. Each combination is engineered for moisture resistance and complies with Health Canada’s formaldehyde emission standards for indoor air quality.
Ordering, Delivery, and Pickup
Once your design is finalised, you have the choice of home delivery or free in-store pickup. Shipping rates depend on your location and order size, with many products qualifying for flat-rate or complimentary delivery promotions. If you opt for store pickup, you’ll receive an alert when your vanity arrives at your chosen RONA location, where staff can help load it into your vehicle.
Warranty and Returns
RONA stands behind its custom cabinetry with a manufacturer warranty that covers defects in construction and finish. Should any issues arise, RONA’s standard return policy applies—allowing exchanges or refunds within a specified period, provided the product is in original condition. For post-installation concerns, in-store customer service teams can coordinate repairs or replacements.
Unique Selling Points
- The reliability and buying power of a national retailer, backed by extensive customer-service infrastructure
- Real-time configurator showing both 3D visuals and transparent pricing
- Wide selection of cabinet finishes and countertop materials under one roof
- Flexible delivery options with frequent shipping promotions
Explore RONA’s Custom Bathroom Vanities with Top and build your ideal unit at the RONA website: https://www.rona.ca/en/bathroom/vanities-and-medicine-cabinets/vanities-with-top-/custom--54cb7
9. Classic Woodworking & Vanity
Classic Woodworking & Vanity brings artisanal flair to custom bathroom cabinetry with a focus on fine joinery and durable finishes. Based in Ontario, this boutique cabinetmaker combines age-old woodworking techniques with contemporary design sensibilities, ensuring each piece is both beautiful and built to last. Their small-batch production model means every cabinet receives meticulous attention—from selecting kiln-dried hardwoods to hand-rubbing low-VOC varnishes that align with Health Canada’s indoor air quality standards.
Product Range
Classic Woodworking & Vanity offers a spectrum of solid-wood vanities, available in both frameless and inset door styles. Whether you lean toward sleek flat panels or the character of raised mouldings, their portfolio includes shaker, raised-panel and bespoke profile options. To enhance architectural interest, you can add integrated accessories such as light valances, fluted columns and pilaster trims—perfect for matching existing millwork or creating a focal point.
Customisation and Consultation
Your journey begins with a design consultation, either virtually or at their Ontario workshop. During this session, a craftsman will review your layout, storage requirements and aesthetic preferences, drawing on National Building Code of Canada 2020 moisture-control guidelines to recommend optimal materials. You’ll receive detailed renderings and actual finish samples before production, so there are no surprises when it’s time to green-light fabrication.
Pricing, Lead Times and Delivery
Every project is uniquely priced to reflect your choices of wood species, hardware and decorative details. Typical lead times run around 12 weeks, allowing for precise joinery and multi-stage finishing. Deliveries cover southern Ontario, with climate-controlled transport options that safeguard your cabinetry from humidity swings during transit.
Unique Selling Points
- Handcrafted, small-batch production with a commitment to lasting quality
- Wide selection of solid-hardwood species and custom door profiles
- Architectural accessories included—light valances, columns and pilasters
- Low-VOC finishes and compliance with Canadian moisture-control standards
Discover the handcrafted elegance of Classic Woodworking & Vanity and request your bespoke quote at https://www.classicwoodworking.net/.
10. 1BENMU Custom Bathroom Vanities & Cabinets
1BENMU is a digital-first supplier specialising in custom wood bathroom cabinets. Catering to both Canadian and international clients, they’ve streamlined the path from concept to installation with a fully online platform. Whether you’re in a major city or a remote town, 1BENMU brings bespoke vanities within reach without compromising on craftsmanship.
Style and Installation Options
From statement freestanding pieces to space-saving floating units, 1BENMU covers the spectrum of installation styles. Freestanding vanities offer a timeless, furniture-like appeal. Floating models create a light, airy feel by opening up floor space. Wall-integrated cabinets, meanwhile, deliver a sleek, built-in look that blends seamlessly with tile and wall finishes.
Customisation Details
Every dimension—width, depth and height—can be specified down to the centimetre, ensuring a perfect fit. The finish palette spans crisp whites, neutral greys and a range of authentic wood grains. Hardware choices include minimalist bar pulls in brushed nickel and decorative knobs in matte black, so you can coordinate details with your faucet, lighting and accessories.
Ordering Process and Support
An intuitive online quoting tool guides you step by step: enter your measurements, select styles and instantly review a detailed cost breakdown. Should questions arise—about plumbing clearances, finish care or installation techniques—a responsive customer-service team is available by phone or email to provide expert advice and troubleshooting.
Pricing, Shipping and Returns
1BENMU’s transparent pricing model means you see exactly how each custom choice influences the final cost. They offer flat-rate or complimentary shipping promotions based on order size and destination, with global delivery options that support projects anywhere. If a return becomes necessary, clear guidelines on return windows and restocking procedures ensure a hassle-free experience.
Unique Selling Points
By operating exclusively online, 1BENMU keeps overheads low and passes those savings on to customers—without sacrificing custom-fit flexibility or material quality. Their international shipping network and proactive design support make them an ideal partner for projects that span regions or require remote coordination.
Discover the full range of bespoke options at 1BENMU Custom Bathroom Vanities & Cabinets.
Final Thoughts: Starting Your Custom Bathroom Cabinetry Project
Choosing the right custom bathroom cabinetry is about balancing style, functionality and peace of mind. Think through your must-haves—door style, hardware finish and countertop material—alongside practical factors such as budget, lead times and warranty coverage. Don’t forget to check that each provider meets Canadian health and safety benchmarks, from the National Building Code’s moisture-control guidelines to Health Canada’s low-VOC and formaldehyde standards.
As you compare offerings, consider how each company’s design tools, pricing transparency and support network align with your needs. Some homeowners appreciate the 3D configurators and virtual consultations offered by large retailers and dealer-based brands, while others prefer the crafted precision of a boutique cabinetmaker. Review lead times, shipping arrangements and return policies side by side to ensure your project stays on schedule and within budget.
If you’re after a cost-effective, lower-commitment route, explore The Door Maker’s DIY cabinet refacing solutions. With fully custom doors, a wide selection of edge profiles and over 130 thermofoil finishes, you can revamp existing cabinetry without a full tear-out. Their intuitive Build a Door tool and step-by-step tutorials guide you through measurement, design and installation—helping you achieve a fresh, high-end look in a fraction of the time.
Ready to refresh your bathroom on your own terms? Browse the full product range and start your refacing project at The Door Maker.
May 11 2025 BY David Adrian, Blog
When it comes to home improvement, one big decision is whether to do a project yourself or hire a contractor. Both options have good and bad points. The best choice depends on factors like your skill level, budget, and project size. In this article, we will discuss key factors. These will help you decide whether to do home projects yourself or hire a contractor.
Understanding the Scope of Your Project
Before diving into a project, it's crucial to understand its scope. The difficulty of the task will often decide if it's good for DIY or if a professional is needed.
Assessing Complexity
Some projects, like painting a room or installing shelves, are relatively straightforward and perfect for DIY enthusiasts. These tasks typically involve basic skills and can be completed with minimal tools, making them accessible for most homeowners. However, tasks like electrical work, plumbing, or structural changes usually need special skills. It is best to leave these jobs to contractors. These complex projects require technical skills. They also have higher risks if something goes wrong, which can affect your home's safety and function.
Project Size and Impact
The size and impact of a project can also influence your decision. Smaller projects, like putting in a new light fixture or changing cabinet handles, have a small impact. They are also less risky, which makes them good for DIY. In contrast, larger projects like kitchen remodels or roof replacements can significantly affect your home's usability and value. These often require detailed planning and coordination, which professional contractors are adept at handling.
Permits and Regulations
Understanding local building codes and regulations is vital, especially for projects that may require permits. DIY enthusiasts may overlook this aspect, leading to potential legal issues down the line. Contractors are usually well-versed in local regulations and can ensure that your project complies with all necessary codes. This expertise not only saves you from potential fines but also ensures that your project is safe and up to standard.
Weighing the Costs
Cost is often a primary consideration when deciding between DIY and hiring a contractor. While doing it yourself may seem like a way to save money, there are other financial aspects to consider.
Material and Tool Expenses
For DIY projects, you will need to purchase all necessary materials and tools, which can add up quickly. The initial outlay for tools can be significant, especially if you need specialized equipment. Contractors often get discounts on materials when buying in bulk. They also own professional tools, which can lower costs. This can result in lower expenses for the same materials and more efficient work, thanks to the tools they have on hand.
Labor Costs vs. Time Investment
While DIY can save on labor costs, it's important to consider the value of your time. Projects can take longer when done solo, particularly if you're learning as you go. Contractors offer a team of skilled workers. They can finish tasks quickly, saving you time. This lets you focus on other responsibilities. This efficiency is very helpful if the project disrupts your daily life. It is also important if you need the work done by a certain deadline.
Hidden Costs and Contingencies
DIY projects often come with hidden costs that can surprise novice renovators. These might include unexpected repairs or additional materials needed due to mistakes. Contractors often expect possible problems and add extra costs in their quotes. This gives a clearer view of the total price. Their experience also helps minimize surprises, ensuring the project stays within budget and on schedule.
Evaluating Skill Level
Your personal skill level is a crucial factor. Understanding your capabilities can prevent costly mistakes and ensure the safety of your home.
Skills and Experience
If you have experience in home renovation and feel confident in your abilities, DIY might be a viable option. Past projects can serve as a good indicator of what you're capable of handling. If the project needs skills you don't have, it's smart to talk to or hire a contractor. This can help you avoid problems. Knowing your limits helps protect your investment. It also makes sure the work is done to a professional standard.
Learning Curve
DIY projects often come with a learning curve. If you're up for the challenge and have the time to learn new skills, it can be rewarding. This process can enhance your understanding of home maintenance and increase your confidence for future projects. If the project is urgent or you don't want to try and fail, hiring a contractor is a better choice. Contractors bring a wealth of knowledge and experience, eliminating the learning curve and ensuring efficient project execution.
Safety and Risk Management
Assessing your ability to manage safety risks is essential. Projects involving electricity, plumbing, or heavy lifting can be hazardous if not handled correctly. Contractors are trained to follow safety protocols and use protective equipment, minimizing risks to themselves and your property. If you are unsure about doing a task safely, hiring a professional can help prevent accidents. They can also make sure you follow safety rules.
Considering Quality and Safety
Quality and safety should never be compromised in home improvement. Understanding the risks involved and ensuring a high standard of work is essential.
Ensuring Quality
Contractors bring professional expertise and are more likely to deliver high-quality results. Their experience allows them to identify potential issues early and address them before they become major problems. If the project involves important aspects, such as structural integrity, it is best to hire a professional. This ensures the job is done correctly the first time. This not only enhances the longevity of the work but also adds value to your home.
Safety Concerns
Certain projects pose safety risks, especially those involving electricity or heavy construction. Mistakes in these areas can lead to serious injury or damage to your home. If there's any doubt about safety, it's best to hire a contractor who is trained to handle such risks. They are equipped with the knowledge and tools to perform the work safely, giving you peace of mind.
Long-term Durability
The longevity of your home improvement project is another consideration. Professional contractors use good materials and follow best practices. This ensures that your project lasts a long time. DIY projects, while satisfying, may lack this level of durability if not executed with the same level of expertise. Investing in professional services can provide long-term benefits, reducing the need for future repairs or replacements.
Time vs. Convenience
Balancing time and convenience is another important consideration. DIY projects can offer flexibility but may lack the convenience of professional services.
Flexibility of DIY
DIY projects allow you to work at your own pace and schedule. This flexibility can be appealing if you enjoy working on home improvements as a hobby. It allows you to pause and resume work as needed, accommodating your lifestyle and commitments. However, this trade-off often means a longer time to finish. This may not be ideal if you want to enjoy the final product soon or if the project is important for your home.
Convenience of Hiring a Contractor
Hiring a contractor provides convenience and efficiency. Professionals manage the project timeline, supply materials, and coordinate labor, freeing you from these responsibilities. This can be particularly advantageous for larger projects or if you have a busy lifestyle. They can make the process easier. This helps finish the project quickly, so you can enjoy the results sooner.
Managing Stress and Expectations
Taking on a home improvement project can be stressful, especially if unexpected challenges arise. Contractors are experienced in managing these stressors, providing solutions and maintaining progress. Their help eases your workload. This lets you enjoy the change instead of worrying about the details. This can lead to a more satisfying experience and a better end result.
Making Your Decision
Ultimately, the decision between DIY and hiring a contractor depends on your unique situation. Consider the project's complexity, your skill level, budget, and the importance of quality and safety.
Tips for Deciding
- Start Small: If you're new to DIY, start with smaller projects to build your skills before tackling more significant tasks. This approach allows you to gain confidence and experience without overwhelming yourself.
- Get Multiple Quotes: When considering contractors, obtain quotes from multiple professionals to compare services and costs. This ensures you get the best value and can make an informed choice based on your budget and expectations.
- Research: Look into the experiences of others who have completed similar projects to inform your decision. Online forums, reviews, and testimonials can provide valuable insights into potential challenges and success stories, helping you set realistic expectations.
Weighing Pros and Cons
Consider creating a list of pros and cons for both DIY and hiring a contractor. This visual comparison can clarify your priorities and highlight the option that aligns best with your goals. Don't forget to consider intangible benefits. These include the joy of finishing a project on your own and the comfort that comes from expert help.
Conclusion
Choosing between DIY and hiring contractors involves careful consideration of various factors. By looking at the scope, cost, skills, quality, and time, you can make a smart choice. This will help ensure your home improvement project is successful. You can either do it yourself or hire someone to help. The key is to ensure the result meets your expectations. It should also improve your home. Embrace the journey, and enjoy the transformation of your home into a place that reflects your style and meets your needs.
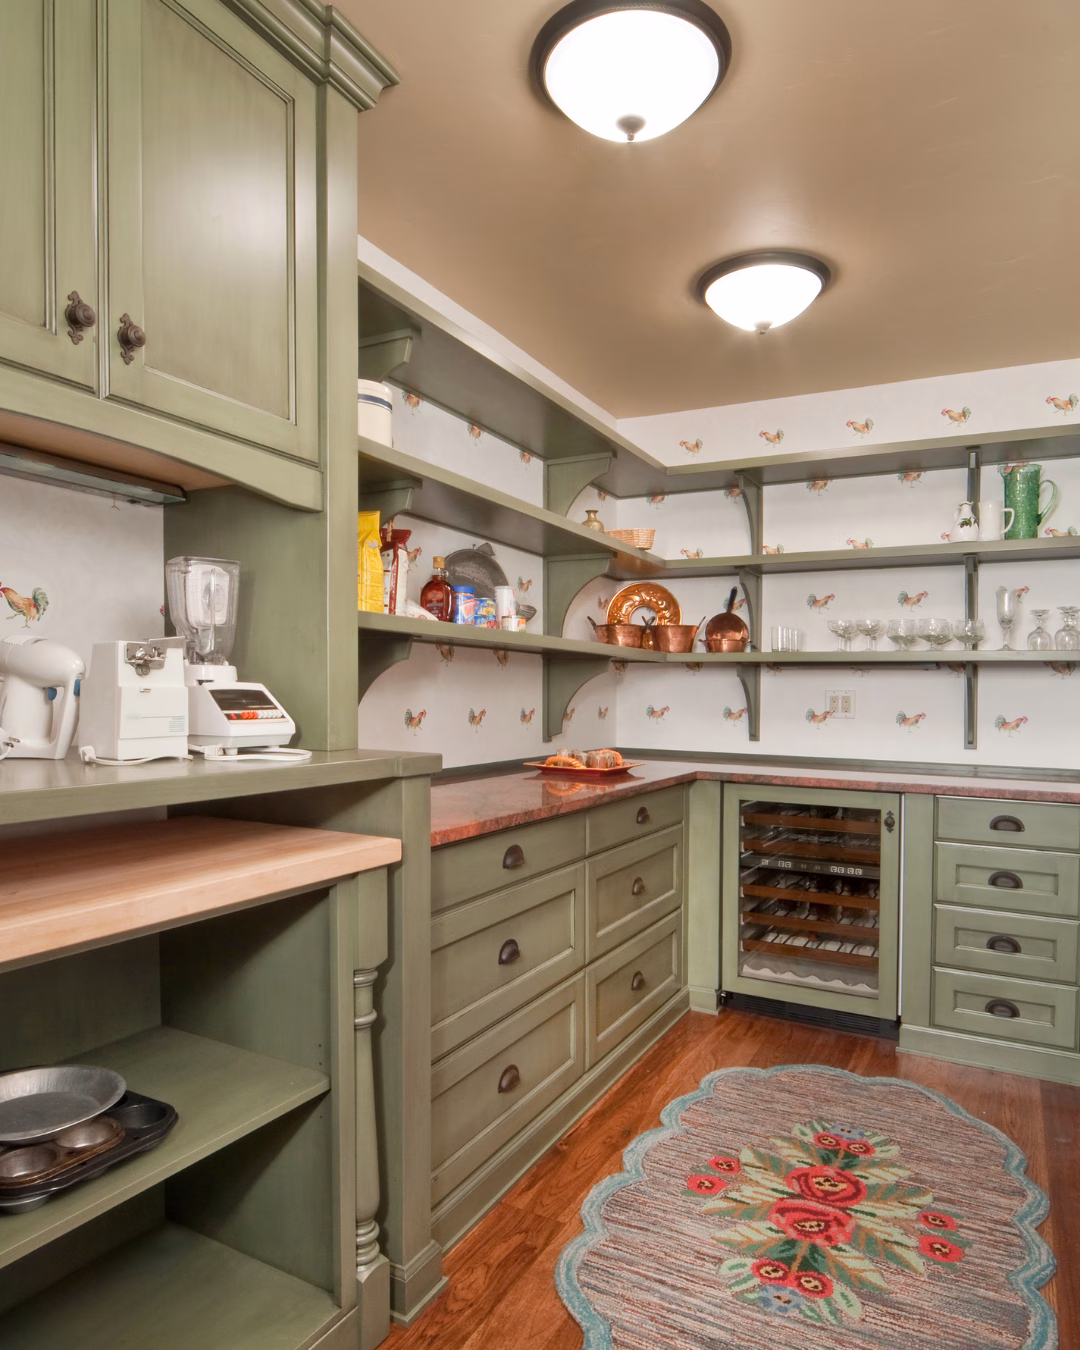
Mar 31 2025 BY David Adrian, Blog
Are you dreaming of a kitchen makeover but concerned about the time, cost, and effort involved? Transforming your kitchen doesn't have to be overwhelming or expensive. One of the most effective and budget-friendly kitchen renovation ideas is to replace kitchen cabinet doors. This simple change can breathe new life into your space, offering a fresh aesthetic without the need for a full renovation.
In this article, we'll explore the benefits of replacing cabinet doors, discuss various styles and materials to consider, and provide a step-by-step guide to help you through the process. Whether you're looking for a sleek modern look or a classic touch, new cabinet doors can be the key to your kitchen transformation.
Why Replace Kitchen Cabinet Doors?
Replacing cabinet doors is an excellent way to update your kitchen's appearance without the hassle of a complete remodel. Here are some compelling reasons why this option might be right for you:
Cost-Effective Renovation
A full kitchen renovation can be costly and time-consuming. By choosing to replace only the cabinet doors, you can achieve a fresh look at a fraction of the cost. This approach allows you to allocate your budget to other aspects of your home or save money for future projects.
Quick and Easy Update
Unlike a full kitchen remodel, replacing cabinet doors is a relatively quick process. It often requires minimal disruption to your daily routine and can be completed in just a few days. You'll be able to enjoy your updated kitchen without the long wait associated with more extensive renovations.
Endless Design Possibilities
Replacing your cabinet doors gives you the opportunity to explore endless design possibilities. From sleek, modern designs to rustic, traditional options, there's a style to suit every taste and decor. Custom cabinet doors can also be tailored to your exact preferences, ensuring a perfect fit for your kitchen.
Choosing the Right Cabinet Doors
When it comes to selecting new cabinet doors, there are several factors to consider. Here's a breakdown of the key elements to help you make the right choice:
Materials
The material of your cabinet doors plays a crucial role in both the appearance and durability of your kitchen. Common materials include:
- Wood: Offers a classic and warm look, available in various finishes. $$$$ in cost.
- MDF (Medium-Density Fiberboard): Provides a smooth finish, ideal for painted doors. $ in cost and your DIY abilities.
- Laminate: Durable and easy to clean, available in a variety of colors and patterns. Straightforward designs no customization.
- Glass: Adds a touch of elegance and allows you to showcase your dishware. Hard to keep clean and streak-free.
Styles
Cabinet door styles can dramatically change the look of your kitchen. Consider these popular options:
- Shaker: Known for its simple and clean lines, suitable for both modern and traditional kitchens.
- Flat-Panel: Offers a sleek, contemporary look with minimal detailing.
- Raised-Panel: Features detailed designs, adding depth and character to your kitchen.
- Beadboard: Provides a charming, cottage-like feel with vertical paneling.
Finishes
The finish of your cabinet doors can enhance their appearance and complement your kitchen's decor. Some popular finishes include:
- Painted: Offers a vibrant and customizable color palette.
- Stained: Highlights the natural beauty of wood grain.
- Glazed: Adds a subtle sheen and accentuates door details.
- Distressed: Creates a vintage, weathered look.
Step-by-Step Guide to Replacing Cabinet Doors
Replacing your cabinet doors can be a straightforward process if you follow these steps:
Step 1: Measure Your Existing Cabinet Doors
Accurate measurements are essential to ensure a perfect fit for your new doors. Measure the height, width, and depth of each door, and note any variations in size.
Step 2: Choose Your Materials and Style
Based on your preferences and budget, select the materials, style, and finish for your new cabinet doors. Consider ordering samples to visualize how they will look in your kitchen.
Step 3: Order Your Custom Cabinet Doors
Once you've made your selections, order your custom cabinet doors from a reputable supplier. Ensure that all measurements and specifications are correct before finalizing your order.
Step 4: Remove Old Cabinet Doors
Carefully remove the existing cabinet doors, hinges, and hardware. Keep the hardware if you plan to reuse it with the new doors.
Step 5: Install New Cabinet Doors
Attach the new doors to the cabinets using the appropriate hinges and hardware. Adjust the alignment and ensure that all doors open and close smoothly.
Step 6: Add Finishing Touches
Install any additional features, such as new handles or knobs, to complete the look. Consider adding soft-close hinges for a touch of luxury and convenience.
Conclusion
Replacing your kitchen cabinet doors is a simple yet impactful way to revitalize your space. With a wide range of materials, styles, and finishes to choose from, you can create a kitchen that reflects your personal taste and enhances your home's overall aesthetic.
Whether you're updating a few doors or your entire kitchen, this cost-effective renovation idea can transform your cooking and dining area. Embrace the opportunity to refresh your kitchen with new cabinet doors and enjoy a beautiful, functional space for years to come.
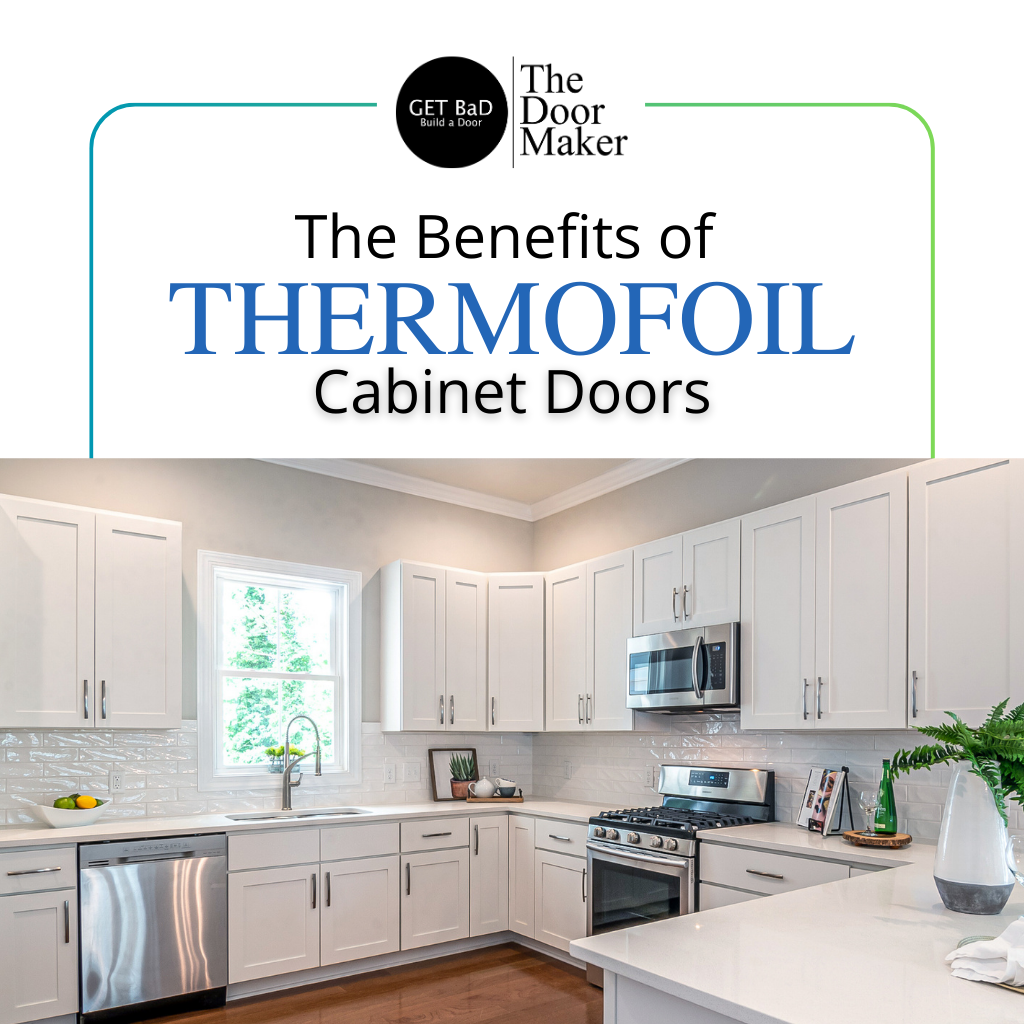
Oct 4 2024 BY David Adrian, Blog
Durable, Affordable, and Low-Maintenance (to name a few)
When upgrading your kitchen, Thermofoil cabinet doors are a popular choice for homeowners seeking a combination of durability, affordability, and easy maintenance. Whether refacing an old kitchen or building a new one, Thermofoil-sealed doors offer several advantages making them a smart investment. Here’s why:
1. Durable and Long-Lasting
Thermofoil cabinet doors are known for their exceptional durability. The PVC covering is resistant to scratches, dents, and cuts, providing a practical choice for busy kitchens. Whether you have kids, pets, or everyday wear and tear, Thermofoil cabinets hold up well over time and maintain their pristine appearance.
2. Moisture and Warp Resistant
Another standout feature is their moisture resistance. The vacuum-sealed PVC finish helps prevent moisture from seeping into the cabinet doors and drawer fronts. This provides an ideal solution for kitchen environments where humidity and spills are common. Unlike wood, Thermofoil doors will not warp or crack over time due to water exposure. They will maintain their shape and structure for years.
3. UV Resistant – No Fading
Unlike painted wood or laminate surfaces, the PVC material used in Thermofoil cabinet products does not fade or change color when exposed to sunlight. This UV resistance ensures that your custom cabinet doors will stay vibrant and beautiful, even in kitchens with lots of natural light.
4. Easy to Maintain
Cleaning and maintaining Thermofoil cabinet doors could not be simpler. All you need is a soft cloth, soap and water, or a common household cleaner. Easily wipe away dirt and grime without worrying about damaging the finish. Their low-maintenance nature makes them perfect for anyone who wants to spend less time cleaning and more time enjoying their kitchen.
5. Affordable
Because of the efficient manufacturing process, Thermofoil doors are a lower cost than traditional wood doors, while still offering a high-end look. The streamlined production and ease of customization mean you get a top-quality product at a fraction of the price. Allowing you to upgrade your kitchen without breaking the bank.
6. Easy to Replace
Custom cabinet doors with a Thermofoil finish are easy to replace. If you ever need a replacement cabinet door, the streamlined production process allows for exact replicas to be made. This means you can order a cabinet replacement that matches your existing doors perfectly and without any hassle.
7. Solid, One-Piece Construction
Thermofoil doors are constructed as a single solid piece, eliminating the risk of joint failure common with traditional wood doors. The absence of seams or joints increases their strength, giving the doors a sleek, modern look that many homeowners love.
8. Extended Warranty for Peace of Mind
Enjoy the security of cabinet doors with a longer warranty. The Door Maker offers a 10-year warranty on all Thermofoil doors, far surpassing the typical 1- to 2-year coverage applied to most wood doors. This extended warranty provides peace of mind, knowing your investment is protected for a decade. The durability and resilience of Thermofoil doors, combined with this extensive warranty, make them an unbeatable option for anyone planning to upgrade with custom Thermofoil cabinetry.
When you are ready to upgrade your kitchen, bathroom, laundry, or any room in your home or office with durable, stylish Thermofoil cabinet doors, The Door Maker has everything you need. With over 30 styles and 130 colors, you can customize the perfect look for your space. Use the Build a Door tool to get started today!
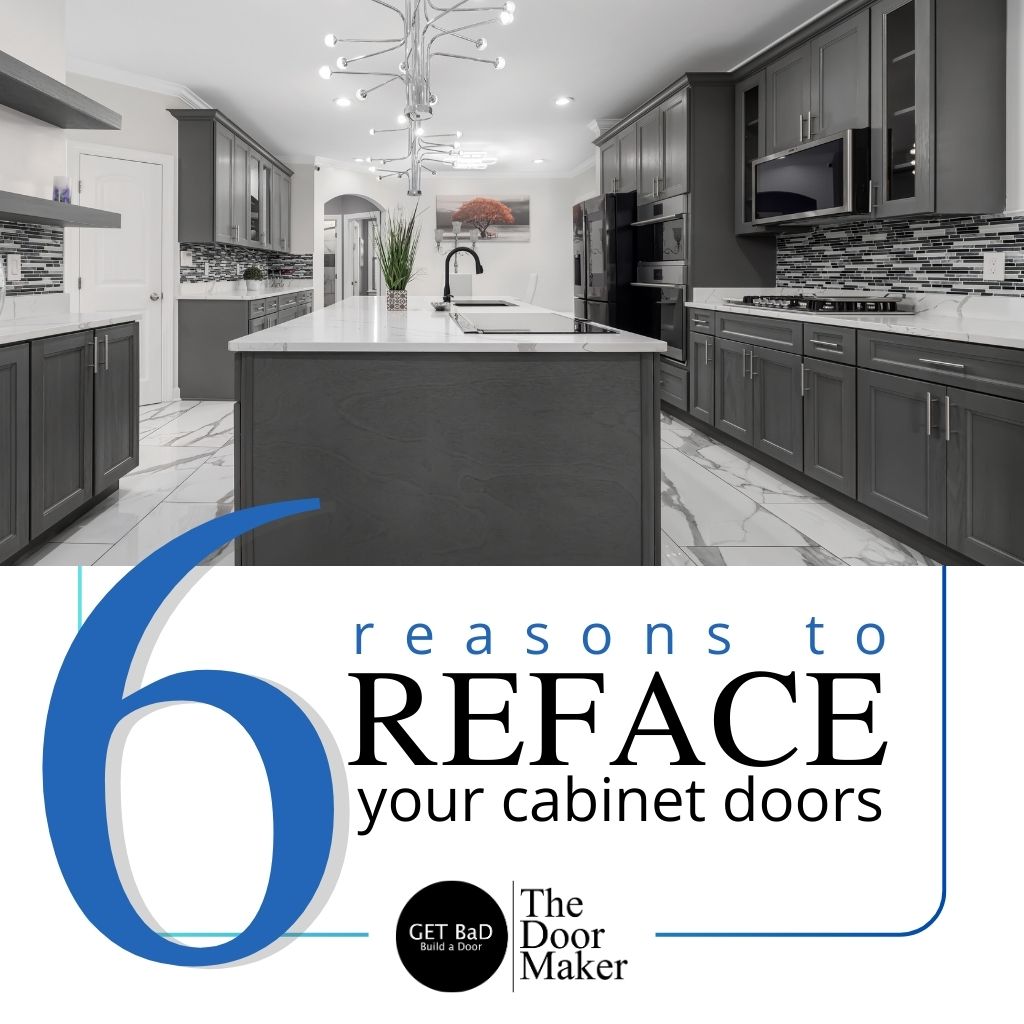
Aug 26 2024 BY David Adrian, Blog
Why DIY Kitchen Refacing Is the Smarter Choice Over a Full Renovation
A full kitchen renovation may sound like an appealing solution to giving your space a fresh look. But while wielding a sledgehammer and gutting your entire room may sound like fun, converting your kitchen into a dust-filled construction zone is not always necessary. The more convenient, cost-effective, and less intrusive option is a DIY kitchen refacing. Let us tell you why, and more importantly how, you should get started with a modern kitchen mini-makeover.
1. Cost-Effective Solution
A full kitchen renovation is expensive. Between labor costs for removal, building and installation, materials, and the unexpected expenses that inevitably arise, you can easily spend tens of thousands of dollars.
On the other hand, kitchen refacing allows you to achieve a stunning transformation at a fraction of the cost. By reusing your existing cabinet frames and simply replacing the cabinet doors and drawer fronts, you save money while still achieving a dramatic update.
Pro Tips:
- - Our custom cabinet doors can be fully wrapped in the color of your choice. This means you can have the color of the back or inside of the door, matched to the color of the door front. This option is available on all door panels in any of our 130+ PVC colors.
- - All our cabinet doors and drawer fronts are easy to care and maintain.
- - Finish the interior of your drawers with bold, dramatic liners for added appeal.
2. Minimal Downtime
A full renovation could leave you without a functional kitchen for weeks. Limited to no access to appliances or counter space, can hinder your ability to prepare meals. Having to dine out, or rely on takeout, can quickly become costly and may be unhealthy.
With DIY kitchen refacing, you can keep your kitchen operational throughout the process. You will still have access to your stove, sink, and other essentials, allowing you to maintain your routine without interruption.
3. Work at Your Own Pace
One of the biggest advantages of DIY refacing is the ability to work at your own pace. Whether you want to tackle the project in a single weekend or spread it out over a few weeks, the choice is entirely yours. This flexibility makes it easier to fit the project into your schedule without the pressure or financial penalty of a contractor’s timeline.
4. Less Mess and Hassle
Renovations are a messy, disruptive process. With contractors coming in and out of your home, tracking dust and dirt, your entire space can feel like a construction zone. Reduced air quality due to lingering sawdust may impact respiratory comfort and agitate allergies.
Refacing, on the other hand, involves minimal mess. Since you are only replacing the cabinet doors and drawer fronts, there is no need to worry about demolition debris or extensive clean-up.
5. Privacy and Comfort
Giving strangers access to your home for days or weeks at a time can be uncomfortable, especially if you have pets who are disturbed by new faces. By opting for DIY refacing, you avoid the inconvenience of having contractors in your home, keeping your space private and peaceful.
6. Complete Control Over Design Choices
When you reface your kitchen yourself, you have complete control over every aspect of the design. Want to try a bold color for your cabinet doors? Prefer a specific style of hardware? The choices are entirely yours, allowing you to customize your kitchen to perfectly match your vision.
Pro Tips:
- From Mullions and Frames, and Multiple Panels, to Wine Racks, explore our product categories for additional customized cabinetry solutions and upgrade your space.
- All TDM products are available with several options including multiple panel profiles, styles, edges, and over 130 colors in matte, textured, and high gloss finishes.
When you are ready to start your DIY kitchen refacing project, The Door Maker has everything you need. Explore our range of door profiles for custom cabinet door replacement, including flat, raised, and shaker doors, to build the perfect match for your DIY project. Ideal for kitchen cupboard doors, our collection of more than 30,000 combinable options will give your kitchen, or bathroom, or even your media room, a whole new look you can install yourself.
Select from more than 30 panel styles, 10 edge profiles, and 130 thermofoil colors and finishes to create the perfect match for your perfect kitchen refacing project.
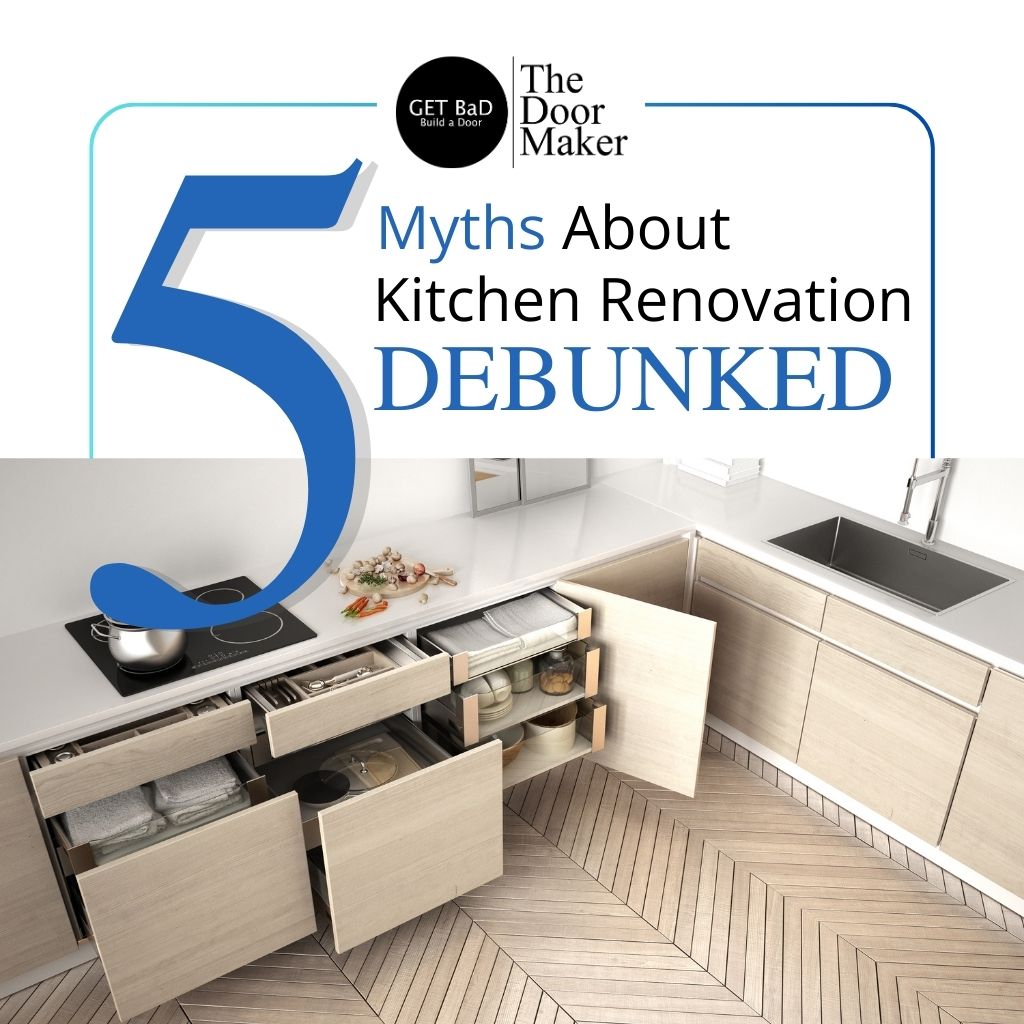
Jun 13 2024 BY superuser, Blog
There are many reasons preventing homeowners from fully renovating their kitchens. Some of these are justified; for example, you may need a place to move to during the renovation, which can be expensive, intrusive, and inconvenient. But others are simply myths perpetuated by others who had their own kitchen renovations go sideways. This blog will debunk some of the most common kitchen renovation myths to help you move forward with your kitchen renovation project.
Common Myths Surrounding Kitchen Renovations
Myth 1: Kitchen Renovations Are Too Expensive
Any home renovation project requires a certain amount of money to be invested. Experienced homeowners know that the kitchen is the single most expensive and labor-intensive room to renovate. Installing new kitchen cabinet replacement doors, buying modern appliances, and replacing the flooring can all cost a pretty penny. The truth is, your kitchen update is a worthwhile investment as the kitchen is usually the primary place where the family gathers and memories are made. A fresh look can be achieved by simply refacing your cabinet doors and drawer fronts if a full renovation is not an option at this time.
Myth 2: You Can’t DIY a Kitchen Renovation Project
Can I really do a kitchen renovation by myself? The answer to this question depends on the scale of the renovation. If your project involves redesigning the entire kitchen layout, installing new cabinetry boxes, replacing the countertops and the backsplash, or repurposing your dining room into an extended kitchen, consider hiring professionals.
If you simply want to update your kitchen cabinet facades and hardware, installing kitchen cabinet replacement doors will help you achieve the fresh look you want. Watching a few videos on how to install kitchen cabinet doors will also help you nail your kitchen cabinet refacing project.
Myth 3: Buying Supplies From Big Box Stores Is More Affordable
People revert to big retailers like Home Depot, Walmart, and Lowe’s for their kitchen renovation needs. They believe these options are affordable and offer flexible return and exchange options. The truth is, however, online businesses like The Door Maker can offer the same or higher levels of service, competitive pricing, and as an added bonus, with TDM you can customize your cabinet doors and drawer fronts to perfectly fit your existing cabinetry, decor style, and color palate. Our team will go above and beyond to ensure your complete satisfaction.
And did you know we offer custom doors specifically designed for IKEA kitchen cabinets? Whether you need new or replacement cabinet doors, we provide a helpful size guide to assist you in matching the door sizes with your existing IKEA cabinets.
Myth 4: Only Trendy Kitchen Designs Add Value to Your Home
Some people have a misconception that the trendier their kitchen the more value it adds to their home. While it is true that selling a house with a recently renovated kitchen is an opportunity to make a profit, it is important to note that it is not only about the kitchen’s visual appeal. A kitchen must also be functional to add to the value of a home.
Consider adding features for improved functionality such as extra-large drawers for pots or small appliances, Lazy Susans to utilize corner spaces, and soft-closing Blum hinges for your cabinet doors.
Check our helpful video tutorials and learn how to install hinges on regular cabinet doors and piano hinges on Lazy Susan cabinet doors. Request pre-drilled hinge holes in your TDM custom cabinet doors for easy installation.
Myth 5: You Need a Complete Kitchen Overhaul
No. Your kitchen upgrade can be anything from a simple cabinet door replacement to a full plumbing and electrical overhaul. Many homeowners opt for simple do-it-yourself cabinet refacing when updating their kitchens. This is because your old cabinet boxes or frames are still in decent condition and all you need to do is update the facade and the hardware. In these situations, it is important to find reliable cabinet door suppliers for your quality replacement MDF cabinet doors. You’ve come to the right place.
Choose The Door Maker For Your Kitchen Renovation Project
If you are looking for MDF cabinet doors for your do-it-yourself cabinet refacing project, look no further. The Door Maker offers high-quality thermofoil cabinet doors at competitive prices. With our wide range of customization options, rest assured you can Build a Door that’s perfect for your kitchen upgrade project. Contact us today to learn more about our products or browse our collection of MDF cabinet doors.
May 18 2023 BY superuser, Blog
Cleaning Thermofoil Cabinets and Cabinet Doors
Thermofoil is known as a thin layer of PVC glued to the surface of an MDF panel. It is popular for the uniformity and simplicity of its finish. Uniformity is also what makes thermofoil cabinet doors and cabinets easy to clean. Here are a few tips on how to clean thermofoil cabinets and cabinet doors:- Use a standard all-purpose scrub-free cleaner or a simple water and soap mixture to clean your thermofoil cabinets and cabinet doors.
- Avoid using cleaning solutions which contain harsh chemicals such as lacquer, thinners, bleaches, solvents or abrasives. Stay away from cleaners with toluene or acetone.
- Avoid spraying the cleaning solution onto the surface of thermofoil cabinets and cabinet doors directly. Instead, spray it onto a paper towel or a clean cloth and wipe down the cabinets and doors. Ensure the paper towel/cloth is damp but not dripping wet. This way, you won’t have to deal with excessive residue from the cleaning solution.
- If there’s residue left from the cleaning solution, give the cabinets a final wipe-down with a damp cloth or paper towel.
- Using a soft scrub-free cloth to clean your thermofoil cabinets and cabinet doors is important as you don’t want to damage the surface. If you have to clean grease stains, use a degreasing agent or an acetone-free nail polish remover.
How Often Should I Clean Thermofoil Cabinets and Cabinet Doors?
There’s no definitive answer to this question, as it depends on how often you use your kitchen to cook meals. Ideally, you should dust your kitchen cabinets and cabinet doors once a week to avoid dust and dirt accumulating and further building up in the corners of the cabinet doors, especially if you have shaker-style cabinets. Remember that the more often you clean your cabinets and cabinet doors, the longer they will last.General care
Aside from cleaning, there are some general care tips you should follow to ensure your thermofoil kitchen cabinets and cabinet doors last longer. They are as follows:- Never try to wax thermofoil cabinets and cabinet doors.
- Pay close attention to areas near the sink and dishwasher and wipe down any excess moisture as quickly as possible.
- Use blinds or curtains to protect thermofoil cabinets from direct and prolonged sunlight exposure, as UV rays can cause thermofoil film to fade.
- If you have mullion cabinet doors with glass inserts, be sure to wipe down the glass with an ammonia-free cleaning solution to keep the glass clear and shiny.
Conclusion
As you can see, maintaining thermofoil cabinets and cabinet doors is not difficult. By following these simple tips, you will be able to keep your kitchen cabinets as good as new and won’t have to think about replacing them for years. For more information on thermofoil cabinet door maintenance, please reach out to us at The Door Maker. A leader in the manufacturing of custom cabinet doors in Canada, we will be happy to answer all your questions and help you find the right cabinet doors style and color for your kitchen.
May 10 2023 BY superuser, Blog
What are the most common materials used in kitchen cabinet making?
Trusting a designer with a new kitchen project is a good idea. However, taking the time to research and educate yourself on the various kitchen cabinet and door materials will help you understand what options are more suitable for your specific circumstances. So, let’s get started.Solid wood
Solid wood is a traditional choice for kitchen cabinets. It is known for its durability and long lifespan. A kitchen made of solid wood can serve you for years. Solid wood is also an environment-friendly material if sourced properly. However, wooden kitchens can be pretty costly. Another drawback of solid wood panels is their porosity. The porous nature of solid wood makes it highly susceptible to moisture and stains, meaning you’ll have to clean up spills as soon as possible to avoid the material rotting or warping.MDF
Durability and affordability make MDF the second most popular material used in kitchen cabinet manufacturing. MDF (or medium-density fiberboard) is essentially an engineered panel produced from wood fibres combined with a wax and/or resin binder and pressure-formed into the desired shape. MDF panels are denser than hardwood and provide a smooth finish which is difficult to achieve with solid wood materials. IKEA cabinet doors in Canada are mostly made of medium-density fiberboard. MDF is a great alternative over solid wood for a high-moisture area like the kitchen for its mould- and water-resistance properties. So if you are looking for an affordable solution that can withstand frequent exposure to water, MDF cabinet doors and cabinets are the way to go.High-density fiberboard
High-density fiberboard (or HDF) is another popular material used in kitchen cabinet making. It is known to be denser and more affordable than hardwood. HDF material is great for use in both humid and dry areas. However, just like wood, it is prone to water damage, so you will have to wipe all cups, dishes and cutlery dry before putting them in an HDF cabinet.Stainless steel
Stainless steel cabinets are not something you will find in an average residential kitchen, but rather in a commercial one. Bakeries, patisseries and restaurants will install stainless steel cabinets and countertops for reasons such as durability, ease of cleaning and long service life. Stainless steel kitchens are built to withstand excessive wear and tear which makes them an ideal choice for commercial kitchens. If you are hesitant about going entirely stainless steel in your kitchen, but you still want the benefit of durability, opt for stainless steel in a kitchen island or get by with a stainless steel backsplash.
Particleboard
Particleboard is probably the least expensive material you can find on the market. Made from wood chips, they are mistakenly confused with MDF and HDF panels. The manufacturing process indeed has some similarities. However, particleboard panels are not as strong and dense as MDF and HDF panels and can easily bend under the weight. Particleboard cabinets can easily crumble, so screwing anything in can be attempted only once, or else the material will fall apart. All in all, try to stay away from particleboard kitchen cabinets, even if your budget is really tight. Consider a more durable option like MDF or HDF panels instead, even if it’s more expensive.The takeaways
Choosing the best materials for kitchen cabinets shouldn’t be limited to visual considerations only. Ultimately, the purpose of your kitchen renovation project is not just to get newer-looking cabinets and countertops, but to get a kitchen that is more functional and long-lasting. Take some time to learn about different materials used in making kitchen cabinets, consider the cost, see which option can serve your purposes better and then make a decision.
Apr 21 2023 BY superuser, Blog
What Is Cabinet Replacement?
Kitchen cabinet replacement involves removing the existing cabinets completely and replacing them with new ones. Along with replacing kitchen cabinets completely, you get to choose new kitchen countertops as well as change your kitchen layout. For this reason, kitchen cabinet replacement is a more expensive option than refacing.What Is Cabinet Refacing?
Cabinet refacing is replacing the doors and drawer fronts of the cabinets without replacing the entire cabinet. Some homeowners complement it by veneering the cabinets and installing new hardware to give their kitchen a totally new look, or simply installing new hardware. Installing kitchen cabinet replacement doors is considered more cost-effective and less disruptive than replacing the entire kitchen.4 Key Differences Between Cabinet Replacement & Cabinet Refacing
While the outcome is similar in both cases, e.g. newer-looking cabinets, there are a few key differences which set cabinet replacement and cabinet refacing apart. These include:- Cabinet replacement allows you to redesign your kitchen completely. If you always wanted to have a kitchen island, complete cabinet replacement is your chance to do so. Cabinet refacing does not give you the liberty to change your kitchen layout.
- Cabinet refacing is a more affordable option that can give your kitchen a fresh look and boost your home's resale value. In addition, cabinet refacing is not as disruptive and messy as replacing the entire cabinetry.
- Cabinet replacement is best for kitchens which are falling apart or have undergone extensive wear and tear. Refacing such cabinets is not recommended for the same reason.
- Cabinet refacing is considered more environmentally friendly than complete kitchen replacement as less material goes to waste.
Can You Do It Yourself?
When it comes to planning a successful DIY kitchen renovation, both cabinet replacement and cabinet refacing require a certain degree of skill and dedication. However, do-it-yourself cabinet refacing is considered more DIY-friendly as it involves less work and does not require a great level of expertise. You can easily learn to unmount old cabinet doors and mount new ones by watching a few YouTube videos. There are companies that offer cabinet refacing services. However, expect to pay a fee for the convenience of having a professional install new kitchen cabinet replacement doors. DIYing full kitchen replacement is certainly more difficult as it is more laborious and resource-consuming than cabinet refacing. However, if a totally new kitchen is what you’re after, then complete kitchen renovation is what you should consider.The Takeaways
In closing, cabinet replacement and cabinet refacing are both viable kitchen remodelling options, although each has its own set of pros and cons. We hope this blog can serve you as a guide to the two kitchen remodelling options and help you make an informed decision.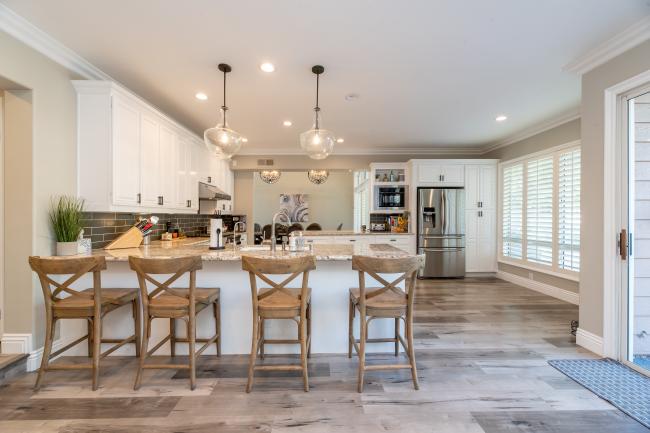
Apr 14 2023 BY superuser, Blog
 Kitchens are the heart of every home. They are where families spend time together, eat and celebrate special occasions. But not all kitchens offer that welcoming spirit. Outdated kitchens with poor lighting and lack of counter space can make you feel uninspired and not want to spend a minute more. If your kitchen is like that, you should consider a kitchen renovation. And if an unmotivating look is not convincing enough for you, here are X more reasons why kitchen renovation is the best thing you can do for your home this year.
Why Consider Kitchen Renovation?
You get a brand new kitchen you deserve
First of all, who wouldn’t love a new kitchen? Sleek marble countertops, matte-finished cabinets and modern lighting will make your morning coffee routine or breakfast with the family even more enjoyable. If you can’t afford to fully renovate, go for a more cost-effective option like installing kitchen cabinet replacement doors. Kitchen refacing will make your cabinets look as new as if you installed them from scratch.Boosted home resale value
Although some may argue here, kitchen renovation has proven to be more of an investment than an expense. With a newly renovated kitchen, you can expect a 75-100% ROI on your investment, depending on the renovation. Obviously, renovating is expensive, but not only do you get to enjoy a brand new space in your home, but you are also increasing the value of your property.Parties will become a common thing in your house
If you like to host family gatherings and parties, remodelling your kitchen will be another chance for you to show off your new mullion cabinet doors and impress your guests. After all, the kitchen is not only the place where you cook. It is also the place where your creativity and design skills can unfold. Even if you are utterly introverted and parties are not your thing, you will find yourself willing to host more parties in your newly renovated kitchen.
You get to take advantage of new technologies
Cooking recipes change rapidly, and so does technology. These days appliances not only serve as tools to help you prepare food. They also make your life a lot easier. For instance, you can get a slow cooker with a delay start feature to help you prepare meals ahead of time. Coffee makers come with built-in grinders to make the perfect coffee.The Last And Most Valid - Why not?
It is hard to find reasons why kitchen renovation is not a good idea. You get to enjoy a brand-new space in your home and show it off to your guests. And if budget is an issue, you can always opt for a partial renovation, like changing the countertops or installing kitchen cabinet replacement doors only. Regardless of how you decide to renovate your kitchen, you will not regret the results.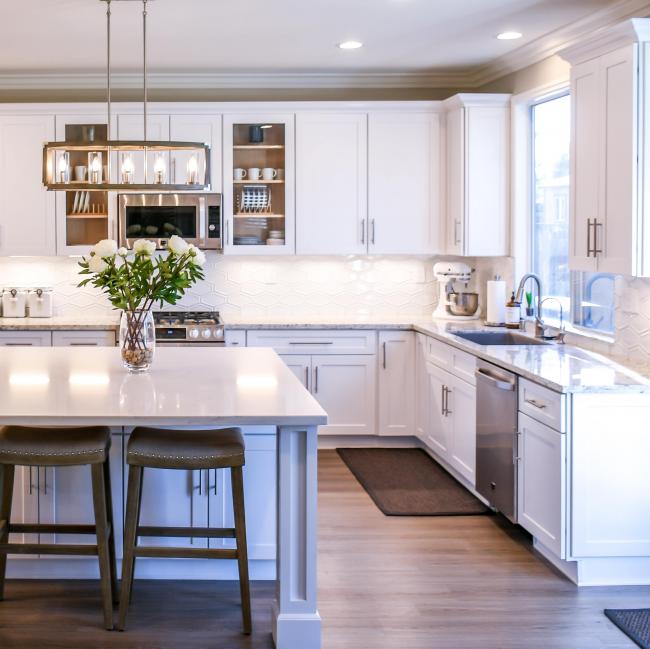
Apr 4 2023 BY superuser, Blog
Four Steps Of A Successful DIY Kitchen Renovation
1. Gather ideas & draft a sketch
Any home improvement project needs to start with drawing some inspiration, and these days, inspiration can be drawn from a wide variety of sources. Follow interior designers’ social media accounts and get inspired by their projects and designs, check some home improvement magazines, and view some kitchen renovation videos on YouTube. These will help you get a sense of what you want your new kitchen to look like, and inspire you to start sketching.2. Determine a budget and set a timeline
The next step after deciding on the design of your ideal kitchen is to estimate the cost. To establish a strong basis for your kitchen makeover budget, do some research. Setting a budget ceiling at the early stages of renovation will help you get a better idea of what to expect and how to plan your finances. Setting a timeline is also crucial when planning a kitchen renovation. The timelines vary based on a number of aspects, including the size of your kitchen, the extent of the work, and the contractor's involvement, if any. Experts predict it will take between one and three months to complete a full kitchen renovation. But if you go for a simple kitchen cabinet refacing DIY, you are looking at a 2 to 7 days timeline, depending on your previous DIY experience.3. Order samples
Kitchen cabinets are the core of any DIY kitchen renovation project. Ordering samples is the best way to picture your new kitchen cabinets. Many companies, like The Door Maker, offer swatches or even door samples that can be ordered online. Ordering samples, whether a swatch or a whole door, will allow you to experience the quality of the materials and the finish and help you with decision-making.4. Order supplies and appliances
Kitchen renovation can involve everything from installing replacement kitchen doors to replacing all kitchen cabinets and appliances. If you are going to replace your old appliances, do your research in advance. Look for the most energy-efficient appliances available and compare prices. If new appliances are not on your budget and all you want is to reface your kitchen cabinets, look for cabinet door suppliers in your area and order all the supplies you need to complete your kitchen cabinet refacing DIY. Some cabinet door suppliers sell online and offer flexible delivery rates when you order a certain amount of doors. After everything has been arranged, you can go ahead and embark upon your DIY kitchen renovation venture. Remember to leave room for the unexpected, and don’t get discouraged if things don’t go exactly as planned. With the right attitude and some creativity, you will achieve the kitchen of your dreams.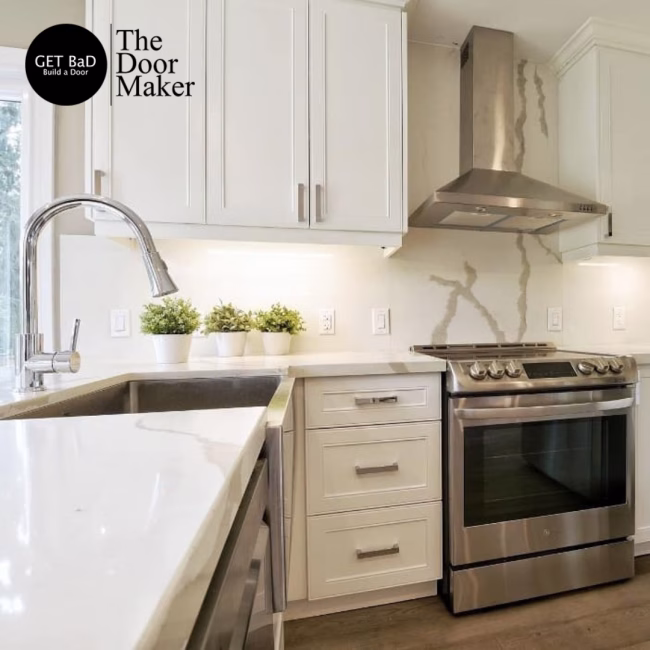
Mar 22 2023 BY superuser, Blog
How to Save Money On a Kitchen Renovation and Still Get the Kitchen of Your Dreams?
Go for butcher block countertops
Quartz and marble countertops no doubt look gorgeous with any kitchen design, but they are also the most expensive materials for countertops. To save money and still have a beautiful and practical countertop, go for the butcher-block type of countertops. They have a lower fabrication cost, so they won't be as expensive as marble or quartz and still offer a no less stylish look.Upcycle your cabinets
Cabinets upcycling has become a huge trend in the last few years. One of the most popular ways to upcycle your kitchen is to install new thermofoil cabinet doors on your cabinets. Installing kitchen cabinet replacement doors is a simple and cost-effective way to transform the look of your kitchen without breaking the bank. If you are keen on all things DIY and upcycling, you will definitely like the DIY kitchen cabinet doors idea.Backsplash
Updating just the backsplash will give your kitchen a breath of fresh air. Choose between tile patterns, vinyl film or no backsplash at all to experiment with different looks. If you go for tile backsplash, experiment with the patterns to find the one that fits your kitchen style best.Update the appliances
Sometimes, it’s not all about the kitchen cabinets or countertops. Outdated appliances that have been there since the 2000s can make your kitchen look old and tiring. If you are not ready to spend on new countertops or cabinets, consider updating the appliances. Not only will you refresh your kitchen look, but you will also make your cooking experience more enjoyable with a new and more efficient stove and oven.Conclusion
Kitchens are no longer only about storage and cooking. They are also about being a place where families and friends gather to share good food and good times. With a bit of creativity and DIY spirit, you can make your old kitchen look brand new and feel welcoming without spending a lot of money.
Mar 17 2023 BY superuser, Blog
What is cabinet refacing?
Cabinet refacing involves replacing existing doors and drawer fronts of your kitchen cabinets with new ones. If the base cabinets are in good shape and haven’t lost their colour, you can leave them as is and make do without veneer panels or painting them. If you are considering updating the colour of the base cabinets too, you can paint them with a new colour or glue a new veneer on them. The hardware (handles, drawer pulls and hinges) is normally replaced during DIY kitchen cabinet refacing too.How does DIY cabinet refacing work?
While many people think kitchen cabinet refacing is the same as cabinet renovation, in reality, it is not. Cabinet refacing primarily involves replacing the doors and drawer fronts of the kitchen cabinets with newer replacement options. The average process would look something like this:- You get precise measurements of your cabinets doors and drawer fronts. Check out this video guide on measuring kitchen cabinet doors for your DIY kitchen cabinet refacing project.
- Do your research on cabinet door suppliers and choose the one you can trust. Select the desired colour for your new cabinet replacement doors and drawer fronts and place the order.
- Remove your old cabinet doors.
- Install new hardware on the new cabinet replacement doors. This step is unnecessary if the old hinges and handles are still in good condition and you decided to keep them.
- Mount new doors and drawer fronts on the cabinets.
Where to get materials for DIY cabinet refacing?
There are multiple cabinet-refacing suppliers in Toronto, the GTA and throughout Ontario. As someone dreaming of a perfect kitchen, you want to be sure the cabinet door replacements you buy are high-quality, long-lasting and of the best possible price. You can start by researching cabinet thermofoil door suppliers online and sorting them by reviews. Next, compare the pricing and the quality of the materials, and find out if the supplier has a physical location where you can visit and ask for samples. All this will help you choose the best supplier at a reasonable price.Why Choose The Door Maker For Your DIY Kitchen Cabinet Refacing Project?
The Door Maker is the number one provider of cabinet thermofoil doors in Ontario and all across Canada. Having been in the business for over 48 years, we have gained a reputation as a reliable and trustworthy kitchen/bath cabinet doors supplier with the best quality products. Not only do our clients get to choose from a wide range of colours, door profiles and edge designs, but they also take advantage of the most affordable prices and flexible payment options. Our clients are never left to wonder about the door's design as our staff is always available to help with colour and design considerations. Our product is easy to install and gives the appearance of painted wood or finely stained natural grain cabinet doors. We are also the manufacturer of our product, so we can offer our customers the best pricing on the market. To top up our exceptional service and excellent product, we use only the latest in technology and machinery to ensure a high level of efficiency in the manufacturing process and zero carbon footprint. TDM is your go-to source for exceptional quality thermofoil cabinet doors in North America.
How much does DIY kitchen cabinet refacing cost?
According to the Home Guide, the average kitchen cabinet refacing cost is $6,518 (~ CAD 8,950). A 10′ x 12′ kitchen will cost between $4,214 and $8,110 (~ CAD 5,783 to CAD 11,130) to reface. Of course, these numbers greatly depend on aspects such as the quality of the materials, hardware, kitchen size and more. Labour costs are also important to keep in mind. If you hire kitchen refacing contractors, expect to pay between $30 to $100 per hour on top of the materials and hardware costs. But if you want to save even more money and are up for a challenge, consider a DIY option.Pros and Cons of DIY kitchen cabinet refacing
When considering DIY kitchen cabinet refacing, it is crucial to weigh all pros and cons of this venture.Why go for DIY kitchen cabinet refacing?
- Brand new kitchen cabinets for a fraction of the cost - DIYing your kitchen cabinet refacing is definitely cheaper than renovating your entire kitchen from scratch.
- No city permits are required - Since cabinet refacing doesn’t involve any major plumbing or electrical work, you don’t need to apply for any permits to reface your kitchen cabinets.
- Boosted home-resale value - With cabinet refacing, your kitchen will look as stunning as a brand new kitchen, so expect to get a higher resale value when selling your home.
- An outlet for creativity - If you are keen on all things DIY, especially those concerning home design, kitchen refacing is a great opportunity to allow your creativity to run wild.
When to stay away from DIY kitchen cabinet refacing?
- Not worth the money if cabinets are old or damaged - cheap, old plywood cabinets showing signs of wear may not be worth the effort of refacing them.
- Doesn’t help change kitchen layout and cabinet space - if kitchen layout is what bothers you more than the cabinet fronts themselves, refacing may not be the best option as it will not change the kitchen’s layout.
FAQs
Can you DIY kitchen cabinet refacing?
Yes, you can! In fact, this process is so easy that you shouldn’t even bother hiring a professional installer to complete your kitchen cabinet refacing project. All you need is ordering the right supplies and a little DIY spirit.How long do kitchen cabinet refacing projects take to complete?
Depending on the kitchen size, it could take you from a weekend to a week or two to finish a DIY kitchen cabinet refacing project. The installation time will also vary depending on your skill level. An experienced DIYer will complete the installation in less time than a novice.Is DIY cabinet refacing worth the money?
Indubitably, yes. Aside from saving you a big chunk of money, your kitchen will obtain a brand-new look without the hassle of a full remodel.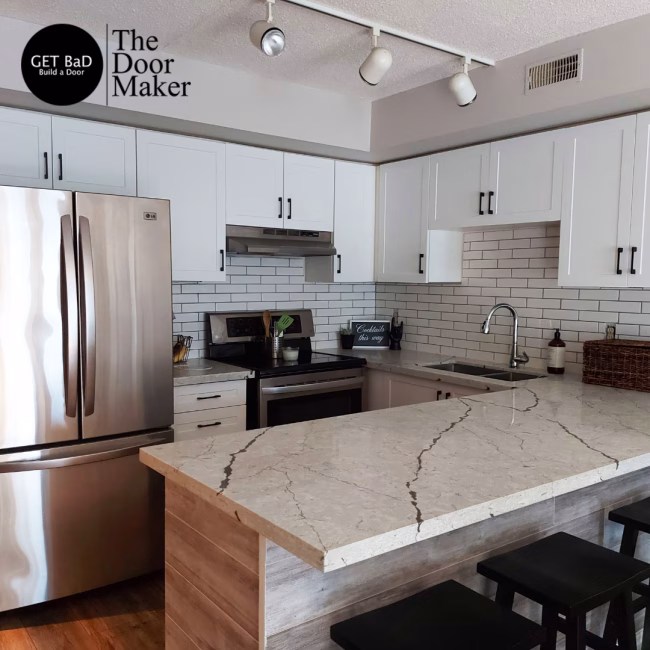
Mar 9 2023 BY superuser, Blog
Are you tired of staring at your outdated kitchen cabinets but don't want to break the bank with a full renovation? Look no further! Cabinet refacing is an affordable and stylish solution that can completely transform the look of your kitchen. From minimalist modern designs to rustic farmhouse vibes, we've rounded up five do-it-yourself cabinet refacing trends that are sure to inspire your next home improvement project. Get ready to elevate your space and impress all those dinner party guests with these must-try cabinet transformations!
5 must-follow modern DIY cabinet refacing trends
Shaker-style cabinets:
If you are looking for a way to update your kitchen cabinets without spending a fortune, cabinet refacing is a great option. Cabinet refacing involves replacing the door and drawer fronts, as well as the hardware, of your existing cabinets. This can be done by either painting or staining the cabinets, or by using new veneer or laminate to give them a fresh look. It is one of the easiest do-it-yourself cabinet refacing trends that prevail today.
One of the most popular do-it-yourself cabinet refacing trends is shaker-style cabinets. Shaker-style cabinets are characterized by their simple, clean lines and lack of ornate details. This style of cabinet is perfect for those who want a sleek and modern look for their kitchen. If you are interested in giving your kitchen a shaker-style makeover, there are a few things you will need to do. First, you will need to remove all of the doors and drawer fronts from your cabinets. Next, you will need to measure the openings for replacement doors and drawer fronts. Once you have the measurements, you can order new doors and drawer fronts from a local kitchen cabinet door manufacturer.
Once you have received your new doors and drawer fronts, it is time to install them. This is relatively easy to do, but if you are not confident in your ability to do it yourself, there are plenty of companies that offer installation services. Once your new doors and drawer fronts are installed, you can then add any hardware that you desire.
Open Shelving:
Open shelving is one of the hottest trends in do-it-yourself cabinet refacing kitchen designs right now. If you are considering a kitchen remodel, you should definitely consider this trend. Open shelving can give your kitchen a more open and airy feel, as well as make it easier to keep your kitchen organized and tidy.
There are a few things to keep in mind if you decide to go with open shelving in your kitchen. First, you will want to make sure that the items on your shelves are neatly arranged and not cluttered. You also want to be sure that the items on your shelves are ones that you use often and that are easily accessible. Finally, you will want to make sure that the shelves themselves are made of sturdy materials so they can support the weight of whatever you put on them.
Modern & Retro Knobs and Handles:
When it comes to do-it-yourself cabinet refacing there are many different trends that come and go. However, there are always certain elements that remain popular among homeowners. One of these trends is the use of modern and retro cabinet knobs and handles. There are many different styles of cabinet knobs and handles available in the market today. When it comes to choosing the right ones for your home, it is important to take into account the overall style of your kitchen or bathroom. For a more modern look, consider cabinet hardware with a sleek and simple design. If you prefer a more retro or vintage style, there are many options available with intricate details and unique finishes.
Glass Doors:
Another popular do-it-yourself cabinet refacing trend is to replace solid doors with glass doors. This gives your kitchen a more open and airy feel, and it also makes it easier to find what you’re looking for in your cabinets. If you’re not sure about committing to all glass doors, you can always start with just a few and see how you like the look. Fixing glass doors might seem difficult but it is easy if you follow the required steps.
Scandinavian Style Cabinets:
There is something about Scandinavian-style cabinets that make them perfect for a do-it-yourself cabinet refacing project. They are simple, yet elegant and can be easily transformed with a few simple changes. One of the most popular trends is to replace old cabinet doors with a white thermofoil MDF alternative . This gives your cabinets a clean and fresh look that is perfect for any kitchen. If you want to add a bit of colour, you can always add some new hardware or even change the door handles. Another popular trend is to stain the cabinets. This gives them a rich and warm look that will complement any kitchen décor.
No matter what trends you decide to follow, remember that cabinet refacing is a great way to save money and still get the kitchen of your dreams! Even though the aforementioned do-it-yourself cabinet refacing trends might seem difficult to do, they are actually not. These trends are easy to follow if you plan them accordingly and mainly, source your materials from a trusted supplier.
Hope these 5 unmissable do-it-yourself cabinet refacing trends help you transform your kitchen into an open and lively space.
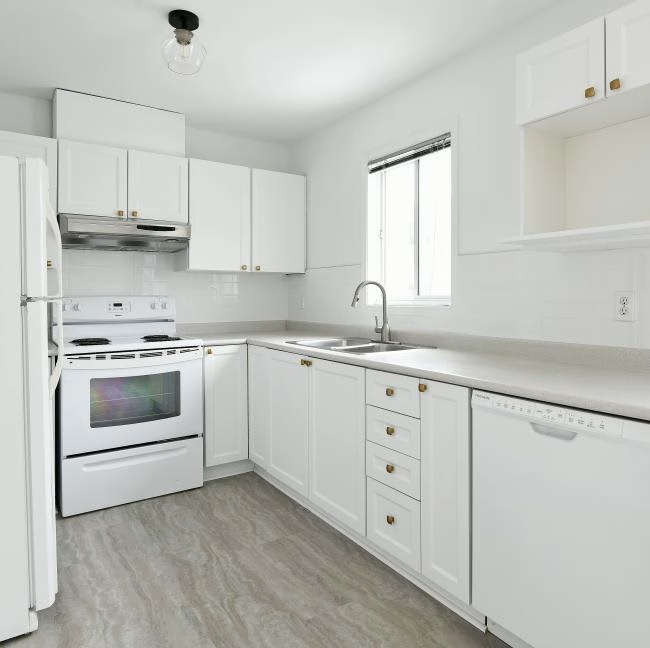
Mar 3 2023 BY superuser, Blog
How to Make Your Kitchen Cabinet Refacing Project a Success?
Plan the budget
Planning how much you can spend on cabinet refacing materials is important as it helps you to stay within the budget. If you set a budget limit for your project and stick to it, you won’t be as tempted to spend money on something you don’t need or can’t afford.Define the project goals
Setting project goals will help you finish your kitchen cabinet refacing project faster. For instance, researching and shortlisting kitchen cabinet refacing suppliers could be one of the goals you can set for yourself. Make sure the goals are clear and attainable. And, if things don’t go the way you planned, don't stress. Take a break and get back to work when your inspiration is back.Get organized
Getting yourself organized will help you get the kitchen of your dreams ready faster. For instance, set a project schedule and stick to it as much as possible. If you are DIYing your kitchen renovation project, set a deadline to order kitchen cabinet refacing supplies, or allocate a day in a week when you can fully dive into the project.Find project inspiration
This part is usually the easiest and the most fun as the sources you can get inspiration from are almost limitless these days. Check some best kitchen renovation projects on Pinterest or Instagram, follow interior designers on social media, and read home improvement magazines.Be patient
We know how tempting it may be to get things done quickly, but rushing your project is never a good idea. The last thing you want is for your new kitchen cabinet replacement doors to end up being half an inch short, right? Work on your project one step at a time and praise yourself for the small accomplishments you achieve.Conclusion
Refacing your kitchen is a challenging journey that requires patience. But when you get to the end, the result is well worth it. Follow these 5 tips to make your kitchen cabinet refacing project an easy and successful one. If you are looking for kitchen cabinet refacing supplies, The Door Maker got you covered. We carry a wide range of flat, raised and shaker-style cabinet doors in over 150 colours available in matte, wood grain, and high-gloss thermofoil finishes. We offer our clients a high-quality product paired with unmatched customer service. Turn your kitchen into a dream with our cabinet doors.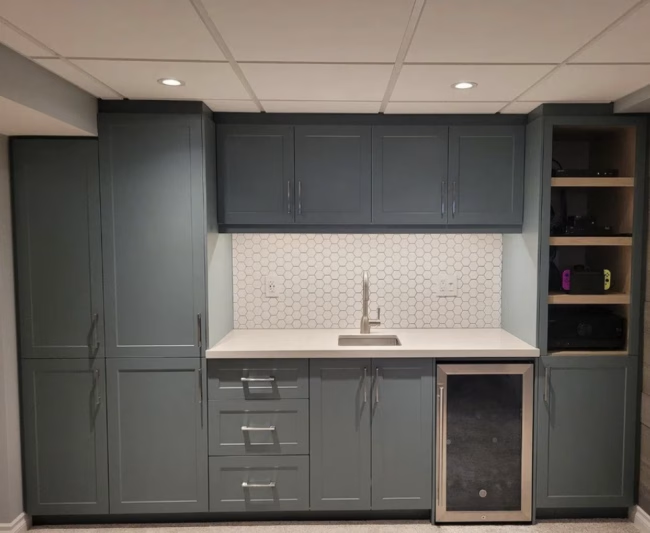
Feb 10 2023 BY superuser, Blog

How to Affordably Upgrade The Look Of Your Old Kitchen?
Upgrade the flooring Traditional vinyl or linoleum floors used to be popular in the 2000s, but these days they are a thing of the past. Consider upgrading the flooring with something more durable, modern and resilient, such as laminate, tile or stone. You can also try wood flooring if you want to go for a timeless option. Sometimes a simple swapping out the old flooring can add a major boost to the look of your old kitchen. Change the countertops Countertops are the most utilized area in the kitchen. Cooking dinner, making your morning coffee, all this is done on the countertop, so you want to make sure it is made of high-quality and durable materials. Replace your old MDF countertops with a sturdier option such as granite, marble, soapstone or wood. Go for DIY kitchen cabinet refacing When you walk into a kitchen, the first thing that catches your eye is…yes, cabinets! Regardless of how great your new dinnerware or curtains look, if your cabinets are outdated, they will ruin the overall look and feel of your kitchen. And if you are not ready yet for a full kitchen makeover, consider a do it yourself kitchen cabinets refacing. This cost-effective kitchen modernization option has been gaining traction in the last decade. Not only does it refreshes the look of your kitchen cabinets, but it also helps you save significant costs on a complete kitchen renovation. Upgrade the lighting Lighting plays an important role in any room, and the kitchen is no exception. Correctly positioned lighting can add that warm and welcoming ambience to your kitchen. There are several ways to improve the lighting in your kitchen: install a dimmer switch to add versatility when cooking or hosting guests, consider LED lighting for under countertops, add a special ambience by hanging a chandelier over the kitchen island. Install new backsplash Installing a new backsplash has several benefits. Not only does it enhance your kitchen decor and makes cleaning easy, but it also increases your home value if you are planning to sell your home eventually. For a timeless backsplash, go for glass, metal or natural stone tile. From changing the lighting to opting for do it yourself cabinet refacing, all this will help you achieve a new kitchen look. Choose the scenario that suits you best and give your kitchen that newer look it deserves.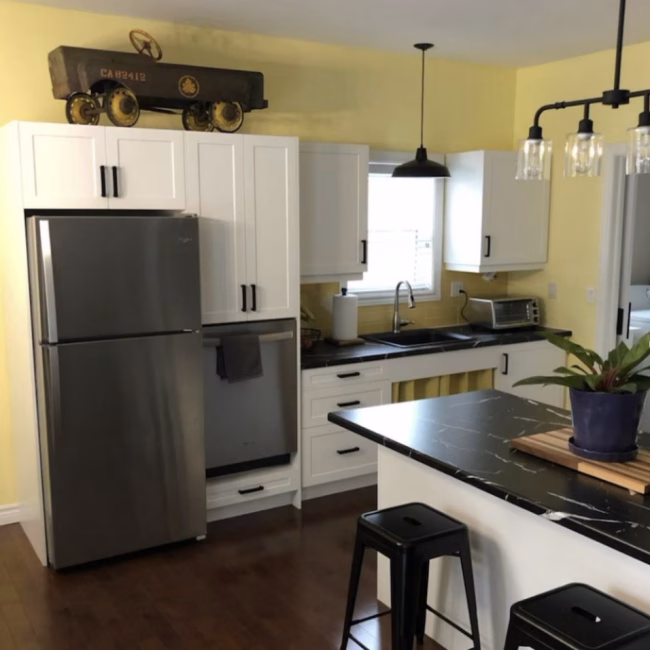
Feb 3 2023 BY superuser, Blog
Why do-it-yourself cabinet refacing is the best way ever to refresh the look of your kitchen?
Kitchen cabinet refacing has been gaining traction for very simple yet compelling reasons. If you are looking to remodel your kitchen, you need to seriously consider do-it-yourself cabinet refacing and here's why:- It saves costs
- It looks as great as a full-fledged kitchen makeover
- It can be fully DIYed
- It takes less time to complete