
Oct 12 2026 BY David Adrian, Blog
1. Shaker Cabinet Doors
Shaker cabinet doors stand out as the go-to choice for both transitional and contemporary kitchens. Their hallmark five-piece construction they strike the perfect balance between simplicity and character. You’ll often spot crisp white Shaker doors in minimalist layouts. They act as a neutral backdrop to statement lighting or sculptural countertops. Dark-stained Shaker doors lend an industrial-modern vibe when paired with metal hardware and concrete surfaces. Pros:- Timeless design that never feels dated
- Highly adaptable to paint, stain or thermofoil finishes
- If every cabinet in the room is Shaker, the effect can seem overly uniform
What defines Shaker style?
Shaker style is all about proportion and function. The rails (top and bottom) and stiles (sides) of the frame are deliberately kept slim, typically around 2" to 3", to maximise the flat panel’s presence without clutter. There’s no ornamentation—no scallops, no beading—just clean edges and perfectly square corners. This focus on utility reflects the Shaker ethos, where form follows function, and the result is an understated elegance.Materials and finishes available for Shaker doors
Shaker doors can be crafted from a variety of substrates:- Solid wood: oak, maple or cherry for authentic grain and natural warmth
- MDF: a smooth, cost-effective base that resists warping
- Thermofoil on MDF: offers a uniform, easy-clean surface in hundreds of colours
Why Shaker doors suit modern kitchens
Clean lines are at the heart of contemporary kitchens, and Shaker doors deliver exactly that. Their simple profile allows bold countertops to really pop. Shaker doors also pair effortlessly with modern hardware. Long bar pulls emphasise the door’s geometry, while concealed handles maintain a seamless façade. In darker kitchens, a painted-white Shaker door can reflect natural light, making the space feel larger and airier.2. Flat Panel (Slab) Cabinet Doors
Flat panel—or slab doors—are the epitome of minimalist design. These cabinet fronts are crafted as one continuous piece, free of visible rails, stiles, or grooves. This makes them perfectly suited to handleless kitchens or integrated-pull profiles. Picture a row of matte charcoal slabs that open with a gentle push or a run of high-gloss white panels reflecting daylight into the room. Their monolithic look creates a sense of calm and simplicity, allowing hardware, lighting and adjacent materials to take centre stage. Beyond their visual appeal, slab doors pair beautifully with modern conveniences like touch-to-open mechanisms and recessed pull-out channels. A subtle bevel or eased edge can add just enough softness to the geometry, keeping the overall look clean yet approachable.Key characteristics of Flat Panel doors
Without the typical frame-and-panel construction, slab doors offer an uninterrupted plane of material. This absence of ornamentation emphasises:- A strong horizontal or vertical sweep across cabinet runs
- Sleek transitions from one surface to the next
- A perfect canvas for bold colours or dramatic textures
Material options and finishes
Slab doors can be realised in a wide array of substrates and finishes to suit both budget and performance requirements:- Painted MDF: A smooth base for any colour, from soft neutrals to vivid hues
- Laminate: Durable, budget-friendly and available in woodgrains, solids and patterns
- Thermofoil: Vinyl-wrapped MDF offering consistent colour and easy cleaning
- High-gloss acrylic: Ultra-reflective surfaces that catch light and enlarge small kitchens
Styling tips for Flat Panel doors
To keep a slab kitchen from feeling stark, consider layering textures and lighting:- Install under-cabinet LEDs to introduce warm pools of light and highlight countertop edges
- Mix in open shelving or glass-front cabinets to break up solid runs and display curated items
- Pair slab doors with natural stone or patterned tile backsplashes for added depth
3. Skinny Shaker (Slim Shaker) Cabinet Doors
Skinny Shaker doors distil the classic Shaker profile into a sleeker, more contemporary form. By trimming down the width of the stiles and rails, these doors introduce an airy, refined look that feels right at home in a modern kitchen. Imagine slender frames just wide enough to hint at structure. Surrounding a flat centre panel that seems to float. This subtle shift in proportion brings a graceful lightness to the cabinetry. Making walls of storage feel less imposing and more integrated with the overall design. Homeowners often choose Skinny Shaker for two-tone schemes where the narrow frames draw the eye without commanding it. In compact kitchens, the reduced visual weight helps smaller layouts feel more spacious. And when paired with minimalist handles or hidden pulls, Skinny Shaker doors strike the perfect balance between tradition and forward-thinking style.Evolution from Classic to Skinny Shaker
Traditional Shaker doors feature stiles and rails commonly around 2" to 3" wide. Slim Shaker, by contrast, typically utilises rails closer to 1½" in width. That cut in measurement may seem modest on paper, but in practice it produces a dramatically different effect. The narrower frame emphasises the flat panel’s uninterrupted surface, offering a subtler shadow line and a more delicate overall aesthetic. It’s a modern refinement of a century-old design principle, maintaining Shaker’s hallmark simplicity while refreshing its proportions.Benefits in modern kitchen design
- Enhanced minimalism: The slim rails keep visual distractions to a minimum, reinforcing the clean lines central to contemporary interiors.
- Perceived spaciousness: Narrow frames recede into the background, letting other elements—countertops, backsplashes, décor—take centre stage.
- Versatile compatibility: Works equally well with statement finishes or subdued palettes, and complements both matte and gloss surfaces without competing for attention.
Integration with custom features
Skinny Shaker profiles lend themselves to creative customisations. Consider swapping solid panels for frosted or clear glass inserts to break up cabinetry runs and introduce a hint of transparency. Or incorporate in-frame metal accents—such as slim brass inlays—to tie cabinet doors to decorative lighting or plumbing fixtures. For those who favour open shelving, a row of slender-framed glass doors can transition smoothly into display units. Crafting a cohesive look across closed and open storage. These tailored touches elevate the pared-back form of Skinny Shaker doors into bespoke centrepieces of your kitchen design.4. Glass Insert Cabinet Doors
Glass insert cabinet doors add a layer of visual lightness to modern kitchens, breaking up solid runs of cabinetry and showcasing curated dishware or décor. Rather than closing off storage, they offer a peek inside without exposing clutter. An ideal solution for those who want a balance between display and concealment. Glass inserts are most often found in upper cabinets, where they catch and reflect natural light, giving the room a more open and airy feel. Installing glass-front doors can instantly elevate a kitchen’s aesthetic, providing contrast to opaque base cabinets or drawer banks. They pair beautifully with minimalist frames—such as Skinny Shaker profiles—or monolithic slab doors, creating a dialogue between transparency and structure. In contemporary layouts, glass inserts foster a sense of continuity, as reflections bounce between pendant lights, glossy backsplashes, and polished hardware. Beyond style, glass-insert doors also encourage thoughtful organisation. Since contents are partially visible, homeowners tend to arrange items deliberately. This translates to curated colour palettes, matching dish sets, or decorative accents that double as functional pieces.Types of Glass Inserts
- Clear glass: Offers the most transparent view, ideal for displaying fine china or glassware in pristine condition.
- Frosted glass: Provides a muted effect that obscures details while still diffusing light. Perfect for hiding everyday items without darkening the cabinet interior.
- Seeded glass: Characterised by tiny air bubbles, it lends a vintage touch and gently scatters light for a subtle glow.
- Textured/ribbed glass: Features linear patterns that distort shapes, adding depth and tactile interest to the door.
- Tinted glass: Comes in soft greys, ambers or greens to complement metallic finishes and dark cabinetry.
Functional and aesthetic benefits
Incorporating glass insert doors creates a sense of openness, counteracting the solid mass of cabinetry. This transparency can make smaller kitchens feel larger and more inviting. Displaying attractive items turns storage into décor, encouraging homeowners to swap out seasonal pieces or rotate collections. Glass doors also reflect light from windows and fixtures, amplifying brightness and adding a dynamic interplay of highlights across surfaces. From a functional standpoint, glass-front doors allow you to locate items quickly. No more opening every door to find that coffee mug. They’re particularly helpful above a beverage station or near the pantry, where visibility enhances convenience.Considerations for glass selection
While glass inserts look stunning, they require a bit more upkeep. Fingerprints, smudges and dust are more noticeable on clear or high-gloss glass, so plan for regular cleaning with a mild, streak-free cleaner. Frosted and textured options hide imperfections better, reducing cleaning frequency. To prevent a cluttered appearance, limit glass doors to a few key cabinets and keep interiors well-organised—consider using matching storage containers or decorative baskets to maintain a cohesive look.5. Beadboard Cabinet Doors
Beadboard cabinet doors bring a breath of cottage charm to contemporary kitchens, offering a subtle nod to traditional craftsmanship without overwhelming clean-lined layouts. Defined by a series of narrow, vertical grooves running down the centre panel. Beadboard injects texture and visual interest into cabinetry runs. Whether you’re aiming for a softly modern take on farmhouse style or simply want to introduce a tactile element to flat-front doors. Beadboard is a versatile choice that pairs beautifully with fresh paint colours, natural wood accents, and minimalist hardware. Often used on islands or lower cabinets, beadboard can break up expanses of smooth surfaces and create focal points in open-plan kitchens. A pastel-painted island clad in beadboard becomes an instant statement, while crisp white beadboard doors around the perimeter lend dimensionality without sacrificing a bright, airy feel. For DIY homeowners, these doors are easy to install and customise—just measure, pick your panel style and go. Below, we explore how to get the look right, from groove profiles to colour pairings and upkeep.Design features of Beadboard doors
Beadboard doors are distinguished by:- Consistent groove spacing: Typically 1/4" to 1/2" wide beads create a rhythmic texture across the panel.
- Groove depth: Between 1/16" and 1/8" depths strike a balance between subtle shadow lines and ease of painting.
- Framed centre panel: A simple four-piece frame surrounds the beadboard, keeping the overall profile clean and structured—perfect for modern layouts.
Matching styles and colour palettes
Beadboard doors shine when paired with complementary hues and finishes:- Soft neutrals: Creamy whites, pale greys or greiges allow the grooves to gently show through, adding warmth without high-contrast drama.
- Navy and jewel tones: Deep blues or emerald greens transform beadboard into a sophisticated accent—ideal for kitchen islands or tall pantry units.
- Pastel accents: Mint greens, blush pinks or light teals bring a playful twist, especially when balanced by matte black hardware or brushed brass fixtures.
Installation and maintenance tips
A few pointers will keep your beadboard doors looking crisp for years:- Painting grooves: Use a small angled brush to work paint into each bead, then back-brush with a foam roller for a smooth finish.
- Filling and caulking: Lightly fill any gaps at joints with a paintable caulk to prevent dust buildup and ensure clean lines.
- Dusting routines: Grooves collect dust more readily than flat panels—run a soft-bristle brush or microfiber cloth along the beads weekly to maintain that fresh-off-the-shelf appearance.
- Touch-up strategy: Keep a tiny pot of matching paint on hand for quick fixes to scuffs or nicks in high-traffic areas.
6. Thermofoil Cabinet Doors
Thermofoil cabinet doors deliver a sleek, uniform surface at a budget-friendly price point. By wrapping a thin layer of PVC vinyl around an MDF substrate, thermofoil creates a seamless front that resists moisture and simplifies maintenance—an ideal choice for busy kitchens where spills and steam are part of daily life. Below, we unpack how thermofoil works, its key advantages and limitations, and why The Door Maker’s extensive selection makes it a go-to for DIY renovations.Overview of Thermofoil technology
Thermofoil doors start with an engineered wood core—typically medium-density fibreboard (MDF)—that’s precisely cut and routed to the desired profile. A heat-activated vinyl film is then vacuum-pressed over the panel, conforming around edges and corners for a continuous finish. Once cooled, the bond between vinyl and MDF creates a hard-wearing surface that mimics painted or laminated doors, but without visible seams or grout lines.Benefits and drawbacks of Thermofoil
Pros:- Moisture resistance: The impervious vinyl layer repels water, making it well-suited for humid environments near sinks and dishwashers.
- Low maintenance: Wipe clean with a damp cloth—no special polishes or sealers required.
- Consistent finish: Vinyl comes in a wide array of colours and textures, guaranteeing uniformity across all door sizes.
- Cost-effective: More affordable than solid wood or lacquered finishes, while still delivering a premium look.
- Heat sensitivity: Prolonged exposure to high temperatures—especially around ovens or stovetops—can cause vinyl to lift or warp.
- Non-refinishable: Unlike solid wood, thermofoil cannot be sanded or repainted; damaged doors must be replaced.
- Edge vulnerabilities: Improper installation or cuts too close to heat sources may lead to peeling at seams.
TDM’s Thermofoil Options
At The Door Maker, you’ll find over 130 thermofoil colours and textures, including matte neutrals, realistic wood grains, subtle textures and high-gloss finishes. Our online Build a Door tool lets you:- Enter your exact measurements for doors and drawer fronts
- Choose from dozens of thermofoil styles with live previews
- Receive a free, no-obligation quote before you order
Care and cleaning guidance for Thermofoil
To keep thermofoil doors looking their best:- Use a mild dish soap and warm water solution applied with a soft cloth
- Avoid scouring pads, abrasive cleaners or bleach, which can scratch or dull the vinyl
- Keep cookware and heat sources at least a few inches away from cabinet faces to prevent heat damage
- Wipe up spills promptly to avoid moisture seeping into seams
7. Lacquered & Acrylic Cabinet Doors
Lacquered and acrylic cabinet doors bring a luxe, high-end feel to contemporary kitchens. Lacquer is applied as a liquid finish—sprayed or trowelled onto an MDF substrate—then sanded and polished between coats to achieve a flawless surface. Acrylic doors, by contrast, use a pre-manufactured sheet of PMMA (polymethyl methacrylate) that’s glued onto the face of the door, resulting in an ultra-smooth, mirror-like finish. Both options offer a choice of high-gloss or matte sheens, allowing you to dial in the exact level of reflectivity and colour saturation you desire. Modern kitchen designs often exploit these finishes to maximise light and create a sense of spaciousness. A row of gloss-lacquer upper cabinets can reflect pendant-light accents, while a matte acrylic island can anchor the room with subdued elegance. Though they may look similar at first glance, lacquered and acrylic doors have distinct performance profiles and price points, so understanding their differences is key to making the right choice.Distinguishing Lacquered from Acrylic finishes
Lacquer finishes are built up in multiple layers—each coat is sprayed, allowed to cure, then lightly sanded to remove imperfections. This labour-intensive process yields rich depth of colour and a silky-smooth feel. Lacquer can be tinted to any custom shade, making it ideal for bespoke colour schemes. However, because it’s a solvent-based system, it requires proper ventilation during application and professional equipment for best results. Acrylic doors are manufactured off-site: large sheets of coloured or clear acrylic are precision-cut and adhesively bonded to the door panel. This method guarantees consistent thickness and finish, while eliminating the need for on-site spraying. Acrylic’s inherent UV stability means colours resist yellowing over time, and the rigid surface is less prone to hairline cracks than lacquer.Aesthetic impact in modern kitchens
Both lacquered and acrylic doors excel in handleless kitchen layouts, where uninterrupted surfaces create a seamless visual flow. High-gloss lacquer amplifies natural light and bounces it around the room, making compact kitchens feel larger. Pair gloss white doors with dark stone countertops for a dramatic contrast, or choose deep charcoal lacquer to frame metallic accents in an industrial-chic setting. Matte acrylic, meanwhile, offers a soft-touch feel that’s perfect for creating tactile warmth. A matte-black island can serve as a sculptural focal point against pale perimeter cabinets, or a muted sage green can introduce subtle colour without overpowering a minimalist palette. For a truly contemporary statement, mix finishes: combine gloss doors on the upper tier with matte acrylic base cabinets to distinguish zones while maintaining cohesion.Durability and maintenance considerations
When it comes to durability, acrylic doors tend to be more resistant to scratches and chemicals than lacquer, but both finishes require gentle care. To clean:- Wipe surfaces with a soft microfiber cloth dampened with warm water and mild dish soap.
- Avoid abrasive sponges, scouring powders or solvent-based cleaners that can dull the finish.
- For stubborn marks on lacquer, a dedicated cabinet polish or a specialised lacquer cleaner can restore shine—test any product in an inconspicuous spot first.
- Acrylic repairs are limited; minor scratches can sometimes be buffed out with a proprietary acrylic polish, but deep gouges may require panel replacement.
8. Slatted Wood Cabinet Doors
Slatted wood cabinet doors introduce a rhythmic texture that transforms flat expanses into warm, tactile statements. Composed of evenly spaced wood slats—either horizontal or vertical—these doors evoke the artisanal quality of louvered shutters while serving practical purposes like airflow and sound diffusion. You’ll often see slatted panels used for pantry doors, appliance garages or utility cupboards, where they lend both character and function to a modern kitchen scheme.Styles of Slatted doors
Slatted styles vary widely in orientation and proportion. Horizontal slats create a sense of width, making cabinets appear broader and lower—ideal for island fronts or base units. Vertical slats, by contrast, emphasise height and draw the eye upwards, perfect for tall pantry doors or floor-to-ceiling storage. Slat widths can range from slim ½" strips for a refined, delicate texture to broader 2" boards that deliver a bolder, more graphic look. Spacing between slats also plays a role: tight gaps yield a subtle striped effect, while wider gaps lean into an open, breezy aesthetic.Functional advantages
Beyond their visual appeal, slatted wood doors offer practical benefits. The gaps between slats allow air to circulate freely, which is useful in ventilated appliance cabinets, wine storage or laundry areas. This design also contributes to acoustic dampening—sound waves break up as they pass through the channels, making slatted fronts a smart choice near dishwashers or recycling centres. Because the panels admit light and air, they can help prevent stale odours and moisture build-up, promoting a fresher environment inside closed storage units.Customisation options for Slatted doors
Slatted doors adapt easily to a range of wood species and finishes. Oak slats deliver pronounced grain patterns and pair beautifully with natural or light-stained looks. Maple offers a smooth, uniform appearance that works well in contemporary, minimalist kitchens. For richer hues, walnut or cherry slats bring depth and warmth. Finishes can be matte, satin or semi-gloss, depending on how much sheen you want; a clear protective coat preserves the natural texture, while tinted stains highlight the wood’s character. For a two-tone effect, combine slatted doors on lower cabinets with flat-panel fronts above, or alternate wood species on island and perimeter units to reinforce zoning in open-plan layouts.9. Melamine Cabinet Doors
Melamine cabinet doors bring together cost-effectiveness and robust performance, making them a smart choice for modern kitchen projects on a budget. At its core, melamine is a decorative surface material that’s bonded to a substrate—often particleboard or MDF—using heat and high pressure. The result is a hard-wearing front that resists scratches, moisture and everyday wear far better than raw wood or simple paint. Thanks to advances in printing and embossing technologies, melamine now comes in an astonishing array of patterns and finishes—from realistic woodgrains to solid colours and textured effects—so you don’t have to sacrifice style for savings. Homeowners appreciate melamine’s low-maintenance nature: it stands up to splashes at the sink, withstands moderate heat near stoves, and wipes clean with a damp cloth. Contractors and DIY renovators value its uniformity—each door looks identical, with no grain variations or knots to worry about. Let’s explore what makes melamine such a versatile option for contemporary cabinet door styles.What is Melamine?
Melamine starts life as paper sheets impregnated with melamine resin, a durable thermosetting polymer. These sheets are layered over an engineered core—usually particleboard or medium-density fibreboard—and pressed under heat to cure the resin. The pressure bonds the decorative paper to the substrate, creating a single, cohesive panel. Edge-banding is then applied around the door’s perimeter to seal the cut edges and prevent moisture infiltration. Unlike veneer or laminate, melamine is factory-finished, so each door arrives ready for installation without additional painting or sealing.Performance characteristics
Melamine cabinet doors excel in several key areas:- Scratch resistance: The cured melamine surface endures daily knocks from cookware, utensils and accidental impacts with minimal scuffing.
- Moisture resistance: A properly sealed edge-band protects the substrate from steam and splashes, making melamine suitable for kitchens and bathrooms alike.
- Heat tolerance: While not impervious to extreme heat, melamine handles normal cooking temperatures well—just avoid placing hot pans directly against the doors.
- Colour and pattern consistency: Factory production ensures every panel matches perfectly, whether you choose a woodgrain that spans multiple doors or a vivid solid hue.
Design possibilities with Melamine
Thanks to digital printing advancements, melamine doors now rival the look of real wood, stone and textured finishes at a fraction of the cost. Popular options include:- Woodgrain patterns: From subtle ash and oak to dramatic walnut and ebony, these prints emulate natural grain with remarkable authenticity.
- Solid colours: Clean whites, slate greys and even bold jewel tones are available in smooth or matt textures.
- Textured and patterned effects: Embossed textures mimic linen, hammered metal or stone, adding tactile interest to flat-panel doors.
10. Wood Veneer Cabinet Doors
Wood veneer cabinet doors combine the warmth and character of real timber with the stability and affordability of engineered substrates. A paper-thin slice of natural wood—known as veneer—is bonded to a sturdy core, giving you authentic grain patterns and tonal variation without the risk of warping or excessive cost that comes with solid slabs. Veneer doors offer the best of both worlds: genuine wood aesthetics, consistent quality, and a more sustainable use of forestry resources.Understanding Wood Veneer types
Veneers are cut from logs using two main techniques, each producing distinct looks:- Rotary-cut veneer is sliced in wide sheets by rotating the log against a stationary blade. This method yields broad, flowing grain patterns—sometimes referred to as “cathedral” or “crown” figures—that add drama and movement to large cabinet runs.
- Sliced veneer, also called plain or quarter-cut, involves slicing the log along its length. The resulting boards display straighter, more uniform grain lines, creating a refined, linear appearance that suits minimalist and contemporary designs.
Advantages over Solid Wood
Wood veneer doors enjoy several practical benefits compared to their solid-wood counterparts:- Dimensional stability: The thin veneer layer, bonded to a stable core such as plywood or MDF, resists seasonal movement and moisture-induced warping that can plague solid timber.
- Consistent appearance: Engineered cores and factory-controlled veneer cuts deliver uniform grain and colour across dozens of panels, eliminating the natural variations and knots you might find in solid wood.
- Cost efficiency: Since veneers use far less hardwood per door, they represent a more budget-conscious way to achieve a high-end wood look. This also makes exotic species, like ebony or rosewood, more accessible for full kitchen refacing.
- Eco-friendly: Veneers maximise each log’s yield, reducing waste and supporting responsible forestry practices.
Finishing and care tips for Wood Veneer
To preserve the natural luster of veneer cabinet doors, follow these guidelines:- Gentle cleaning: Wipe surfaces with a soft, lint-free cloth dampened in a mild soap solution. Avoid abrasive pads or harsh chemicals that could strip the finish.
- Moisture control: Keep cabinets away from direct water splashes and ensure adequate kitchen ventilation. If spills occur, blot immediately rather than rubbing vigorously.
- Protective coatings: Most veneer doors arrive pre-finished with durable lacquers or UV-cured varnishes. If you choose to refinish, opt for thin, even coats of water-based lacquer, lightly sanding between applications for a smooth result.
- Routine maintenance: Polish occasionally with a high-quality, pH-neutral wood polish to enhance depth and guard against minor scratches. Always test any new product in a discreet area first.
How to Choose the Right Contemporary Cabinet Door Style
Choosing the perfect cabinet door style means aligning your aesthetic goals with practical considerations—your kitchen’s layout, budget, material durability and maintenance routine. Start by evaluating your space: note how much natural light pours in, observe the flow between sink, stove and refrigerator, and consider existing finishes like countertops or flooring. Next, decide whether you want a look that’s distinctly modern (think flat-front slabs or handleless profiles) or a more transitional feel (Slim Shaker or mixed-material designs). Finally, order sample doors or full-scale mock-ups so you can see colours, textures and edge details in your actual kitchen setting before committing. Many homeowners wonder: “What is the most timeless cabinet door style?” Shaker and slab doors frequently top the list for their enduring simplicity, while beadboard and raised-panel designs offer a nod to tradition without feeling outdated. If a purely contemporary vibe is your aim, look for uninterrupted surfaces and minimal ornamentation—flat panels, integrated pulls and subtle edge bevels are key indicators of a modern silhouette. To help you narrow down options quickly, here’s a side-by-side comparison of popular contemporary styles:| Style | Material Options | Budget Level | Maintenance |
|---|---|---|---|
| Shaker | Solid wood, MDF, Thermofoil | Moderate | Low to moderate |
| Flat Panel (Slab) | MDF, Laminate, Acrylic, Thermofoil | Moderate to high | Low |
| Thermofoil | Vinyl-wrapped MDF | Low | Very low |
| Melamine | Particleboard or MDF core | Low | Low |
| Wood Veneer | Plywood/MDF core with real wood face | High | Moderate |
Assessing your kitchen layout and style goals
Analyse your work triangle and the amount of wall space you have for upper versus lower cabinets. In a compact galley kitchen, a row of lighter-coloured slab doors or narrow-framed Slim Shaker cabinets can prevent the room from feeling closed in. If your kitchen lives in an open-plan setting with abundant daylight, richer wood veneers or matte finishes can withstand darker cabinetry without overwhelming the space.Balancing budget and material performance
When pinpointing a “modern look” within your budget, map out the lifespan you expect from your cabinets. Thermofoil and melamine deliver the lowest upfront cost, while painted MDF and laminate slab doors occupy the mid-range. Wood veneers and high-gloss acrylic sit at the premium end but reward you with scratch resistance and refinishable surfaces. Chart your anticipated wear and tear: families with young children or frequent entertainers may prioritise ultra-durable, low-maintenance finishes, whereas more occasional cooks might invest in higher-end materials.Considering long-term maintenance and care
Every surface demands its own cleaning regimen. Thermofoil and melamine are practically wipe-and-go, resisting moisture and stains with just a damp cloth and mild detergent. Lacquered, acrylic and painted finishes, by contrast, benefit from soft microfiber cloths and gentle cleaners to preserve shine and avoid micro-scratches. Real wood veneers need cautious moisture control and occasional polishing, but they can also be lightly refinished if damage occurs. Make sure your choice complements not only your design dream but also the time you’re prepared to spend on upkeep.Quality & Safety Standards for Cabinet Doors
When selecting contemporary cabinet doors, it’s vital to consider indoor air quality, structural durability and regulatory compliance. In Canada, two benchmarks ensure peace of mind: Formaldehyde Emission Regulations for composite wood products and the Kitchen Cabinet Manufacturers Association (KCMA) A161.1 certification for performance. These standards protect health and guarantee your cabinetry will stand up to everyday use.Formaldehyde Emission Regulations in Canada
Canada’s Guidance Document on Formaldehyde Emissions from Composite Wood Products Regulations limits the release of formaldehyde—a common volatile organic compound (VOC) linked to respiratory irritation. Regulated product categories and their maximum allowable emissions are:- Hardwood plywood: ≤ 0.05 ppm
- Particleboard: ≤ 0.09 ppm
- Medium-density fibreboard (MDF): ≤ 0.11 ppm
Importance of KCMA Certification
The KCMA A161.1 standard subjects cabinet doors to rigorous trials that mimic long-term kitchen use. Key assessments include:- Door and drawer cycling: 100,000 open/close cycles to simulate years of wear.
- Static load testing: Verifying frame integrity under weight (e.g., heavy cookware).
- Impact resistance: Ensuring panels resist dents and cracks from daily knocks.
- Finish durability: Evaluating adhesion, chemical resistance and stain performance.
Ensuring your doors meet standards
Before committing to a supplier, verify that cabinet doors comply with both formaldehyde and KCMA requirements:- Check for visible labels or stamps on each door or its packaging referencing Canada’s emission classes and KCMA A161.1 certification.
- Request copies of third-party laboratory reports or certificates from recognized testing bodies.
- Confirm that markings include the product category (MDF, particleboard, etc.), the formaldehyde emission limit and the certifier’s identification.
Final Thoughts & Next Steps
From the understated elegance of Shaker and its slimmer Skinny Shaker cousin to the pure minimalism of slab doors, each of these ten contemporary cabinet door styles brings its own character and practical edge. Glass inserts and beadboard offer textural contrast, while thermofoil, melamine and acrylic deliver fuss-free, low-maintenance surfaces. Wood veneer and slatted doors introduce warmth and natural grain, rounding out a palette of options that suit every design ambition and budget. Before committing to a single style, take a moment to assess your kitchen’s layout, lighting and daily routines. Will you benefit from the openness of glass-front uppers? Do you need ultra-durable, easy-clean surfaces around busy cooking zones? How does your choice of finish interact with existing countertops, hardware and flooring? Ordering sample doors or full-scale mock-ups can save headaches later—seeing materials in your own environment helps you judge colour, texture and edge profiles with confidence. Ready to turn ideas into reality? Start by gathering measurements and snapping a few photos of your current cabinets. Use those insights to explore finishes, edge details and hardware options. Then head over to The Door Maker’s online Build a Door tool to design custom doors in minutes, get a free quote and take the next step in your kitchen refresh. Ready to transform your kitchen? Visit The Door Maker to build your custom cabinet doors today and bring your contemporary vision to life.
Oct 11 2026 BY David Adrian, Blog
Guide to cost savings
This comprehensive guide unpacks the true cost of cabinet refacing, offering seven distinct ways to estimate your project—from national averages and linear foot pricing to per-door calculations and material-specific breakdowns. You’ll find practical examples for every kitchen size, clear explanations of what’s included in professional quotes, and a detailed look at the real factors that drive costs up or down. Whether you’re considering a hands-on DIY approach or weighing the advantages of hiring a pro, you’ll also discover effective strategies for keeping your refacing budget in check, insights on return-on-investment, and important considerations for environmentally responsible disposal. While The Door Maker doesn’t publish set prices online, you can build your own cabinet door design and get a tailored, obligation-free quote in minutes using their online “Build a Door” t ool. Use this guide to plan your project with confidence, maximise your savings, and achieve a fresh new look—without the stress or expense of a full-scale renovation.1. Average National Cost Range for Cabinet Refacing
Across Canada and North America, a full cabinet refacing project generally falls between $4,000 and $9,500. This all-inclusive price reflects the removal of existing doors, application of new veneers or laminates, installation of fresh hardware and the labour required to complete the transformation. While regional labour rates and material choices will cause some fluctuation, this range serves as a reliable benchmark for homeowners planning their renovation budget. Although The Door Maker doesn’t list fixed prices online, viewing these nationwide averages can help you decide whether to request a no-obligation quote via the “Build a Door” tool. Refacing allows you to keep your existing cabinet boxes intact, reducing waste and often saving both time and money compared to a full cabinet replacement</a>.What the All-Inclusive Estimate Covers
A typical cabinet refacing quote will include:- Replacement doors and drawer fronts
- Veneer or laminate applied to existing cabinet boxes
- Basic hinges, glides and pull hardware
- Skilled labour for removal, fitting and final adjustments
- Disposal of old materials and site cleanup
- Project management and quality inspections
2025 Cost Range Overview
According to industry research, homeowners can expect the following figures for a standard kitchen refacing project Source: Modernize:- Low end: approximately $4,000 for smaller layouts or entry-level materials
- Mid range: around $6,750 for an average 200 sq ft kitchen with mid-grade finishes
- High end: up to $9,500 for larger kitchens, premium veneers or custom details
2. Per Linear Foot Pricing
One of the most common ways professionals estimate cabinet refacing costs is by charging per linear foot (LF). Rather than quoting an entire kitchen as a lump sum, they measure the total length of cabinetry runs—essentially the continuous span of cabinets along walls and islands—and multiply it by a fixed rate. This approach makes it easy to tailor the quote to the exact size of your kitchen and simplifies comparisons between materials or installers.How Linear Foot Pricing Works
A linear foot in the context of cabinet refacing refers to one foot of cabinet frontage, measured horizontally from one end of the run to the ot her. This includes doors, drawer fronts and any adjoining panels. By using a per-LF rate, contractors can account for:- Material costs (veneers, laminates and edge banding)
- Labour time (surface preparation, veneer application and fitting)
- Basic hardware (hinges, glides and pulls)</li>
- Disposal and site cleanup
Example Calculations
Below is a sample cost breakdown using representative rates of $100/LF, $175/LF and $250/LF. Adjust these figures to reflect your installer’s rates or the quality of materials you prefer.| Linear Feet | Low ($100/LF) | Mid ($175/LF) | High ($250/LF) |
|---|---|---|---|
| 20 LF | $2,000 | $3,500 | $5,000 |
| 30 LF | $3,000 | $5,250 | $7,500 |
| 40 LF | $4,000 | $7,000 | $10,000 |
Typical Cost Range per Door/Drawer
Most standard cabinet doors and drawer fronts fall within a similar price band:- Low end: $100 each
- Mid range: $250 each
- High end: $400 each
Budgeting for a Standard Kitchen
To see how these costs add up, consider an average kitchen with:- 20 cabinet doors
- 10 drawer fronts
20 doors + 10 drawers = 30 pieces
- At $100 each:
30 x $100 = $3,000 - At $250 each (mid range):
30 x $250 = $7,500 - At $400 each:
30 x $400 = $12,000
4. By Kitchen Size Category
Kitchen footprint plays a significant role in your cabinet refacing budget. As the room grows, so do the number of doors, drawer fronts and the length of veneer required. Below is an overview of what you might expect to invest in a refacing project based on kitchen size:Small Kitchen (100 sq ft)
In a compact kitchen—roughly 100 square feet—you typically have 10 to 20 linear feet of cabinets. Even with a modest layout, your refacing project can deliver a fresh appearance without breaking the bank.-
- Estimated cost range: $1,000–$5,000
- Factors at this scale include fewer doors/drawers (often under 25 pieces) and minimal surface preparation.
- Entry-level laminate or thermofoil can keep costs near the lower end, while upgrading to mid-range veneers pushes you toward the upper li
Mid-Size Kitchen (200 sq ft)
A mid-sized kitchen of about 200 square feet usually contains 20 to 30 linear feet of cabinetry. This size represents the national average and matches the $4,000 to $9,500 bracket we discussed earlier.- Estimated cost range: $4,000–$9,500
- Typical door/drawer count: 30–40 components.
- Mid-range materials and hardware are most common here, blending affordability with stylish finishes.
- If you add an island or extra pantry doors, expect the estimate to climb proportionally.
Large Kitchen (300 sq ft+)
For spacious kitchens exceeding 300 square feet—with 30+ linear feet of runs including islands and specialty units—you’ll be looking at a premium bud get.- Estimated cost range: $10,000–$15,000+
- High door and drawer counts (40+ pieces) plus potential under-cabinet lighting or crown moulding.
- Upgrading to wood veneer or solid wood can push your investment above the baseline.
- Custom layouts with corner units, built-in features or glass-front doors further influence the final total.
5. Material-Specific Cost Breakdown
Choosing the right material for your cabinet refacing project not only influences the overall price but also affects durability, maintenance and st yle. Here’s how the most common options stack up in terms of cost and characteristics. Source: Bob VilaLaminate or Thermofoil
Laminate and thermofoil are the most budget-friendly choices, with projects typically ranging from $1,000 to $3,000 for an average kitchen. These materials consist of a printed or vinyl finish applied over engineered wood, making them resistant to moisture and easy to clean. While they offer a wide variety of colours and patterns, they can be prone to peeling or chipping if exposed to high heat or sharp impacts.Wood Veneer
For a step up in authenticity and texture, wood veneer provides a real‐wood face bonded to an underlying substrate. Expect refacing costs in the $2,500 to $6,500 bracket. Veneers deliver the warmth and grain of natural wood—often oak, maple or cherry—at a fraction of the price of solid wood. They require slightly more careful maintenance (avoiding excess moisture) but offer a classic look that pairs well with both traditional and modern décor.Solid Wood or Plywood
Premium refacing with solid wood or high-grade plywood doors and drawer fronts usually starts around $5,000</strong> and can exceed $10,000 for larger layouts ies. This option guarantees maximum longevity, repairability and premium aesthetics, as every panel is genuine wood throughout. Solid wood refacing often comes with custom milling options—raised panels, intricate beading and artisan profiles—that justify the higher investment and deliver a truly bespoke finish.6. Labour Cost Breakdown
Labour often makes up the largest portion of a cabinet refacing budget, reflecting the skilled work required to remove old components, prepare surfaces, apply new materials and carry out precision installati ons. Understanding how labour factors into your overall cost can help you spot where efficiencies or savings might be found—and why experienced craftsmen command a significant share of the budget.Percentage of Project Cost
On average, labour accounts for 50%–70% of the total cabinet refacing price. That means, for a mid-range project of around$6,750, you might see labour fees of anywhere from:
$6,750 × 50% = $3,375
$6,750 × 70% = $4,725
Breakdown of Tasks and Rates
To give you a clearer picture of where labour dollars go, here’s a breakdown of common refacing tasks and their typical ra tes:- Demolition & disposal:
$10–$20per linear foot Removing and hauling away old doors, drawer fronts, hinges and any damaged veneer. - <strong>Surface preparation:
$20–$50per linear foot Cleaning, sanding and priming cabinet boxes to ensure a flawless bond with new veneers or laminates. - <strong>Veneer application:
$30–$60per linear foot Cutting, fitting and adhering the chosen material—whether wood veneer, laminate or thermofoil—followed by edge-banding and finishing. - <strong>Door & drawer installation:
$20–$40each Precisely mounting new doors and drawer fronts, adjusting alignment, depth and reveal for a uniform look and smooth operation. - <strong>Hardware fitting:
$20–$30per labour hour, plus$2–$5per piece Installing hinges, pulls and drawer glides; drilling, measuring and fine-tuning each fitting to factory standards.
7. Add-Ons and Upgrades Pricing
Once your cabinet shells and doors have been refaced, a few targeted upgrades can take functionality and style to the next le vel. These optional extras let you personalise your kitchen to suit your cooking habits and décor preferences—and each comes with its own price tag. Below is a breakdown of some of the most popular add-ons and what you might expect to invest.Crown Moulding
Adding crown moulding brings a polished, built-in look to refaced cabinets. Installers will measure, cut and finish decorative trim along the top edge of your units, creating a seamless transition to the ceiling. Cost range: $12–$20 per linear foot.<br />Factors influencing price include the complexity of the profile (simple ogee vs. layered designs), the wood species or MDF quality, and the number of inside corners that require precision mitre cuts.Under-Cabinet Lighting
Under-cabinet lights are a game-changer for task visibility and evening ambience. Most setups use low-voltage LED puck lights or slim strip lights, complete with transformers and discrete wiring. Installation involves cutting small holes, securing fixtures, and routing cables to a switch or power outlet. Cost per fixture: $230–$300. This typically covers the light fitting itself, transformer, wiring labour and basic dimmer or switch hook-up. Premium options—like tunable white LEDs or touch-sensitive controls—may push you toward the higher end of the spectrum.Glass Door Inserts
For a taste of showroom flair, swapping out solid door panels for glass inserts instantly brightens cabinet interiors and displays your favourite dishw are. Options range from clear or frosted glass to decorative patterns or fluted designs. Cost per door: $150–$200. That price includes cutting the glass to size, installing a secure frame or glazing bead, and sealing around the edges. If you combine glass fronts with under-cabinet or interior cabinet lighting, you’ll accentuate this upgrade even more.In-Cabinet Organisers
Custom organisers—such as pull-out trays, vertical dividers, spice racks and Lazy Susans—maximise storage efficiency and reduce rummaging. Each feature is fitted inside your existing boxes, sliding on metal tracks or rotating on lazy-Susan hardware. Cost range: $70–$300 each.<br />Simple pull-outs (for trays or baking sheets) and corner-cabinet carousels sit at the lower end, while full-extension pull-outs, appliance garages or multi-tier spice racks can climb to the top of this range.8. DIY vs Professional Cost Scenarios
Many homeowners wonder whether to tackle cabinet refacing themselves or bring in a professional. Each route has its own benefits—DIY can reduce upfront costs, while hiring a pro saves time and ensures a flawless finish. Here, we compare the typical expenses, advantages and potential pitfalls of DIY, professional and hybrid approaches so you can decide which suits your budget, skill level and timeline best.DIY Material-Only Estimate
If you already own basic woodworking gear—a router or table saw, a reliable edge-banding iron and a shop vacuum—a DIY refacing project can cost between $1,000 and $3,000 for materials al one. This covers:- Replacement doors and drawer fronts (thermofoil or veneer)
- Veneer or laminate sheets plus edge banding and adhesive
- New hinges, pulls and drawer glides
- Sandpaper, primer, brushes and finish
Professional Installation Estimate
Handing the job to a qualified installer brings predictability and speed. A full-service professional refacing project typically ranges from $4,000 to $9,500, covering:- Detailed site measurement and custom door cutting
- Surface prep, sanding and perfect veneer or laminate application
- Precision hardware fitting and alignment
- Removal, disposal of old materials and thorough cleanup
- Project management, quality checks and often a workmanship warranty
Hybrid Approach
A hybrid model combines the cost savings of with the expertise of a professional installer. By handling straightforward tasks yourself—such as accurate measuring or the removal of old doors—you can shave 10% to 20% off a full-service quote. A typical arrangement might look like:- You use TDM’s “Build a Door” tool to define quantities, styles and materials
- You remove and label existing doors/drawers for the installer
- The professional carries out veneer application, door hanging and final adjustments
9. Additional Factors Influencing Cabinet Refacing Costs
Beyond base estimates and material choices, a handful of external variables can push your cabinet refacing budget up or down. Understanding these nuances will help you set realistic expectations and get more accurate quotes.Regional Variations
Labour and material expenses vary widely across Canada. Contractors in high-cost urban centres—like Vancouver or Toronto—typically charge 10 %–20 % more per hour than those in smaller towns or rural areas. Likewise, shipping specialty veneers or hardware to remote locations can incur extra freight fees. When comparing quotes, be sure to ask whether the installer’s rates reflect local market conditions or if any travel surcharges apply.Kitchen Layout & Complexity
A straightforward run of cabinets along a single wall is far simpler—and less time-consuming—than a layout with corner units, angled sections or multiple isla nds. Each inside corner or non-standard run often requires custom trimming, additional edge banding and extra alignment checks. If your kitchen includes built-in features—such as a pantry wall or open shelving niches—plan for 5 %–15 % higher labour costs to cover the bespoke adjustments.Project Duration & Scheduling
Most professional cabinet refacing jobs wrap up in 3–5 days, but timing can shift based on installer availability and project sc ope. Busy seasons (spring and early summer) may create scheduling bottlenecks, leading to longer lead times or premium rush fees. For a realistic timeline, review your installer’s calendar and inquire about potential delays. Mont-River recommends booking at least six weeks ahead to secure your preferred start date and to guarantee uninterrupted work.Lead-Safe Work and Disposal Fees
Homes built before 1990 often contain lead-based paints. If your refacing project disturbs old finishes, local regulations may require a certified lead-safe contractor. These professionals follow strict protocols—containment, wet-sanding and HEPA vacuuming—that add roughly $300–$600</strong> to the total cost. You may also face municipal disposal fees for hazardous waste, which typically range from $50 to $150 per cubic metre of debris. Factor these charges into your budget if you suspect lead-paint disturbance or unusual waste streams.10. Top Savings Tips to Lower Your Cabinet Refacing Budget
Even a modest cabinet refacing project can add up quickly. By applying a few strategic cost-cutting measures, you can stretch your dollars further without compromising on style or quality. Here are our top recommendations:Choose Affordable Materials
Opting for laminate or thermofoil veneers instead of solid wood can shave thousands off your overall bill. Low-maintenance foils are available in an ever-growing palette of colours and textures, and they resist moisture better than natural veneer. If you do want a wood look, consider a thin wood veneer over engineered core—it retains real-wood grain at a fraction of the price of solid panels.Retain Existing Hardware
Before you trash old knobs, pulls and hinges, take stock of what still works. A thorough cleaning or a quick spray of satin-chrome can make well-worn hardware look practically new. If you do decide to switch styles, shop around local hardware stores or online wholesalers—many offer trend-right pieces at lower markup than specialty installers.Bundle Projects
If you’re planning additional upgrades—like new countertops, backsplash installation or under-cabinet lighting—grouping them with your refacing job can yield volume discou nts. Contractors often reward larger work orders with better rates on labour, delivery and waste removal. Even ordering slightly more veneer or doors while you’re at it can net you reduced per-unit costs.Get Multiple Quotes
Don’t settle for the first number you receive. Aim to gather at least three detailed estimates that break down materials, labour and disposal fees. Comparing line-item pricing reveals where installers are marking up their services or materials, giving you bargaining power to negotiate a fairer deal or spot areas where you can downgrade to hit your budget.Time Your Project
Scheduling your refacing during the industry’s slow season—typically late fall or mid-winter—can yield discounted labour rates and faster start da tes. Keep an eye out for manufacturer promotions or holiday sales on veneers and hardware, and align your project timeline to take advantage of these offers. A little patience can translate into significant savings on both materials and installation.11. How Cabinet Refacing Can Increase Your Home’s Value
Updating cabinets through refacing not only revitalises your space but can also bolster your home’s resale appeal. Potential buyers often notice freshly refaced cabinetry first, associating modern finishes and cohesive hardware with a well-kept property. Let’s explore how this relatively modest investment can translate into substantial returns when it comes time to sell.Return on Investment Statistics
According to industry surveys, homeowners recoup roughly 70% to 80% of their refacing outlay in added property value. For example, a $6,000 cabinet refacing project could boost your home’s market price by $4,200 to $4,800. This level of ROI rivals other popular reno tasks—such as bathroom updates—yet costs considerably less than a full cabinet replacement.Refacing vs Full Replacement ROI Comparison
While replacing kitchen cabinets might seem like the ultimate upgrade, it can carry price tags two to three times higher than refacing—and the ROI doesn’t always justify that expe nse. Refacing offers a quick refresh for a fraction of the cost, and the visual impact is immediate. In contrast, investing heavily in new custom cabinetry can yield diminishing returns at resale, as buyers are often unwilling to pay a premium for features beyond functional and aesthetic improvements.Appeal to Potential Buyers
Freshly refaced cabinets give prospective buyers a strong first impression of care and attention to detail. Crisp edges, uniform hardware and on-trend finishes signal that the home has been maintained and updated. That sense of move-in readiness often encourages buyers to make offers more swiftly—and at closer to asking price—than homes with dated or worn cabinetry. By choosing cabinet refacing, you can achieve a high-impact, wallet-friendly upgrade that resonates with today’s market demands. It’s a small change that can deliver a big boost to your home’s overall value and appeal.12. Environmentally Responsible Disposal Practices in Canada
Cabinet refacing is already a win for the environment—it repurposes your existing cabinet boxes and significantly cuts down on new material us age. However, you’ll still end up with old doors, drawer fronts, veneers and hardware that need to be disposed of responsibly. In Canada, construction, renovation and demolition (CRD) waste is managed under a mix of federal guidelines and provincial/municipal regulations. By following these disposal best practices, you can minimise landfill contributions and often reduce your overall project costs.Understanding CRD Waste Regulations
CRD waste encompasses anything removed or discarded during a renovation: wood scraps, MDF panels, metal fittings, laminate off-cuts and more. Although federal bodies like Environment Canada set broad objectives for waste reduction and diversion, each province—and in many cases individual municipalities—maintains its own rules about how this debris must be handled. Generally, you are required to:- Separate waste streams on-site (e.g., wood, metal, plastics).
- Transport materials to certified transfer stations or recycling depots.
- Secure permits for large-volume or hazardous-waste disposal when necessary.
Municipal Recycling & Drop-Off Programs
Most Canadian cities provide convenient options for residents to recycle or safely discard renovation debris:- Wood and untreated lumber: chipped or whole boards often accepted at green depots.
- Metal hardware: hinges, screws and drawer glides can be dropped off with metal recyclers.
- Clean laminate/veneer pieces: some facilities accept small, non-hazardous off-cuts.
Extended Producer Responsibility (EPR)
Extended Producer Responsibility (EPR) programmes shift the end-of-life management of materials back to manufacturers and suppliers. Several provinces in Canada have active EPR schemes that cover cabinetry and related products:- British Columbia: Product Care’s Furniture and Carpet stewardship programme accepts laminates and wood-based panels.
- Ontario: The Resource Productivity and Recovery Authority (RPRA) coordinates the collection and processing of wood, MDF and other renovation materials.
- Quebec: Recyc-Québec runs initiatives for construction and demolition waste, including cabinetry components.
13. Ergonomic and Safety Best Practices for DIY Cabinet Refacing
Refacing your own cabinets can be rewarding, but a lack of preparation or attention to ergonomics and safety can turn a satisfying project into a painful one. Prioritising tool upkeep, managing airborne dust, using the right protective equipment and adopting healthy work habits will help reduce the risk of injury and ensure you finish on time and on budget. Below are four key areas to focus on when tackling a DIY cabinet refacing job.Tool Inspection & Maintenance
Before each work session, give your power tools and hand tools a thorough once-over. Inspect blades and bits for dullness or damage and replace them if necessary. Check power cords for frays or exposed wires and ensure moving parts on routers, sanders and drills spin freely without wobbling. A well-maintained tool not only cuts cleaner but also minimises kickback and binding—common causes of accidents. For more guidance on safe carpentry practices, see the CCOHS tool maintenance checklist.Dust Control & Ventilation
Cabinet refacing generates fine wood and veneer particles that can irritate your eyes, lungs and skin. Set up a shop vacuum with a HEPA filter to capture dust at the source—whether it’s coming from a sander or a table saw. Keep windows and doors open to maintain a steady flow of fresh air, and avoid working in confined spaces without an extraction fan. Clearing dust as you go helps protect your respiratory system and prevents slippery floors that can lead to trips or falls.Personal Protective Equipment (PPE)
Never underestimate basic PPE. At a minimum, equip yourself with:-
- Safety glasses or goggles to shield your eyes from flying chips and splinters.
- A respirator or N95 mask when sanding or cutting to trap fine dust and volatile organic compounds from adhesives or finis
- Hearing protection—either earmuffs or earplugs—if you’re running loud tools for extended periods.
- Cut-resistant gloves when handling sheet materials or sharp-edged veneers; switch to grip-friendly work gloves for tool operation.
Safe Work Practices
Staying mindful of your body’s posture and limits can save you from long-term aches. Position workpieces at waist height to avoid bending or overreaching; use adjustable sawhorses or workbenches if necessary. Alternate tasks every hour—switch from sanding to fitting doors, for instance—to engage different muscle groups. Secure loose clothing, remove jewellery that could catch on tools, and keep long hair tied back. Finally, take short breaks to stretch and hydrate, especially during longer sessions. These small habits go a long way in maintaining steady progress and preventing injury. By incorporating these ergonomic and safety best practices into your DIY cabinet refacing project, you’ll work more efficiently, minimise health risks and achieve professional-looking results—without the common aches, strains or mishaps that cost time and mo ney.14. Your Next Steps for a Successful Cabinet Refacing Project
You’ve now seen the full spectrum of costs—from national averages and per-linear-foot rates to per-door pricing and DIY scenarios—along with the key factors that influence your budget, the most effective ways to save, and the safety and environmental considerations you’ll want to keep in mind. Armed with this knowledge, you can confidently approach your cabinet refacing project with a clear plan, realistic expectations and an eye for quality.Lets Begin:
<p>Begin by taking accurate measurements of your existing cabinet runs, doors and drawer fronts. Compare the options covered in this guide—entry-level thermofoil, mid-range veneers or premium solid-wood panels—and decide where to allocate your budget. Factor in any upgrades you’d like, such as crown moulding or under-cabinet lighting, and remember the savings tips: shop affordable materials, reuse existing hardware where possible and collect multiple quotes to ensure you get the best value. Next, consider your ideal approach:- If you’re a seasoned DIYer, gather the right tools, protective g
- If you prefer a hands-off experience, engage a professional installer to handle everything
- Or choose a hybrid route—use our “Build a Door” platform to design your doors and do the removal yourself, then let an expert take over the installat

Oct 4 2026 BY David Adrian, Blog
Durable, Affordable, and Low-Maintenance (to name a few)
When upgrading your kitchen, Thermofoil cabinet doors are a popular choice for homeowners seeking a combination of durability, affordability, and easy maintenance. Whether refacing an old kitchen or building a new one, Thermofoil-sealed doors offer several advantages making them a smart investment. Here’s why:
1. Durable and Long-Lasting
Thermofoil cabinet doors are known for their exceptional durability. The PVC covering is resistant to scratches, dents, and cuts, providing a practical choice for busy kitchens. Whether you have kids, pets, or everyday wear and tear, Thermofoil cabinets hold up well over time and maintain their pristine appearance.
2. Moisture and Warp Resistant
Another standout feature is their moisture resistance. The vacuum-sealed PVC finish helps prevent moisture from seeping into the cabinet doors and drawer fronts. This provides an ideal solution for kitchen environments where humidity and spills are common. Unlike wood, Thermofoil doors will not warp or crack over time due to water exposure. They will maintain their shape and structure for years.
3. UV Resistant – No Fading
Unlike painted wood or laminate surfaces, the PVC material used in Thermofoil cabinet products does not fade or change color when exposed to sunlight. This UV resistance ensures that your custom cabinet doors will stay vibrant and beautiful, even in kitchens with lots of natural light.
4. Easy to Maintain
Cleaning and maintaining Thermofoil cabinet doors could not be simpler. All you need is a soft cloth, soap and water, or a common household cleaner. Easily wipe away dirt and grime without worrying about damaging the finish. Their low-maintenance nature makes them perfect for anyone who wants to spend less time cleaning and more time enjoying their kitchen.
5. Affordable
Because of the efficient manufacturing process, Thermofoil doors are a lower cost than traditional wood doors, while still offering a high-end look. The streamlined production and ease of customization mean you get a top-quality product at a fraction of the price. Allowing you to upgrade your kitchen without breaking the bank.
6. Easy to Replace
Custom cabinet doors with a Thermofoil finish are easy to replace. If you ever need a replacement cabinet door, the streamlined production process allows for exact replicas to be made. This means you can order a cabinet replacement that matches your existing doors perfectly and without any hassle.
7. Solid, One-Piece Construction
Thermofoil doors are constructed as a single solid piece, eliminating the risk of joint failure common with traditional wood doors. The absence of seams or joints increases their strength, giving the doors a sleek, modern look that many homeowners love.
8. Extended Warranty for Peace of Mind
Enjoy the security of cabinet doors with a longer warranty. The Door Maker offers a 10-year warranty on all Thermofoil doors, far surpassing the typical 1- to 2-year coverage applied to most wood doors. This extended warranty provides peace of mind, knowing your investment is protected for a decade. The durability and resilience of Thermofoil doors, combined with this extensive warranty, make them an unbeatable option for anyone planning to upgrade with custom Thermofoil cabinetry.
When you are ready to upgrade your kitchen, bathroom, laundry, or any room in your home or office with durable, stylish Thermofoil cabinet doors, The Door Maker has everything you need. With over 30 styles and 130 colors, you can customize the perfect look for your space. Use the Build a Door tool to get started today!

Sep 18 2026 BY superuser, Blog
What is cabinet refacing?
Cabinet refacing involves replacing existing doors and drawer fronts of your kitchen cabinets with new ones. If the base cabinets are in good shape and haven’t lost their colour, you can leave them as is and make do without veneer panels or painting them. If you are considering updating the colour of the base cabinets too, you can paint them with a new colour or glue a new veneer on them. The hardware (handles, drawer pulls and hinges) is normally replaced during DIY kitchen cabinet refacing too.How does DIY cabinet refacing work?
While many people think kitchen cabinet refacing is the same as cabinet renovation, in reality, it is not. Cabinet refacing primarily involves replacing the doors and drawer fronts of the kitchen cabinets with newer replacement options. The average process would look something like this:- You get precise measurements of your cabinets doors and drawer fronts. Check out this video guide on measuring kitchen cabinet doors for your DIY kitchen cabinet refacing project.
- Do your research on cabinet door suppliers and choose the one you can trust. Select the desired colour for your new cabinet replacement doors and drawer fronts and place the order.
- Remove your old cabinet doors.
- Install new hardware on the new cabinet replacement doors. This step is unnecessary if the old hinges and handles are still in good condition and you decided to keep them.
- Mount new doors and drawer fronts on the cabinets.
Where to get materials for DIY cabinet refacing?
There are multiple cabinet-refacing suppliers in Toronto, the GTA and throughout Ontario. As someone dreaming of a perfect kitchen, you want to be sure the cabinet door replacements you buy are high-quality, long-lasting and of the best possible price. You can start by researching cabinet thermofoil door suppliers online and sorting them by reviews. Next, compare the pricing and the quality of the materials, and find out if the supplier has a physical location where you can visit and ask for samples. All this will help you choose the best supplier at a reasonable price.Why Choose The Door Maker For Your DIY Kitchen Cabinet Refacing Project?
The Door Maker is the number one provider of cabinet thermofoil doors in Ontario and all across Canada. Having been in the business for over 48 years, we have gained a reputation as a reliable and trustworthy kitchen/bath cabinet doors supplier with the best quality products. Not only do our clients get to choose from a wide range of colours, door profiles and edge designs, but they also take advantage of the most affordable prices and flexible payment options. Our clients are never left to wonder about the door's design as our staff is always available to help with colour and design considerations. Our product is easy to install and gives the appearance of painted wood or finely stained natural grain cabinet doors. We are also the manufacturer of our product, so we can offer our customers the best pricing on the market. To top up our exceptional service and excellent product, we use only the latest in technology and machinery to ensure a high level of efficiency in the manufacturing process and zero carbon footprint. TDM is your go-to source for exceptional quality thermofoil cabinet doors in North America.
How much does DIY kitchen cabinet refacing cost?
According to the Home Guide, the average kitchen cabinet refacing cost is $6,518 (~ CAD 8,950). A 10′ x 12′ kitchen will cost between $4,214 and $8,110 (~ CAD 5,783 to CAD 11,130) to reface. Of course, these numbers greatly depend on aspects such as the quality of the materials, hardware, kitchen size and more. Labour costs are also important to keep in mind. If you hire kitchen refacing contractors, expect to pay between $30 to $100 per hour on top of the materials and hardware costs. But if you want to save even more money and are up for a challenge, consider a DIY option.Pros and Cons of DIY kitchen cabinet refacing
When considering DIY kitchen cabinet refacing, it is crucial to weigh all pros and cons of this venture.Why go for DIY kitchen cabinet refacing?
- Brand new kitchen cabinets for a fraction of the cost - DIYing your kitchen cabinet refacing is definitely cheaper than renovating your entire kitchen from scratch.
- No city permits are required - Since cabinet refacing doesn’t involve any major plumbing or electrical work, you don’t need to apply for any permits to reface your kitchen cabinets.
- Boosted home-resale value - With cabinet refacing, your kitchen will look as stunning as a brand new kitchen, so expect to get a higher resale value when selling your home.
- An outlet for creativity - If you are keen on all things DIY, especially those concerning home design, kitchen refacing is a great opportunity to allow your creativity to run wild.
When to stay away from DIY kitchen cabinet refacing?
- Not worth the money if cabinets are old or damaged - cheap, old plywood cabinets showing signs of wear may not be worth the effort of refacing them.
- Doesn’t help change kitchen layout and cabinet space - if kitchen layout is what bothers you more than the cabinet fronts themselves, refacing may not be the best option as it will not change the kitchen’s layout.
FAQs
Can you DIY kitchen cabinet refacing?
Yes, you can! In fact, this process is so easy that you shouldn’t even bother hiring a professional installer to complete your kitchen cabinet refacing project. All you need is ordering the right supplies and a little DIY spirit.How long do kitchen cabinet refacing projects take to complete?
Depending on the kitchen size, it could take you from a weekend to a week or two to finish a DIY kitchen cabinet refacing project. The installation time will also vary depending on your skill level. An experienced DIYer will complete the installation in less time than a novice.Is DIY cabinet refacing worth the money?
Indubitably, yes. Aside from saving you a big chunk of money, your kitchen will obtain a brand-new look without the hassle of a full remodel.
Aug 27 2026 BY Ksenija Lebec, Blog
Custom cabinet doors in Canada typically run from roughly $7 to $15 per square foot for raw MDF materials, with finishing adding another $10 to $53 per square foot depending on paint or stain complexity. A standard kitchen door often lands in a wide price range when finished, influenced by size, material, and finish type, though quotes vary based on whether shipping and minimums are included. Get exact measurements before requesting quotes so the numbers you’re comparing actually mean the same thing.
TL;DR:
- Raw MDF cabinet doors typically cost between $7 and $15 per square foot, with finishing adding $10 to $53 per square foot depending on complexity.
- Material prices increase from MDF to plywood and solid wood, with solid options like maple or oak exceeding $20 to $30 per square foot before finishing.
- Larger orders generally qualify for better per-square-foot rates, but minimum door sizes and freight costs can significantly raise overall prices.
- Choosing simpler styles and standard finishes can reduce costs, while accurate measurements and itemized quotes prevent unexpected expenses.
- Canadian-made doors usually come with a slightly higher price but offer benefits like shorter delivery times and better quality control.
Table of Contents
- How Much Do Custom Cabinet Doors Cost in Canada?
- What Six Factors Drive Custom Cabinet Door Costs?
- What Do Three Sample Canadian Kitchen Budgets Look Like?
- How Can You Lower Your Custom Cabinet Door Costs?
- How Do You Measure and Order Custom Cabinet Doors Correctly?
- Do Cabinet Door Prices Vary by Region in Canada?
- Does a Warranty Change What You Pay for Cabinet Doors?
- Are Canadian-Made Doors Worth More Than Imported Options?
- What’s the One Thing Every Canadian Homeowner Should Verify First?
- Ready to Get an Accurate Quote for Your Kitchen?
- Sources
How Much Do Custom Cabinet Doors Cost in Canada?
The range is wide because “custom cabinet door prices” covers everything from a flat MDF slab to a hand finished solid maple panel with glazing. Understanding where your project sits on that spectrum is the first step toward a realistic budget.
Raw MDF doors, the most common starting point for refacing projects, generally run $7 to $15 per square foot, with professional-grade CNC-cut MDF closer to $12 to $13 per square foot. Plywood doors sit a step above that, and solid wood options, especially maple or oak, often exceed $20 to $30 per square foot before any finish is applied.
Here’s a general breakdown of raw material pricing across the three most common substrates:
- MDF (slab or shaker): roughly $7 to $15 per square foot
- Plywood: roughly $15 to $22 per square foot
- Solid wood (maple, oak, cherry): roughly $22 to $35+ per square foot
Pro Tip: A door that measures less than the supplier’s minimum still gets billed at the minimum rate. Most Canadian suppliers apply a 1.5 square foot minimum per door or drawer front, so a tiny spice-drawer front can cost the same as a much larger piece.
Do the math on an average kitchen door, roughly 3 square feet, and you’re looking at $21 to $45 in raw material at typical MDF rates. Add finishing, which can run $10 to $53 per square foot depending on whether it’s a simple painted finish or a multi-coat lacquer with glazing, and a single finished door can land anywhere from $60 to well over $200. That spread is exactly why two quotes for “the same door” can look wildly different: one includes finish and shipping, the other doesn’t.
What Six Factors Drive Custom Cabinet Door Costs?
Material is the obvious lever, but it’s rarely the only one moving your total. Six variables typically decide where your final invoice lands.
Material choice sets the floor. MDF costs less than plywood, which costs less than solid wood, and that order rarely flips regardless of supplier.
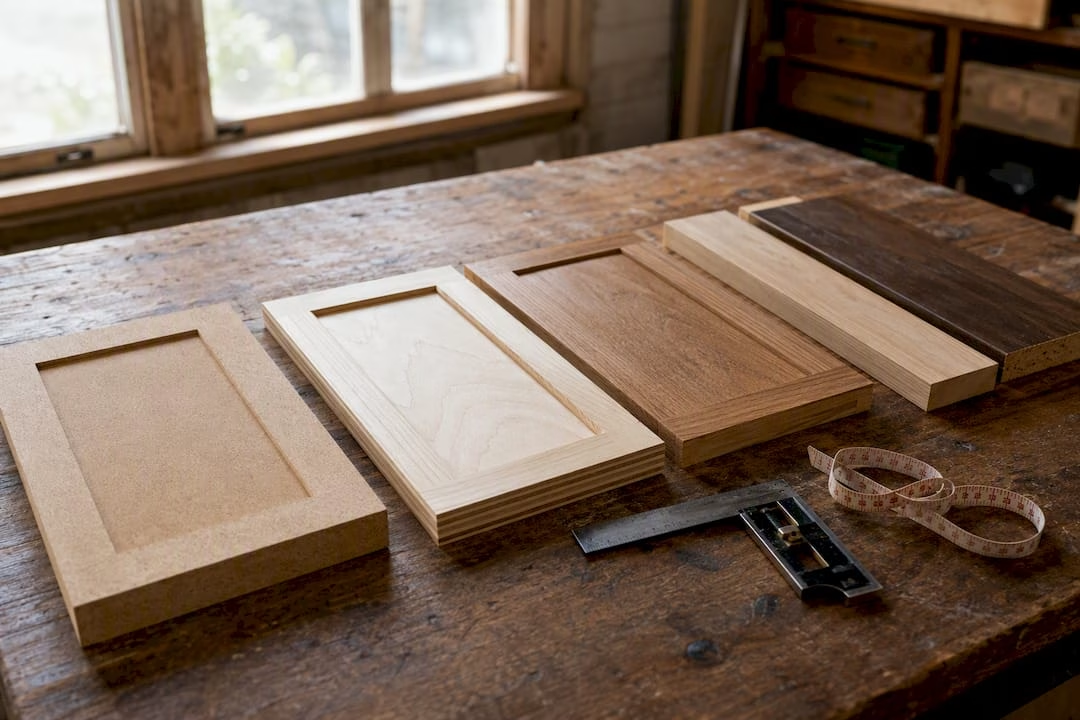
Style complexity adds labor time. A flat slab door takes far less machining than a five-piece shaker, and a raised panel or specialty profile with decorative routing pushes costs higher still.
Finish type is often the single biggest swing factor, since professional finishes and glazing can add $10 to $53 per square foot on top of the raw door price.
Order size and volume matter more than most homeowners expect. Suppliers frequently offer better per-square-foot rates on larger orders because setup costs get spread across more doors.
Rush fees and shipping can quietly inflate a quote. Expedited production and freight to rural addresses both carry accessorial charges that don’t always show up until checkout.
Add-ons round out the list: hinge boring for popular systems like Blum, custom sizing outside standard dimensions, and special edge profiles each carry their own small per-door fee that adds up across a full kitchen.
Choices around style and finish, not material alone, tend to move a quote the most.
What Do Three Sample Canadian Kitchen Budgets Look Like?
Real numbers help more than percentages. Here’s how three different approaches play out for a mid-size Canadian kitchen with 20 doors and drawer fronts.
-
Economy: MDF slab or basic shaker. At $7 to $10 per square foot raw and a simple painted finish, expect $60 to $90 per door for an average 3 square foot door. Twenty doors runs roughly $1,200 to $1,800 before shipping. Skipping glazing and keeping the profile flat is what keeps this tier affordable.
-
Midrange: painted MDF or plywood shaker. Raw costs climb to $12 to $18 per square foot, and a quality painted finish adds another $15 to $25 per square foot. That puts a single door in the $80 to $130 range, with a full 15 to 20 door order landing between $1,600 and $2,600.
-
Premium: solid wood or decorative profiles. Solid maple with a raised panel and custom stain typically costs more, and premium finishing or glazing adds considerably on top. Some Canadian manufacturers list solid wood options well above $22 to $23 per square foot before finish, so a full kitchen in this tier commonly runs $3,500 to $6,000 or more.
Minimums and shipping shift every one of these totals. A kitchen with several small drawer fronts under the 1.5 square foot minimum will price higher per piece than the square-foot math above suggests, and freight to a rural address adds another variable worth confirming upfront.
How Can You Lower Your Custom Cabinet Door Costs?
Refacing instead of full cabinet replacement is the single biggest lever available. Swapping doors and drawer fronts while keeping your existing cabinet boxes typically costs a fraction of a full teardown and rebuild, since you’re avoiding new cabinet carcasses, plumbing disconnection, and countertop removal entirely. Our cabinet refacing cost comparison breaks down where those savings actually come from.
Beyond that broader decision, a few smaller choices add up fast:
- Choose simpler styles. A shaker or slab profile costs less to machine than a raised panel or custom glazed finish.
- Stick with standard finishes. Custom color matching and multi-coat lacquer both carry labor premiums that flat paint or stain don’t.
- Consolidate your order. Grouping similar door sizes and ordering everything at once often qualifies for better per-square-foot pricing than ordering in batches.
- Request itemized quotes. Ask suppliers to break out material, finish, hardware add-ons, and shipping separately so you’re comparing true apples to apples, not just a bottom-line number.
A low headline price with no breakdown is often hiding a thinner finish or a shipping surprise waiting at checkout.
How Do You Measure and Order Custom Cabinet Doors Correctly?
Custom doors are cut to your exact dimensions, and accurate measuring is the single most common factor in avoiding costly reorders. Suppliers work to tight manufacturing tolerances, and a measurement off by even a fraction of an inch can mean a door that doesn’t sit flush.
Before you request a quote, walk through this sequence:
- Measure every door and drawer front individually using a step-by-step measurement guide for new cabinet doors rather than eyeballing from a single template.
- Order a sample door or color swatch to confirm the finish matches what you’re picturing before committing to a full kitchen.
- Confirm whether your quote includes finishing, hinge boring, and shipping, not just raw material.
- Ask about production lead times and whether rush fees apply if your timeline is tight.
Pro Tip: Precision matters more than people expect. Doors are cut to fine tolerances, and a supplier’s online calculator catches sizing mistakes before they become an expensive reorder.
Do Cabinet Door Prices Vary by Region in Canada?
Yes, and the gap can be meaningful depending on where you live. Homeowners in major urban centers like Toronto, Vancouver, and Calgary often see slightly higher labor and finishing rates baked into local supplier pricing, reflecting higher regional overhead and shop rent.
Rural and remote areas face a different cost pressure: freight. Shipping cabinet doors to smaller communities in Northern Ontario, the Maritimes, or interior British Columbia typically adds more to the final bill than any regional labor difference does, since doors are bulky, need careful packaging, and travel further from manufacturing hubs concentrated in Ontario and Quebec.
This is part of why comparing quotes across Canada purely on a per-square-foot basis can mislead you. A supplier quoting a lower base price in one province might offset that entirely with a higher shipping charge to your address. The more useful comparison factors in your all-in landed cost, meaning raw material, finish, and freight combined, not just the number printed at the top of the quote.
Online suppliers who ship nationally tend to standardize pricing more than local shops do, since their cost structure isn’t tied to a single region’s labor market. That can work in your favor if you’re in a smaller market where local cabinet shops are scarce and pricing power sits with just one or two providers.
Does a Warranty Change What You Pay for Cabinet Doors?
It usually does, and that’s not a bad thing. A supplier backing their doors with a meaningful warranty, covering delamination, finish cracking, or warping, is signaling confidence in their materials and construction, and that confidence typically comes with a slightly higher price than an unwarrantied budget option.
The tradeoff is usually worth it. Cabinet doors take daily abuse: steam from cooking, grease, humidity swings between seasons, and constant hand contact around handles and edges. A door with a thin veneer or poorly sealed MDF core can start showing damage within a couple of years, while a warrantied product with proper edge banding and sealed substrates is built to hold up far longer.
When you’re comparing quotes, ask specifically what the warranty covers and for how long. Some suppliers only guarantee against manufacturing defects, which is a much narrower promise than a warranty covering finish performance over five or ten years of normal kitchen use. A vague “satisfaction guarantee” without specifics is worth far less than a written warranty that names what’s covered.
Paying slightly more upfront for a supplier with a clear, documented warranty is often cheaper over the life of your cabinets than replacing a budget door that fails in year three. Treat warranty terms as part of the price comparison, not an afterthought you check after you’ve already decided.
Are Canadian-Made Doors Worth More Than Imported Options?
Often, yes, though not always for the reason homeowners expect. Canadian-manufactured doors typically carry a modest premium over imported alternatives, and that gap usually reflects shorter shipping distances, more consistent quality control, and faster turnaround on reorders or replacement parts, not necessarily superior raw material.
Imported doors, frequently sourced from overseas manufacturers, can undercut Canadian pricing on paper. But that lower sticker price often comes with longer lead times, since freight from overseas takes weeks rather than days, and less flexibility if a piece arrives damaged or doesn’t match your original order. Getting a replacement door from an overseas supplier can take as long as the original order did.
There’s also a quality consistency argument worth weighing. Manufacturing quality and finish expectations vary significantly between suppliers, and a low per-square-foot price on an imported door doesn’t guarantee the same core density, edge sealing, or finish durability you’d get domestically. Canadian manufacturers working to North American humidity and temperature conditions also tend to build doors that hold up better to the specific climate swings homeowners here deal with each winter.
For most homeowners, the smarter comparison isn’t Canadian versus imported on price alone. It’s landed cost plus turnaround time plus how easily you can get support if something arrives wrong.
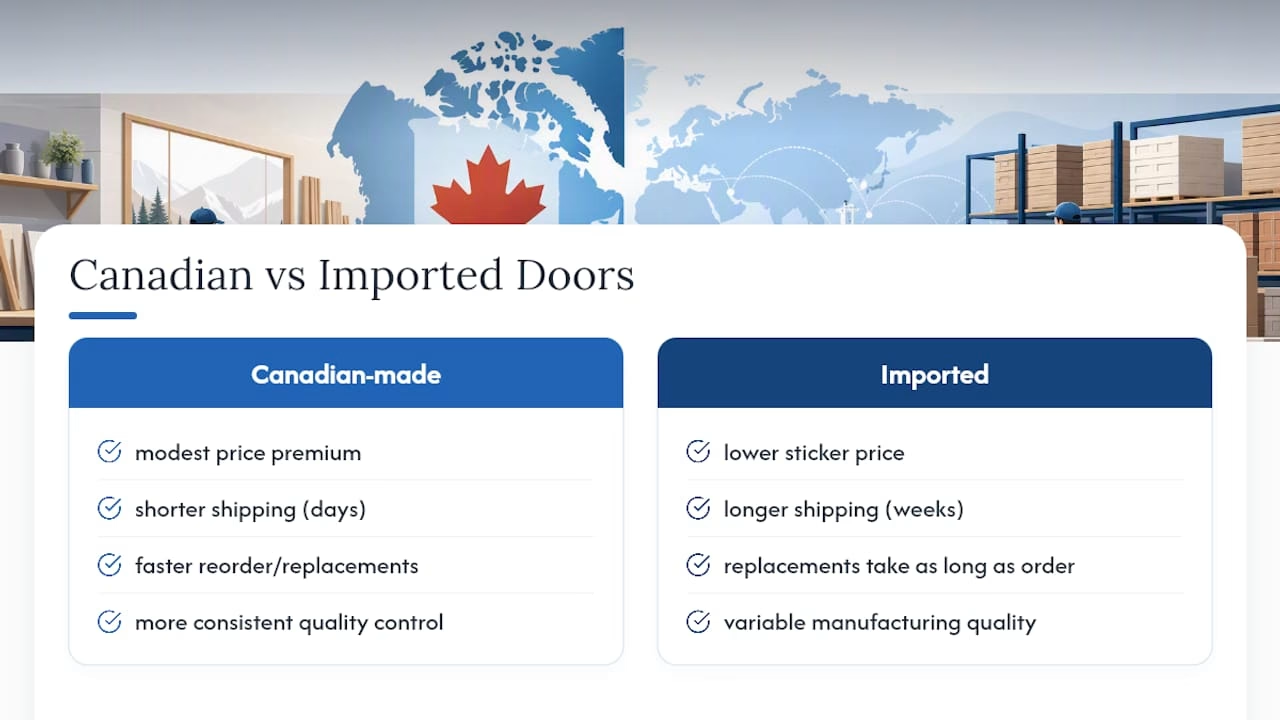
What’s the One Thing Every Canadian Homeowner Should Verify First?
Budget for $60 to $150 per finished door in the midrange tier, and get your measurements locked down before you request a single quote. Confirming whether finish and shipping are included is the step most homeowners skip, and it’s the one that causes the biggest sticker shock later. The Door Maker’s measure, design, order process, backed by a wide selection of styles and finishes, exists specifically to make that sequence painless. Request a sample door or a measured quote before committing to a full kitchen order.
— David
Ready to Get an Accurate Quote for Your Kitchen?
Tdm-thedoormaker is the alternative to guessing at a cabinet shop’s quote sheet: our online configurator gives you real, itemized pricing for your exact door sizes in Canadian dollars, before you commit to anything. Instead of waiting on a contractor callback or driving to three different showrooms to compare finishes, you measure your own doors using our guided tools, design them from over 30 styles and 130+ colors and finishes, and see your total cost before you order.

That measure, design, order workflow is built around precision sizing to 1/10,000 of an inch, so the door that arrives fits the opening you measured, not an approximation of it. You can request sample doors and color swatches first to confirm finish quality in person, which removes the guesswork that comes with ordering sight unseen. If you’re still weighing whether refacing or full replacement makes more sense for your kitchen, our refacing versus replacement comparison lays out the cost difference plainly. When you’re ready, head to our custom cabinet door ordering page and start with a free measured quote.
Sources
The pricing ranges and finishing costs cited throughout this guide draw from published Canadian supplier data. TrueCore’s MDF pricing breakdown supports the raw material per-square-foot figures. Cutting Edge’s cost guide informed the minimum square-footage explanation, while their standard grade doors page supports the finishing add-on ranges. Their measurement information guide informed the measuring guidance above.
- How Much Do MDF Cabinet Doors Cost in Canada? (Pricing Explained)
- Cost Of Canadian Custom Cabinet Doors
Recommended
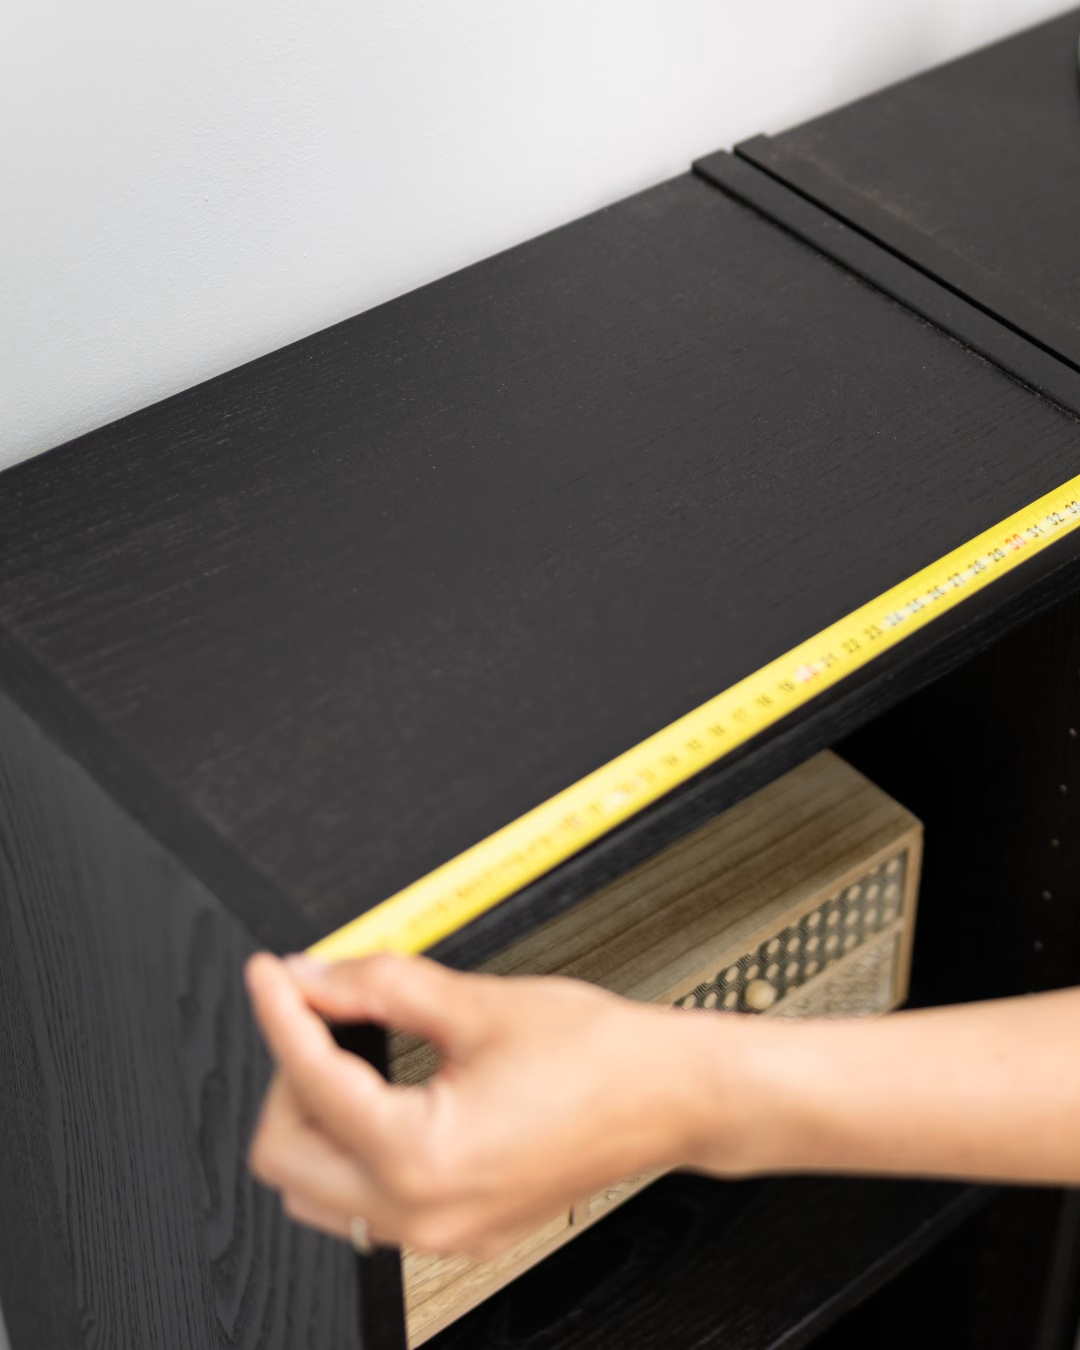
Aug 7 2026 BY David Adrian, Blog
Gathering the Right Tools for the Job
A few minutes of organization now will save you from a ton of frustrating do-overs later. You only need a few simple things, but they need to be the right things. A flimsy, old tape measure just won't cut it. They can sag or even stretch, which is a recipe for disaster when you're ordering custom doors. Your most important tool is a high-quality steel tape measure. It gives you the rigidity you need for a perfectly straight, precise reading, especially when you're measuring a wide opening. Next, grab a simple notepad and a pencil. It's tempting to just jot numbers down on a scrap of wood or punch them into your phone, but don't. A dedicated notepad keeps your width and height measurements organized and easy to read, which seriously cuts down on the chance of mixing them up. For example, a note like "Upper Cabinet #1: 18" W x 32" H" is much clearer than a random "18x32" in your phone's notes.Pro Tip: Always double-check if your cabinet frames are square. This is a big one, especially in older homes where things have had time to settle. Just hold a small level against the frame—it'll tell you instantly if it's plumb. This quick check can save you a headache and explain why you might be getting different measurements at the top and bottom of an opening.Here's a quick rundown of what you'll want on hand:
- Steel Tape Measure: This is non-negotiable for accurate, consistent readings.
- Notepad & Pencil: To keep every measurement clear and organized.
- Straight Edge or Level: Perfect for checking if frames are square and helping you draw straight lines if needed.
Cracking the Code on Cabinet Overlays
 Before you even think about touching a tape measure, you need to understand how your doors sit on the cabinet frame. This is called overlay, and it’s the single biggest factor in getting your door sizes right. A measurement for one style will be completely wrong for another, so this is a critical first step.
Simply put, overlay describes how much of the cabinet face frame the door covers when closed. Getting this right dictates the entire formula for your final door dimensions.
Full Overlay Doors
Just like the name says, full overlay doors cover almost the entire cabinet face frame. This gives you that modern, seamless look with very tight gaps between doors. When you look at the cabinets, you see door, door, door—and very little of the frame behind them. To measure for a single full overlay door, you’ll take the opening's width and height, then add the overlay amount to each dimension. A very common overlay is 1/2 inch, which means you’d add a total of 1 inch to the final width and height measurements (1/2 inch for the left side, 1/2 inch for the right, and so on). Here's a real-world example: If your cabinet opening is 16 inches wide by 30 inches high, and you want a standard 1/2 inch overlay:- Door Width: 16" + 1" = 17"
- Door Height: 30" + 1" = 31"
Partial Overlay Doors
Partial overlay is the classic style you’ve probably seen in countless kitchens. Also known as traditional or standard overlay, the door only partially covers the face frame. This design leaves a good portion of the frame—usually 1 to 1.5 inches—exposed around each door. The measuring process is the same as for full overlay, but you're just adding a smaller amount. For instance, with a 3/8 inch overlay, you'd add a total of 3/4 inch to the opening's width and height. Practical Example: For that same 16-inch wide by 30-inch high opening, but with a 3/8-inch partial overlay:- Door Width: 16" + 3/4" = 16 3/4"
- Door Height: 30" + 3/4" = 30 3/4"
A small mistake here can throw everything off. You could end up with doors that collide with each other or have sloppy, uneven gaps, completely ruining the professional look you're after. Nail the overlay, and the rest of the job becomes much easier.
Inset Doors
Inset doors are in a class of their own. They don't sit on top of the frame at all—they sit perfectly flush inside the cabinet opening. The face of the door is level with the cabinet frame, giving it a high-end, custom furniture appearance. Measuring for inset doors is the opposite of the other styles; you subtract instead of add. You'll measure the opening precisely and then subtract a small amount, typically 1/8 inch total from both the width and height. This creates a tiny, consistent clearance gap so the door doesn't scrape against the frame. Let's use our example opening: For a 16-inch wide by 30-inch high opening:- Door Width: 16" - 1/8" = 15 7/8"
- Door Height: 30" - 1/8" = 29 7/8"
Cabinet Door Overlay Measurement Guide
To make things easier, here’s a quick-reference table that breaks down the math for each style.| Door Style | Measurement Approach | Example Calculation |
|---|---|---|
| Full Overlay | Opening + (Overlay x 2) | 16" Opening + (1/2" x 2) = 17" |
| Partial Overlay | Opening + (Overlay x 2) | 16" Opening + (3/8" x 2) = 16 3/4" |
| Inset | Opening - Clearance Gap | 16" Opening - 1/8" = 15 7/8" |
Measuring Cabinet Openings Like a Pro
Alright, let's get to the most important part: measuring your cabinet openings. This is where a little bit of precision goes a long way. I’m going to walk you through the same process the pros use to make sure every door hangs perfectly, and it all comes down to what we call the "rule of threes." One thing you learn quickly is that cabinet frames, especially in older homes, are almost never perfectly square. Houses settle, wood shifts over the years, and things can get a bit skewed. Just measuring in one spot is a classic rookie mistake that leads to doors that scrape, bind, or have weird, uneven gaps.The Rule of Threes in Practice
To work around any of these imperfections, you need to measure the width at the top, middle, and bottom of the opening. Then, you'll do the same for the height by measuring the left, middle, and right sides. This approach gives you the full story of the opening's actual shape, not just a single snapshot. Once you have your three width and three height measurements, the rule is simple: always use the smallest measurement of the set. This is your safety net. It guarantees your new door will fit into the tightest point of the opening without any trouble. Let’s say you measure the width and get these numbers:- Top: 15 inches
- Middle: 15 1/16 inches
- Bottom: 14 15/16 inches
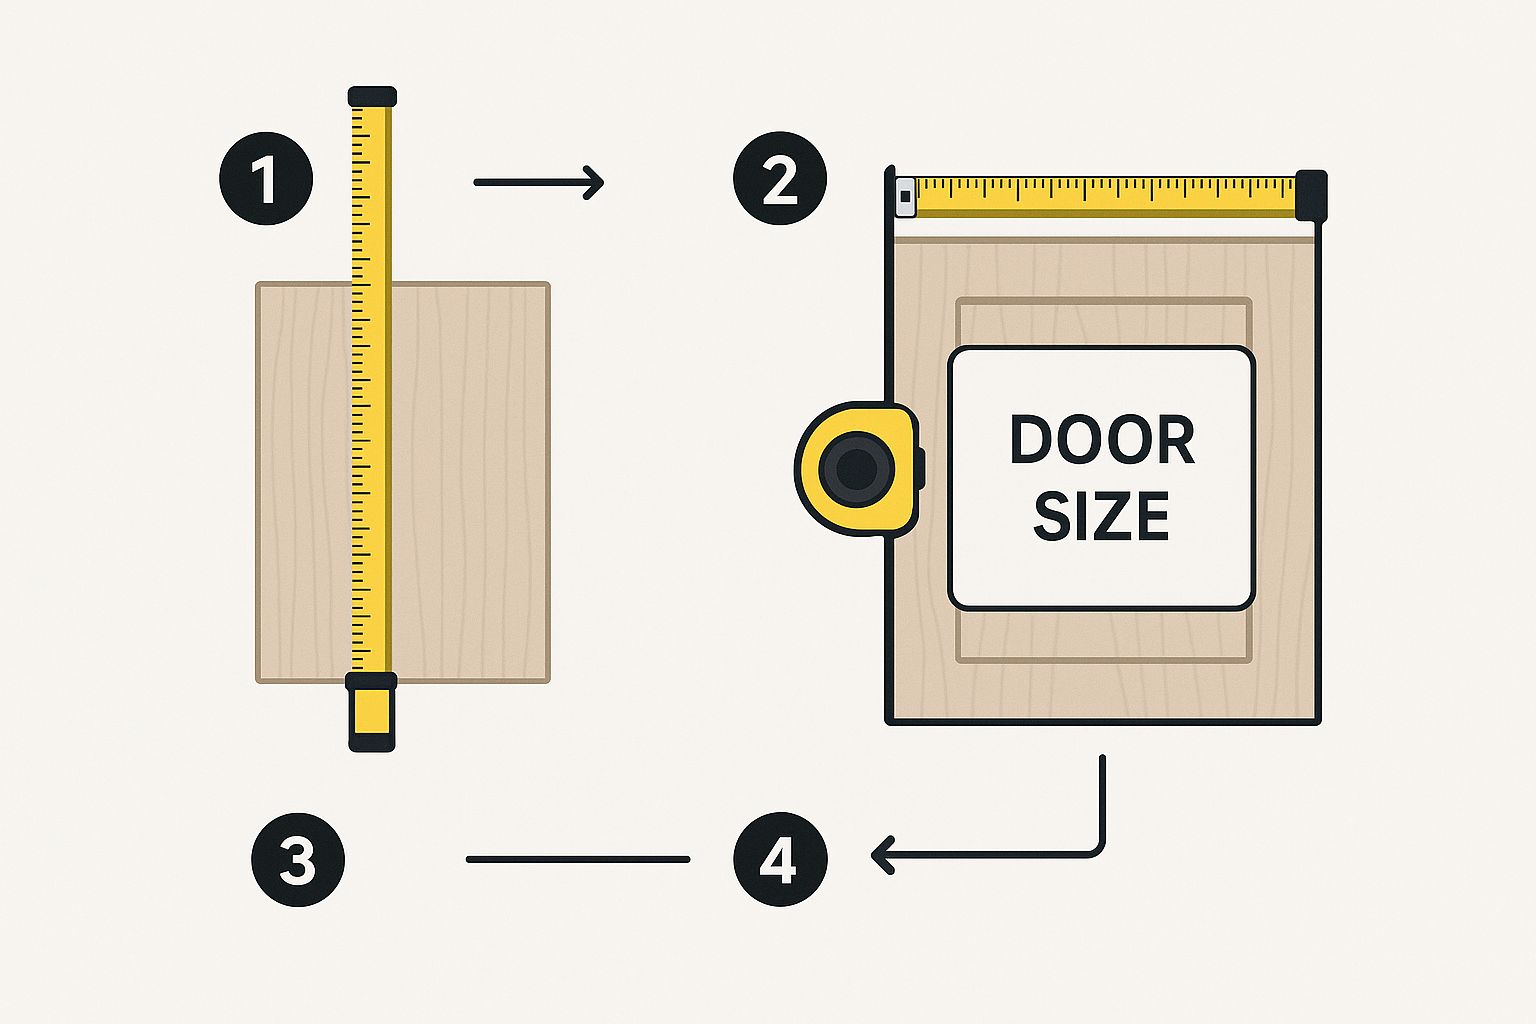 It’s a great visual reminder that both height and width need that same level of careful attention. These two dimensions are the foundation of your whole project.
Measuring for Double Doors
What about those wide openings that need a pair of doors? The process starts the same but has one extra step to make sure they meet perfectly in the center without clashing. First, measure the opening's width using the rule of threes and take the smallest dimension, just like before. Now, you need to account for a small gap between the two doors so they don't smack into each other. A standard gap is 1/8 inch. To figure out the width for each individual door, you'll add 1 inch for the overlay (assuming a standard 1/2-inch overlay on both sides), subtract the 1/8-inch gap, and then divide the whole thing by two. Here's a practical example: Your opening is 30 inches wide.- Add Overlay: 30" + 1" = 31"
- Subtract Gap: 31" - 1/8" = 30 7/8"
- Divide by Two: 30 7/8" ÷ 2 = 15 7/16" Each of your two doors should be 15 7/16 inches wide.
How to Measure Existing Doors for a Perfect Match
If you're already happy with how your current doors fit and you're just looking for a style upgrade, measuring your existing doors is a fantastic shortcut. But there's definitely a right way to do it. The biggest mistake I see people make is trying to measure a door while it's still hanging on the hinges—it’s a surefire way to get inaccurate numbers. To get a perfect measurement, you have to take the door off first. Lay it down on a flat, stable surface like a workbench or even a clean spot on the floor. This gets rid of any sag from the hinges and guarantees your tape measure lies perfectly straight. Once it's flat, carefully measure the exact height and width down to the nearest 1/16th of an inch.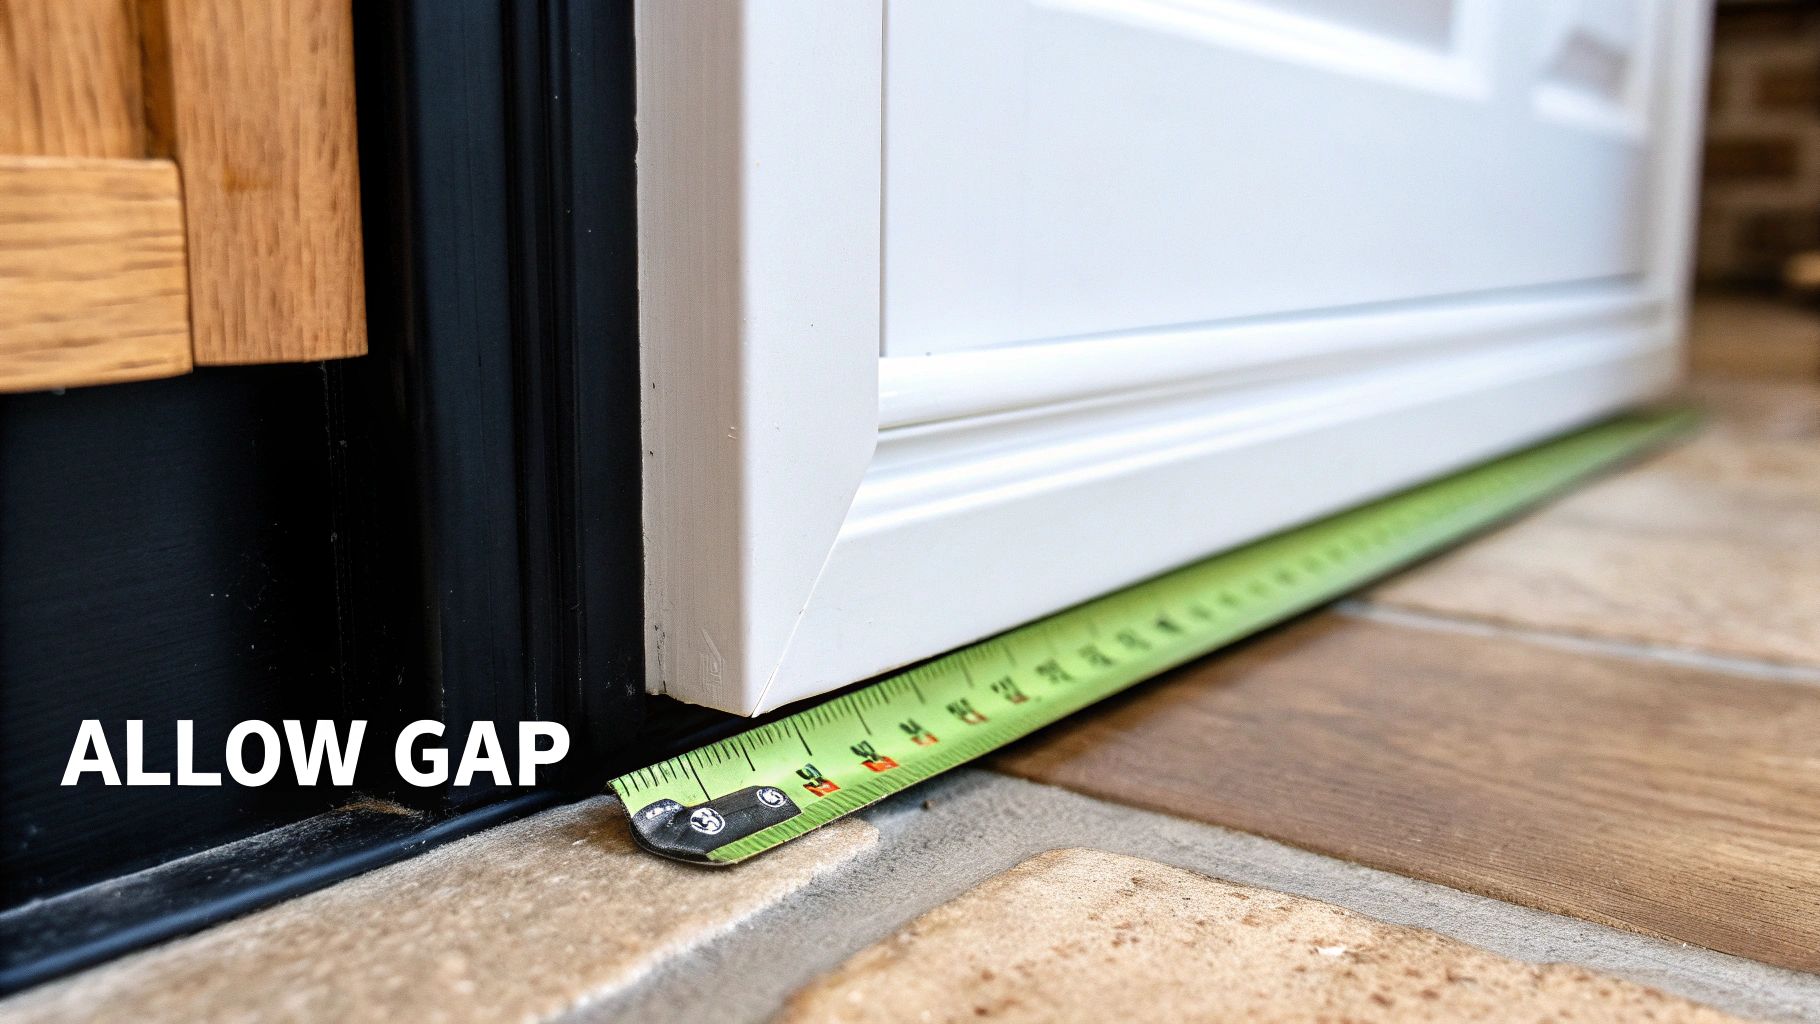
Don't Forget Hinge Placement
Getting the height and width is only half the battle. The most critical step—and the one people often forget—is to measure for your hinge placements. If you skip this, your new doors won't line up with the existing hinge holes on your cabinet frames, and that's a massive headache you don't want. You'll need to record the distance from both the top and bottom edge of the door to the center of each hinge cup hole. That's the large, round recess where the hinge itself sits.For example, if your top hinge cup is 3 inches from the top edge of the door, and the bottom hinge is 3 inches from the bottom edge, you need to write those exact numbers down. This precision is what turns the project into a seamless swap instead of a frustrating struggle.This step is an essential part of the process when you want to transform your kitchen by replacing cabinet doors without the pain of redrilling your cabinet frames. A few extra moments of careful measuring here will pay off big time. To make sure you don't miss anything, just follow this simple checklist for each door:
- Door Width: Measured flat, to the nearest 1/16".
- Door Height: Measured flat, to the nearest 1/16".
- Top Hinge: Distance from the top edge to the center of the hinge cup.
- Bottom Hinge: Distance from the bottom edge to the center of the hinge cup.
Common Measuring Mistakes and How to Avoid Them
Even with the best intentions, a few simple mistakes can derail your entire cabinet door project. We’ve seen it happen. Let’s walk through the common traps people fall into and, more importantly, how you can sidestep them for a flawless result. These small details are often the difference between a professional finish and a frustrating redo. One of the most frequent slip-ups is just mixing up the width and height measurements on your notepad. It sounds basic, but in the middle of a project, it happens more than you’d think. Always, always label your numbers clearly—something like "15” W x 30” H"—to avoid any confusion when it's time to place your order.Overlooking the Details
Another classic mistake is forgetting to correctly account for your overlay or necessary clearance gaps. We once had a homeowner who measured perfectly for a set of inset doors but forgot to subtract the crucial 1/8-inch clearance gap on all sides. The result? Beautiful new doors that were just slightly too big and wouldn't close. A real headache.The old carpenter’s mantra, "Measure twice, cut once," is the golden rule here. Before you finalize anything, do yourself a favor and double-check every single number on your list against the actual cabinet frames. This one final check is your best insurance policy against costly errors.Getting these measurements right is absolutely vital. The global cabinet door market was valued at around USD 17 billion in 2025, a figure that shows just how massive this industry is. Improper sizing doesn't just affect your project; it contributes to waste and installation issues that have a ripple effect. Avoiding these common pitfalls is a huge step toward a successful project. For those looking to dive deeper, our guide on refacing kitchen cabinet doors offers even more tips that can help ensure a smooth process from start to finish.
Answering Your Cabinet Measurement Questions
Even with the most detailed guide, there are always a few questions that pop up right when you think you’re done measuring. We’ve been there. To help you get over that final hurdle, we’ve pulled together the most common questions we hear from customers and installers alike.Key Questions Answered
So, what’s the standard overlay for modern cabinets? While it can definitely vary, 1/2 inch is what you’ll see most often. This just means the door overlaps the cabinet frame by that amount on all four sides. But remember, the real boss here is your hinges—always check their specs before you lock in your final door size. Another tricky spot we get asked about all the time is corner cabinets, especially those with bi-fold or lazy Susan doors. These can feel a little intimidating. The best way to tackle them is to measure each of the two door panels individually for both its width and height. For a practical example, a Lazy Susan door might consist of two panels, each measuring 10" x 30", hinged together to cover a larger corner opening.The golden rule through all of this? Consistency. In the U.S., most suppliers, including us, work in inches down to the 1/16th. On the other hand, European-style cabinets are often measured in millimeters. It’s always smart to check with your door supplier to see what unit they prefer so you can avoid any frustrating conversion errors.Nailing these final details will help you figure out if this is a project you want to tackle yourself or if it’s time to call in a pro. Our guide on choosing between DIY and hiring contractors can help you make that call. For a wider perspective on getting dimensions right, you might find these expert tips on how to measure furniture for a perfect fit helpful, too.
Ready to turn those perfect measurements into the perfect doors? At The Door Maker, our “Build a Door” tool makes it simple to design the exact custom cabinet doors you've been imagining. Start your project today at https://tdm-thedoormaker.com. Article created using Outrank

Jul 21 2026 BY Ksenija Lebec, Blog
Professional painting kitchen cabinets cost falls between $2,000 and $7,000 for a typical kitchen in 2026, with the full market range running from $800 on a small galley to over $12,000 for a large luxury layout. By the linear foot, expect typical costs for brush-and-roll and higher costs for HVLP spray. Per door, professional painters charge a range of fees per cabinet door and drawer front.
Here is what drives those numbers at a glance:
- Average professional cost: $2,000–$7,000 (typical kitchen)
- Full market range: $800–$12,000 depending on size and finish
- Cost per linear foot: $30–$60 brushed; $40–$100 sprayed
- Cost per cabinet door: $90–$175; per drawer front: $30–$50
- Cost per square foot: $3–$10, all-in with labor and materials
- Labor share: 70–85% of the total quote
- DIY materials only: $200–$600, but requires 30–50 hours of your time
Painting is still far cheaper than replacement. Full cabinet replacement can run $28,000 or more, while even a high-end paint job rarely exceeds $12,000. That gap is why so many homeowners treat painting as the first serious option before considering anything more disruptive.
What factors affect the cost of painting kitchen cabinets?
Labor is the single largest variable, but it is far from the only one. Understanding what moves the quote helps you budget realistically and spot inflated bids before you sign anything.

Cabinet material shapes both prep time and primer cost significantly. Wood cabinets require sandpaper and chemical deglosser; laminate cabinets require bonding primer and more labor., or the paint peels within months. MDF needs drywall joint compound to seal edges plus an oil-based primer at $30–$60 per gallon. Wood veneer calls for wood glue repairs before any primer goes on.
Kitchen size and layout directly scale labor and materials. A small galley with around 15 linear feet typically costs a few thousand professionally; a large kitchen with around 35 linear feet costs several thousand, varying by finish and complexity. Complex layouts with corner units or decorative molding significantly increase labor requirements compared to straightforward flat-panel cabinetry.
- Paint type and finish: Latex and acrylic paints run $20–$50 per gallon; oil-based runs $20–$80. Semi-gloss and high-gloss finishes cost slightly more per gallon but hold up better in a kitchen environment.
- Application method: HVLP spray typically increases cost over brush-and-roll but produces a smoother, factory-grade finish without brush marks.
- Prep work scope: Stripping a failed finish adds $600–$1,500 to the project. Standard prep (cleaning, sanding, priming) adds $400–$1,200 depending on cabinet condition.
- Regional labor rates: Metro areas like Los Angeles can cost nearly twice what the same scope runs in Midwestern cities like Omaha. Regional labor multipliers can effectively double the total.
- Color direction: Switching from dark to light colors requires additional primer for full coverage, increasing the prep work needed.
- Door style: Raised-panel and shaker doors require more labor due to their detailed surfaces compared to flat-panel doors.
Pro Tip: Get quotes from at least three painters and ask each one to break out labor, materials, and prep separately. A painter who bundles everything into one number is harder to compare and easier to overpay.
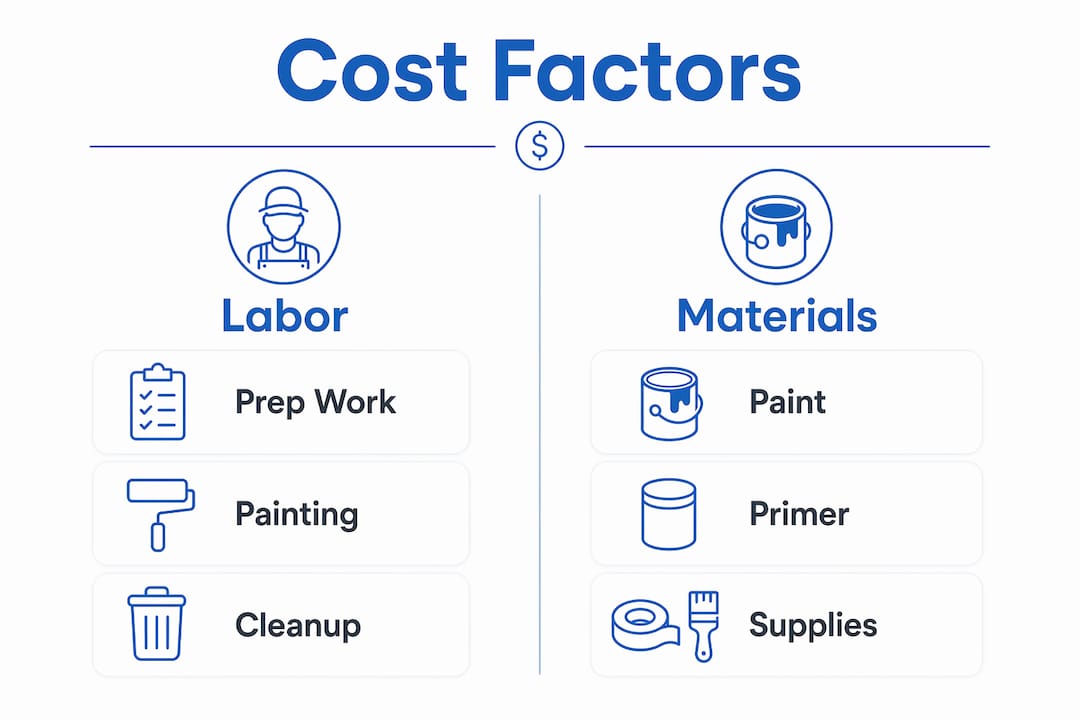
DIY versus professional cabinet painting: what does each actually cost?
The honest comparison here is not just dollars. It is dollars plus time plus the real risk of having to redo the job.
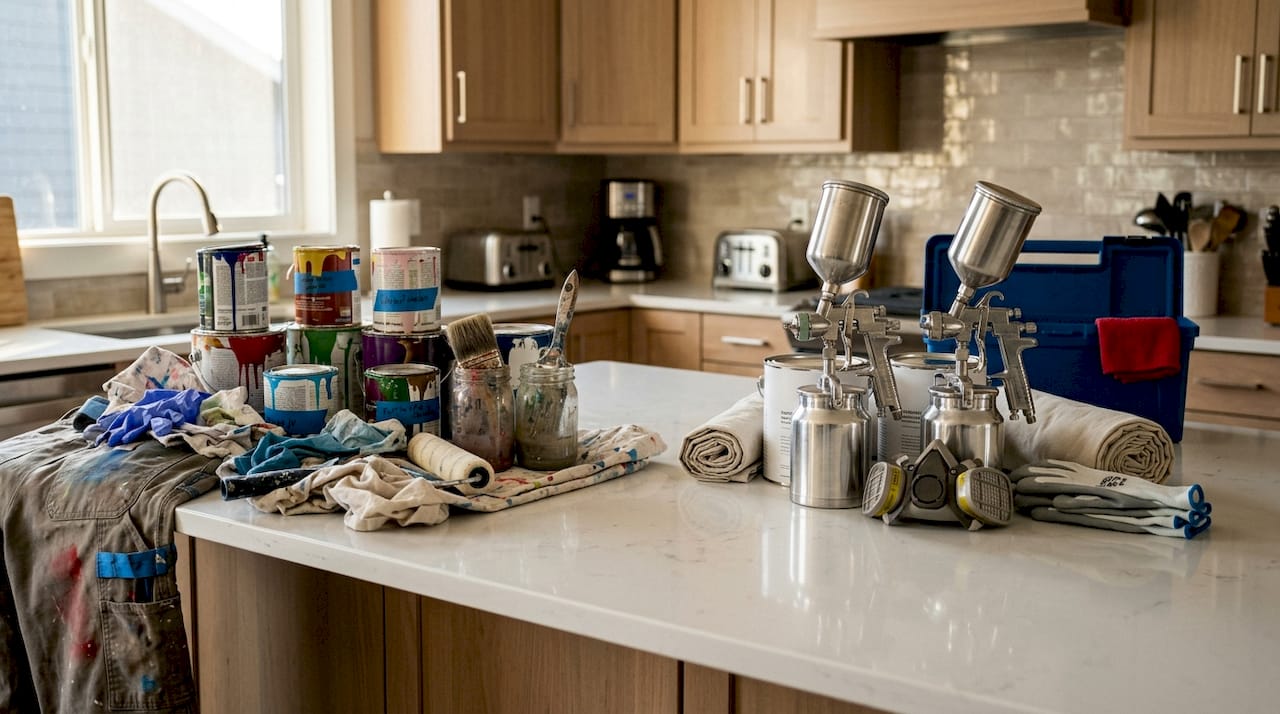
DIY materials for a 25-linear-foot kitchen run $200–$600, covering paint, primer, sandpaper, brushes or rollers, and drop cloths. Add $100–$300 for tools like an orbital sander if you do not already own one. The catch is the time: plan on 30–50 hours spread across three to five weekends. That is a real commitment, and the finish quality depends heavily on how well you prep.
Professional painting on the same 25-linear-foot kitchen generally costs several thousand dollars all-in. You get a crew that finishes in 2–5 business days, HVLP spray equipment that produces a smooth factory finish, and typically a 2–5 year warranty on the work.
| Factor | DIY | Professional |
|---|---|---|
| Paint and primer | $200–$600 | Included |
| Tools (sander, brushes) | $100–$300 | Included |
| Labor cost | — | $2,000–$7,000 |
| Time to complete | 30–50 hours over 3–5 weekends | 2–5 business days |
| Finish quality | Good with patience; brush marks common | Factory-grade spray finish |
| Warranty | None | 2–5 years typical |
| Total cost (25 LF kitchen) | $200–$600 | — |
| Risk of needing a redo | High on laminate | Low |
Where DIY makes sense: wood cabinets in good condition, a homeowner with painting experience, and a willingness to invest the prep hours properly. Where it gets risky: laminate or thermofoil surfaces, heavily damaged cabinets, or any situation where you are tempted to skip sanding to save time. Cutting corners on prep is the most common reason DIY cabinet paint jobs fail within a year. You can read more about avoiding refacing mistakes that apply equally to painting projects.
- DIY works well when: cabinets are solid wood, in decent condition, and you have prior painting experience
- Hire a pro when: cabinets are laminate, thermofoil, or MDF; when you want a spray finish; or when the kitchen is large and complex
- Hidden DIY cost: if the finish fails and you need to repaint within 2–3 years, your total cost often exceeds what a professional would have charged initially
Additional costs and maintenance considerations for painted cabinets
The quoted price for painting rarely tells the whole story. Several line items tend to appear once a painter actually looks at your cabinets up close.
Pre-painting repairs are the most common add-on. Damaged cabinetry with scratches, loose hinges, or peeling paint needs fixing before primer goes on. Budget $140–$500 for cabinet repairs depending on the extent of the damage. Skipping repairs and painting over them produces visible imperfections that no amount of topcoat can hide.
Hardware removal and replacement adds another layer. Painters typically charge to remove and reinstall hardware, and if you want new pulls or knobs, new cabinet hardware usually costs under $100 for standard options but can climb to $1,000 or more for designer or antique styles.
- Finish stripping: If the existing finish is failed or incompatible with new paint, stripping adds $600–$1,500 to the project total.
- Touch-up costs: Even a quality paint job chips eventually in a high-traffic kitchen. Budget for periodic touch-ups every few years, especially around handles and drawer edges.
- Disposal and cleanup fees: Some contractors include this; others charge separately. Confirm upfront whether masking, cleanup, and material disposal are in the quote.
- Longevity by finish type: Semi-gloss and high-gloss finishes hold up better to grease, moisture, and daily cleaning than satin or eggshell. Paying slightly more per gallon for a higher sheen pays off in a kitchen setting.
Painted cabinets can last 8–15 years with proper care, but kitchen cabinets live a hard life. Grease, steam, and constant handling all work against the finish. Wiping cabinets down with a gentle cleaner regularly and avoiding abrasive scrubbers extends the paint life considerably. For a detailed look at care and maintenance practices that protect your finish, Tdm-thedoormaker covers the specifics.
How to reduce your cabinet painting costs without cutting quality
Saving money on a cabinet painting project does not require sacrificing the result. It requires knowing where the real cost levers are.
The single most effective move is doing your own prep cleaning before the professionals arrive. Grease embedded in cabinet surfaces is one of the hardest problems painters face, and if they have to degrease thoroughly, that time goes on your bill. Scrubbing cabinets with a TSP substitute or a strong degreaser before the crew shows up can meaningfully reduce labor hours.
Pro Tip: Choose a cabinet-grade acrylic enamel or alkyd-hybrid paint rather than standard wall paint. The price difference per gallon is modest, but cabinet-grade coatings resist chipping and peeling far longer, which means fewer touch-ups and a longer interval before repainting.
- Bundle projects: If you are also repainting walls or trim, combining jobs in one mobilization often earns a 10–20% discount since the painter is already set up on-site.
- Avoid unnecessary stripping: If your existing finish is in good condition and compatible with new paint, a quality bonding primer is usually enough. Full stripping adds significant cost and is only necessary when the old finish is failing.
- Get multiple quotes: Pricing for the same scope can vary by hundreds of dollars between painters. Three quotes give you a realistic market rate and help you identify outliers.
- Choose mid-range paint: A proven mid-range cabinet paint at $40–$60 per gallon performs comparably to premium brands at $80–$100 per gallon for most kitchens. The finish quality depends more on prep and application than on the paint brand alone.
- Consider kitchen budget upgrades that pair with painting: Replacing just the hardware while painting can refresh the entire look for a fraction of a full renovation cost.
If you are weighing painting against other options, the cost of cabinet refacing is worth reviewing. Refacing replaces doors and drawer fronts with factory-finished surfaces, which sidesteps the durability concerns that come with painting entirely.
How long does a professional cabinet painting project take?
A professional crew typically completes a kitchen cabinet painting project in 2–5 business days, though the exact timeline depends on kitchen size, cabinet condition, and how much prep work the job requires.
Day one is almost entirely prep: removing doors and drawer fronts, cleaning, degreasing, sanding, and masking the surrounding area. This stage takes longer than most homeowners expect, and rushing it is where most finish failures begin. Day two typically covers priming and the first coat of paint. Days three and four allow for drying between coats and the application of the final topcoat. Day five, when needed, covers reinstallation and any touch-up work.
- Prep phase: 1–2 days for cleaning, sanding, and priming
- Paint application: 1–2 days for two coats with adequate dry time between
- Curing period: Paint may be dry to the touch in hours, but full cure takes 2–4 weeks. Treat cabinets gently during this window.
- DIY timeline: The same scope typically stretches across 3–5 weekends when done by a homeowner, since you are working in shorter sessions and waiting for full dry time between coats.
- Kitchen disruption: Expect limited access to your kitchen for the duration. Painters need to work with doors off and surfaces masked, so plan meals accordingly.
Larger kitchens with 35 or more linear feet, heavily damaged cabinets, or complex layouts with corner units and decorative molding push toward the longer end of that range. A straightforward galley with flat-panel doors in good condition can realistically finish in two days.
Why prep work and paint quality determine your long-term costs
The most expensive cabinet painting mistake is not choosing the wrong color. It is skipping prep steps to save time or money upfront.
Experts consistently note that a successful cabinet paint job is roughly 80% prep work and 20% painting. That ratio sounds extreme until you see what happens when it is reversed. Paint applied over greasy, unsanded, or unprimed surfaces peels within months, regardless of how good the paint itself is. The repair cost, plus the cost of stripping and repainting, typically exceeds what proper prep would have added to the original quote.
HVLP spray systems are the other major quality factor. Professional painters use HVLP because it achieves a factory-smooth finish that brush or roller application simply cannot replicate on raised-panel or shaker doors. The equipment is expensive and requires an experienced operator, which is part of why HVLP spray adds 30–70% over brush-and-roll per linear foot. For most homeowners, that upcharge is worth it on visible upper cabinets and door faces.
- Use specialized cabinet primers: Standard drywall primer does not bond well to cabinet surfaces. A shellac-based or bonding primer is the right starting point, especially on MDF and laminate.
- Sand between coats: Light sanding between primer and topcoat removes dust nibs and creates better adhesion. Skipping this step is visible in the finished surface.
- Allow full cure time: A finish that feels dry is not necessarily cured. Hanging doors too soon or cleaning aggressively within the first few weeks damages the surface before it has fully hardened.
- Hire contractors with cabinet-specific experience: General interior painters and cabinet specialists use different techniques. A contractor who primarily paints walls may not have the spray equipment or prep discipline that cabinet work demands.
Painter expertise and professional-grade equipment matter more to finish longevity than paint brand alone. A skilled contractor with mid-range paint and proper prep will consistently outperform a less experienced one using premium paint with shortcuts.
Is painting the right move, or is there a better option?
Painting delivers real value when your cabinet boxes are structurally sound and you want a fresh look without a full renovation budget. The cost advantage over replacement is substantial, and a quality paint job can last a decade with proper maintenance.
That said, painting is a surface fix. If your cabinet doors are warped, the finish is repeatedly failing, or you want a more durable factory finish, cabinet refacing is worth comparing directly. Refacing replaces the doors and drawer fronts with new factory-finished panels while keeping the existing cabinet boxes, which gives you a result closer to new cabinets without the full replacement price.
Tdm-thedoormaker offers custom cabinet doors online in over 30 styles and 130+ colors, sized to the nearest 1/10,000 of an inch. For homeowners who have already priced out painting and want to compare what new doors would cost, it is a straightforward way to get a number without a contractor visit.

Key Takeaways
Professional cabinet painting costs vary widely for a typical kitchen in 2026, with labor typically comprising the largest portion of the total cost, making the painter’s skill and prep discipline the most important factors in long-term value.
| Point | Details |
|---|---|
| Average professional cost | Expect $2,000–$7,000 for a typical kitchen; the full range runs $800–$12,000. |
| Labor dominates the quote | Labor accounts for 70–85% of the total cost, so the painter you hire matters more than the paint brand. |
| DIY saves money upfront | DIY materials run $200–$600 but require 30–50 hours and carry a higher risk of finish failure. |
| Prep is 80% of the job | Skipping cleaning, sanding, or priming leads to peeling within months regardless of paint quality. |
| Refacing is worth comparing | If doors are warped or paint keeps failing, replacing doors through refacing often costs less long-term than repeated repainting. |
Recommended
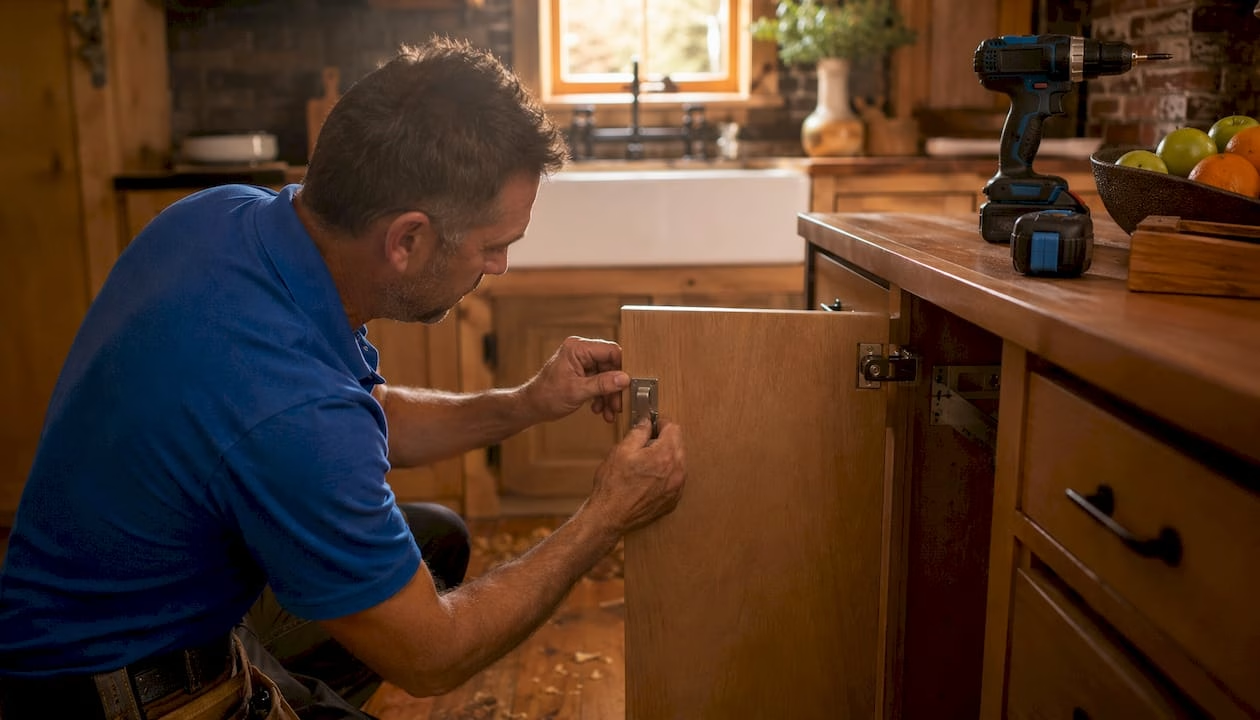
Jul 17 2026 BY Ksenija Lebec, Blog
- Door coverage: The door fully covers the cabinet box edge, leaving no visible frame gap
- Cabinet type: Designed for frameless (European-style) construction
- Standard cup size: 35 mm diameter borehole, the industry standard for concealed European hinges
- Mounting: Concealed inside the cabinet when closed, preserving a sleek exterior
- Contrast with half overlay: A 1/2 overlay hinge leaves the center stile of a face frame cabinet exposed between adjacent doors, while a full overlay hinge covers the entire edge
What makes full overlay cabinet hinges worth the upgrade?
The features built into modern full overlay hinges go well beyond simply holding a door open. Soft-close mechanisms, multi-directional adjustability, and thoughtful mounting options combine to make these hinges genuinely functional hardware, not just a commodity part. Soft-close technology is now a standard expectation in quality kitchen refacing. The integrated damper in the hinge arm slows the door in the final inch of travel, so it closes quietly every time. Soft-close reduces noise and prevents the repeated impact that wears down door edges, hinge screws, and cabinet box corners over years of daily use. Some hinges offer an on/off adjustment for the closing speed, letting you dial in behavior based on door weight and personal preference.
3D or 6-way adjustability is the feature that separates a professional-looking installation from a frustrating one. Modern concealed hinges allow you to adjust doors in six directions: horizontally, vertically, in depth, and with tilt correction. That means you can fine-tune every door after mounting without removing it, achieving consistent gaps across an entire run of cabinets.
Key features to evaluate when shopping:
- Soft-close with on/off control: Lets you customize closing speed for heavy or lightweight doors
- 6-way cam adjustment: Covers height, side, depth, and tilt for precise alignment
- Opening angle: Most full overlay hinges open to 110°; some specialty versions reach 165°
- Door thickness range: Standard compatibility runs from 15 mm to 24 mm
- Material: Galvanized steel or nickel-plated steel for corrosion resistance and durability
- Finish options: Nickel, matte black, brushed brass, and chrome to match your hardware pulls
Where full overlay hinges work best
Full overlay hinges belong on frameless cabinets, and that covers a wider range of applications than most homeowners initially realize. The frameless construction style, sometimes called European-style cabinetry, builds the box without a face frame attached to the front. The door itself becomes the finished surface, and the hinge must support that fully covered look. Common applications where full overlay hinges perform well:- Kitchen cabinets: Upper and lower runs where a seamless, flat-front appearance is the goal
- Bathroom vanities: Frameless vanity boxes benefit from the clean edge coverage and moisture-resistant finishes
- Pantry and utility cabinets: Heavier doors in these spaces benefit from soft-close damping and durable steel construction
- Built-in furniture: Bookcases, media units, and laundry room cabinetry built without face frames
- Custom cabinetry: Any project where the door panel is sized to cover the full cabinet opening edge
How to choose the right full overlay hinges for your project
Choosing correctly comes down to four things: cabinet type, overlay measurement, door thickness, and the features you actually need. Getting any one of these wrong means buying again.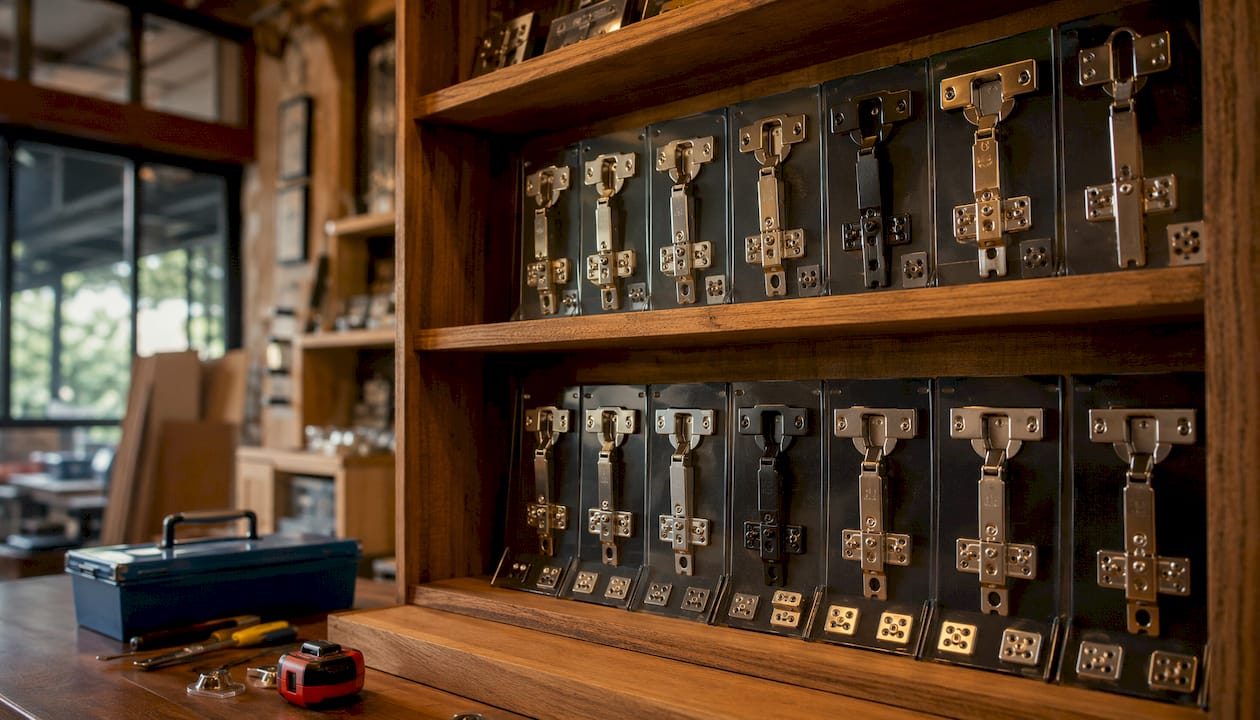 Start with cabinet type. Before you order anything, confirm whether your cabinets are frameless or face frame. Mixing hinge types with the wrong cabinet construction prevents proper door mounting and creates overlay gap problems that no amount of adjustment will fix.
Measure your overlay carefully. Full overlay means the door covers the entire front edge of the cabinet box. If you are retrofitting existing cabinets, measure the actual overlap of the door over the cabinet edge. A hinge rated for 1/2-inch overlay may only apply to the top and bottom of the door, while the sides overlay by a full inch, so precise measurement before purchase prevents a mismatch.
Key selection criteria:
- Cup hole diameter: Confirm your door material accepts a 35 mm bore; this is the universal standard for concealed European hinges
- Door thickness: Most full overlay hinges accommodate 15 mm to 24 mm door thickness; verify your doors fall in that range
- Soft-close preference: Decide whether you want soft-close only, self-close only, or a combination with on/off speed control
- Mounting plate type: Clip-on for easy future removal; screw-on for a more fixed installation
- Finish: Match to your existing pulls and knobs for a cohesive look
- Opening angle: 110° covers most standard cabinets; go wider if doors are near walls or appliances
Step-by-step installation guide for full overlay hinges
Installing concealed full overlay hinges is a manageable DIY project when you work through it methodically. The most common mistakes happen at the measuring and drilling stage, so take your time there. What you need before you start:- 35 mm Forstner bit and drill
- Drilling template or jig (most hinge manufacturers include one, or sell it separately)
- Screwdriver or drill with appropriate bit
- Tape measure and pencil
- Level or straightedge
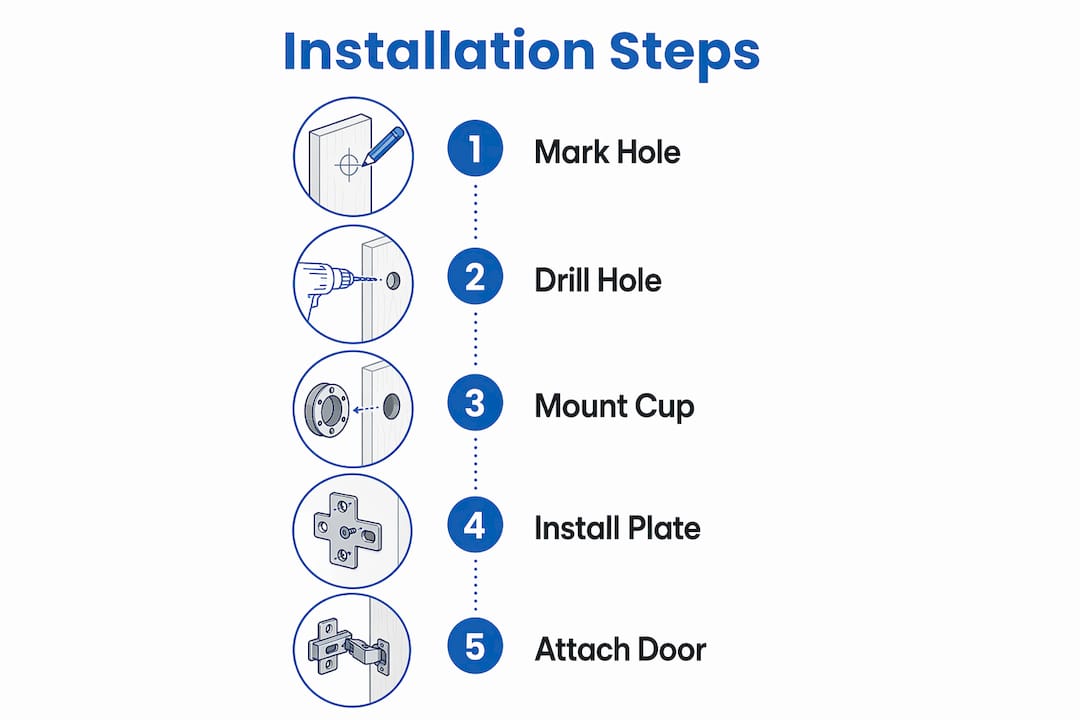 Step 3: Mount the hinge cup. Press the hinge cup into the bore hole and secure it with the provided screws. The arm should fold flat against the door back when closed.
Step 4: Install the mounting plate. Attach the baseplate to the interior side wall of the cabinet box at the correct height. Most plates have slotted holes for initial positioning before final tightening.
Step 5: Attach the door. Clip or screw the hinge arm onto the mounting plate. For clip-on systems, you simply press until you hear a click.
Step 6: Adjust for alignment. Use the 6-way adjustability screws to dial in the door position. Adjust height first, then side-to-side, then depth. Check the gap between adjacent doors with a consistent spacer, such as a folded piece of cardboard.
Common pitfalls to avoid:
- Drilling the cup hole too deep causes the hinge arm to sit proud and prevents the door from closing flush
- Incorrect overlay measurement leads to doors that overlap each other or leave a gap at the cabinet edge
- Skipping the drilling jig results in angled holes that misalign the hinge arm
- Over-tightening mounting plate screws in particleboard strips the hole; use a hand screwdriver for final tightening
Understanding the main cabinet hinge types
Knowing the difference between hinge types helps you buy the right hardware the first time and makes it easier to identify what you already have when replacing worn hinges. Full overlay hinges are built for frameless cabinets. The door covers the entire front edge of the cabinet box, and the hinge sits fully concealed inside when the door is closed. This is the style behind the flat-front, handle-free kitchens common in contemporary design. Half overlay hinges (1/2 overlay hinges) are designed for face frame cabinets where two doors share a center stile. Each door overlays the stile by approximately 1/2 inch, leaving the stile visible between the doors. These hinges are the standard in traditional American kitchen cabinetry and are not interchangeable with full overlay versions without modification. Inset hinges position the door inside the cabinet opening, flush with the face frame. The door does not overlay the frame at all. Inset installations require the most precise fitting and are common in furniture-style cabinetry and period-appropriate kitchen designs. A quick comparison:| Hinge type | Cabinet style | Door position | Gap appearance |
|---|---|---|---|
| Full overlay | Frameless | Covers full box edge | 2 mm between doors |
| Half overlay (1/2 overlay) | Face frame | Covers half the stile | Stile visible between doors |
| Inset | Face frame | Sits inside opening | Frame fully visible |
How Tdm-thedoormaker can take your cabinet upgrade further
Replacing hinges is often the first step in a larger cabinet refresh, and new hardware alone can only do so much. If your cabinet doors are dated, damaged, or simply the wrong style for the look you want, Tdm-thedoormaker offers a practical path forward through custom cabinet door refacing. The process works in three steps: measure your existing openings, design your doors using the online configurator, and place your order. Tdm-thedoormaker cuts every door to 1/10,000-inch precision, so the fit against your new full overlay hinges is exact. You choose from over 30 styles and 130+ colors and finishes, from flat-panel slab doors that suit frameless cabinets perfectly to shaker profiles and raised-panel options.
The cost advantage over a full cabinet replacement is real. You keep the existing cabinet boxes, replace only the doors and drawer fronts, and update the hardware at the same time. The result looks like a full renovation at a fraction of the price. Tdm-thedoormaker also offers add-on hinge hole boring, so your new doors arrive ready to accept the 35 mm concealed hinges you have already selected.
Pairing new doors with quality full overlay hinges and soft-close mechanisms gives you a kitchen or bathroom that functions as well as it looks. If you want to see how the door styles and colors work in your space before committing, Tdm-thedoormaker offers sample doors and color swatches. You can also explore the full cabinet refacing versus replacement comparison to decide which approach fits your budget and timeline.
Key Takeaways
Full overlay cabinet hinges are the correct hardware for frameless cabinets, and choosing the right type, measuring accurately, and pairing them with quality doors produces a durable, professional result.| Point | Details |
|---|---|
| Match hinge to cabinet type | Full overlay hinges only work correctly on frameless cabinets; face frame cabinets require half overlay or inset hinges. |
| Standard cup size is 35 mm | All modern concealed European hinges use a 35 mm bore hole; confirm your drill bit and jig match before starting. |
| 6-way adjustability simplifies installation | Height, side, depth, and tilt adjustments let you correct door alignment after mounting without removing the door. |
| Clip-on baseplates save maintenance time | Clip-on mounting plates allow tool-free door removal, making future adjustments and cleaning much easier. |
| Pair new hinges with new doors for best results | Combining full overlay hinges with custom-sized replacement doors from Tdm-thedoormaker delivers a complete, cohesive upgrade. |
Recommended

Jul 16 2026 BY Ksenija Lebec, Blog
A cabinet door calculator is a specialized tool that computes accurate door dimensions from cabinet opening measurements by factoring in overlay, reveal, and hinge specifications. Getting these numbers right is the difference between doors that swing freely and doors that bind, gap, or refuse to close. Most homeowners assume measuring a cabinet opening is enough. It is not. The final door size depends on overlay type, reveal gaps, and hinge boring distance, all working together. This guide explains exactly how the math works, what standard dimensions to expect, and how to measure with confidence before you order.
How does a cabinet door calculator determine door dimensions?
A cabinet door calculator applies a standard industry formula to turn your opening measurements into finished door sizes. The core formula for a full overlay door is: Door Width = Opening Width + (2 × Overlay) minus (2 × Gap). Height follows the same logic. With a standard 1/8-inch gap and a typical 1/2-inch overlay, the door ends up about 3/4 inch wider than the opening on each dimension. That extra width is intentional. It covers the face frame edge and creates a clean, finished look.
Overlay type changes everything. Full overlay doors cover nearly the entire face frame, leaving only a small reveal between adjacent doors. Partial overlay doors sit closer to the opening center, leaving more frame visible. Inset doors sit flush inside the opening, requiring reveal gaps of about 1/16 inch to prevent binding. Lip or rabbet doors have a small step cut into the back edge that drops into the opening. Each style produces a different door size from the same opening measurement.
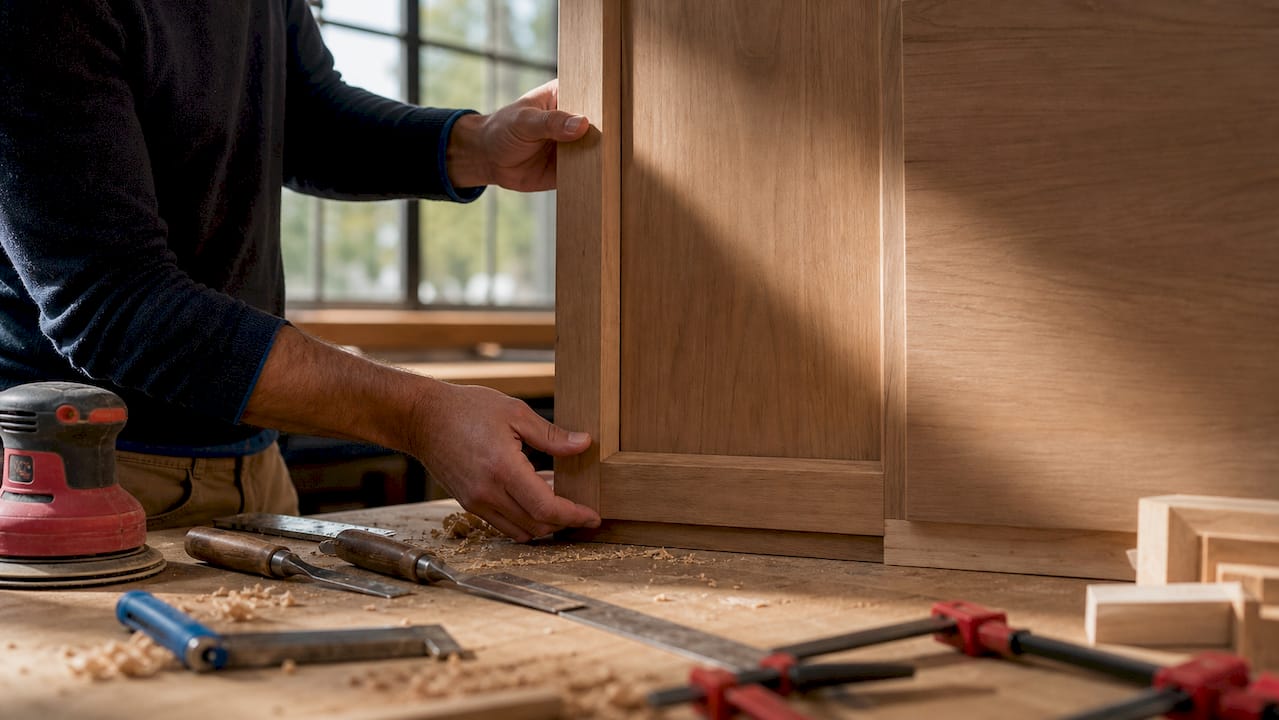
The reveal gap is a functional requirement, not a design preference. A gap that is too tight causes doors to rub or collide. A gap that is too wide looks sloppy and lets light through. For double doors sharing one opening, you also need to account for a center gap of 2–3mm between the two doors. That gap reduces each individual door’s width. Forgetting it is one of the most common ordering mistakes homeowners make.
Here is a sample calculation for a full overlay single door:
- Measure the cabinet opening width: 15 inches
- Choose overlay: 1/2 inch per side
- Set reveal gap: 1/8 inch per side
- Apply the formula: 15 + (2 × 0.5) minus (2 × 0.125) = 15 + 1 minus 0.25 = 15.75 inches
- Round to the nearest 1/16 inch for your order
Pro Tip: Always measure to the nearest 1/16 inch. Rounding to the nearest 1/4 inch is the single most common source of poor-fitting doors in DIY projects.
What are the standard cabinet and door size increments in residential kitchens?
Standard US kitchen cabinets follow predictable size increments, which makes calculator inputs much easier to verify. Cabinet widths increase in 3-inch steps from 9 inches to 36 inches. Upper cabinet heights run from 12 to 42 inches in 3-inch or 6-inch steps. Base cabinets are typically 30 or 36 inches high, not counting the countertop. These standards exist because they simplify manufacturing, installation, and replacement.
| Cabinet type | Width range | Height range | Common increments |
|---|---|---|---|
| Upper wall cabinet | 9–36 in | 12–42 in | 3-in width, 3- or 6-in height |
| Base cabinet | 9–36 in | 30 or 36 in | 3-in width |
| Tall pantry unit | 18–36 in | 84–96 in | 3-in width |
| Drawer front | 9–36 in | 5–10 in | Varies by drawer count |
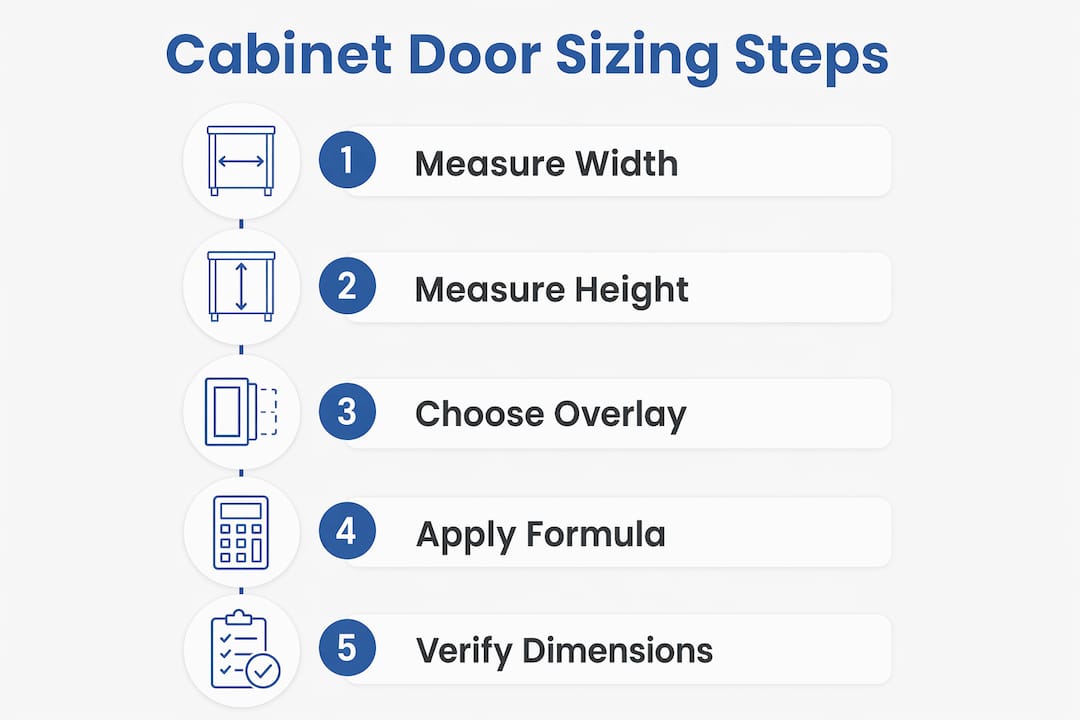
Knowing these increments helps you catch measurement errors before they reach the calculator. If your measured opening width is 17 inches, something is likely off. Standard cabinets do not come in 17-inch widths. A reading like that usually means you measured to the wrong point, such as the outside of the face frame instead of the inside opening. Checking your numbers against standard increments acts as a built-in confidence check.
Tall units and drawer fronts are the two areas where homeowners most often get tripped up. Tall pantry cabinets can reach 84 or 96 inches, and their door heights need to account for the full opening minus any fixed shelves or structural rails. Drawer fronts are sized differently from doors. They are measured by the drawer box opening, not the cabinet frame, and they often stack in groups of two or three. A custom cabinet door sizing approach handles each of these cases separately rather than applying one formula to all.
How to measure your cabinet openings and hinges accurately for the calculator
Accurate measurement is the foundation of every good cabinet door calculation. The tools you need are a fractional tape measure calibrated to 1/16-inch increments, digital calipers and a steel ruler for hardware, and a notepad to record each measurement individually. Do not rely on memory or a single measurement per opening.
The process differs slightly depending on whether your cabinets are framed or frameless:
- Framed cabinets: Measure the opening between the inside edges of the face frame, both width and height. The face frame is the flat border you see around each door.
- Frameless (European-style) cabinets: Measure the full interior width and height of the cabinet box opening. There is no face frame, so the door covers the entire front.
- Replacement doors: Measure the back of the existing door rather than the front. The back surface is flatter and gives a more accurate reading.
- Overlay check: Subtract the opening width from the door width, then divide by two. That number is your current overlay per side.
- Hinge cup diameter: Most kitchen cabinet hinges use a 35mm cup diameter, while smaller vanity cabinets often use 26mm. Confirm this before ordering.
- Boring distance: Measure from the door edge to the center of the hinge hole. This typically runs 3–6mm and must match your new hinge specification exactly.
- Measure every door individually. Openings in the same run of cabinets are rarely identical. Settlement, installation variation, and past repairs all create small differences that add up.
Pro Tip: Take three measurements across each opening, at the top, middle, and bottom for width, and at the left, center, and right for height. Use the smallest reading. Doors need to fit the tightest point.
How does hinge type and overlay style influence cabinet door calculations?
Hinge choice and overlay style are directly linked. Changing one without adjusting the other produces doors that sit unevenly or rub the frame. The boring distance must align precisely with the hinge specification. Even a 1mm mismatch can cause a door to sit proud of the frame on one side while sitting flush on the other.
Key relationships between hinges and overlay:
- Full overlay hinges are designed for doors that cover the full face frame. They require a specific boring distance, typically 3mm from the door edge.
- Half overlay (partial overlay) hinges are used when two doors share a single cabinet partition. Each door overlaps the partition by half, and the hinge is set accordingly.
- Inset hinges mount inside the cabinet opening and require very tight tolerances. The door must fit the opening with only a 1/16-inch gap on all sides.
- Hinge count by door height: Doors up to 24 inches use two hinges; doors from 24 to 36 inches use three; doors over 36 inches need four or more depending on weight.
- Door weight matters. Solid wood doors are heavier than MDF or thermofoil doors. Heavier doors may require an additional hinge even within the standard height range. You can compare solid wood versus MDF options to understand how material affects hinge requirements.
A cabinet door calculator gives you the correct nominal size. It does not verify that your chosen hinge physically fits that size. Calculators are planning tools, not final authorities. Always confirm hinge specifications against your calculated door dimensions before placing an order or making a cut.
Practical tips for using a cabinet door calculator effectively in your DIY project
A calculator produces accurate results only when the inputs are accurate. These habits protect you from the most common and costly mistakes:
- Verify every measurement twice before entering it into the calculator. A single transposed digit can produce a door that is an inch too wide.
- Understand what overlay and gap values the calculator assumes by default. Some tools default to 1/2-inch overlay and 1/8-inch gap. If your cabinets use different values, override the defaults manually.
- Account for double-door center gaps of 2–3mm when splitting a wide opening into two doors. The calculator should subtract this gap from each door’s width.
- Check your hinge specifications against the calculator output before ordering. The boring distance and cup diameter must match the door thickness and edge distance.
- Consider material thickness. A 3/4-inch thick door behaves differently from a 5/8-inch door when paired with the same hinge. Thicker doors may need a different boring distance.
- Confirm final measurements on-site after any cabinet repairs, leveling, or shimming. Openings can shift slightly during prep work.
- Use the calculator result as your order specification, but walk the measurement tape one more time before you submit. That final check takes two minutes and prevents weeks of delays.
Key takeaways
A cabinet door calculator produces accurate door dimensions only when overlay type, reveal gaps, and hinge specifications are all entered correctly alongside the measured opening size.
| Point | Details |
|---|---|
| Use the correct formula | Door size equals opening plus overlay minus gap; full overlay typically adds 3/4 inch per dimension. |
| Follow standard size increments | US cabinets increase in 3-inch width steps; verify your measurements match these increments as a competency check. |
| Measure every door individually | Openings in the same cabinet run vary; always use the smallest reading across three measurement points. |
| Match hinge specs to door size | Boring distance and cup diameter must align with your overlay choice; mismatches cause uneven door hang. |
| Treat the calculator as a planning tool | Confirm hardware compatibility and site conditions before ordering or cutting any material. |
Why I always double-check the calculator before ordering
I have seen homeowners order a full kitchen’s worth of doors based on a single pass through a calculator, only to find that three or four doors do not fit. The math was right. The inputs were wrong. Someone measured the outside of the face frame instead of the inside opening, or they forgot to account for the center gap on a double-door pantry. The calculator did exactly what it was told. It just was not told the right things.
The most underestimated step in any cabinet door project is verifying the hinge boring distance. Homeowners focus on width and height, which makes sense. But a door that is the right size and hung on the wrong hinge sits crooked, rubs the frame, or will not close flush. I have watched people reorder doors when the real fix was a $4 hinge adjustment. Spending ten minutes with digital calipers on your existing hinges before you calculate anything saves that kind of frustration.
My honest advice: use a calculator early and use it often, but treat every output as a draft. The final number comes from a tape measure held against the actual opening on the day you order. Cabinets settle. Walls are not always plumb. Kitchens that were installed fifteen years ago have had repairs, paint layers, and small shifts that no calculator can account for. The tool is genuinely useful. It is not a substitute for showing up with a tape measure.
— David
Tdm-thedoormaker makes custom sizing straightforward
Once you have your measurements confirmed, the next step is turning those numbers into doors that actually arrive correctly sized. Tdm-thedoormaker specializes in custom cabinet door refacing with a process built around three steps: measure, design, and order. Every door is cut to your exact dimensions, so the overlay and gap values you calculated translate directly into the finished product.
Tdm-thedoormaker’s website includes detailed measurement guides and a custom ordering process that walks you through submitting your dimensions correctly. The selection covers a wide range of styles, colors, and materials, including MDF and thermofoil options, at pricing that consistently undercuts larger retailers. If you have done the measuring work and confirmed your specs, Tdm-thedoormaker handles the rest with fast turnaround and precision craftsmanship.
FAQ
What is a cabinet door calculator used for?
A cabinet door calculator computes the correct door width and height from your cabinet opening measurements by applying overlay, gap, and hinge specifications. It eliminates manual formula errors and speeds up the planning process for DIY and professional projects.
What is the standard gap around cabinet doors?
The standard reveal gap is 1/8 inch for overlay doors and 1/16 inch for inset doors. These gaps prevent doors from binding against the frame or colliding with adjacent doors during normal use.
How many hinges does a cabinet door need?
Doors up to 24 inches tall use two hinges; doors from 24 to 36 inches use three; doors over 36 inches require four or more, depending on door weight and material.
What is the standard hinge cup size for kitchen cabinets?
The standard hinge cup diameter for kitchen cabinets is 35mm. The boring distance from the door edge to the hinge hole center runs 3–6mm and must match your hinge specification exactly.
Should I measure the front or back of an existing cabinet door?
Measure the back of the door. The back surface is flatter and gives a more accurate reading than the front, which may have decorative profiles, paint buildup, or edge banding that distorts the true dimension.