Blog

48–72 Hours vs Weeks: Acclimating Cabinet Doors for DIYers and Shops

48–72 Hours vs Weeks: Acclimating Cabinet Doors for DIYers and Shops

Yes. Cabinet doors need time to equilibrate to your home’s temperature and humidity before final milling or installation. Factory-finished doors usually need a couple of days of rest in the room where they’ll hang. Raw solid wood or newly milled stock is a different animal. It can take days to several weeks before it’s dimensionally stable enough to trust.


TL;DR:

  • Most cabinet doors need a minimum of 48 to 72 hours of acclimation in a conditioned space before milling or installation.
  • Raw solid wood can take several weeks to stabilize, especially in extreme seasonal humidity, while engineered materials stabilize faster.
  • Avoid drilling or hinge routing until measurements are stable over multiple days, as premature work locks in shifting dimensions.
  • Maintain indoor humidity between 30% and 55% and temperature around 68 to 72°F to prevent wood swelling, shrinking, or joint issues.
  • Consider ordering prefinished custom doors, which arrive precisely sized and finished, to avoid lengthy shop time and waiting periods.

Table of Contents

Quick Checklist: What to Do the Moment Doors Arrive

Before you touch a drill or a hinge, run through this on delivery day:

  • Unpack doors from plastic and cardboard right away. Trapped moisture under wrapping causes uneven equilibration.
  • Label and photograph each door so you can track any movement over the following days.
  • Place doors in the conditioned space where they’ll be installed, spaced apart for airflow, away from direct sun or heat vents.
  • Check your indoor humidity with a digital hygrometer and log the starting number.
  • Give prefinished doors 48 to 72 hours minimum. Raw stock needs rough milling, a rest period, then final milling.
  • Hold off on hinge routing or drilling until dimensions stop changing.

That last point trips up more DIYers than any other. Drilling too early locks in measurements that shift a week later.

How Long Does Acclimation Actually Take?

There’s no single number, and manufacturer guidance reflects that spread. Some cabinet shops tell customers 48 to 72 hours is enough for factory-finished doors. Others recommend 30 to 60 days of acclimation for full cabinetry before installation, particularly when the home’s humidity hasn’t stabilized after construction.

The material makes the biggest difference. Raw solid wood, especially long boards, can take weeks to settle. Engineered materials like plywood and MDF stabilize faster, but they still need time once a finish goes on. Trade guidance on trim and mill stock puts the range even wider: a few days up to six weeks, depending on board thickness and how far the wood’s moisture content is from your home’s baseline.

Season matters too. Winter air below 20% relative humidity pulls moisture out of wood fast, and summer humidity above 60% pushes it back in. Both extremes usually call for longer waits or active humidity control.

Don’t confuse finish dry time with cure time. A coat can feel dry to the touch in hours, but full hardness on water-based finishes often takes 7 to 21 days, and oil-based finishes can take up to 30. Plan handling and hardware installation around cure time, not the moment the surface stops feeling tacky.

The Step-by-Step Process From Arrival to Installation

Getting this right isn’t complicated, but skipping a step is how warped doors end up back on a return truck.

  1. Inspect on arrival. Photograph and label each door, check for shipping damage, and remove all packaging. If you have a moisture meter, take a baseline reading on the wood and log your room’s humidity with a hygrometer.
  2. Rough-dimension raw stock first. Leave extra thickness rather than cutting to final size immediately. Cutting straight to final dimensions can release internal stresses that only show up later as bowing.
  3. Stack and rest. Use thin stickers between boards so air circulates evenly, and let the stack rest in the conditioned space for days to weeks depending on thickness and species.
  4. Final-dimension once stable. Only mill to final size after the stock has stopped moving between measurements.
  5. For factory-finished doors, open the boxes and let them sit in the installation room for 48 to 72 hours before you start layout work.
  6. Confirm stability before drilling for hinges. Take repeat measurements a day apart. If a door has moved, wait longer and keep monitoring.
  7. Watch for cupping, bowing, or checking at the ends. Document any movement and decide whether light planing, sanding, or a full replacement panel is the right fix.

Pro Tip: Keep a simple log with the date, door number, and measurement on a sticky note taped to each piece. It takes thirty seconds and saves you from second-guessing whether a door actually moved or you’re just eyeballing it wrong.

What Temperature and Humidity Should Your Space Hold?

Aim for 30% to 55% relative humidity and roughly 68 to 72°F, which lines up with the humidity range manufacturers generally recommend to keep cabinetry stable long after installation. Outside that band, wood either swells and jams joints or shrinks and opens gaps at the seams.

A few practical moves get you there:

  • Run your HVAC system consistently rather than letting the house swing between heating cycles.
  • Add a small humidifier in dry winter climates or a dehumidifier during humid stretches.
  • Never store doors in a basement or an unconditioned garage. Those spaces run far outside your target range and defeat the whole point of acclimating.
  • Store doors flat on a clean, level surface with thin stickers for airflow between them, or upright on a padded A-frame with even support along the full length.
  • Leave plastic wrap off once doors are indoors so moisture can equalize naturally.

If you’re mid-renovation, hold off on final cabinet installation until wet trades like drywall mudding or fresh concrete have finished and the space has had time to dry out. Those jobs dump moisture into the air that undoes days of careful acclimation.

Fixing and Preventing Warped or Swollen Doors

Most warping traces back to uneven moisture absorption, and the fix starts before the door ever gets hung. Finishing both faces of a door equally, including the edges, keeps moisture moving in and out at the same rate on both sides. A door finished on the front only will almost always cup toward the unfinished back over time.

  • Seal end grain on solid wood parts. It absorbs moisture faster than the face grain and is a common source of splitting.
  • Leave a small expansion gap for panels inside frame-and-panel doors. A panel fit too tight will bind and crack when humidity rises.
  • Rough-mill and rest stock before final dimensioning, especially with kiln-dried hardwood that may carry hidden internal stress.
  • For minor issues, adjust the hinges, plane a tight edge, or sand lightly. Real structural distortion usually means remaking the panel.

Pro Tip: If you see the same door warp twice after two separate fixes, stop repairing and start replacing. That pattern almost always points to a stress problem baked into the wood itself, not a workmanship issue.

For panel-specific movement issues, our cabinet side panel guide breaks down expansion gaps in more detail, and our guide on replacing warped cabinet doors walks through when repair stops making sense.

When Does Ordering Custom Doors Make More Sense Than DIY Milling?

Acclimation isn’t hard to understand, but it takes patience, shop space, and the discipline to leave stock alone for weeks when you’d rather be installing. If you’re dealing with irregular cabinet openings, widespread movement across a dozen doors, or you simply don’t have room to rough-mill and rest lumber properly, DIY acclimation stops being the low-risk option.
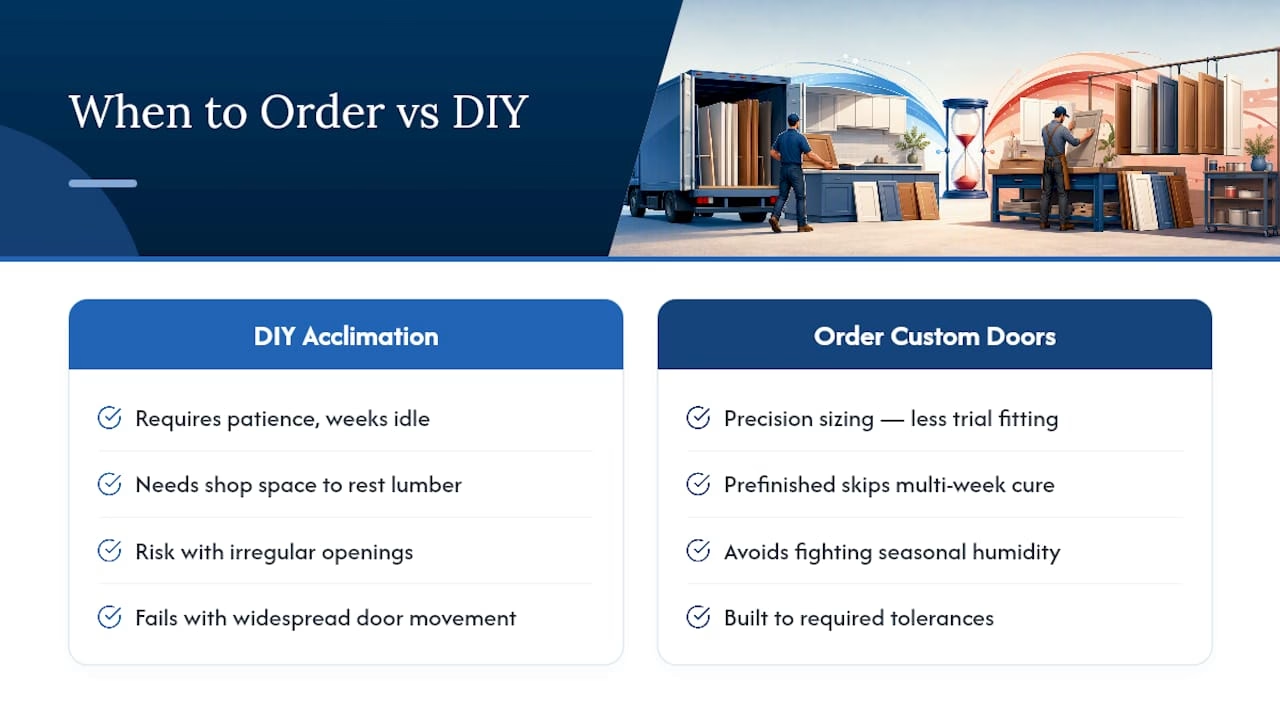
When Does Ordering Custom Doors Make More Sense Than DIY Milling? — overview diagram

That’s where a measure, design, and order process removes most of the guesswork. Precision sizing eliminates the on-site trial-and-error that comes from hand-fitting raw stock, and prefinished options skip the multi-week finish cure window entirely. You’re not fighting seasonal humidity swings with a stack of boards in your garage. You’re ordering doors already built to the tolerances your cabinets need.

For readers weighing solid wood against engineered options before they even get to acclimation, our comparison of solid wood cabinet doors versus MDF covers how each material behaves in shop conditions.

— David

A Faster Path to Doors That Don’t Need Weeks of Waiting

Tdm-thedoormaker is the alternative to raw lumber and weeks of shop time for anyone who wants finished cabinet doors without babysitting a stack of boards for a month. Measure your openings, design your doors in over 30 styles and 130+ colors and finishes, and place the order. Because every door is cut to precise sizing down to 1/10,000 of an inch and arrives finished, you skip the rough mill, rest, and final mill cycle entirely, along with the finish cure wait that comes with painting or staining on site.

Tdm-thedoormaker

Doors also come with hinge-hole options, sample doors, and color swatches, so you can check fit and finish before committing to a full order. If your current doors are already showing bowing or swelling and you’re deciding whether to repair or replace, start by browsing custom cabinet doors online to see sizing and finish options for your project.

Where to Read More on Acclimation and Finishing

Sources

FAQ

How do I adjust cabinet doors so they don’t swing open too far?

Most cabinet hinges have a built-in adjustment screw that controls the door’s opening angle. Turn it clockwise to restrict swing or counterclockwise to loosen it, checking the fit against neighboring doors after each turn.

What cabinet color won’t go out of style?

Warm and cool neutrals like white, gray, and greige have held up as durable long-term choices because they pair with changing hardware and countertop trends without looking dated.

How can I update my kitchen cabinet doors without replacing the whole cabinet box?

Refacing with new custom doors and drawer fronts keeps your existing cabinet boxes in place while swapping the visible surfaces, which is exactly the approach Tdm-thedoormaker’s measure, design, and order process is built around.

What is the 1/3 rule for cabinet hardware?

The 1/3 rule places knobs or pulls roughly one third of the way down from the top edge on upper cabinet doors and one third up from the bottom edge on lower cabinet doors, giving a consistent, comfortable grip height throughout the kitchen.
FROM THE SAME CATEGORY

Sep 8 2026 BY Ksenija Lebec, Blog

Landlords: inspect cabinets, run vacancy based ROI, budget $1,000–$13,000, and plan 1–3 day refacing installs with bulk order tips.

Build a Door MADE TO FIT YOU!

30+ Styles, 130+ Finishes: DIY Cabinet Doors to Build or Order

30+ Styles, 130+ Finishes: DIY Cabinet Doors to Build or Order

For most homeowners, a Shaker flat-panel or a painted slab door gives you the best mix of style, durability, and DIY friendliness. Both styles forgive small measurement errors and take PVC coatings well. Whichever style you land on, measure every opening for overlay or inset mounting before you cut a single board or place an order, and The Door Maker can produce that exact design once you know your numbers.


How To:

  • Measure cabinet openings three times at different points to ensure accurate sizing, avoiding binding or gaps caused by own imperfect measurements.
  • Use solid wood for stained doors where grain matters, but choose plywood or MDF for stable, painted, or moisture-prone environments to prevent warping.
  • Select Shaker or slab doors for first-time builders, while saving raised panel or inset styles for more experienced projects due to their higher tolerances and complexity.
  • Budget doors based on the number of openings, reserving higher-end styles and finishes for focal areas like islands or glass inserts to manage costs effectively.
  • Building doors yourself benefits from precise measurement tools and ordering services that can deliver doors sized to thousandths of an inch for a perfect fit every time.

Table of Contents

Designing cabinet doors starts with matching a style to your skill level, your finish plans, and how the room actually gets used. The style you pick determines everything downstream: which tools you need, how forgiving your joinery has to be, and whether paint or stain will look right on it.

Shaker doors are a popular and practical choice. The frame-and-panel construction is genuinely forgiving for first-time builders, and the flat center panel works well with various finish options.

  • Shaker: frame-and-panel with a flat center panel; versatile across kitchen styles, painted or stained.
  • Slab/flat-panel: a single flat board or panel with no frame; the easiest style to build and the easiest to wipe clean, which is why it dominates modern kitchens.
  • Raised panel: a traditional profile with a beveled, raised center; it needs more router setup time and tooling but delivers a classic, formal look.
  • Inset: doors that sit flush inside the frame rather than overlapping it; the payoff is a custom, furniture-grade appearance, but it demands tight tolerances and careful measurement.
  • Specialty inserts (glass, cane, mesh, louvered): swap the panel for a different material to add texture, ventilation, or visual break in upper cabinets, pantries, or islands.

Pick Shaker or slab if this is your first build. Save raised panel and inset for a second project, once you understand how your equipment holds a tolerance.

Materials and Construction Choices: What to Use and Why

Material choice affects three things: how the door looks finished, how long it lasts, and how forgiving it is to build. Get this wrong and even a well-designed door will crack, sag, or cup within a season.

  • Solid wood (maple, oak, poplar): best for stained doors where grain matters; strong but moves with humidity, so panels must be sized to float.
  • Plywood: dimensionally stable, good for slab doors and wide panels where solid wood would cup.
  • MDF: the standard choice for painted doors because it has no visible grain and machines cleanly, but it’s heavier and less tolerant of moisture.
  • PVC/thermofoil: fully sealed, highly resistant to humidity, common in kitchens and bathrooms where moisture is a constant issue.

Grain direction matters more than most first-time builders expect. Stiles should run with the grain vertical, and any solid panel wider than roughly 24 inches needs stabilization or should be swapped for an engineered panel to avoid seasonal cupping.

Pro Tip: Match your material to your finish before you buy anything. If you want a stained, natural-wood look, buy solid wood and accept the movement it comes with. If you want a smooth painted finish, MDF will save you sanding time and give you a flatter surface.

The most common failure mode isn’t bad wood. It’s a glued panel that had nowhere to expand and eventually split the frame apart.

How Do You Measure Overlay vs. Inset Cabinet Doors?

Overlay doors are sized larger than the cabinet opening so they cover the face frame, while inset doors are sized to fit flush inside the opening with a consistent reveal gap. Get either formula wrong by even a fraction of an inch and the door either binds or leaves an ugly gap.

  1. Overlay sizing: measure the opening width and height, then add your overlay allowance on each side (commonly 1/2 inch per side for a standard 1-inch total overlay, though full-overlay designs vary). A 12-inch-wide opening with a 1/2-inch overlay per side becomes a 13-inch-wide door.
  2. Inset sizing: measure the opening exactly, then subtract your reveal gap. Most builders target a reveal of approximately an eighth of an inch on all sides, with some tolerance to avoid binding as humidity shifts the wood.
  3. Measure three times: check width and height at the top, middle, and bottom of every opening, and record the smallest measurement. Cabinet boxes are rarely perfectly square, and building to the largest number guarantees a door that won’t close.
  4. Use the right tools: a steel tape measure, a combination square, and a notepad. Skip the flexible cloth tape, which stretches and throws off small measurements exactly where precision matters most.

For a full walkthrough with diagrams, The Door Maker’s measurement guide and its companion piece on cabinet door overlay cover both mounting styles in more depth than a formula alone can.

Build Overview: Step-by-Step Workflow for a Shaker Flat-Panel Door

Building a Shaker door is a sequence, and skipping steps or rushing the dry-fit is where most first attempts go wrong. This is the order that professional project plans consistently follow.

  1. Plan and cut a sheet: calculate rail length using the visible-rail formula (overall door width minus two times the stile width), and write every dimension down before you touch a saw.
  2. Mill the rails and stiles: bring your stock to final thickness and width, and orient the stiles with the grain running vertically for strength and a cleaner finish.
  3. Rout the groove: cut a groove into the inside edge of every rail and stile to hold the floating panel, using a consistent setup so all four pieces match.
  4. Cut the floating panel: size it to leave a clearance of 1/16 to 1/8 inch on all sides inside the groove, so it can expand and contract with humidity.
  5. Dry-fit before glue: assemble the frame without adhesive and check that the door is square by measuring both diagonals; they should match within a hair.
  6. Glue up the frame only: apply glue to the rail and stile joints, but never glue the panel itself into the groove. That single rule is the one build guides return to again and again.
  7. Drill hinge cups: mark hinge cup placement (typically a few inches from the top and bottom edges) and drill to the depth your hinge hardware specifies.
  8. Finish, then hang: sand, finish, and let it cure fully before mounting.

Choose your joinery based on your tools and patience. Cope-and-stick joints give production-quality results with a router table and matched bit set. Mortise-and-tenon is the strongest option and worth the extra setup time for doors that will see heavy use. Pocket screws are the fastest path to a square, functional door if you’re building your first one and don’t own a router table yet.

Pro Tip: Dry-fit every single door before glue-up, even your tenth one. A five-minute check with a tape measure across both diagonals catches a square problem that’s nearly impossible to fix once the glue sets.

Hands dry-fitting shaker cabinet door

Keep a push stick and eye protection within reach at every stage, and never freehand a narrow stile past a spinning blade. Table saw kickback is the single most common injury in home cabinet shops.

Finishing, Hardware, and Installation Tips

Finish quality and hardware placement are what separate a door that reads “custom” from one that reads “homemade.” Both come down to following a sequence rather than rushing to the last coat.

  • Prep and prime: sand to a consistent grit, apply a conditioner on raw wood if staining, and prime MDF or wood before any painted finish.
  • Topcoat choice: water-based polyurethane recoats faster than oil-based finishes and won’t yellow painted doors over time.
  • Hinge placement: European concealed hinges mount into a drilled cup a few inches from the top and bottom edge, and most models include a three-way adjustment screw for fine-tuning gaps after installation.
  • Hardware proportion: pick pulls and knobs sized to the door, and mount them at a consistent height across every door in the run.
  • Quick fixes: a door that won’t close flush usually needs a hinge adjustment, not a rebuild; a sticking door often just needs a fresh coat of wax on the hinge pin.

Not every upgrade requires building new doors from scratch. Some of the most effective design updates rely entirely on finish and color contrast rather than structural changes.

  • Two-tone doors: paint uppers and lowers different colors, a low-effort change if your doors are already off the hinges.
  • Beading or fluting: a router pass adds a subtle raised or grooved detail to an otherwise plain Shaker or slab door.
  • Handleless or finger-pull profiles: requires new doors milled with an integrated pull, not something you retrofit onto existing doors.
  • Glass or cane inserts: swap a solid panel for glass or woven cane in upper cabinets to break up a wall of matching doors.
  • Mesh or wire inserts: common in pantries or laundry rooms where ventilation matters as much as looks.

Two-tone paint and routed details are weekend projects. Handleless profiles and inserts almost always mean ordering new doors, since they change the door’s core construction rather than its surface. For more current combinations, this roundup of interior door trends is worth a look before you commit to a direction.

Impact of Door Design on Cabinet Functionality and Ergonomics

Door style isn’t just a visual decision. It changes how a kitchen actually works day to day. A raised panel door adds visual weight and depth, but that extra material also adds swing clearance requirements, which matters in a tight galley kitchen where two doors can collide if opened at the same time.

Inset doors look sharp, but their tight reveal tolerances mean they’re less forgiving of a house that settles over the years. A quarter-inch of foundation movement that a standard overlay door would absorb without anyone noticing can turn an inset door into one that scrapes or won’t latch.

Hardware and pull placement affect ergonomics more than most homeowners expect. Pulls mounted too high or too low force an awkward reach, especially on tall pantry cabinets or low base cabinets accessed while bending. Handleless, finger-pull designs solve some accessibility concerns for households with limited grip strength, but they add a learning curve for guests unfamiliar with the mechanism.

Hand gripping cabinet door pull hardware

Glass and open-mesh inserts change function too. They demand more visual tidiness inside the cabinet, since the contents are now on display, and they trade a bit of insulation and sound dampening for that visual openness. Louvered doors, meanwhile, solve airflow problems in laundry hampers or pantries but aren’t a fit anywhere moisture or dust control matters. Match the door’s physical behavior to how the cabinet gets used, not just how it looks in a photo.

How to Incorporate Cabinet Door Design With Overall Kitchen or Room Design Styles

Cabinet doors set the tone for a room more than almost any other single element, because they cover the largest continuous surface area in most kitchens. A farmhouse kitchen leans on Shaker doors with a painted finish and simple hardware. A modern kitchen leans on slab doors, often handleless, in a single continuous color or a bold two-tone split between uppers and lowers.

Traditional and formal rooms tend to pair raised panel doors with warmer wood tones and ornate hardware, while transitional kitchens split the difference: Shaker doors, but with a mix of painted and stained finishes across the island and perimeter cabinets to create contrast without going fully modern or fully traditional.

The room’s other fixed elements should drive the decision more than trend charts do. Countertop material, floor tone, and wall color all interact with door finish. A busy stone countertop usually calls for a simpler, single-tone door so the whole kitchen doesn’t compete for attention. A plain quartz or laminate counter can support a bolder two-tone door scheme without feeling busy.

Consistency across the room matters as much as the style itself. Mixing raised panel doors on base cabinets with slab doors on uppers reads as unfinished rather than intentional, unless it’s a deliberate two-tone strategy carried through with matching hardware and a clear color logic tying the two treatments together.

Maintenance and Durability Considerations for Different Cabinet Door Designs

Every cabinet door design ages differently, and the maintenance burden varies more by material and finish than by style alone. Painted MDF doors show wear at touch points first, typically around the pull and along the bottom edge where hands and cleaning cloths make repeated contact. Touch-up paint and a light scuff sand every few years keeps them looking fresh.

Solid wood doors, whether Shaker or raised panel, handle minor dings better than MDF because you can sand and refinish a scratch without it showing through to a substrate. That same wood will expand and contract seasonally, though, so hinges may need periodic adjustment as gaps shift slightly with humidity.

PVC and thermofoil doors resist moisture better than any painted wood or MDF option, making them a strong pick near sinks, dishwashers, and in humid climates. Their weak point is heat: a thermofoil door positioned too close to a wall oven or range without adequate clearance can delaminate at the edges over time.

Glass, cane, and mesh inserts each carry their own upkeep. Glass needs regular cleaning to stay attractive, since fingerprints and grease show immediately. Cane and mesh trap dust in their weave and need more frequent attention than a solid panel ever will. Louvered doors, with their many angled slats, are the highest-maintenance option on this list purely because of surface area and the number of edges collecting dust.

Cost Implications and Budgeting Tips for Various Cabinet Door Design Choices

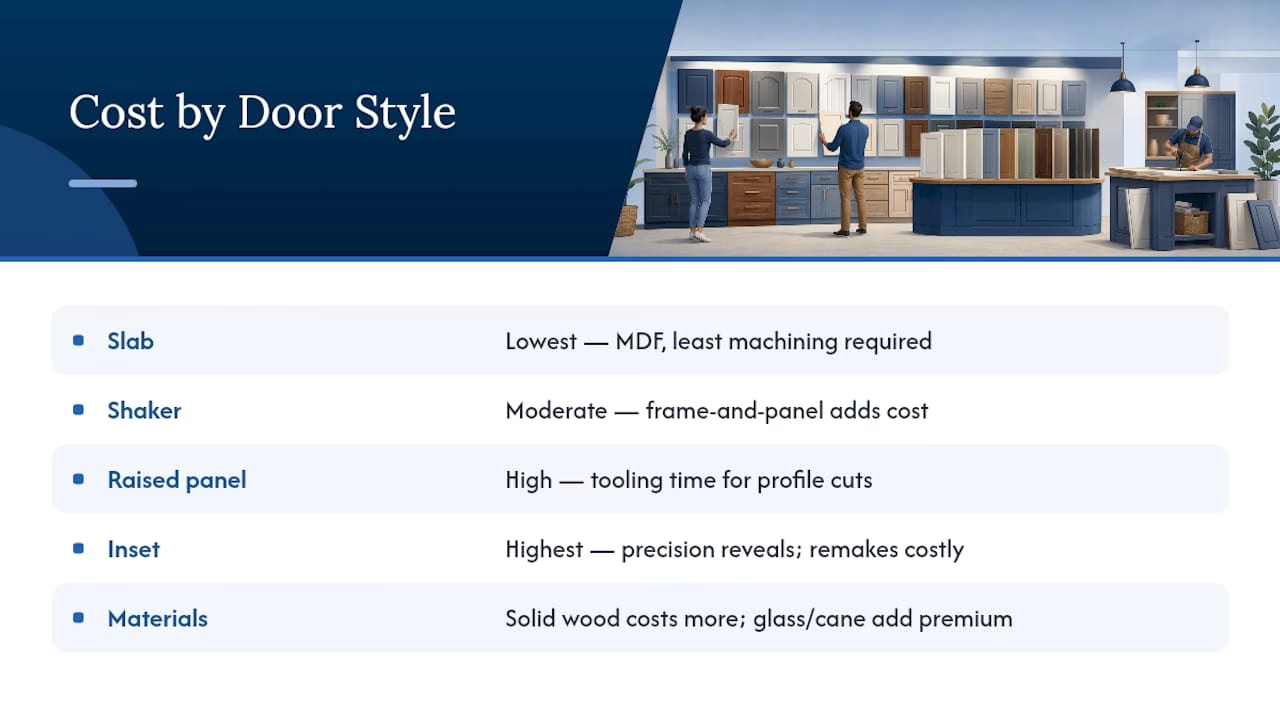
Door style and material drive cost more than almost any other kitchen decision outside of countertops. Slab doors in MDF are typically the least expensive option to produce, since they require the least machining and material. Shaker doors cost more than slab because of the added frame-and-panel construction, but the increase is usually modest given how much value the style adds.

Cost comparison chart for cabinet door styles and materials

Raised panel and inset doors sit at the higher end of the budget. Raised panel costs more due to the tooling time needed to cut the profile, and inset costs more because of the precision required to hold tight, consistent reveals across every door in a kitchen. A single inset door built out of tolerance can mean remaking it, which adds cost fast if you’re building it yourself.

Material choice compounds the style decision. Solid wood costs more than engineered panels or MDF, and specialty inserts like glass or cane add a per-door premium on top of whatever the base door style costs.

Budget realistically by pricing per opening, not per kitchen. A 15-door kitchen upgrading from slab to Shaker will feel very different in total cost than a 6-door kitchenette making the same jump. If your budget is tight, reserve the higher-cost styles and inserts for visible focal points, like an island or a glass-front upper, and keep the rest of the run in a simpler, more economical style.

Why We Recommend Measuring Twice Before You Build or Order

Most DIY door failures trace back to one bad measurement, not bad woodworking. A door built to the largest of three measurements instead of the smallest almost never closes right, and that mistake is nearly impossible to fix after the glue dries.

The Door Maker exists for the moment when precision measurement matters more than saving a weekend. Its measure, design, and order process, backed by sizing accurate to 1/10,000 of an inch and a wide range of styles and finishes, removes the tolerance risk entirely.

Build it yourself if you enjoy the process and your openings are standard. Order custom if precision, inset tolerances, or your time matter more than the build itself.

— David

How The Door Maker Helps You Skip the Guesswork

Building your own doors is rewarding, but it’s also where small measurement errors turn into wasted material and a second trip to the lumberyard. Tdm-thedoormaker built its measure, design, and order process specifically for the reader who wants the exact style discussed above without the trial-and-error of a first build.

Tdm-thedoormaker

You measure your openings using the same overlay and inset rules covered earlier, choose from more than 30 styles and 130-plus colors and finishes in the online configurator, and order doors sized to 1/10,000 of an inch. If you’re not ready to commit to a full order, request a sample door or color swatch first to check the finish against your kitchen in person. For homeowners weighing a full box replacement against updating just the doors, this comparison of refacing versus replacement lays out the cost difference clearly. When you’re ready to move forward, start your design in The Door Maker’s online configurator and get precise custom doors without picking up a router.

Where to Go for More Build Detail

For deeper build specs beyond what fits here, WoodWiki’s cabinet door guide covers style selection in detail, while SawStop’s project plan walks through exact joinery and hinge specs step by step.

Sources

FROM THE SAME CATEGORY

Sep 8 2026 BY Ksenija Lebec, Blog

Landlords: inspect cabinets, run vacancy based ROI, budget $1,000–$13,000, and plan 1–3 day refacing installs with bulk order tips.

Build a Door MADE TO FIT YOU!

Cut Kitchen Remodel Costs in Canada 2026 With Cabinet Refacing

Cut Kitchen Remodel Costs in Canada 2026 With Cabinet Refacing

Most Canadian homeowners should plan for a kitchen remodel budget between $18,000 and $85,000, with $35,000 to $75,000 covering the mid-range full renovation most people actually book. The biggest swing factor isn’t the finishes you pick. It’s whether you’re moving walls or plumbing, and whether you live in a market like Toronto or Vancouver where labour and permits run higher than the national average.


TL;DR:

  • Mid-range kitchen renovations in Canada typically cost between $35,000 and $75,000, with labor and permit costs varying significantly by location.
  • Cabinetry accounts for 30% to 40% of the total budget, with remodeling costs highly sensitive to choice of materials and whether cabinets are replaced or refaced.
  • Regional differences are substantial, with Vancouver projects ranging from $30,000 to over $150,000 and smaller markets often 20% to 30% cheaper.
  • Hidden costs like structural assessments, permit fees, and unexpected damage can increase the budget by 10% to 20%, especially in older homes.
  • To save costs, consider refacing cabinets, purchasing remnant stone, ordering appliances on clearance, and spreading renovation phases over time.

Table of Contents

What Are Typical Kitchen Renovation Costs by Project Tier?

Your budget tier depends less on taste and more on how much of the existing kitchen you’re keeping. A national planning range of $18,000 to $85,000 covers everything from a weekend refresh to a full structural overhaul, but the tiers inside that range behave very differently.

  • Cosmetic refresh ($8,000 to $18,000): New hardware, paint or refacing on existing cabinet boxes, updated lighting, and a fresh backsplash. No layout changes. Typically wraps in 1 to 3 weeks.
  • Budget/entry renovation ($18,000 to $35,000): New countertops, mid-grade appliances, some new cabinetry (often refaced rather than replaced), same footprint. Takes 3 to 6 weeks.
  • Mid-range full renovation with new cabinetry throughout, upgraded countertops, full appliance package, possible minor layout tweaks, generally the most common tier homeowners land in, lasting 6 to 10 weeks. New cabinetry throughout, upgraded countertops, full appliance package, possible minor layout tweaks. This is the most common tier homeowners land in, running 6 to 10 weeks.
  • High-end/full gut renovation ($75,000 to $150,000+): Structural changes, custom cabinetry, premium stone, and often new plumbing or electrical runs. Expect 10 to 16 weeks, sometimes longer with permit delays.

How Should You Break Down Your Kitchen Renovation Budget?

Contractors and estimators tend to split costs the same way regardless of project size, which makes percentage allocation a useful planning shortcut before you get real quotes.

  1. Cabinetry: 30% to 40% of total spend, the single largest line item in almost every project.
  2. Labour: about 25%, covering demolition, installation, and trades like electrical and plumbing.
  3. Countertops: about 15%, varying widely by material choice (laminate versus quartz versus natural stone).
  4. Appliances: about 15%, though this can spike fast with premium brands.
  5. Flooring, permits, and contingency: the remaining 10% to 15%, often underestimated by first-time renovators.

On a $60,000 mid-range project, that math works out to roughly $18,000 to $24,000 for cabinetry, $15,000 for labour, $9,000 for countertops, $9,000 for appliances, and $3,000 to $6,000 split across flooring, permits, and contingency.

Cabinetry and countertops are the two most volatile categories. A custom cabinetry package can swing thousands of dollars based on wood species and door style alone, and HomeStars reports an average kitchen renovation cost of about $30,944 across Canadian projects, a figure that shifts noticeably once you factor in region and cabinetry grade.

How Much Does a Kitchen Remodel Cost in Different Provinces?

Where you live changes your budget more than almost any design decision. Provincial construction costs, labour availability, and permit fees vary enough that a national average can be misleading if you don’t adjust for your own market.

  • British Columbia shows the widest spread of any province, with high-end projects in Vancouver ranging from $30,000 to $150,000, driven by labour costs and permit complexity.
  • Alberta tends to be more predictable, with full gut renovations commonly landing between $35,000 and $75,000.
  • Ontario, particularly the Greater Toronto Area, sits closer to BC pricing on labour but often has faster permit turnaround outside the downtown core.

As a rule of thumb, budget a 20% to 30% urban premium if you’re renovating in Toronto, Vancouver, or Calgary versus a smaller city or rural market. Before finalizing your number, call your municipality directly to confirm current permit fees. They change year to year and vary by project scope.

What Hidden Costs Should You Budget For?

The costs that blow up a kitchen remodel budget are rarely the ones on the original quote. They’re the ones discovered mid-demolition.

  • Engineering assessments: If you’re removing a load-bearing wall, expect $1,500 to $3,500 for stamped drawings before you even touch a permit application.
  • Permit fees: Vary by municipality, typically a few hundred to over a thousand dollars depending on scope.
  • Remediation: Older homes sometimes reveal outdated wiring, knob-and-tube, or moisture damage behind cabinetry once walls open up.

Build in a contingency of 10% to 15% on top of your planned budget, and push closer to 15% to 20% if you own a home built before 1980 or plan any structural work.

Pro Tip: Get the engineering assessment done before you finalize your cabinetry order. If the wall turns out to be load-bearing, you’ll want that cost locked in before you’re mid-renovation and stuck waiting on a structural engineer.

What’s the Best Way to Save on a Kitchen Remodel?

Cutting corners on a kitchen remodel usually backfires. Cutting the right corners doesn’t. The single biggest lever most homeowners overlook is cabinet refacing instead of full replacement.

When your existing cabinet boxes are structurally sound, replacing only the doors, drawer fronts, and hardware delivers a comparable visual transformation at a fraction of full-replacement cost, since you’re not paying to tear out and rebuild boxes that were never the problem. It also cuts demolition time and disposal fees.

  • Phase the renovation over 12 to 18 months if cash flow is tight, tackling cabinetry first and countertops later.
  • Look for remnant stone pieces at fabrication shops, often 30% to 50% cheaper than full slabs.
  • Buy last year’s appliance models during floor-model clearance events.
  • Handle demolition and painting yourself if you’re comfortable with basic tools.
Strategy Typical Savings Best For
Cabinet refacing vs. full replacement Significant reduction versus new boxes Sound existing cabinet structure
Remnant stone countertops 30% to 50% off slab price Smaller footprints, single islands
Phased renovation Spreads cost over time, not total savings Tight cash flow, no urgent timeline
DIY demolition Reduces labour line item Comfortable homeowners, simple layouts

If you’re renovating to sell within a year or two, match your spend to your neighborhood. Overbuilding a $100,000 kitchen in a $450,000 house rarely pays back.

How Do You Get an Accurate Kitchen Renovation Quote?

Insist on specifics before you sign anything.

  1. Confirm the quote lists exact quantities, material allowances, and clearly stated exclusions, not just a lump sum.
  2. Ask for dollar allowances on tile, fixtures, and hardware so you can compare bids apples-to-apples rather than being misled by an artificially low base price.
  3. Verify licensing, WCB/WSIB coverage, and ask for two or three references from recent projects.

On payment, industry guidance recommends capping your upfront deposit to a moderate percentage, with milestone-based payments thereafter., with the rest released against milestones: demolition complete, rough-ins done, cabinetry installed, final walkthrough.

Pro Tip: Get the change-order policy in writing before demolition starts. Verbal agreements on added costs are the number one source of budget disputes homeowners report after the fact.

How Long Does a Kitchen Renovation Take?

A cosmetic refresh takes 1 to 3 weeks. Mid-range renovations run 6 to 10 weeks. Full gut jobs stretch 10 to 16 weeks or more. Custom cabinetry and imported stone often carry 6 to 10 week lead times, so order early. Late fall and winter bookings tend to have shorter contractor wait lists than spring.

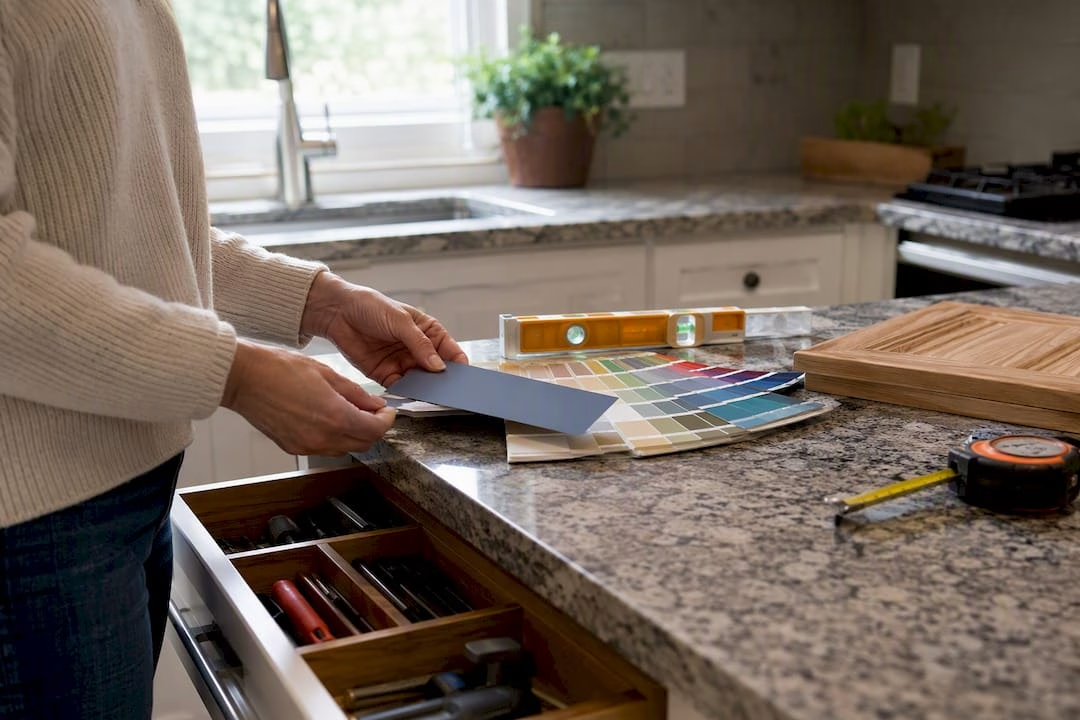
Hands with color swatch and tools on kitchen counter

Will a Kitchen Renovation Increase My Home’s Value?

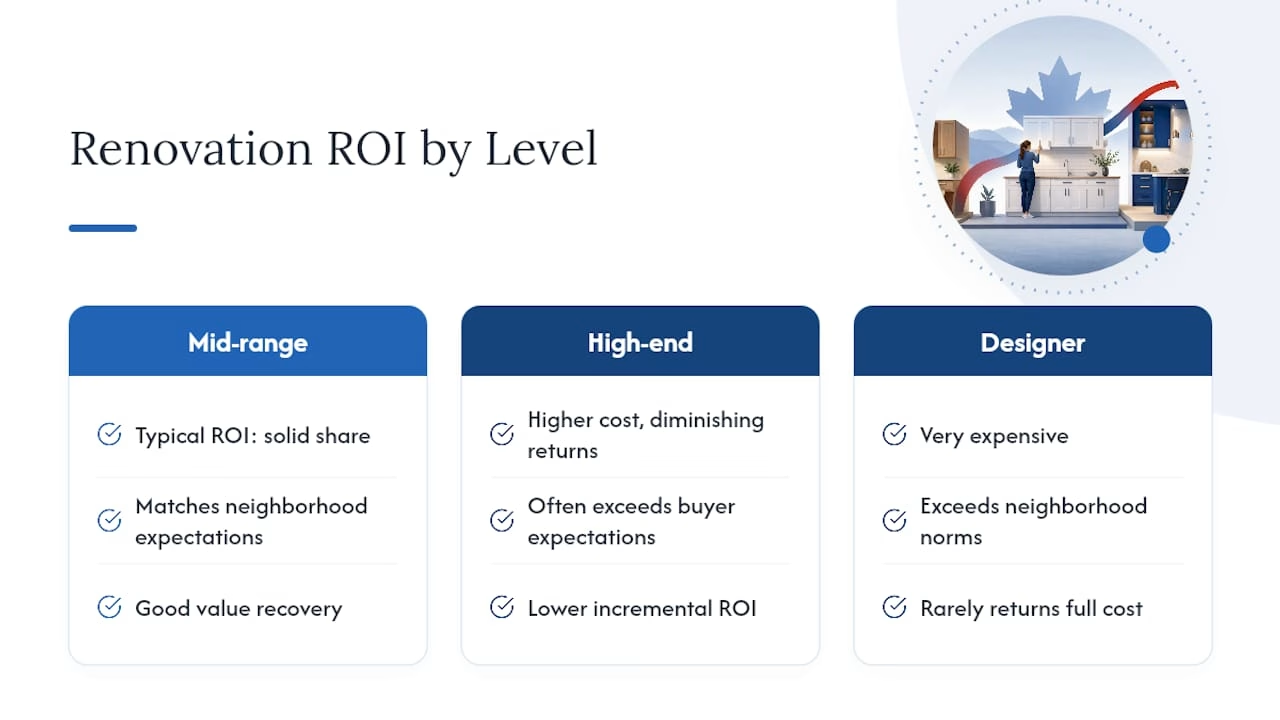
Mid-range kitchen renovations tend to recoup a solid share of their cost at resale, while very high-end luxury upgrades have diminishing returns. Once they exceed what buyers expect in the neighborhood. A $150,000 designer kitchen in a starter-home market rarely returns its full cost. Match your upgrade level to comparable homes nearby, not your personal wish list.

Diagram of kitchen renovation cost versus resale value

Where Homeowners Get Their Kitchen Budget Wrong

The most common mistake is budgeting only against cabinetry price tags and skipping contingency altogether. The second is accepting a vague verbal quote instead of a detailed written one. Get itemized quotes, pay on milestones, and seriously price out refacing before assuming full replacement is your only option.

— David

Get a Real Number for Your Cabinetry Without the Full-Replacement Price Tag

If cabinetry is eating 30% to 40% of your kitchen budget, refacing is worth pricing out before you commit to full replacement. Tdm-thedoormaker builds custom cabinet doors, drawer fronts, and frames sized to your existing boxes to within 1/10,000 of an inch, ordered through a simple measure, design, and order process, so you get a new look without rebuilding cabinets that are already structurally fine.

Tdm-thedoormaker

With over 30 styles and 130+ colors and finishes to choose from, plus optional hinge-hole drilling and sample doors before you commit, the selection rivals what you’d find shopping full cabinet lines, at a fraction of the cost and turnaround time. If your kitchen budget is tight and your cabinet boxes are sound, compare the numbers for yourself on cabinet refacing versus full replacement and see where the savings actually land before you order anything.

Sources

For localized numbers beyond this guide, check RenoPlanner’s cost breakdown, HomeStars’ pricing guide, and the Canada Construction Network’s regional cost report. For financing options, review this renovation loan guide. Always get three written quotes before committing to a contractor.

FROM THE SAME CATEGORY

Sep 8 2026 BY Ksenija Lebec, Blog

Landlords: inspect cabinets, run vacancy based ROI, budget $1,000–$13,000, and plan 1–3 day refacing installs with bulk order tips.

Build a Door MADE TO FIT YOU!

Custom Cabinet Door Prices in Canada: What to Budget

Custom Cabinet Door Prices in Canada: What to Budget

Custom cabinet doors in Canada typically run from roughly $7 to $15 per square foot for raw MDF materials, with finishing adding another $10 to $53 per square foot depending on paint or stain complexity. A standard kitchen door often lands in a wide price range when finished, influenced by size, material, and finish type, though quotes vary based on whether shipping and minimums are included. Get exact measurements before requesting quotes so the numbers you’re comparing actually mean the same thing.


TL;DR:

  • Raw MDF cabinet doors typically cost between $7 and $15 per square foot, with finishing adding $10 to $53 per square foot depending on complexity.
  • Material prices increase from MDF to plywood and solid wood, with solid options like maple or oak exceeding $20 to $30 per square foot before finishing.
  • Larger orders generally qualify for better per-square-foot rates, but minimum door sizes and freight costs can significantly raise overall prices.
  • Choosing simpler styles and standard finishes can reduce costs, while accurate measurements and itemized quotes prevent unexpected expenses.
  • Canadian-made doors usually come with a slightly higher price but offer benefits like shorter delivery times and better quality control.

Table of Contents

How Much Do Custom Cabinet Doors Cost in Canada?

The range is wide because “custom cabinet door prices” covers everything from a flat MDF slab to a hand finished solid maple panel with glazing. Understanding where your project sits on that spectrum is the first step toward a realistic budget.

Raw MDF doors, the most common starting point for refacing projects, generally run $7 to $15 per square foot, with professional-grade CNC-cut MDF closer to $12 to $13 per square foot. Plywood doors sit a step above that, and solid wood options, especially maple or oak, often exceed $20 to $30 per square foot before any finish is applied.

Here’s a general breakdown of raw material pricing across the three most common substrates:

  • MDF (slab or shaker): roughly $7 to $15 per square foot
  • Plywood: roughly $15 to $22 per square foot
  • Solid wood (maple, oak, cherry): roughly $22 to $35+ per square foot

Pro Tip: A door that measures less than the supplier’s minimum still gets billed at the minimum rate. Most Canadian suppliers apply a 1.5 square foot minimum per door or drawer front, so a tiny spice-drawer front can cost the same as a much larger piece.

Do the math on an average kitchen door, roughly 3 square feet, and you’re looking at $21 to $45 in raw material at typical MDF rates. Add finishing, which can run $10 to $53 per square foot depending on whether it’s a simple painted finish or a multi-coat lacquer with glazing, and a single finished door can land anywhere from $60 to well over $200. That spread is exactly why two quotes for “the same door” can look wildly different: one includes finish and shipping, the other doesn’t.

What Six Factors Drive Custom Cabinet Door Costs?

Material is the obvious lever, but it’s rarely the only one moving your total. Six variables typically decide where your final invoice lands.

Material choice sets the floor. MDF costs less than plywood, which costs less than solid wood, and that order rarely flips regardless of supplier.

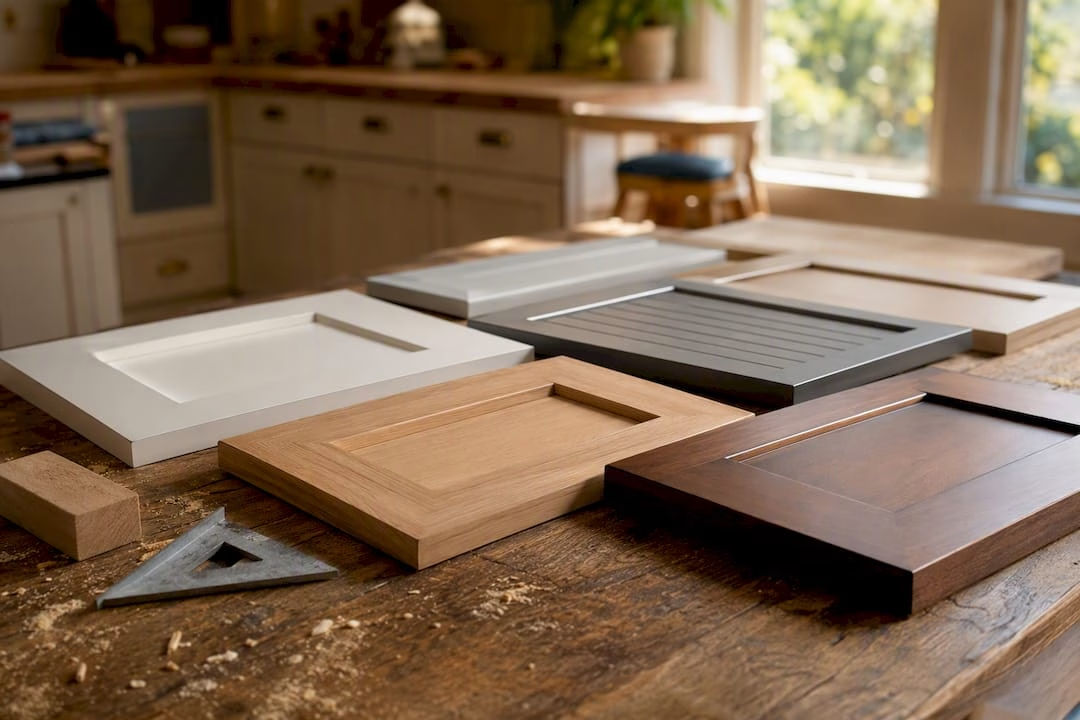
Different cabinet door material samples overlapped

Style complexity adds labor time. A flat slab door takes far less machining than a five-piece shaker, and a raised panel or specialty profile with decorative routing pushes costs higher still.

Finish type is often the single biggest swing factor, since professional finishes and glazing can add $10 to $53 per square foot on top of the raw door price.

Order size and volume matter more than most homeowners expect. Suppliers frequently offer better per-square-foot rates on larger orders because setup costs get spread across more doors.

Rush fees and shipping can quietly inflate a quote. Expedited production and freight to rural addresses both carry accessorial charges that don’t always show up until checkout.

Add-ons round out the list: hinge boring for popular systems like Blum, custom sizing outside standard dimensions, and special edge profiles each carry their own small per-door fee that adds up across a full kitchen.

Choices around style and finish, not material alone, tend to move a quote the most.

What Do Three Sample Canadian Kitchen Budgets Look Like?

Real numbers help more than percentages. Here’s how three different approaches play out for a mid-size Canadian kitchen with 20 doors and drawer fronts.

  1. Economy: MDF slab or basic shaker. At $7 to $10 per square foot raw and a simple painted finish, expect $60 to $90 per door for an average 3 square foot door. Twenty doors runs roughly $1,200 to $1,800 before shipping. Skipping glazing and keeping the profile flat is what keeps this tier affordable.

  2. Midrange: painted MDF or plywood shaker. Raw costs climb to $12 to $18 per square foot, and a quality painted finish adds another $15 to $25 per square foot. That puts a single door in the $80 to $130 range, with a full 15 to 20 door order landing between $1,600 and $2,600.

  3. Premium: solid wood or decorative profiles. Solid maple with a raised panel and custom stain typically costs more, and premium finishing or glazing adds considerably on top. Some Canadian manufacturers list solid wood options well above $22 to $23 per square foot before finish, so a full kitchen in this tier commonly runs $3,500 to $6,000 or more.

Minimums and shipping shift every one of these totals. A kitchen with several small drawer fronts under the 1.5 square foot minimum will price higher per piece than the square-foot math above suggests, and freight to a rural address adds another variable worth confirming upfront.

How Can You Lower Your Custom Cabinet Door Costs?

Refacing instead of full cabinet replacement is the single biggest lever available. Swapping doors and drawer fronts while keeping your existing cabinet boxes typically costs a fraction of a full teardown and rebuild, since you’re avoiding new cabinet carcasses, plumbing disconnection, and countertop removal entirely. Our cabinet refacing cost comparison breaks down where those savings actually come from.

Beyond that broader decision, a few smaller choices add up fast:

  • Choose simpler styles. A shaker or slab profile costs less to machine than a raised panel or custom glazed finish.
  • Stick with standard finishes. Custom color matching and multi-coat lacquer both carry labor premiums that flat paint or stain don’t.
  • Consolidate your order. Grouping similar door sizes and ordering everything at once often qualifies for better per-square-foot pricing than ordering in batches.
  • Request itemized quotes. Ask suppliers to break out material, finish, hardware add-ons, and shipping separately so you’re comparing true apples to apples, not just a bottom-line number.

A low headline price with no breakdown is often hiding a thinner finish or a shipping surprise waiting at checkout.

How Do You Measure and Order Custom Cabinet Doors Correctly?

Custom doors are cut to your exact dimensions, and accurate measuring is the single most common factor in avoiding costly reorders. Suppliers work to tight manufacturing tolerances, and a measurement off by even a fraction of an inch can mean a door that doesn’t sit flush.

Before you request a quote, walk through this sequence:

  • Measure every door and drawer front individually using a step-by-step measurement guide for new cabinet doors rather than eyeballing from a single template.
  • Order a sample door or color swatch to confirm the finish matches what you’re picturing before committing to a full kitchen.
  • Confirm whether your quote includes finishing, hinge boring, and shipping, not just raw material.
  • Ask about production lead times and whether rush fees apply if your timeline is tight.

Pro Tip: Precision matters more than people expect. Doors are cut to fine tolerances, and a supplier’s online calculator catches sizing mistakes before they become an expensive reorder.

Do Cabinet Door Prices Vary by Region in Canada?

Yes, and the gap can be meaningful depending on where you live. Homeowners in major urban centers like Toronto, Vancouver, and Calgary often see slightly higher labor and finishing rates baked into local supplier pricing, reflecting higher regional overhead and shop rent.

Rural and remote areas face a different cost pressure: freight. Shipping cabinet doors to smaller communities in Northern Ontario, the Maritimes, or interior British Columbia typically adds more to the final bill than any regional labor difference does, since doors are bulky, need careful packaging, and travel further from manufacturing hubs concentrated in Ontario and Quebec.

This is part of why comparing quotes across Canada purely on a per-square-foot basis can mislead you. A supplier quoting a lower base price in one province might offset that entirely with a higher shipping charge to your address. The more useful comparison factors in your all-in landed cost, meaning raw material, finish, and freight combined, not just the number printed at the top of the quote.

Online suppliers who ship nationally tend to standardize pricing more than local shops do, since their cost structure isn’t tied to a single region’s labor market. That can work in your favor if you’re in a smaller market where local cabinet shops are scarce and pricing power sits with just one or two providers.

Does a Warranty Change What You Pay for Cabinet Doors?

It usually does, and that’s not a bad thing. A supplier backing their doors with a meaningful warranty, covering delamination, finish cracking, or warping, is signaling confidence in their materials and construction, and that confidence typically comes with a slightly higher price than an unwarrantied budget option.

The tradeoff is usually worth it. Cabinet doors take daily abuse: steam from cooking, grease, humidity swings between seasons, and constant hand contact around handles and edges. A door with a thin veneer or poorly sealed MDF core can start showing damage within a couple of years, while a warrantied product with proper edge banding and sealed substrates is built to hold up far longer.

When you’re comparing quotes, ask specifically what the warranty covers and for how long. Some suppliers only guarantee against manufacturing defects, which is a much narrower promise than a warranty covering finish performance over five or ten years of normal kitchen use. A vague “satisfaction guarantee” without specifics is worth far less than a written warranty that names what’s covered.

Paying slightly more upfront for a supplier with a clear, documented warranty is often cheaper over the life of your cabinets than replacing a budget door that fails in year three. Treat warranty terms as part of the price comparison, not an afterthought you check after you’ve already decided.

Are Canadian-Made Doors Worth More Than Imported Options?

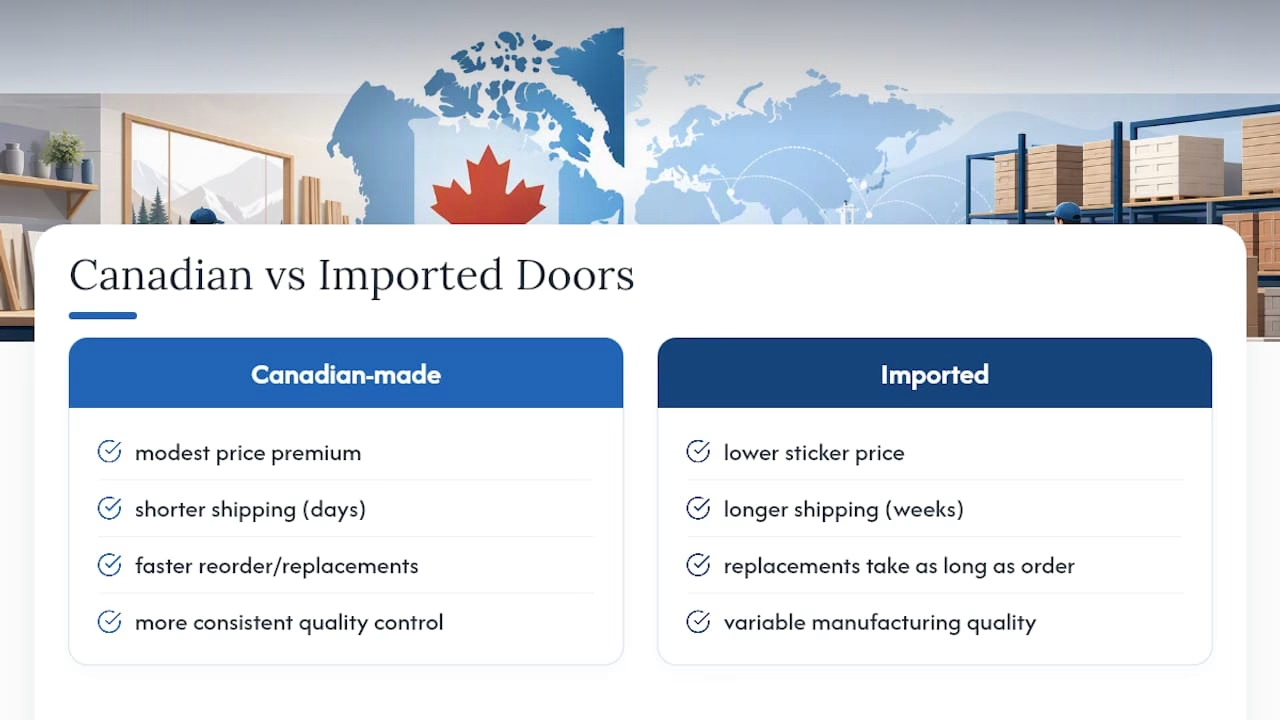
Often, yes, though not always for the reason homeowners expect. Canadian-manufactured doors typically carry a modest premium over imported alternatives, and that gap usually reflects shorter shipping distances, more consistent quality control, and faster turnaround on reorders or replacement parts, not necessarily superior raw material.

Imported doors, frequently sourced from overseas manufacturers, can undercut Canadian pricing on paper. But that lower sticker price often comes with longer lead times, since freight from overseas takes weeks rather than days, and less flexibility if a piece arrives damaged or doesn’t match your original order. Getting a replacement door from an overseas supplier can take as long as the original order did.

There’s also a quality consistency argument worth weighing. Manufacturing quality and finish expectations vary significantly between suppliers, and a low per-square-foot price on an imported door doesn’t guarantee the same core density, edge sealing, or finish durability you’d get domestically. Canadian manufacturers working to North American humidity and temperature conditions also tend to build doors that hold up better to the specific climate swings homeowners here deal with each winter.

For most homeowners, the smarter comparison isn’t Canadian versus imported on price alone. It’s landed cost plus turnaround time plus how easily you can get support if something arrives wrong.

Are Canadian-Made Doors Worth More Than Imported Options? — overview diagram

What’s the One Thing Every Canadian Homeowner Should Verify First?

Budget for $60 to $150 per finished door in the midrange tier, and get your measurements locked down before you request a single quote. Confirming whether finish and shipping are included is the step most homeowners skip, and it’s the one that causes the biggest sticker shock later. The Door Maker’s measure, design, order process, backed by a wide selection of styles and finishes, exists specifically to make that sequence painless. Request a sample door or a measured quote before committing to a full kitchen order.

— David

Ready to Get an Accurate Quote for Your Kitchen?

Tdm-thedoormaker is the alternative to guessing at a cabinet shop’s quote sheet: our online configurator gives you real, itemized pricing for your exact door sizes in Canadian dollars, before you commit to anything. Instead of waiting on a contractor callback or driving to three different showrooms to compare finishes, you measure your own doors using our guided tools, design them from over 30 styles and 130+ colors and finishes, and see your total cost before you order.

Tdm-thedoormaker

That measure, design, order workflow is built around precision sizing to 1/10,000 of an inch, so the door that arrives fits the opening you measured, not an approximation of it. You can request sample doors and color swatches first to confirm finish quality in person, which removes the guesswork that comes with ordering sight unseen. If you’re still weighing whether refacing or full replacement makes more sense for your kitchen, our refacing versus replacement comparison lays out the cost difference plainly. When you’re ready, head to our custom cabinet door ordering page and start with a free measured quote.

Sources

The pricing ranges and finishing costs cited throughout this guide draw from published Canadian supplier data. TrueCore’s MDF pricing breakdown supports the raw material per-square-foot figures. Cutting Edge’s cost guide informed the minimum square-footage explanation, while their standard grade doors page supports the finishing add-on ranges. Their measurement information guide informed the measuring guidance above.

FROM THE SAME CATEGORY

Sep 8 2026 BY Ksenija Lebec, Blog

Landlords: inspect cabinets, run vacancy based ROI, budget $1,000–$13,000, and plan 1–3 day refacing installs with bulk order tips.

Build a Door MADE TO FIT YOU!

Drawer Front Styles: A Homeowner’s Guide to Choosing Right

Drawer Front Styles: A Homeowner’s Guide to Choosing Right

A drawer front is the visible face attached to a drawer box, and the style you pick sets the tone for your whole kitchen or bathroom. The styles worth knowing are:

  • Shaker — clean, recessed panel, works almost anywhere
  • Slab/flat-panel — smooth modern face, no frame
  • Raised-panel — traditional, dimensional profile
  • Inset — furniture-grade, flush with the cabinet frame
  • Beadboard/fluted — grooved, cottage character
  • Five-piece/mitered — matches framed door construction

Unless you’re deliberately mixing textures, match your drawer fronts to your cabinet doors for a cohesive look.

Key Takeaways

Choosing the right drawer front style comes down to matching profile and construction to your existing cabinetry, then getting the reveal and hardware placement right during installation.

Point Details
Match your doors first Pick a drawer front profile that matches your existing cabinet doors unless you’re intentionally contrasting.
Slab favors modern, MDF favors paint Slab construction suits contemporary looks, and MDF is the practical default for painted finishes.
Keep your reveal consistent Target roughly 1/8 to 1/4 inch and use spacer blocks to mount slides at a repeatable height.
Order fronts as a set Cutting fronts from the same sheet keeps grain and color matched across a stacked bank of drawers.
Custom sizing reduces install risk Tdm-thedoormaker’s configurator offers 30+ styles, 130+ finishes, and sizing to 1/10,000 of an inch for an exact-fit replacement.

A Closing Note on Getting This Right

Most drawer front regrets come from rushing the measuring step, not from picking the wrong style. If you’re on the fence, order a sample before committing to a full run, and lean on our replacement drawer front guide for the specific measurements to double-check first.

— David

Table of Contents

Choosing among the common cabinet drawer designs comes down to how much detail you want and which room you’re outfitting. Here’s how the six main styles actually perform once they’re installed.

1. Shaker

Shaker fronts have a recessed center panel framed by flat rails and stiles, and they’ve become the default choice in most new kitchens because they read as both classic and current. They pair well with brushed nickel or matte black bar pulls, and they take paint or stain equally well. You’ll see them in kitchens, bathrooms, and laundry rooms without exception.

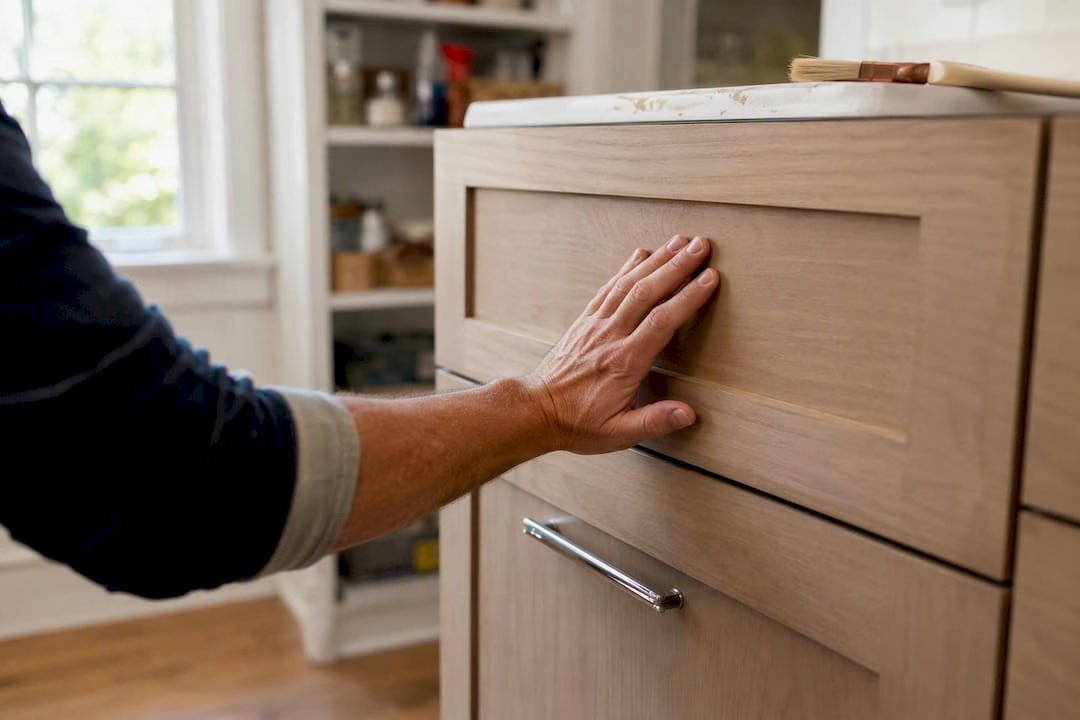
Hand touching shaker style cabinet drawer front

2. Slab/Flat-Panel

A slab front is a single flat piece with no frame or panel detail, which makes it the go-to for modern drawer fronts. Painted slab doors show every imperfection in the substrate, so the material underneath matters more here than with any other style. Stained slab fronts work best in wood species with tight, even grain like maple or birch.

Maple slab flat-panel drawer front close-up

3. Raised-Panel

Raised-panel fronts have a center panel that’s milled to stand higher than the surrounding frame, giving real shadow and depth. This style reads as traditional or transitional, and it tends to look out of place in a strictly contemporary kitchen. It shows up most often in dining rooms, formal kitchens, and older homes being renovated to match existing trim.

4. Inset

Inset drawer fronts sit flush within the cabinet frame rather than overlapping it, which is why they’re associated with furniture-grade cabinetry. The trade-off is precision: an inset front needs a tight, even reveal on all four sides, and even minor humidity swings in solid wood can throw that gap off. If you’re set on this look, budget extra time for fitting.

5. Beadboard/Fluted

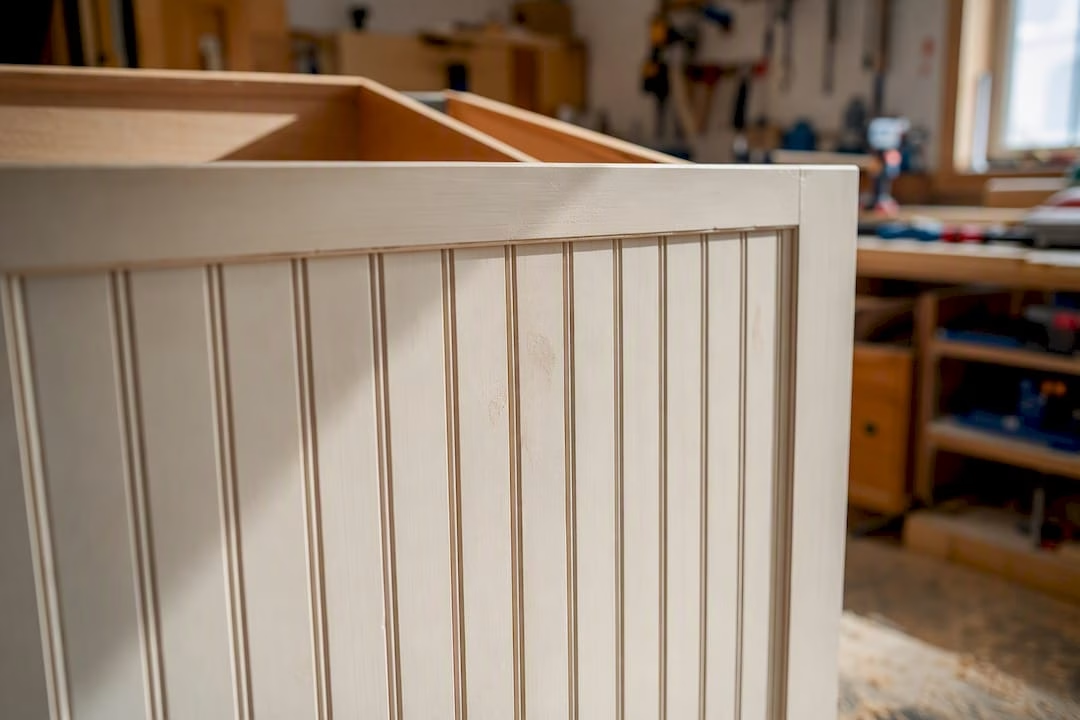
Beadboard fronts carry vertical grooves milled into the panel face, giving a cottage or farmhouse feel that slab and Shaker fronts can’t replicate. Those grooves collect dust and grease faster than a flat surface, so plan on more frequent wipe-downs in a working kitchen.

Beadboard drawer front vertical grooves close-up

6. Five-Piece/Mitered

A five-piece front is built from a frame and panel, mitered at the corners to mirror the construction of a matching cabinet door. Use this style specifically when your doors are already five-piece and you need drawer fronts that read as part of the same set. It costs more than slab construction because of the added joinery, but the visual payoff is a seamless bank of doors and drawers.

Pro Tip: If you’re mixing drawer styles across a kitchen, keep the profile consistent on any run of drawers you’d see in a single glance, like a stack under the cooktop. Small inconsistencies are far more noticeable stacked vertically than spread across a room.

How Drawer Fronts Are Built and What They’re Made From

Every drawer front falls into one of two construction types. A slab front is one solid or engineered panel with no joinery, which is why it dominates the modern cabinet door styles you’ll see in current kitchens. A five-piece front is assembled from a frame and center panel, and it’s the only way to authentically match a framed door profile like Shaker or raised-panel.

Material choice matters as much as construction type:

  • Solid wood takes stain beautifully but moves with humidity, so gaps can shift over a season.
  • MDF sands to a glass-smooth surface and resists warping, making it the practical default for painted slab fronts.
  • Plywood offers good stability at a lower cost than solid hardwood.
  • Thermofoil and PVC resist moisture well.

DIY frameless cabinet plans commonly specify MDF for painted slab fronts precisely because it primes and sands so evenly. Edge-banding and veneer quality determine how well a finish holds up over time, and in kitchens or bathrooms where moisture is constant, a properly sealed edge is what keeps a painted MDF front from swelling at the seams.

How to Choose the Right Drawer Front for Your Space

Start with cohesion. If your cabinet doors are Shaker, matching Shaker drawer fronts is the safer call, and style guides for cabinet drawer fronts consistently point toward consistency over contrast unless you have a specific design reason to break the pattern.

  1. Check hardware compatibility. Confirm handle or knob center-to-center spacing before ordering, especially if you’re keeping existing hardware or switching to push-to-open mechanisms.
  2. Set your budget tier. Painted MDF slab fronts cost less than stained solid wood five-piece fronts, and that gap widens further with inset construction.
  3. Weigh lead time against fit. Stock sizes ship faster, but custom sizing avoids the shims and trims that stock often requires.
  4. Build your measurement list. Note opening width, height, and depth for every drawer, and photograph your existing hardware before removal.
  5. Ask your supplier the right questions. Confirm reveal tolerances, finish options, and whether hinge-hole or hardware drilling comes pre-installed.

Pro Tip: Measure every opening even if they look identical. Cabinet boxes settle unevenly over the years, and a front cut to one universal size rarely fits the whole run perfectly.

For a full walkthrough before you order, our guide to choosing replacement drawer fronts covers supplier questions in more depth.

Custom Drawer Fronts vs. Stock Replacements

Custom sizing earns its cost when your openings aren’t standard, when you need matched grain across a long run of drawers, or when color fidelity to existing cabinetry matters. Stock fronts make sense for straightforward, standard-size openings where speed matters more than an exact match.

  • Choose custom for precise fit, consistent grain, and finish that matches existing doors.
  • Choose stock when your openings are standard sizes and you need a fast, budget-friendly turnaround.
  • Expect custom orders to take longer to arrive but require far less on-site trimming and shimming than stock pieces forced into odd openings.

Replacing drawer fronts instead of full cabinets is one of the highest-impact, lower-cost upgrades available to homeowners who like their cabinet layout but want a new look.

Installation Tips That Make a DIY Job Look Professional

Getting the fit right during install is what separates a front that looks custom from one that looks like an afterthought.

  1. Set a consistent reveal. A tight, even gap between fronts is an industry standard for a professional look, with many woodworkers targeting a small, tight gap around one eighth of an inch for a furniture-like fit, or a slightly larger margin for a more forgiving DIY build.
  2. Use spacer blocks for slide mounting. Cutting a scrap block to your desired reveal height and resting the drawer slide on it while you screw it in gives you a repeatable, accurate setup across every drawer in the run.
  3. Order and cut fronts as a set. Cutting drawer faces from the same sheet keeps grain and color consistent across a stacked bank.
  4. Drill hardware with a jig, then fasten front to back. Driving screws in a front-to-back sequence while the front is clamped in position avoids shifting the reveal at the last step.

Practical shop wisdom holds that screwing slides to spacer blocks and mounting them with the cabinet laid on its side turns an awkward, one-drawer-at-a-time job into a fast, repeatable process across an entire bank of drawers.

For the drilling step specifically, our hardware hole drilling guide walks through jig setup for clean, consistent holes.

How the Door Maker Simplifies Custom Drawer Fronts

Tdm-thedoormaker built its ordering process around three steps: measure, design, and order, all through an online configurator instead of a showroom visit. That process removes most of the guesswork that trips up DIY refacing projects.

  • Over 30 styles and 130-plus colors and finishes to match or intentionally contrast existing cabinetry
  • Sizing precision down to 1/10,000 of an inch, which matters most for inset and tight-reveal projects
  • Sample doors and color swatches available before you commit to a full order
  • Optional hinge-hole drilling so fronts arrive ready to hang

For readers comparing this against hiring a local carpenter, a configurator-based order tends to make more sense when you already know your measurements and want predictable pricing.

Where Today’s Drawer Front Styles Actually Came From

Shaker style traces back to 18th and 19th century Shaker religious communities, whose furniture makers valued plain construction over ornamentation for religious reasons rather than aesthetic ones. That utilitarian frame-and-panel design happened to age well, and it’s why Shaker cabinetry still dominates new kitchen builds two centuries later.

Raised-panel fronts descend from European furniture traditions, particularly French and English cabinetry, where a milled, dimensional panel signaled craftsmanship and status. That association with formality is exactly why raised-panel still reads as traditional today, even in a kitchen with none of the surrounding period detail.

Slab fronts are a newer development, tied closely to the rise of mid-century modernism and, later, the minimalist design movements of the 2000s and 2010s. Flat, unornamented surfaces became a design statement in their own right rather than a cost-cutting shortcut, which is part of why painted MDF slab fronts now command a premium finish reputation rather than a budget one.

Beadboard’s roots run through Victorian-era interior paneling, originally used on walls and wainscoting before cabinetmakers adapted the grooved profile for smaller-scale drawer and door fronts. Five-piece and mitered construction has been standard cabinetry practice for centuries, simply because it’s the most direct way to build a stable frame around a panel using hand tools, long before machine-milled slab fronts were even possible to produce at scale.

Modern kitchens are leaning further into slab fronts in matte, textured finishes rather than the high-gloss look that dominated a decade ago. Matte painted MDF and PVC finishes hide fingerprints better than gloss and photograph well, which matters if resale value is part of your calculation.

Rustic and farmhouse styling hasn’t faded, but it has shifted from heavy beadboard toward simpler Shaker profiles paired with warm wood tones and black iron hardware. That combination reads as rustic without the maintenance burden of deep grooves collecting grease.

Transitional kitchens, blending a Shaker or five-piece frame with simplified, streamlined hardware, remain the safest resale choice because they don’t commit fully to either a traditional or contemporary look. If you’re renovating a home you might sell within five to ten years, transitional styling tends to age the most gracefully.

Color is doing more of the design work than profile shape right now. A slab front in a deep green or navy paired with brass hardware can look just as current as a stark white Shaker front, so before committing to a shape, look at current cabinet door design trends for finish and color direction, since that’s where most of the visual change is happening. For general principles on matching a door style to your home’s existing character, this guide to choosing interior door styles applies the same logic to cabinetry decisions.

Order Your Custom Drawer Fronts

Tdm-thedoormaker gives you exact sizing down to 1/10,000 of an inch and a sample swatch before you commit, which removes the two biggest risks in any drawer front replacement: a bad fit and a color that looks different once it’s on the wall.

Tdm-thedoormaker

If your cabinet boxes are in good shape but the fronts are dated, worn, or simply the wrong style for how you live now, replacing them is almost always cheaper than a full cabinet swap. Start by measuring your openings, then head to our custom cabinet door ordering page to walk through the configurator and request a sample before placing your full order.

Sources

FROM THE SAME CATEGORY

Sep 8 2026 BY Ksenija Lebec, Blog

Landlords: inspect cabinets, run vacancy based ROI, budget $1,000–$13,000, and plan 1–3 day refacing installs with bulk order tips.

Build a Door MADE TO FIT YOU!

Hinge Hole Boring: A Practical Guide for Cabinet Doors

Hinge Hole Boring: A Practical Guide for Cabinet Doors

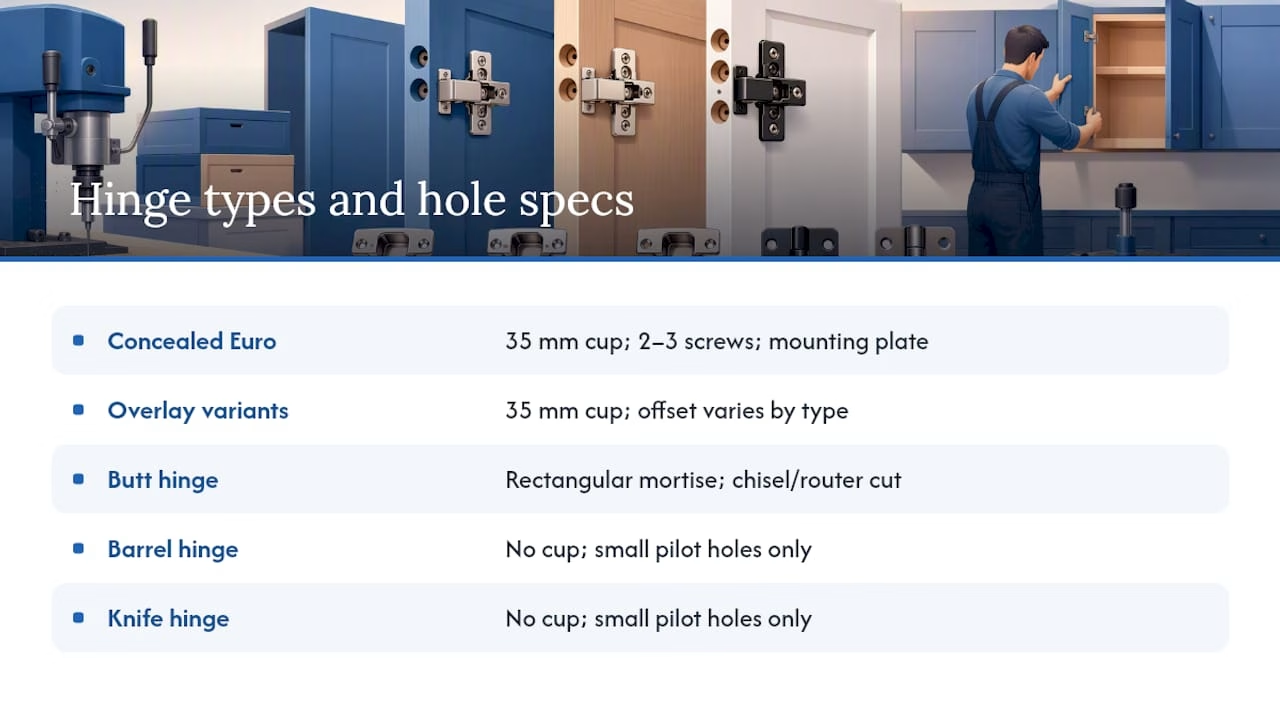
Hinge hole boring is the process of drilling a flat‑bottomed cup, typically 35mm across and about 13mm deep, into the back edge of a door so a concealed hinge can seat and swing correctly. It is a different operation from mortising a butt hinge, which cuts a shallow rectangular pocket into the door edge rather than a round cup. For one door or a handful of cabinets, a hand drill with a hinge boring jig and a quality Forstner bit gets you there. If you’re outfitting a whole kitchen, working with veneered stock, or you simply can’t afford a misplaced hole, ordering pre‑bored or custom cabinet doors removes the risk entirely.

  • DIY route: jig, Forstner or dedicated hinge boring bit, stop collar, drill press or hand drill
  • Skip‑the‑risk route: order pre‑bored, custom‑sized doors and let a machine hold the tolerance for you

Key Takeaways

Accurate hinge hole boring depends on matching bit, offset, and depth stop to the hinge manufacturer’s spec. Machine pre‑boring removes that risk entirely for finish‑sensitive or high‑volume projects.

Point Details
Confirm specs before drilling Check cup diameter, depth (commonly 13mm), and offset (2 to 8mm) against your specific hinge, not memory.
Use the right bit A Forstner or hinge boring bit with a stop collar produces the flat‑bottomed, smooth‑walled cup concealed hinges need.
Prevent blowout Clamp a sacrificial backing board under the exit point and slow down as the bit nears full depth.
Repair before replacing Stripped screw holes usually need a hardwood dowel and re‑drilled pilot hole rather than a full door swap.
Consider pre‑bored doors for risk‑sensitive work Tdm-thedoormaker’s measure, design, order process delivers doors with hinge holes already bored to spec, cutting rework risk on volume or veneer projects.

Table of Contents

What Tools Do You Need for Hinge Hole Boring?

The bit matters more than the drill. A Forstner bit or a purpose‑built hinge boring bit cuts a flat‑bottomed hole with clean, smooth walls, which is exactly the shape a concealed hinge’s cup needs to seat flush. Standard twist bits leave a pointed, tapered bottom that lets the hinge rock and eventually loosen its grip on the wood. Carbide‑tipped versions hold an edge far longer than high‑speed steel, especially once you’re cutting into hardwood or MDF.  A long‑shank Forstner paired with a stop collar is the setup most jig makers recommend for clean results.

Size and depth need to match the hinge, not just the door. Most concealed European hinges use a 35mm cup at roughly 13mm deep. Check the hinge manufacturer’s spec sheet before you drill. A cup drilled even a millimeter too deep on thin door stock can weaken the material and leave the hinge sitting poorly.

Match the bit’s shank length to your door thickness, and always run a stop collar or the jig’s built‑in depth stop so every hole comes out identical.

Drill choice depends on volume and precision needs:

  • A hand drill with a good jig works fine for a handful of doors
  • A drill press adds vertical stability for anyone boring more than a few doors at once
  • A benchtop hinge boring machine is the professional‑grade option, holding tolerances that hand tools struggle to match consistently

Round out your setup with two clamps, a sacrificial backing board under the exit side of the hole, and some dust control, since Forstner bits throw a surprising amount of chip debris at higher RPMs.

Pro Tip: Buy one extra bit in the size you use most. A dull Forstner bit doesn’t just cut slower, it burns hardwood edges and tears veneer, and you won’t notice the difference until the damage is already done.

How Do You Measure and Lay Out Hinge Positions?

Getting the hole in the right spot matters as much as getting it round. Standard cabinet doors use two hinges positioned with margins from the top and bottom edges. Doors over 36 inches typically need a third hinge in the middle to prevent sagging.

  1. Confirm the hinge offset first. This is the shoulder distance from the door’s edge to the center of the cup, and it commonly runs between 2mm and 8mm depending on overlay style. Get this wrong and the door either binds against the cabinet frame or leaves a gap that never quite closes flush.
  2. Mark your centerlines before you touch a drill. Use a combination square to strike a line parallel to the door edge at your offset distance, then mark hinge centers along that line at your chosen top and bottom margins.
  3. Use a template for repeat work. If you’re boring more than two or three doors, a marked template or story stick keeps every hole in the same spot. This matters enormously once the doors are hung side by side and any inconsistency becomes visible at a glance.
  4. Run a manufacturer’s spec checklist before drilling anything. Confirm cup diameter, cup depth, offset, and screw spacing against the actual hinge you’re installing, not the hinge you installed last time.

A jig with a built‑in scale speeds all of this up, since most let you set the offset once and repeat it across every door without re‑measuring. If you’d rather use proven measurement tables than build your own from scratch, our guide to hinge drilling patterns walks through the numbers most cabinet lines actually use.

How Does a Hinge Boring Jig Work?

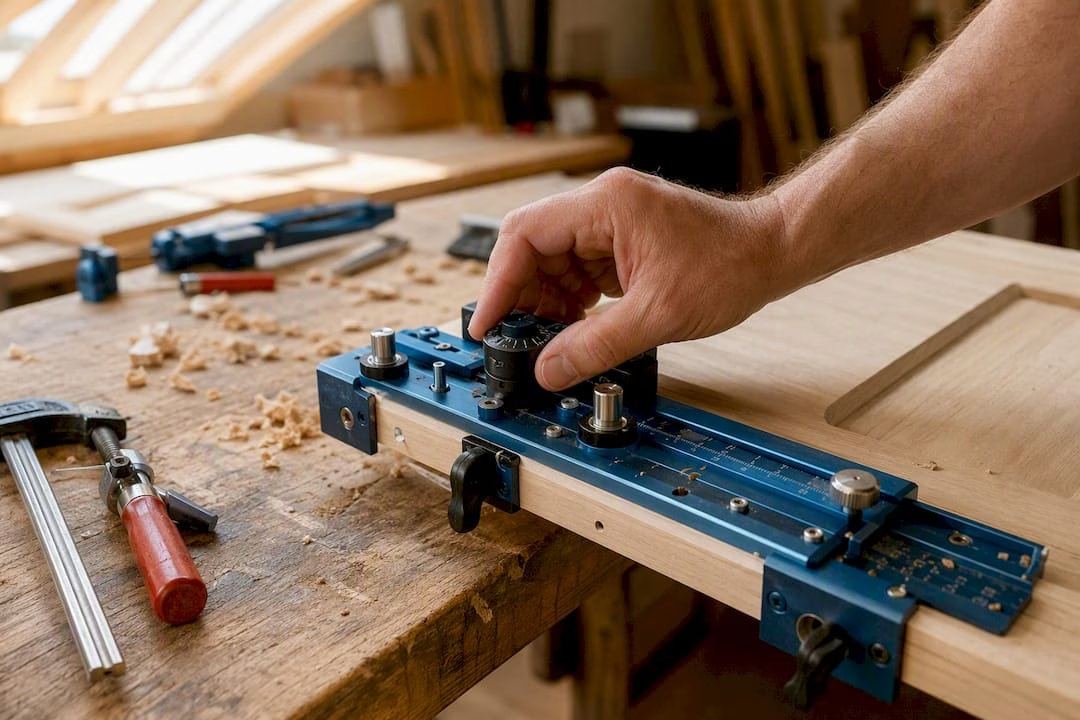
A concealed hinge jig replaces a drill press with a mechanical fixture that locates the cup and pilot holes. The core parts are an indexing cam that sets your offset distance, a clamping base that holds the jig square to the door edge, stop collars that fix your drilling depth, and screw‑hole guides that pre‑position the pilot holes for the hinge’s mounting screws.

Hinge boring jig clamped and adjusted on door edge

Setting one up follows a consistent sequence. Clamp the door securely, ideally with a sacrificial board underneath the boring point, then dial the jig’s cam to your required offset and lock the clamping base against the door edge. Kreg’s jig, for example, relies on firm clamping at two points of contact plus solid support underneath the door to hold precision through the cut, not just at the start.

Feature tradeoffs worth knowing before you buy:

  • Jigs with a built‑in scale save time on repeat work but cost more upfront than a simple template
  • Spring‑loaded clamp feet, the kind Rockler’s Jig It system uses, speed up single‑door jobs but can shift slightly on warped or uneven stock
  • Screw‑hole guides built into the jig save a second setup step but only work with the hinge brand the jig was designed around

Pro Tip: If your jig doesn’t include a screw‑hole guide, drill your cup first, hold the hinge in the cup by hand, and mark the screw centers directly through the hinge plate. It takes ten extra seconds and eliminates almost all pilot‑hole misalignment.

The whole point of these features is replicating what a drill press does automatically: fixed alignment, controlled depth, and zero wander. A well‑set jig gets a hand drill remarkably close to that same repeatability on a bench or right at the jobsite.

What Is the Step‑by‑Step Process for Boring Hinge Cups?

Getting a clean cup on the first try comes down to preparation more than drilling speed. Rushing the setup is where almost every bad hole starts.

  1. Confirm your specs. Check the hinge’s cup diameter, depth, and offset one more time against your jig setting before any bit touches wood.
  2. Choose your bit and depth stop. Match the Forstner or hinge boring bit to the cup diameter, and lock a stop collar at the exact depth. 13mm for standard concealed hinges, though always verify against the hinge you’re using.
  3. Mark and secure. Strike your centerline, position the jig, and clamp the door with a sacrificial backing board directly under the exit point.
  4. Align the bit. Center the bit tip in the jig’s guide bushing before starting the drill, not after it’s already spinning.
  5. Control the plunge. Start the drill at a moderate speed, apply steady downward pressure, and let the bit cut rather than forcing it.
  6. Watch your RPM for the material. Large-diameter Forstner bits need slower speeds on hardwoods to prevent scorching, since dense stock generates more friction heat than softwood or MDF at the same feed rate. A rough guide: slow down as bit diameter and wood density both increase.
  7. Clear chips periodically. Retract the bit partway through deeper cups to clear debris rather than plowing straight through, which reduces heat buildup and blowout risk.
  8. Stop at the depth collar. Let the stop collar do its job rather than eyeballing depth by feel.
  9. Clean the cup. Remove chips and light fuzz from the cup walls with a chisel edge or shop vacuum before test‑fitting.
  10. Drill pilot holes using the jig’s guide. Keep these centered and square so the hinge plate sits flat against the door.
  11. Test‑fit the hinge. Set the hinge in the cup dry, check that it sits flush, and adjust offset on the next door if it doesn’t.

Once your hinges are seated and screwed down, our step-by-step cabinet door installation guide covers final alignment and reveal adjustments.

How Do You Repair or Replace a Failed Hinge Hole?

Not every bad hole means a ruined door. Surface‑level cosmetic damage, chipped edges around a cup or a screw hole that’s slightly off, can often be filled and sanded smooth. Structural damage, where the screw no longer bites into solid wood, needs a more permanent fix.

  • Wood filler handles cosmetic gaps and minor chips around the cup rim, but it won’t hold a screw thread under door weight.
  • For stripped screw holes, drill out the damaged hole, glue in a properly sized hardwood dowel, let it cure, trim flush, and re‑drill a fresh pilot hole through the dowel for a solid new screw bite.
  • For a mislocated cup, the same dowel‑and‑refill approach works, followed by re‑boring the cup at the correct offset once the patch has cured fully.
  • Cosmetic touch‑up after any repair means sanding flush, spot‑staining to match the surrounding finish, and sealing before rehanging the hinge.
  • When damage is extensive or the door face has been through more than one repair already, replacing the door outright is usually faster and cleaner than a third patch job.

When Should You Order Pre‑Bored or Professionally Drilled Doors?

Some jobs simply carry too much risk for a hand drill and a jig, no matter how careful you are. A finished veneer door, a full kitchen’s worth of matching doors, or a client project where rework isn’t an option.  Situations where machine tolerances earn their cost.

  • Volume work. Boring twenty identical cups by hand introduces small variations that become visible once the doors hang side by side.
  • Finish‑sensitive materials. Veneers and painted MDF show blowout and tear‑out far more visibly than raw hardwood, and a slip is much harder to hide.
  • Tight tolerance requirements. Dedicated hinge boring machines hold tolerances often around ±0.2mm, a level of consistency that’s difficult to replicate reliably across dozens of hand‑drilled holes.
  • Time constraints. A shop‑grade boring machine cuts and repeats a setup far faster than resetting a hand jig door after door.

This is precisely the gap Tdm-thedoormaker’s process is built around: you measure your existing openings, design your door style and finish, and order doors that arrive with hinge holes already bored to spec. The measure, design, order workflow shifts the tolerance risk off your bench and onto machine‑controlled production. Before you commit to either path, weigh your own time against the cost of a replacement door if a DIY hole goes wrong, and check whether your project’s finish can even hide a repair if one becomes necessary.

Do Different Hinge Types Need Different Hole Specs?

Not every hinge on a cabinet door needs a 35mm cup. Standard concealed European hinges, the most common type in modern cabinetry, use that flat‑bottomed cup and typically mount with two or three screws on the hinge plate side, plus a separate mounting plate that attaches to the cabinet frame.

Diagram of hinge types and hole specifications

Overlay hinges, which come in full‑overlay, half‑overlay, and inset variants, all use the same 35mm cup boring but differ in the offset distance from the door edge. That offset controls how far the door sits over the cabinet face frame. A full‑overlay hinge typically needs a smaller offset than an inset hinge. Boring the same cup at the wrong offset for your specific overlay style is one of the most common fit failures in cabinet work.

Butt hinges, common on framed inset doors and older cabinetry, skip the round cup entirely in favor of a rectangular mortise cut with a chisel or router, matched to the hinge leaf’s exact dimensions. Barrel hinges and knife hinges, occasionally used on flush overlay doors, need only small pilot holes rather than any cup or mortise at all.

Before boring anything, confirm which hinge family you’re actually installing. A cup sized correctly for a European concealed hinge is the wrong hole entirely for a butt hinge or barrel hinge, and no amount of careful drilling fixes a hole cut for the wrong hardware type.

Does Wood Type Change How You Bore Hinge Holes?

Hardwood, softwood, and MDF each behave differently under a Forstner bit, and treating them identically is a common source of tear‑out. Dense hardwoods like maple and oak generate more heat at the same drilling speed, so a slower RPM and steady, even pressure prevent the bit from scorching the cup walls or dulling prematurely.

Forstner bit boring hardwood cabinet door

Softwoods such as pine and poplar cut faster and with less resistance, but they’re also more prone to crushing or tearing around the cup rim if you push too hard or use a bit that’s gone slightly dull. A sharp bit and moderate feed rate matter more here than raw speed.

MDF core plywood and veneered doors, meanwhile, are the most finish‑sensitive of all, since any tear‑out shows immediately through a thin veneer layer with no way to sand it out without going through to the substrate.

Whatever the material, matching bit sharpness and feed rate to the wood in front of you, rather than running one setting for every door, is what separates a clean cup from a torn one.

How Do You Maintain Hinges After Installation?

A correctly bored hinge hole is only half the job. Concealed hinges rely on a spring mechanism and moving pivot points that need occasional attention to keep doors closing smoothly for years rather than months.

A light application of machine oil or silicone-based lubricant on the hinge’s pivot points once or twice a year keeps the spring action smooth and prevents the metal-on-metal squeak that develops in kitchens exposed to grease and humidity. Avoid heavy grease, which attracts dust and grit that eventually works its way into the mechanism.

Screws loosen over time from repeated door swings, especially on heavier doors or ones that get slammed rather than closed gently. Check mounting screws every few months during the first year, since wood compresses slightly around a new screw thread as the door settles into daily use. If a screw hole has worked loose enough that the screw spins without biting, that’s the point to use the dowel repair described earlier rather than just driving a bigger screw into a weakened hole.

Most concealed hinges also include adjustment screws that shift the door’s position side to side, up and down, and in and out from the cabinet frame. A five-minute seasonal check, especially after temperature and humidity swings that shift wood dimensions, keeps doors sitting flush without needing to touch the boring at all.

What Mistakes Beyond Blowout Should You Watch For?

Blowout gets most of the attention, but it’s rarely the mistake that actually ruins a project. Misalignment and orientation errors cause more rework than a torn exit hole ever does.

Boring a hinge cup on the wrong edge, mixing up left and right hinge sides on a pair of doors, is a surprisingly common error, especially when working through a stack of doors quickly. Always dry‑fit or at least visually confirm swing direction before the bit touches wood, not after the first hole is already cut.

Inconsistent offset across multiple doors is another frequent problem, usually caused by re‑measuring by hand instead of using a fixed jig setting or template for every door in the batch. Even a millimeter of drift between doors becomes visible once they’re mounted side by side on the same cabinet run.

Skipping the manufacturer’s spec check is the mistake underneath most of the others. Assuming last year’s hinge brand uses the same offset and cup depth as this year’s box, without checking the actual spec sheet, is how a batch of otherwise well‑drilled doors ends up with hinges that don’t sit flush. A five‑minute check against the actual hardware in hand prevents almost every alignment failure on this list.

Is DIY Hinge Boring Worth the Risk, or Should You Order Pre‑Bored Doors?

The conventional DIY advice treats hinge boring as mostly a tool problem: buy the right bit, get a jig, follow the steps, and you’re set. That’s true as far as it goes, but it undersells how much of the real risk sits in repetition, not technique. One clean cup on a test scrap proves almost nothing about door twenty in a full kitchen run, where fatigue, small clamp shifts, and a slightly warmed bit all compound quietly.

Where most guides fall short is treating every project as equally forgiving. A single raw pine cabinet door can absorb a minor offset error that a veneered, finish‑matched kitchen door cannot. If you’re doing one or two doors, learn the jig, respect the depth stop, and enjoy the satisfaction of a clean cup done right. If you’re touching a dozen doors or anything with a finish you can’t easily patch, the math shifts toward letting a machine hold the tolerance instead of your forearm.

— David

Skip the Drilling Risk With Pre‑Bored Custom Doors

If a jig setup, a stack of matching doors, and the possibility of one bad cup on door number eleven sound like more risk than you want to take on, Tdm-thedoormaker builds that risk out of the process entirely. Instead of boring holes yourself and hoping every offset matches, you measure your existing cabinet openings, design your door style and finish from over 30 styles and 130+ colors, and order doors sized to your exact dimensions, with hinge holes already bored to spec before they ever leave production.

Tdm-thedoormaker

That measure, design, order sequence means the tolerance work happens on a controlled production line rather than your workbench, which matters most on finish‑sensitive materials where a torn cup can’t be sanded out without showing through the surface. It also saves the time a full kitchen’s worth of hand‑drilled doors would otherwise cost you in jig setup, test cuts, and rework. Start by browsing custom cabinet doors online to see current styles, pricing, and how the hinge hole add‑on works for your project.

Sources

FROM THE SAME CATEGORY

Sep 8 2026 BY Ksenija Lebec, Blog

Landlords: inspect cabinets, run vacancy based ROI, budget $1,000–$13,000, and plan 1–3 day refacing installs with bulk order tips.

Build a Door MADE TO FIT YOU!

Fixing Cabinet Door Gaps: The Right Reveal and Quick Repairs

Fixing Cabinet Door Gaps: The Right Reveal and Quick Repairs

Most cabinet doors should sit with a 1/8-inch reveal around each edge. That’s the industry benchmark cabinetmakers use because it hides seasonal wood movement while still looking crisp. Acceptable range runs from about 1/16 inch on tight, frameless installs up to 1/4 inch on older face-frame cabinets.

Before you touch a screwdriver, do two things. First, measure the gap at the top, bottom, hinge side, and latch side of every problem door. Second, try a quarter-turn on the hinge’s adjustment screws and see if the gap closes evenly. Most uneven cabinet door gaps trace back to hinges that simply drifted out of adjustment, not a warped door or a bad cabinet box.

  • Target reveal is a modest small gap for standard overlay doors
  • Tight-fit range varies depending on hinge and style
  • First fix to try is small hinge adjustments, rechecked after each turn

Key Takeaways

Consistent cabinet door gaps come from correct hinge adjustment first, precise measurement second, and custom-sized replacement doors when repair reaches its limit.

Point Details
Target reveal Aim for a 1/8-inch gap around doors, adjusting down to 1/16 inch only with hinges rated for it.
Measure before adjusting Check top, bottom, hinge side, and latch side with a caliper before touching any screws.
Hinges first, trimming last Try lateral, height, and depth hinge adjustments in quarter-turn steps before cutting any material.
Watch for structural causes Warped doors or an out-of-square cabinet box won’t respond to hinge adjustment alone.
Order custom when repair fails Tdm-thedoormaker builds doors to exact measurements when hinge fixes and trimming no longer solve the gap.

Table of Contents

How to Measure Cabinet Door Gaps Accurately

Grab a digital caliper, a feeler gauge, or a steel ruler. Calipers give you the most repeatable numbers, which matters once you start comparing “before” and “after” on multiple doors.

  1. Label each door (top left, bottom right, and so on) so your notes don’t get scrambled.
  2. Measure the gap between cabinet doors at the top, bottom, and both vertical edges, then check the midpoint between double doors, where mismatched hinges often show up first.
  3. Note the hinge type and give the door a gentle push and pull to feel for looseness.
  4. Write down every number next to your target reveal so you can see exactly which edge is off and by how much.

Pro Tip: Keep a simple measurement log for the whole run of cabinets. Comparing four doors side by side makes it obvious whether one hinge is the problem or the whole cabinet run is out of square.

Common Causes of Wide or Uneven Cabinet Door Gaps

Not every gap problem has the same fix, so diagnosis matters more than tools here.

Common causes of wide or uneven cabinet door gaps include hinge adjustment drift, stripped or loose mounting screws, warped doors, and an out-of-square cabinet carcass. Each cause affects gap issues differently and requires appropriate diagnosis.

Fixing Cabinet Door Gaps With Hinge Adjustment and Shims

Most modern hinges give you three adjustment paths, and each one corrects a different symptom. Lateral adjustment shifts the door left or right, which is your main tool for evening out the gap between double doors. Height adjustment raises or lowers the door, useful when one door sits higher than its neighbor. Depth adjustment moves the door in or out from the frame, correcting a door that sits flush on one side and proud on the other.

  1. Loosen the relevant adjustment screw a quarter turn, never more on the first pass.
  2. Close the door and check the reveal by eye and with your ruler or caliper.
  3. Repeat in quarter-turn increments until the gap matches your target on all four edges.
  4. If the hinge won’t hold adjustment, or the screws spin without tightening, the mounting plate is likely stripped.

For stripped screw holes, back the screws out, fill the hole with wood glue and a few wooden toothpicks or matchsticks, let it cure, and redrive the screw into fresh material. For a hinge plate that sits slightly proud or recessed, thin shim stock or a stacked washer behind the plate closes small gaps without replacing hardware. Both repairs cost under a couple of dollars and take fifteen minutes, which makes them worth trying before you assume a door needs replacing.

Pro Tip: Adjust one screw at a time and recheck the gap before moving to the next. Turning two adjustment points at once makes it nearly impossible to tell which change actually fixed the problem.

When to Trim, Plane, or Order a Replacement Door

If hinge adjustment and shimming don’t close the gap, and the door itself is oversized or warped, trimming becomes the next option, particularly for inset doors that need to sit flush inside the frame.

  1. Test-fit the door in the opening before removing any material.
  2. Work from the hinge stile outward, removing small amounts at a time with a hand plane or table saw.
  3. Recheck squareness and reveal after every pass. It’s far easier to remove another sixteenth of an inch than to add material back.

Solid-wood doors need a margin for seasonal expansion, so trimming a reveal down to 1/16 inch in a dry Canadian winter can mean binding doors by mid-summer. If a door needs more than modest trimming, ordering a replacement is usually the better move. A custom order needs exact height, width, overlay or reveal amount, hinge cup placement, and door style, since precise sizing is what actually prevents the same gap problem from reappearing.

Tools, Hinge Types, and Materials for the Job

A basic kit handles nearly every gap repair: a digital caliper or steel ruler, a Phillips and flathead screwdriver, a small level, shim stock or thin washers, wood glue, and toothpicks for stripped holes. On the hinge side, European cup hinges come in several swing angles, commonly 107, 120, and 170 degrees, and swapping hinge models can be the actual fix if your current hardware can’t hold a tight reveal.

Tools for cabinet hinge and gap repair

For trimming jobs, a table saw or track saw gives the cleanest edge, and a Forstner bit handles new hinge cup holes. If you only need these once, renting beats buying.

Deciding Between Repair and Custom Replacement Doors

Hinge adjustment fixes most gap problems. But some situations call for new doors instead of another round of tweaking.

  • Multiple doors affected: if three or more doors on the same run show inconsistent gaps, the cabinet box itself may be out of square, and no amount of hinge work fixes that.
  • Visible warping: a door that won’t sit flat against the frame, even with new hinges, needs replacing.
  • Cabinet age and finish wear: boxes that are structurally sound but cosmetically dated are strong candidates for refacing rather than full replacement.
  • Low tolerance for repeat adjustments: if you’ve adjusted the same door twice already, a new door built to precise dimensions saves you a third round.

Tdm-thedoormaker’s process starts with the same measurements covered above: height, width, overlay, and hinge cup position, then builds doors sized to those numbers within a tenth-thousandth of an inch. That level of exactness is what separates a door that holds its reveal from one you’ll be adjusting again next season.

Making Small Gaps Look Intentional

Even a well-adjusted door run can have tiny inconsistencies, and a few finishing tricks make them disappear visually.

  • Use temporary spacers during installation to hold a consistent reveal while screws go in.
  • Touch up raw edges with matching paint where needed.
  • Consider a light bevel on the door edge as a design detail.
  • Choose paint over stain for cabinets exposed to humidity swings, as paint better hides minor seasonal gap changes.

Pro Tip: Magnetic catches help pull doors fully closed and square, minimizing visual impact of uneven gaps.

An Installer’s Note on Realistic Expectations

Test-fit before you cut anything. Small adjustments, checked and rechecked, solve far more problems than one aggressive trim ever will. On solid wood, resist the urge to dial in a razor-tight reveal, especially in humid climates. That gap needs room to breathe. Plan a seasonal check every spring and fall, and most doors will hold their fit for years.

An Installer's Note on Realistic Expectations — overview diagram

Get Cabinet Doors That Hold Their Fit

If you’ve adjusted the hinges twice and the gap still bothers you, that’s usually a sign the doors themselves, not the hardware, are the problem. Tdm-thedoormaker builds custom cabinet doors and drawer fronts sized to your exact measurements, down to a tenth-thousandth of an inch, so the reveal you plan for is the reveal you get.

Tdm-thedoormaker

The ordering process follows the same measure, design, order sequence covered throughout this guide: you submit your height, width, overlay, and hinge cup measurements through the online configurator, choose from more than 30 styles and 130-plus colors and finishes, and place your order with hinge holes pre-drilled if you need them. If you’re not ready to commit to a full run, ordering a single real-size sample door lets you check color, finish, and fit before you buy. When you’re ready, start with the custom cabinet door ordering page and get a quote based on your own measurements.

Sources

Measurement and hinge-adjustment guidance draws on Rockler’s reveal guide, WOODWEB’s hinge clearance discussion, and Wood Magazine’s inset door sizing method. Hinge manufacturer manuals remain the authority on exact travel and clearance specs.

FROM THE SAME CATEGORY

Sep 8 2026 BY Ksenija Lebec, Blog

Landlords: inspect cabinets, run vacancy based ROI, budget $1,000–$13,000, and plan 1–3 day refacing installs with bulk order tips.

Build a Door MADE TO FIT YOU!

How to Read a Cabinet Door Size Chart and Get an Exact Fit

How to Read a Cabinet Door Size Chart and Get an Exact Fit

Getting a finished door size from an opening comes down to two formulas. For overlay doors, add twice the overlay to the opening: DW = OW + 2×OL and DH = OH + 2×OL. For inset doors, subtract twice the reveal: DW = OW − 2×RV and DH = OH − 2×RV.

Before you touch either formula, measure the opening to the nearest 1/16 inch. Rounding to the nearest inch is the single most common reason a custom door arrives wrong.

Use these defaults until you confirm your own hardware spec:

  • Partial overlay: 1/2 inch per side
  • Full overlay: 1-1/4 inches per side
  • Inset reveal: 1/16 to 1/8 inch per side
  • Center gap between paired doors: 1/8 inch

Key Takeaways

Accurate cabinet door sizing depends on measuring the opening to the nearest 1/16 inch and applying the correct overlay or inset formula for your hinge type.

Point Details
Two core formulas Overlay adds twice the overlay amount to the opening; inset subtracts twice the reveal.
Measure to 1/16 inch Rounding to the nearest inch is the most common cause of a wrong-size door order.
Know your defaults Partial overlay is 1/2 inch, full overlay is 1-1/4 inches, and center gaps run about 1/8 inch.
Split wide openings Single doors wider than roughly 24 inches usually split into two panels to prevent sag.
Order through The Door Maker Tdm-thedoormaker builds custom doors to submitted measurements with sizing precision to 1/10,000 inch.

Table of Contents

Standard Cabinet Door Size Chart by Cabinet Type

You won’t find one universal size, because a door is only as big as the box behind it, and boxes come in a handful of predictable families. Base cabinets run 34.5 inches high and 24 inches deep as an industry standard, while wall cabinets vary far more, commonly ranging from 12 to 42 inches tall and 12 to 24 inches deep depending on how high the upper cabinet run sits.

Diagram of standard cabinet door sizes by cabinet type

Widths follow a similar logic across the board. Base cabinets are commonly sold in several inch increments within a typical range, and tall or pantry cabinets usually match ceiling height or bulkheads. Use these common width and height ranges as your starting expectation, then verify against your actual opening.

Think of this chart as a quality control check, not a substitute for your own tape measure. It tells you whether the number you just measured is plausible, and it flags outliers worth double checking. If your wall cabinet opening comes in at 48 inches tall, that’s outside the normal range and worth remeasuring before you cut anything or place an order.

Sinks and appliances often have custom cabinet sizes that differ from standard base cabinet dimensions to accommodate plumbing and appliance sizes. Always measure those individually rather than assuming they follow the standard.

How Do You Measure Cabinet Doors Accurately?

Grab a rigid steel tape, a pencil, and a notebook before you start. A cloth or fabric tape sags across a wide opening and introduces error you won’t catch until the door shows up too small. A caliper is a nice-to-have for checking reveal gaps on existing doors, but it isn’t required for a first measurement.

Where you measure depends on your cabinet construction. On a face-frame cabinet, measure the inside opening of the frame itself, not the outside of the cabinet box. On a frameless cabinet, measure the inside width of the box, since there’s no frame opening to reference. Confusing the two is one of the fastest ways to order a door that’s off by half an inch or more.

Follow this sequence for every opening:

  1. Measure the width at the top of the opening, then again at the bottom, and record both numbers separately.
  2. Measure the height on the left side, then the right side, and record both.
  3. If the two width or height readings differ, use the smaller number for overlay doors and the larger number for inset doors, since that keeps the door from binding.
  4. Round every reading to the nearest 1/16 inch and write it down immediately. Don’t try to remember it and transfer it later.
  5. Repeat the process on at least three openings per cabinet run to catch inconsistencies from settling or installation drift.

Cabinet openings are rarely perfectly square, especially in older homes. A gap of even 1/8 inch between the top and bottom width readings is common and not a sign you measured wrong. It’s a sign the cabinet itself is slightly out of square, and your door size needs to account for the tighter measurement.

Pro Tip: Take a photo of each opening with your tape measure still in frame, labeled with painter’s tape if you’re measuring several cabinets at once. It takes ten seconds and saves you from a callback measurement later.

Why Do Overlay and Inset Doors Use Different Formulas?

Overlay and inset doors solve the same problem, covering an opening, from opposite directions. An overlay door sits on top of the face frame or cabinet edge, so its finished size has to exceed the opening by the amount of overlay on each side. An inset door sits flush inside the opening, so its finished size has to be smaller than the opening by the reveal gap that lets it swing without rubbing.

The standard formulas work like this, where OW and OH are opening width and height, OL is overlay, RV is reveal, and G is the center gap between paired doors:

  • Overlay, single door: DW = OW + 2×OL, DH = OH + 2×OL
  • Overlay, double door: DW = (OW + 2×OL − G) / 2, DH = OH + 2×OL
  • Inset, single door: DW = OW − 2×RV, DH = OH − 2×RV
  • Inset, double door: DW = (OW − 2×RV − G) / 2, DH = OH − 2×RV

A quarter inch of overlay variance between hinge lines can throw off an entire run of doors, which is why the hinge spec matters as much as the tape measure. Most concealed hinges are built for either 1/2 inch partial overlay or 1-1/4 inch full overlay, and mixing the two on the same job is how adjacent doors end up with mismatched gaps. Check the hinge cup and mounting plate before you finalize either number.

Frameless cabinets add one more wrinkle: there’s no face frame opening to measure, so overlay math starts from the box width itself rather than a frame cutout. That changes what “OW” means in the formula, even though the arithmetic stays identical. Our overlay measuring guide walks through both cabinet types side by side if you’re unsure which one you’re working with.

When Should One Opening Get Two Doors Instead of One?

Width is the deciding factor, and builders have a well established line: openings wider than about 24 inches typically split into two doors rather than one. A single panel that wide tends to sag over time, and it’s more likely to bind against an adjacent door or cabinet when it swings.

Splitting a double-door opening requires one extra step beyond the single-door formula:

  1. Add the overlay on both outer edges, but subtract the center gap between the two doors first.
  2. Divide that number by two to get the width of each individual door: (OW + 2×OL − G) / 2.
  3. Keep the height calculation identical to a single door, since height doesn’t change when you split the width.
  4. Check that both doors land at the same width. If your opening isn’t perfectly square, the two panels can come out slightly different sizes, which shows up as an uneven center gap once they’re hung.

If you’re refacing an entire run of cabinets, check that the center gap matches across every double-door opening in that run, not just within one cabinet. Inconsistent gaps are one of the first things a trained eye catches, even from across the room.

What’s Different About Sizing Drawer Fronts?

Drawer fronts follow the same overlay or inset math as doors, just applied to a shorter, wider panel. The width calculation is identical, but the height is usually smaller, especially on the top drawer of a base cabinet, which often runs shallower than the drawers below it to leave more usable box space.

Drawer box width matters here too, separate from the front panel. Standard side-mount slides need roughly 1 inch of total clearance, about 1/2 inch per side, between the drawer box and the cabinet opening. That clearance doesn’t affect your front panel size, but it does affect whether your existing drawer box will accept a new slide without modification.

If you’re replacing slides at the same time as fronts, confirm the manufacturer’s clearance spec rather than assuming the 1/2 inch per side default. Some soft-close and undermount slides require different tolerances, and our guide to replacement drawer fronts covers the sizing differences in more detail.

Common Measuring Mistakes That Lead to Wrong-Size Doors

Most sizing problems trace back to a handful of repeat offenders, and they’re easy to avoid once you know what to watch for.

  • Measuring the outside of the cabinet frame instead of the inside opening
  • Rounding to the nearest inch instead of the nearest 1/16 inch
  • Assuming every opening is perfectly square without checking multiple points
  • Ordering before confirming the hinge overlay spec, especially on older or unbranded hardware
  • Forgetting that a sink base or appliance opening won’t match the standard chart

Pro Tip: Before you order anything, jot down the hinge type, overlay amount, and reveal gap for each opening in the same notebook where you recorded your measurements. Cross-referencing those notes against your final numbers catches mismatches while they’re still cheap to fix.

If a run of cabinets includes an unusual opening, a warped panel, or visible gaps from prior settling, ordering a single sample panel before committing to a full set is worth the small extra cost and wait.

Three Worked Examples Using the Formulas

Running real numbers through each formula makes the math click faster than reading the variables alone.

  1. Single overlay door. Opening measures 16 inches wide by 30 inches tall, with 1/2 inch partial overlay. DW = 16 + (2 × 0.5) = 17 inches. DH = 30 + (2 × 0.5) = 31 inches. Finished door: 17 by 31 inches.
  2. Double overlay doors. Opening measures 30 inches wide by 24 inches tall, with 1/2 inch overlay and a 1/8 inch center gap. Per-door width = (30 + 1 − 0.125) / 2 = 15.4375 inches, rounded to 15-7/16 inches. Height = 24 + 1 = 25 inches. Two finished doors: 15-7/16 by 25 inches each.
  3. Inset door. Opening measures 18 inches wide by 32 inches tall, with a 1/8 inch reveal per side. DW = 18 − 0.25 = 17.75 inches. DH = 32 − 0.25 = 31.75 inches. Finished door: 17-3/4 by 31-3/4 inches.
Example Opening (W×H) Overlay/Reveal Finished Size
Single overlay 16″ × 30″ 1/2″ overlay 17″ × 31″
Double overlay 30″ × 24″ 1/2″ overlay, 1/8″ gap 15-7/16″ × 25″ (each)
Inset 18″ × 32″ 1/8″ reveal 17-3/4″ × 31-3/4″

Solid wood inset doors need a little extra breathing room beyond these numbers. Wood movement from seasonal humidity changes means a tight 1/16 inch reveal that looks clean in January can bind by August. If you’re using solid wood on an inset design, lean toward the 1/8 inch end of the reveal range rather than the 1/16 inch minimum.

Adjusting Sizes for Different Cabinet Styles or Manufacturers

The formulas stay constant, but the numbers you plug into them shift depending on who built the box. Semi-custom manufacturers often standardize on a specific overlay, commonly 1/2 inch or 1-1/4 inch, across their entire product line, while a cabinet built decades ago by a local shop might use an overlay that doesn’t match either standard at all.

Shaker-style cabinets, which dominate current kitchen design, are almost always full overlay or inset, rarely partial overlay, since the flat panel look depends on minimal reveal between doors. Traditional raised-panel cabinets more often use partial overlay, which shows more of the face frame between doors.

If you’re replacing doors on cabinets you didn’t build yourself, don’t assume the previous owner’s hinge spec matches any industry default. Pull one existing door and measure its overlay directly against the frame before ordering replacements, especially if the cabinets are older or came from a manufacturer that’s no longer in business. A five-minute check against the physical hardware beats guessing from a chart, every time.

Frameless European-style cabinets, common in modern and IKEA-adjacent builds, tend to run full overlay almost exclusively, since there’s no face frame to reveal between doors. If your kitchen mixes framed and frameless boxes, which happens more often than you’d expect in additions or partial remodels, treat each section as its own measuring project rather than assuming one overlay number applies everywhere.

Can Temperature and Humidity Change Your Cabinet Door Fit?

Wood and wood composite doors expand and contract with seasonal humidity, and that movement is exactly why reveal and overlay tolerances exist in the first place. A door that swings freely in a dry winter can develop a faint drag against the frame in a humid summer, particularly with solid wood panels in a kitchen near a dishwasher or range.

Close-up of wood cabinet door reveal gap

Thermofoil and painted MDF doors move far less than solid wood, since the substrate underneath is more dimensionally stable across a normal seasonal range. That’s part of why so many manufacturers default to MDF cores for painted finishes rather than solid wood, even on higher end lines.

If you’re inset-fitting solid wood doors, build in a reveal closer to 1/8 inch rather than 1/16 inch, especially in a climate with real seasonal humidity swings. That extra margin gives the wood somewhere to expand into without binding against the frame in August. Kitchens and bathrooms see more humidity swing than any other room in the house, simply from cooking steam and shower moisture, which makes them the rooms where a too-tight reveal shows up first.

None of this means solid wood is a poor choice. It means the reveal number in your formula should reflect the material and the room, not just a chart default.

Choosing Door Sizes for a Custom Cabinetry Project

Custom projects give you room to deviate from the standard chart entirely, but that freedom only pays off if you measure with the same discipline you’d use on a stock replacement. Start by confirming your hinge hardware and overlay preference before you finalize a single dimension, since changing that decision later means resizing every door in the project.

Workbench with tools for custom cabinetry measurement

Decide on face-frame or frameless construction early, since that choice determines whether your opening measurement comes from a frame cutout or a box width. Mixing the two assumptions partway through a project is one of the more expensive mistakes a DIY renovator can make, because it usually means remaking doors rather than adjusting them.

For a kitchen with mixed cabinet heights, standardize your overlay and reveal numbers across every opening rather than choosing per-cabinet. Consistency in the gap between doors reads as intentional design; inconsistency reads as a mistake, even when every individual door is measured correctly. If you’re weighing a full custom build against refacing existing boxes, our comparison of refacing versus a full remodel breaks down where each approach makes more financial sense.

If your project extends beyond cabinetry into interior doors, the measuring discipline carries over directly. General guidance on replacing interior doors covers similar planning questions around fit, hardware, and swing clearance.

A Precision Note From Tdm-thedoormaker

Precise sizing is the difference between a door that hangs flush and one that needs a shim. Tdm-thedoormaker builds every custom door to your submitted measurements with sizing tolerances down to 1/10,000 inch, and our measure, design, order process is built around catching errors before they reach production.

Order Custom Cabinet Doors Sized to Your Exact Measurements

Measuring by hand works, but it carries risk. One overlooked 1/16 inch error on a face-frame opening, and the door you ordered doesn’t sit flush. Tdm-thedoormaker removes that risk by building every door around the exact numbers you submit through our online configurator, with hinge boring, sample doors, and color swatches available before you commit to a full order.

Tdm-thedoormaker

The configurator walks you through the same measure, design, order sequence covered in this guide, checking your entered dimensions against realistic ranges before production starts. You choose from more than 30 styles and 130-plus colors and finishes, and every door ships boasting the overlay or inset setting you specify, not a generic default. If you’d rather verify your math before ordering, our cabinet door calculator guide is a useful second check. When you’re ready to move forward, visit the custom cabinet doors ordering page to start your configuration and get a size confirmed before it goes into production.

Frequently Asked Questions

What is the standard overlay for kitchen cabinet doors?
Most cabinets use either 1/2 inch partial overlay or 1-1/4 inch full overlay, depending on the hinge hardware installed. Check your existing hinge cup before assuming either number applies to your project.

How do I measure a cabinet opening if it’s not perfectly square?
Measure the width at the top and bottom, and the height at the left and right sides, recording all four numbers separately. Use the smaller reading for overlay doors and the larger reading for inset doors to avoid binding.

What size should a double cabinet door be?
Add the overlay to your opening width, subtract the center gap, then divide by two: (OW + 2×OL − G) / 2. A 30 inch wide opening with 1/2 inch overlay and a 1/8 inch gap produces two doors at roughly 15-7/16 inches each.

Do inset doors need a different reveal for solid wood?
Yes. Solid wood expands and contracts with humidity, so a reveal closer to 1/8 inch holds up better across seasons than the tighter 1/16 inch minimum some charts suggest.

Can I use a standard cabinet door size chart instead of measuring my own opening?
A chart is useful for sanity checking your numbers, but every cabinet opening should still be measured directly. Manufacturing tolerances, settling, and prior installation work all cause real openings to deviate from published standards.

Sources

FROM THE SAME CATEGORY

Sep 8 2026 BY Ksenija Lebec, Blog

Landlords: inspect cabinets, run vacancy based ROI, budget $1,000–$13,000, and plan 1–3 day refacing installs with bulk order tips.

Build a Door MADE TO FIT YOU!

Cabinet Door Thickness: What DIYers Need to Know

Cabinet Door Thickness: What DIYers Need to Know

Most cabinet doors are ¾ inch (19 mm) thick. That’s the stock standard across nearly every major manufacturer, and it’s the safest choice if you’re replacing doors or refacing a kitchen without touching the boxes. Thinner options like ⅝ inch (16 mm) show up in frameless, lightweight builds, while ⅞ inch (22 mm) and 1 inch (25 mm) are reserved for premium raised-panel doors or deeper decorative profiles.

If you’re not sure which way to go, match your existing door thickness whenever possible. If you’re starting from scratch or don’t have an old door to measure, ¾ inch is the industry standard for a reason: it balances rigidity, weight, and hinge compatibility better than any other option on the shelf.

Thickness (inches) Thickness (mm) Common Use
5/8" 16 mm Frameless, lightweight, painted slab doors
3/4" 19 mm Standard stock thickness, most kitchens
7/8 inch (22 mm) 22 mm Miter-joint doors, deeper profiles
1" 25 mm Premium, heavily detailed raised panels

Diagram comparing cabinet door thicknesses and uses

Key Takeaways

Cabinet door thickness of ¾ inch (19 mm) is the industry standard because it balances stiffness, weight, and hinge compatibility better than thinner or thicker alternatives.

Point Details
Standard thickness Three-quarter inch (19 mm) works for most kitchens, replacements, and refacing projects.
Match existing doors Measure your current door thickness before ordering replacements to avoid hinge mismatches.
Material changes the math MDF and solid wood typically run ¾ inch; plywood often drops to ⅝ inch in frameless builds.
Panel construction needs clearance Frame-and-panel doors need about 1/16 inch of panel float per side to prevent cracking.
Get precise sizing from The Door Maker The Door Maker offers custom sizing to 1/10,000 of an inch, hinge boring, and sample doors to confirm thickness before ordering.

Table of Contents

Cabinet Door Thickness Options by Material

The material behind your door does as much work as the thickness number itself. A ¾ inch MDF door and a ¾ inch solid wood door behave differently under heat, humidity, and years of hands grabbing the same spot. Here’s how the common substrates stack up.

  • MDF (medium-density fiberboard): Usually milled at ¾ inch (19 mm) for painted, furniture-grade doors, though some manufacturers offer a lighter ⅝ inch (16 mm) option for budget builds. MDF takes paint beautifully because it has no wood grain to telegraph through the finish, but it’s heavier per square foot than solid wood at the same thickness.
  • Plywood: Frequently used at ⅝ inch in frameless (European-style) cabinet systems, where the goal is shaving weight off large door runs without sacrificing structural integrity. Plywood resists warping better than solid wood because its cross-laminated layers cancel out seasonal movement in any one direction.
  • Solid wood: Typically milled to ¾ inch for stiles, rails, and slab doors alike. Solid wood is the material most prone to seasonal expansion and contraction, which is exactly why frame-and-panel construction (more on that below) exists in the first place.
  • Thermofoil, veneer-faced, and HDF substrates: These usually wrap an HDF or MDF core, so they inherit that core’s ¾ inch standard. The vinyl or veneer layer adds negligible thickness, but it does limit your options for edge detailing compared to solid wood.
  • Metal: Less common in residential kitchens, but when it appears (industrial-style lofts, commercial kitchens), sheet thickness runs much thinner than wood equivalents, often under ⅛ inch, since metal doesn’t need the same mass to resist flexing.

If you’re painting your doors, thickness matters less than substrate choice. MDF’s smooth, grain-free surface is why most painted Shaker doors on the market are MDF rather than solid wood. If you’re staining to show off wood grain, you’ll want solid wood or a quality veneer, and you’ll want to stick closer to ¾ inch for stability. Thinner cores become more acceptable once you’re working with a frameless box and full overlay doors, where the cabinet frame itself, not the door, carries most of the visual weight.

How Door Thickness Affects Stiffness, Weight, and Fit

Thicker doors resist bowing, hold hardware more securely, and feel more substantial when you close them. But thickness isn’t a free upgrade. Add mass and you add weight, and every extra ounce has to be carried by your hinges and screws.

Take a tall pantry door, anything over 36 inches, as an example. A ⅝ inch slab door that size will often show visible deflection at the outer edge over a few years, especially in humid climates. Bump that same door to ¾ inch and the added rigidity noticeably reduces sag. This is why taller doors almost always specify thicker stock regardless of the rest of the kitchen’s spec.

Tall cabinet door with visible edge sag outdoors

Warping risk depends heavily on substrate, not just thickness. Solid wood panels expand and contract across the grain with seasonal humidity swings, which is precisely why frame-and-panel construction lets the center panel “float” in a groove instead of gluing it rigid. Engineered substrates like MDF and plywood move far less, which is one reason manufacturers note that a thicker door only improves durability when the core and joinery are built to match, not just to add weight for its own sake.

Pro Tip: If you’re upgrading from a ⅝ inch door to ¾ inch or thicker, check your hinge cup depth before you order. Standard hinges are calibrated for a specific thickness range, and a mismatch means the door won’t sit flush, or the hinge won’t seat far enough into the material to hold long term.

Hands measuring hinge cup depth on cabinet door

Slab vs. Frame-and-Panel Doors: Thickness Rules for Each

A slab door is one flat piece of material, no seams, no joinery. A frame-and-panel door is built from separate stiles (vertical pieces), rails (horizontal pieces), and a center panel that floats inside a groove. Each construction style calls for different thickness decisions.

For slab doors, the finished thickness is simple: it’s whatever your chosen material measures, typically ¾ inch for MDF or solid wood, ⅝ inch for lightweight plywood builds. There’s no assembly tolerance to think about because there’s nothing to assemble.

Frame-and-panel doors are more particular. Here are the numbers worth memorizing:

  • Stile and rail width: Most Shaker-style doors use stiles and rails between 2 and 2.5 inches wide. Merillat, one of the largest cabinet manufacturers in North America, standardized on 2 inch face frames because that width uses hardwood efficiently while still holding its proportion and strength.
  • Groove (tongue and groove) depth: A 3/8 inch groove is the default most cabinet door calculators build from, deep enough to hold the panel securely without weakening the stile.
  • Panel clearance: Leave about 1/16 inch of clearance per side for smaller cabinet-scale doors so the panel can expand and contract with humidity without cracking the frame. Larger panels need more, sometimes up to ⅛ to ¼ inch total.
  • Panel material and thickness: Plywood or HDF panels move less than solid wood, so they can be cut closer to the groove depth with less clearance. Solid wood panels need the full float allowance every time, since they’re the piece most likely to swell in summer humidity.

Picture the door as three separate parts working together: two vertical stiles, two horizontal rails connecting them at top and bottom, and a panel resting loose inside the grooved channel they form. If you’re building or ordering custom Shaker doors, those proportions are what make the finished door look balanced rather than top-heavy or spindly.

Does Door Thickness Affect Hinge Compatibility?

Most concealed European hinges are calibrated around a ¾ inch door, but plenty of hinge lines accept anything from ⅝ inch to 1 inch once you swap in the right mounting plate. The hinge cup itself doesn’t change; what changes is how deep it needs to sit and which plate compensates for the difference.

Concealed cup hinges are the most common in modern kitchens and the most sensitive to thickness mismatches, since the cup bores directly into the door’s inner face. Traditional butt hinges and exposed hinges are more forgiving because they mount to the surface rather than boring into it, but they still depend on screw length matching the door’s actual depth.

Thicker doors also change how far your screws need to travel and how much material surrounds your handle or pull hardware. A thin ⅝ inch door gives a screw less to bite into, which is part of why lightweight doors sometimes need backer plates behind heavily used hardware.

Pro Tip: Before ordering hardware for a nonstandard thickness, measure your hinge cup depth with a caliper if you have one. It takes thirty seconds and saves you from pre-boring holes that end up too shallow or too deep for the mounting plate you actually received.

Can You Use ½ Inch Plywood or MDF for Cabinet Doors?

Yes, but only in specific situations, and you should expect tradeoffs in stiffness and hinge holding strength. Half-inch stock works fine on smaller slab doors, especially in full-overlay frameless boxes where the door isn’t spanning a large opening on its own.

Good candidates for ½ inch material include:

  • Small upper cabinet doors, generally under 24 inches tall, where deflection isn’t a real concern.
  • Frameless cabinet systems using full overlay doors, since the box itself provides most of the structural support.
  • Painted slab doors with quality edge banding to hide and reinforce the exposed core.

If you’re set on thinner stock for a larger door, you can compensate with a few reinforcements: a cross-batten glued to the back face, backer strips behind hinge locations, a solid wood edge band glued around the perimeter, or hinges specifically rated for thinner substrates. None of these turn ½ inch material into a ¾ inch replacement, but they close most of the practical gap for lighter-duty applications.

Choosing Thickness When Ordering Replacement or Refacing Doors

Match your existing door thickness whenever you can. If you don’t have an old door to measure, or you’re refacing entirely, default to ¾ inch and adjust your hinge plates if your cabinet boxes call for something different.

Run through this checklist before you place an order:

  1. Measure your current door thickness at the edge with a tape measure or calipers.
  2. Check your hinge cup depth to confirm what thickness range your existing hardware can accommodate.
  3. Confirm your overlay or inset style, since this affects how the door thickness reads against the face frame or box.
  4. Decide on material based on whether you’re painting or staining, and how much weight your hinges can handle.
  5. Order a sample door if you’re uncertain, so you can check thickness, fit, and finish before committing to a full order.

The Door Maker builds custom doors to precise sizing, down to 1/10,000 of an inch, and offers hinge boring and sample doors specifically so you’re not guessing at thickness compatibility before a full order ships. If you’re mid-decision on replacing doors only versus a full cabinet swap, thickness matching is one of the details that makes the difference between a clean install and a frustrating one.

Measuring and Specifying Door Thickness Correctly

Always calculate your finished door size from the opening dimensions plus your overlay or reveal, never from the opening alone. This single habit prevents more fit problems than any other measuring step in the entire process.

Here’s the short checklist worth taping to your shop wall:

  • Measure door thickness directly at the edge, not through the face, since finishes can slightly distort a face-only reading.
  • Measure hinge cup depth if you’re reusing existing hardware.
  • Note whether you’re working with overlay or inset doors. Full overlay typically uses about ½ inch per side, while inset doors use roughly ⅛ inch of reveal.
  • Record height and width to the nearest 1/16 inch.

Expect a shop tolerance of about plus or minus 1/32 inch on finished doors, with a standard 1/8 inch gap between double doors. If you’re cutting your own plywood panels, double check the actual sheet thickness before machining grooves. Nominal “quarter inch” plywood can measure closer to 5 mm rather than a true ¼ inch, which throws off groove depth if you don’t verify it first.

Cabinet Door Thickness Cheat Sheet

Keep this nearby the next time you’re speccing a build or placing an order:

  • ⅝ inch (16 mm): Frameless, lightweight, painted slab doors where weight matters more than mass.
  • ¾ inch (19 mm): The default for nearly everything. Stock kitchens, refacing projects, and most frame-and-panel builds.
  • ⅞ inch to 1 inch (22 to 25 mm): Premium, custom raised-panel doors where visual heft and deep profile detailing are the goal.

Shop rules-of-thumb worth memorizing: stile and rail widths of 2 to 2.5 inches, a 3/8 inch groove depth, and roughly 1/16 inch of panel clearance per side. If the math still feels like a lot to juggle in your head, the Cabinet Door Calculator runs these numbers for you based on your actual opening and overlay specs.

A Note From The Door Maker on Choosing Thickness

We see the same tension play out in almost every refacing project: homeowners want the substantial feel of a thick, premium door, but they don’t always want to pay for or install the hardware upgrades that come with it. Our honest take is that ¾ inch gets it right for the overwhelming majority of kitchens, and going thicker only pays off when the joinery and hinges are built to match. If you’re not sure which way to go, we’ll help you measure or send a sample door before you commit to a full order.

Get Precision Sizing Without the Guesswork of a Full Remodel

Ordering custom doors online means the thickness spec has to be right the first time, since there’s no showroom to walk into if a hinge cup doesn’t seat correctly. The Door Maker builds every door to your exact measurements, down to 1/10,000 of an inch, and includes hinge boring and sample doors so you can confirm fit before committing to a full kitchen’s worth of doors.

Tdm-thedoormaker

Whether you’re matching an existing ¾ inch profile or stepping up to a heavier custom raised-panel look, our configurator walks you through measuring, choosing material, and ordering in three steps. If you’re still weighing refacing against a full cabinet swap, our guide on refacing versus a full remodel breaks down where the cost and effort actually diverge. Order a sample door today and see the thickness, finish, and craftsmanship in your own kitchen before you commit to the full project.

Sources

FROM THE SAME CATEGORY

Sep 8 2026 BY Ksenija Lebec, Blog

Landlords: inspect cabinets, run vacancy based ROI, budget $1,000–$13,000, and plan 1–3 day refacing installs with bulk order tips.

Build a Door MADE TO FIT YOU!

Mullion Door Designs: Patterns, Materials, and Ordering

Mullion Door Designs: Patterns, Materials, and Ordering

Mullion door designs are multi-lite cabinet doors where decorative bars, called mullions, divide a glass or panel insert into a grid or pattern. They work best as accent pieces: think glass-front upper cabinets flanking a range hood, a display hutch, or a run of cabinets over a coffee bar, rather than every door in the kitchen.
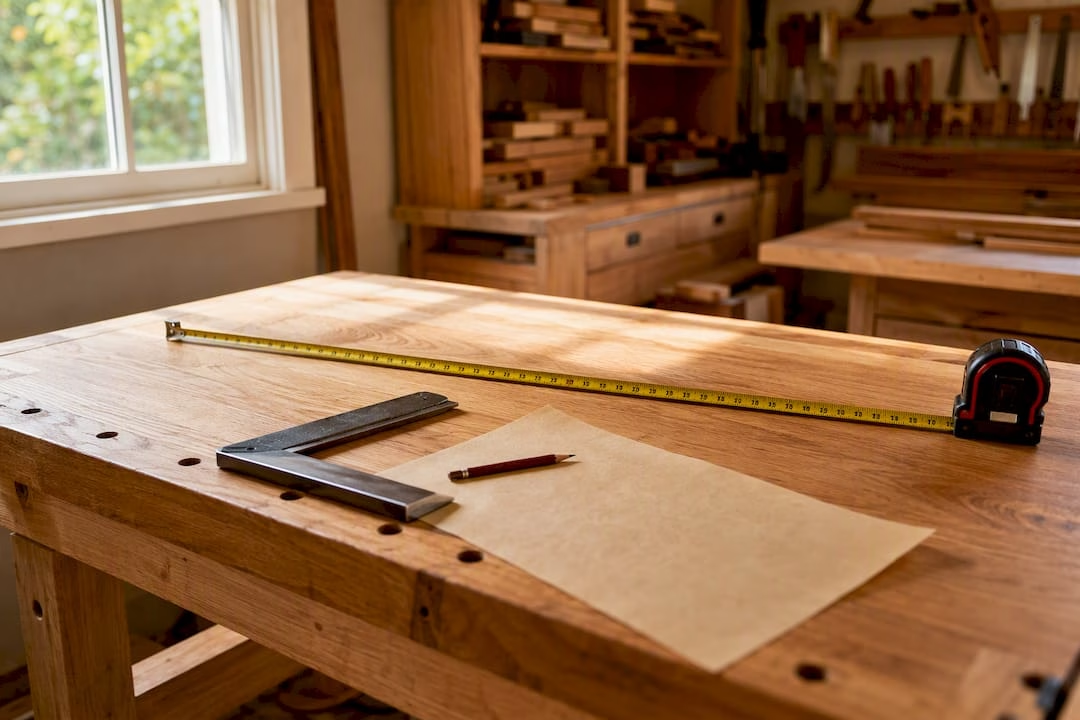
Before you pick a look, you need three decisions settled:

  • Pattern family (grid, prairie, mission, arched, diamond, or a slim modern layout)
  • Material and finish (solid wood, painted MDF, or metal)
  • Insert type (clear glass, frosted, mirror, or a non-glass alternative)

Everything else, from cost to lead time, follows from those three choices. Get them right and the rest of the specification process is straightforward.

Key Takeaways

Choosing a mullion door design comes down to matching pattern family and material to your cabinet style, then verifying half-lap construction before you order.

Point Details
Pick pattern by style Match grid or prairie patterns to Shaker/flat-panel doors, arched or diamond to raised-panel doors.
Prioritize half-lap joinery Ask manufacturers whether mullions are half-lap joined, not glued, for lasting durability.
Use mullions selectively Reserve mullion doors for upper cabinets and focal points; avoid high-wear lower cabinets.
Order a sample first Test finish and insert combinations on a real sample door before committing to a full run.
Order through Tdm-thedoormaker Use the measure, design, and order configurator for precision sizing and retainer options built to your opening.

Further Reading on Mullion Patterns and Glazing

Table of Contents

What Are the Main Mullion Door Styles?

Three pattern families cover most kitchens. Frame or grid patterns space lites evenly, four, six, or nine panes in a symmetrical layout, and read as classic or transitional depending on the cabinet profile around them. Prairie patterns put small lites in the corners around one large central pane, a look borrowed from Frank Lloyd Wright era casework that pairs naturally with Craftsman and Mission cabinetry. Mission patterns use short horizontal lites across the top with taller panes below, echoing Mission-style furniture lines.

From those three bases, manufacturers build custom variants: arched tops for a softer, more traditional feel, diamond lites for a formal or European look, and X-lite or double-X configurations that add a diagonal accent to an otherwise plain grid.

Style pairing matters more than pattern choice alone. Grid and prairie mullions sit comfortably on Shaker or flat-panel doors, since both share clean, rectilinear lines. Arched and diamond mullions tend to look better against raised-panel or slightly ornamented door styles, where the extra detail doesn’t clash. Slim, modern mullion layouts, thin bars, minimal grid divisions, pair almost exclusively with flat-panel or slab-adjacent doors for a contemporary kitchen.
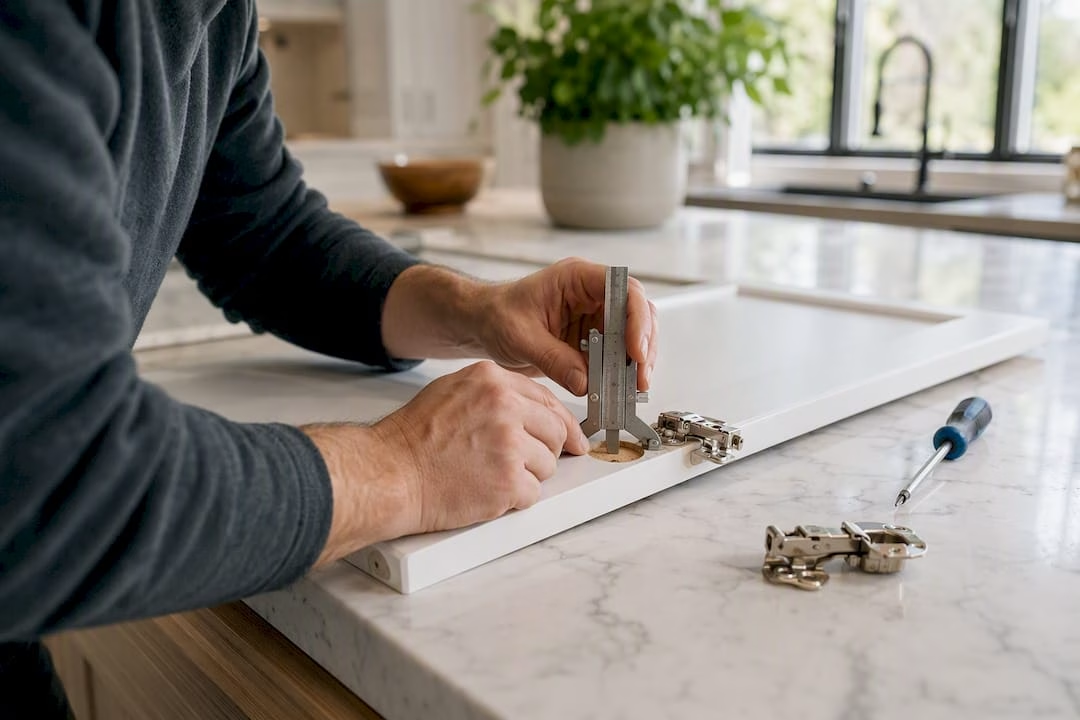
If you’re working with a designer or ordering samples, ask for photos of each pattern installed on the same door style you’re considering. A mullion pattern that looks striking in a manufacturer’s catalog can read completely differently once it’s scaled to your actual door dimensions.

Which Materials and Finishes Work Best for Mullions?

Material changes both the mood and the maintenance schedule of a mullion door. Solid oak or maple mullions bring warmth and a traditional feel, and they take stain well if you’re matching existing wood cabinetry. Painted MDF is the more common choice for modern kitchens, since it gives crisp, consistent lines and hides grain variation that would otherwise show through paint. Metal or aluminum mullions, still less common but growing in availability, produce a slim, contemporary profile that reads almost architectural against a glass panel.

A few practical points to weigh:

  • Stained wood mullions need grain-matching across the whole door run, which raises scrutiny during quality checks.
  • Painted finishes hide seams and joints better than stain, making them more forgiving on complex patterns like diamond or X-lite.
  • Metal mullions resist warping over time but cost more and offer fewer color options than wood or MDF.

Pro Tip: Order a sample door in your chosen mullion pattern and finish before committing to a full kitchen run. Paint and stain both look different under cabinet lighting than they do on a swatch card.

What Glass and Insert Options Are Available?

The insert is doing as much visual work as the mullion pattern itself. Clear glass shows off dishware and glassware and makes small kitchens feel more open, while frosted or textured glass hides clutter but keeps some light transfer. Back-painted glass adds solid color behind the mullion grid, a popular way to introduce an accent color without painting the whole door.

Close-up of mullion door with varied glass inserts

Beyond glass, several non-glass inserts create distinct effects: mirror inserts bounce light around a dim kitchen corner, wire mesh gives a farmhouse or industrial look with full ventilation, and tin panels bring a vintage, almost pantry-door character. Acrylic is a practical substitute for tempered glass in households with young kids, since it won’t shatter.

Weigh visibility against upkeep before you choose. Clear glass shows fingerprints and dust fastest. Frosted and textured options hide daily grime but cost more to keep spotless in tight grid patterns, since cleaning a nine-lite grid takes longer than wiping one flat pane.

How Are Mullion Doors Constructed?

Build quality comes down to how the mullions attach to the frame, not how the pattern looks in a photo. Some manufacturers glue or staple thin mullion strips onto a single pane of glass; it’s inexpensive but tends to loosen over time with kitchen humidity and temperature swings. Half-lap joinery, where mullion strips are notched and interlocked at each intersection, produces a noticeably stronger and cleaner joint, and it’s what most reputable cabinet door makers use for anything beyond a basic grid.

Hands showing half-lap joint on wooden mullion door

Glazing method matters too. Most doors use integrated retainer slots machined into the stile and rail, holding glass between 1/8" and 1/4" thick with a rubber or wood retainer strip. True divided lites, separate small panes of glass set into individual openings, exist but are uncommon in modern kitchens. Most current mullion doors use one full sheet of glass behind a decorative overlay, which is easier to clean and less expensive than managing multiple small panes.

Pro Tip: Ask any manufacturer whether their mullions are half-lap joined or simply glued to the glass. It’s a five-second question that tells you a lot about how the door will hold up after a few years of kitchen heat and steam.

Where Should You Use Mullion Cabinet Doors?

Upper cabinets and display zones are where mullion doors earn their keep. Designers generally steer clear of installing them on lower cabinets, where daily bumps, spills, and heavier use put more stress on glass and joinery. Mixing solid doors with mullion doors, rather than using mullions throughout, keeps a kitchen from feeling busy while still creating a clear focal point above the range or beside a window.

A few pairings tend to work reliably:

  • Farmhouse kitchens: painted wood mullions with wire mesh or textured glass inserts.
  • Modern kitchens: slim metal or thin painted mullions with clear or back-painted glass.
  • Transitional kitchens: grid or prairie patterns in a stained wood finish, mixed with flat-panel solid doors elsewhere.

Symmetry also matters more than most homeowners expect. Two matching mullion doors flanking a range hood read as intentional; one mullion door tucked into an otherwise solid run can look like an afterthought.

How Do You Choose and Specify a Mullion Pattern?

Work through the decision in order rather than picking a pattern first and working backward. Match the pattern to your existing cabinet style, settle on material and finish, choose the insert, then confirm hinge and hardware prep before you finalize an order.

  1. Identify your cabinet door style (Shaker, raised-panel, flat-panel) and shortlist compatible patterns.
  2. Choose material and finish based on existing cabinetry and maintenance tolerance.
  3. Select the insert type based on privacy, light, and cleaning preferences.
  4. Confirm hinge boring and any hardware prep needed before ordering.

Measuring accurately prevents most ordering headaches. Measure width and height at three points on each opening (top, middle, bottom) since older cabinet boxes are rarely perfectly square, and record the smallest of the three measurements for each dimension. Note existing hinge type and boring pattern if you’re replacing doors on cabinets you’re keeping.

Cost and lead time both scale with pattern complexity. Standard grid patterns in common sizes ship fastest and cost least. Diamond, arched, and X-lite patterns often carry design charges and minimum size requirements, and unusually small or oversized doors typically need custom drawings before a manufacturer will quote them, which adds time to the process.

How Does The Door Maker Handle Mullion Door Orders?

Tdm-thedoormaker built its ordering process around three steps: measure, design, and order, all through an online configurator that walks you through pattern selection, sizing, and finish choices with video guidance at each stage.

Mullion orders through Tdm-thedoormaker include a range of material and color options, precision sizing down to 1/10,000 of an inch, and integrated retainer options sized to your chosen glass or insert. You can also request hinge boring, sample doors, and color swatches as add-ons before committing to a full order, which matters given how differently paint and stain colors can look once they’re on an actual door front instead of a swatch card.

Trust signals worth noting if you’re comparing manufacturers:

  • Precision sizing to 1/10,000", which reduces gap and reveal problems during installation.
  • Sample doors and swatches available before full production.
  • A documented, step-by-step configurator process rather than a phone-quote system.

A trade perspective on mullion door quality

Good joinery and finish quality matter more over five years than they do on installation day. If you’re unsure which pattern fits your kitchen, order a sample door before committing to a full run. It’s a small cost against a full cabinet order.

Order Your Custom Mullion Doors With Confidence

Big box retailers sell mullion doors in a handful of fixed sizes and limited patterns, which forces you to compromise on either fit or style. Tdm-thedoormaker solves that by building every mullion door to your exact opening, with over 30 styles and 130+ colors and finishes to choose from, so you’re not squeezing a stock pattern into a custom kitchen.
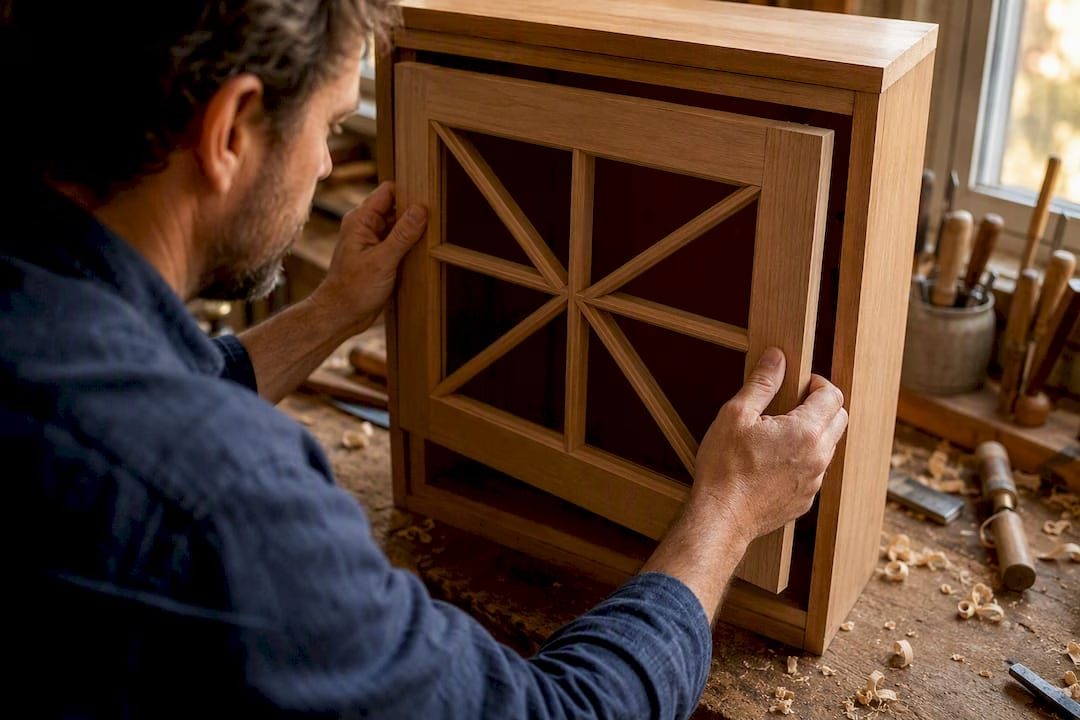
Tdm-thedoormaker

Whether you’re leaning toward a classic grid pattern or a slim modern mullion with back-painted glass, the online configurator lets you measure, design, and price your doors before you commit to anything. If you’re still deciding on insert material, the glass alternatives guide is worth a look before you finalize your order. Start your configuration today and get a precise quote based on your actual cabinet openings, not a generic size chart.

FROM THE SAME CATEGORY

Sep 8 2026 BY Ksenija Lebec, Blog

Landlords: inspect cabinets, run vacancy based ROI, budget $1,000–$13,000, and plan 1–3 day refacing installs with bulk order tips.

Build a Door MADE TO FIT YOU!